Configure Modbus TCP Communication
This section introduces how to configure the Modbus TCP communication. Before configuration, please confirm that you have already selected the robot and entered the communication configuration interface.
-
In the Communication mode section, complete the following configurations.
-
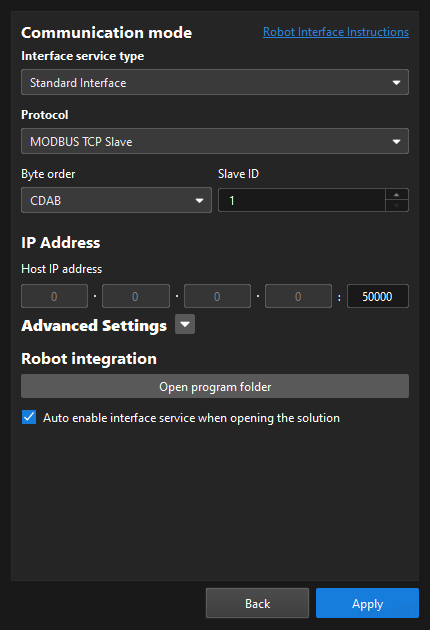
Set the “Interface service type” parameter to Standard Interface, and set the “Protocol” parameter to MODUBS TCP Slave.
-
Set the “Byte order” parameter. Set it based on the master device’s floating point byte order. For standard big-endian data, select DCBA; for standard small-endian data, select ABCD.
-
Set Slave ID according to your needs.
-
-
In the IP Address section, enter the port number of the host (Modbus TCP slave). The port number should be set to 50000 or larger.
-
(Optional) In the Advanced Settings section, configure parameters as needed.
-
Max num of poses to send per time: When you use the run Mech-Vision project command, you can set the maximum number of poses that can be sent by the vision system each time. The maximum number is 30.
-
Timeout for getting Mech-Viz data (s): If you use the run Mech-Viz project command and Mech-Viz does not return the result during the specified timeout period, a timeout error code will be returned.
-
Timeout for getting Mech-Vision data (s): If you use the run Mech-Vision project command and Mech-Vision does not return the result during the specified timeout period, a timeout error code will be returned.
-
Return "1102:Successfully triggered" after the capture: In eye in hand scenarios, if you select this option, the vision system will return "1102:Successfully triggered" after the camera finishes image-capturing. This way, the robot can move immediately without waiting for the Mech-Vision project to finish running, shortening the cycle time. If you do not select this option, the robot have to wait for the Mech-Vision project to stop running before moving.
After you select this option, Timeout waiting for capture completion (s) will be displayed. If the camera needs a relatively long period of time to capture the image, specify a larger timeout period. -
Property Configuration: This button does not take effect on the selected protocol. Please ignore this button.
-
Reset: Reset the preceding configuration items (except Property Configuration) to default values.
-
-
(Optional) Select Auto enable interface service when opening the solution. When the solution is opened, you do not need to start the interface service manually.
-
Click the Apply button.
Next, you need to complete the remaining Standard Interface configuration according to the communication object.