Calc Results by Python
Function
This Step runs a user-defined script through Python and outputs the calculation results to Mech-Vision.
The characteristics of this Step are as follows:
-
Support multi-threading.
-
Load Python script in real time.
-
Support various data type conversions when transferring data between C++ and Python.
-
Allow for the display of the Python’s log in the log panel of Mech-Vision.
Usage Scenario
When a custom calculation is required, this Step can be used to run the user-defined Python script so that the workflow in the solution can be simplified.
Input and Output
-
Input: determined by the data type input in the Input Port(s) parameter. Rename a port is not supported.
-
Output: determined by the data type input in the Output Port(s) parameter. Rename a port is not supported.
|
You can specify the data type of the input/output port according to the data type of the prior or succeeding Steps’ input/output port. |
Python Library Installation and Usage
Python Library Installation
Python 3.9.13 and two commonly used Python libraries, NumPy and OpenCV, are built into Mech-Vision. The “Calc Results by Python” Step will use the built-in Python environment while the Step running. If there is any missing Python library when you use this Step, you need to install the library in the Mech-Vision’s built-in Python environment. The procedures for installation are as follows:
-
Enter the Python installation directory in Mech-Vision.
-
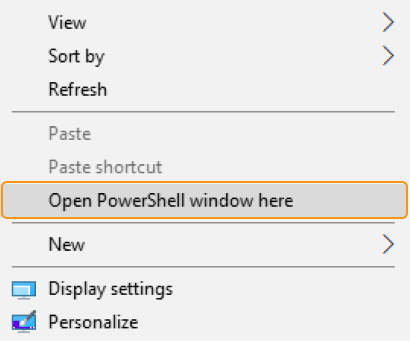
In the blank area of the Python installation directory, hold down the Shift key and right-click, then select Open PowerShell window here to open the PowerShell command-line tool.
-
Type “.\python.exe -m pip install xxx” (“xxx” is the name of the Python library) on the command line to install the missing Python library.

Step Usage Instructions
After preparing the Python script, please follow the procedure below to use the Step. For detailed description of the parameters, please refer to Parameter Description.
-
Set the data type for the input and output ports. Enter the data type for Input Port(s) and Output Port(s) according to the data type of the prior or succeeding Steps’ input/output port.
-
Specify the file path of the Python script. Select the file path of the script to be loaded in the Script File Path parameter.
-
Set the name of the function to be called. Once the Script File Path has been specified, this Step will retrieve the function names in the script automatically, and you can select the name of the function to be called in the drop-down list of Function Name.
-
Run the Step.
|
|
From Mech-Vision 1.8.0, the execution mode of the “Calc Results by Python” Step is changed from serial to parallel (consistent with the effect of the threading module in Python). When calling camera APIs that do not support parallel execution within the script (such as enumerating cameras), it is necessary to add a lock at the location of that API call. |
Notes
Please pay attention to the following issues when you write the Python script and run the script in this Step.
Use valid file names
Python script file names can only contain letters, numbers, underscores, or Chinese characters. For example: calc_result.py, test_01.py. Hyphens (-) are not allowed, otherwise the function name cannot be called.
Third-Party Library is Recommended
Running a Python script within Mech-Vision differs from running it directly in Python, which may cause certain Python libraries to fail during installation or malfunction after installation. Therefore, it is recommended to use third-party libraries.
Use the NumPy Library
The NumPy library is used to support some complicated formats of data. If a parameter type is NumPy array, but the NumPy has not been imported, an error may occur. Therefore, you should add the import numpy statement at the beginning of the script.
Import Predefined Modules
|
When the input or output port type of this Step is PointCloud, predefined module must be imported. |
When using a Python script in Mech-Vision to process data of types PointCloud, you should import the corresponding predefined module into the script. This allows Python to recognize and operate the data structure when running the script. If the required module is not imported, the script will fail to recognize these classes and encounter errors during execution.
You can find the predefined modules in the software installation directory (e.g., C:/Mech-Vision & Mech-Viz-2.2.1/Mech-Vision/python/Lib/py_module). The module can be used to handle the following type of data:
-
Point cloud data
-
Description: A class that represents point cloud data, including information such as point coordinates, normals, and color.
-
Port type: PointCloud
-
Module to import into a Python script: mmind_pointcloud
Instructions
from mmind_pointcloud import * # must be imported def create_simple_pointcloud(): xyz = np.array( # xyz is the basic data of the point cloud and must exist. [ [0.0, 0.0, 0.0], [1.0, 0.0, 0.0], [0.0, 1.0, 0.0], [0.0, 0.0, 1.0], [1.0, 1.0, 1.0], ], dtype=np.float32, ) normals = np.array( # The number of normals values must be the same as the number of xyz points. [ [0.0, 0.0, 1.0], [0.0, 0.0, 1.0], [0.0, 0.0, 1.0], [0.0, 0.0, 1.0], [0.0, 0.0, 1.0], ], dtype=np.float32, ) colors = np.array( # The number of colors values must be the same as the number of xyz points. [ 0xFF0000, 0x00FF00, 0x0000FF, 0xFFFF00, 0xFFFFFF, ], dtype=np.uint32, ) intensity = np.array([10, 20, 30, 40, 50], dtype=np.uint8) cloud = PyPointCloud( xyz=xyz, normals=normals, colors=colors, intensity=intensity, uniformColor=0, width=0, # unorganized ) return cloud
-
Pay Attention to the Data Dimension when Writing the Script
When writing the Python script, please note the dimension of data corresponding to each port of the Step.
-
0 dimension by default: Image; PointCloud; Number; Bool; Index; String
-
1 dimension by default: Pose; Pose2D; Size3D
|
Use “[]” after the data type to add a dimension. For example, the data dimension of Number is 0, while the data dimension of Number[] is 1. |
Parameter Description
| Parameter | Description |
|---|---|
Input Port(s) |
Description: This parameter is used to specify the data type(s) of the input port(s). The input data types will be passed to the called function as parameters in the corresponding order.
|
Output Port(s) |
Description: This parameter is used to specify the data type(s) of the output port(s). Data returned by the function will be returned to the Step in the corresponding order and will be parsed according to the corresponding data type.
|
Script File Path |
Description: This parameter is used to select the file path of the script to be loaded.
|
Function Name |
Description: This parameter is used to set the name of the function to be called.
|
The currently supported data types are as follows:
| Step port type | Data type used in Python | Input data example |
|---|---|---|
Pose[] |
List |
[[10, 20, 30, 0.951, 0.255, 0.168, 0.045]], [10, 20, 30, 0.951, 0.255, 0.168, 0.045]]
|
Pose2D[] |
List |
[[1, 2, 1, 1, 1]], [2, 0, 120, 1, 1]]
|
Number[] |
List |
[1.1, 2, 999.9, -22] |
String[] |
String |
['string_1', 'string_2', 'string_3'] |
Image |
8-bit unsigned integer (single channel or three channel)
|
Taking a grayscale image, which has only one channel, as an example, the input data is as follows:
|
PointCloud |
||
Size3D[] |
64-bit floating point number |
[[2.5, 5, 0.001]], [6, 5, 0.02]]
|
Index[] |
Integer |
[45, 10, 90] |
Bool[] |
Boolean |
[True, False, True] |
|
From Mech-Vision 2.2.1, the point cloud port type of the "Calculate Results with Python" step is unified as "PointCloud". When configuring the port, there is no longer a distinction between "PointCloud/XYZ", "PointCloud/XYZNormal", and "PointCloud/XYZRGB". If users need to use the point cloud port, they can set the port type to "PointCloud" and write the point cloud data in the Python script. |
Python Example Programs
To facilitates the learning and utilizing of this Step, some Python programs are provided in the following section to help you get familiar with the Step port type.
Getting Started
Output Data of One Type with Python Script
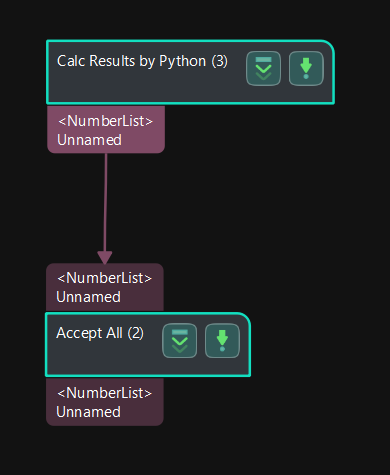
The function that outputs data of one type is defined in the program below. Please refer to Usage Instructions to call this function in the Step.
def get_doublelist():
    return [1.1,22,3.3]
The Mech-Vision project corresponding to this function is shown below. You can double-click the dataflow corresponding to the output port to check the output result.
Output Data of Multiple Types with Python Script
The function that outputs data of multiple types is defined in the program below. Please refer to Usage Instructions to call this function in the Step.
import numpy as np

def example_of_basic_portTypes():
    numList = [1.1, 2, 999.9, -22]
    indexList = [45, 10, 90]
    boolList = [True, False, True]
    strList = ['string_1', 'string_2', 'string_3']
    poseList = [[10, 20, 30, 0.951, 0.255, 0.168, 0.045], [10, 20, 30, 0.951, 0.255, 0.168, 0.045]]
    pose2dList = [[0, 0, 0], [2, 0, 0.785]]
    size3dList = [[2.5, 5, 0.001], [6, 5, 0.02]]
    return numList, indexList, boolList, strList, poseList, pose2dList, size3dList
The Mech-Vision project corresponding to this function is shown below. You can double-click the dataflow corresponding to the output ports to check the output results.

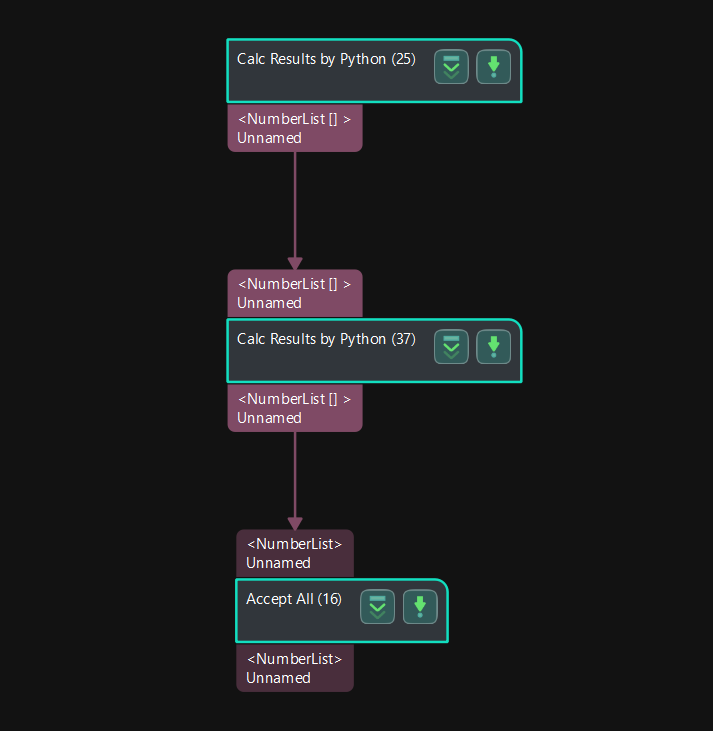
Process Data with Two “Calc Results by Python” Steps
The function to output the list of numerical values is defined in Program 1. The function to calculate the sum of values within each numerical list is defined in Program 2.
Please refer to Usage Instructions to use the following programs, connect Steps, and calculate the sum of the input numerical lists.
Program 1:
def get_numberlist_1():
    return [[1, 2, 3],[4,5,6]]
Program 2:
def cal_number_list(nums_list):
    sums = []
    for nums in nums_list:
        sum = 0
        for num in nums:
            sum += num
        sums.append(sum)
    return [sums]
The Mech-Vision project corresponding to this function is shown below. You can double-click the dataflow corresponding to the output ports to check the output results.
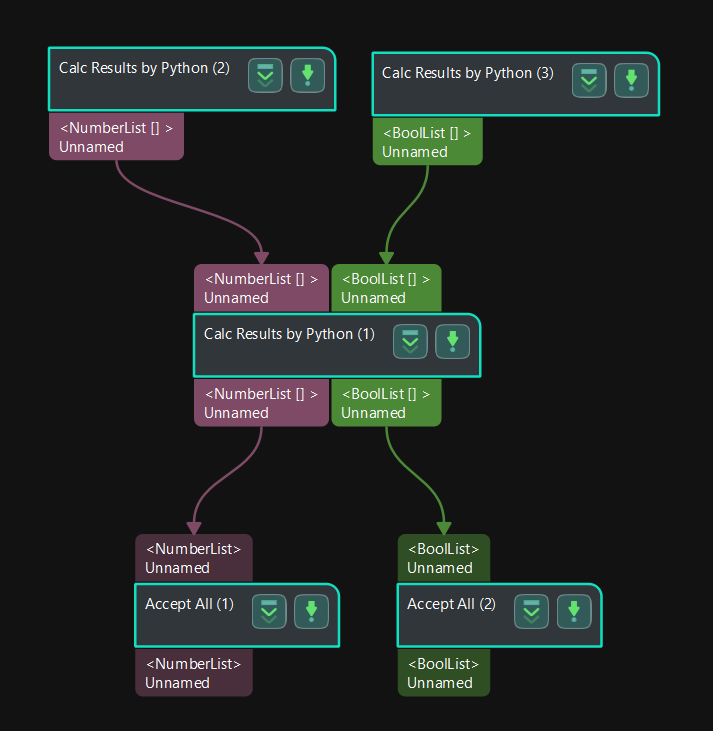
Process Data with Multiple “Calc Results by Python” Steps
The function to output the list of numerical values is defined in Program 1. The function to output lists of Booleans is defined in Program 2. In program 3, the value “9999” is added to the numerical value, and a “False” is added to the list of Booleans, and the new list of numerical values and list of Booleans will be output.
Please refer to Usage Instructions to use the following programs in the Step to process the input data.
Program 1:
def get_doublelist():
    return [1.1,22,3.3]
Program 2:
def get_bool_list():
    return [[True,False],[True,True],[False,False]]
Program 3:
def print_multi_values(numberList, boolList):
	numberList.append(9999)
	boolList.append(False)
	return numberList, boolList
The Mech-Vision project corresponding to this function is shown below. You can double-click the dataflow corresponding to the output ports to check the output results.
Application Examples
Saving Abnormal Data Generated During Project Execution
In actual applications, various errors may occur in the project. You can use the custom Python script together with the Data Storage feature in Mech-Vision to save the abnormal data for troubleshooting, thus improving the stability of the vision system.
The detailed instructions are as follows.
-
Enable the Data Storage feature.
Enable Save data and parameters in Mech-Vision Project Assistant. If errors occur when the project executes, the raw data will be save under Project folder/data/error_data.
-
Write the Python script.
A Python example program that determines whether the pose result output by the “3D Matching” Procedure is null is as follows:
def abnormal_output_detection(outputs): if len(outputs) == 0: raise Exception("NO RESULT!!!") else: pass -
Please refer to Usage Instructions to use the above program in the Step, and connect the Step after “3D Matching”.
After running the project, if the pose result output by “3D Matching” is null, an error message will pop up, and the abnormal data will be saved under Project folder/data/error_data.