Branch by Tag
Function
Branch by Tag should be used in conjunction with Set Tag for Branch. You can set tags in the workflow, and then select different branch exits according to tags in the subsequent workflow.
| The example projects of the “Set Tag for Branch” Step and “Branch by Tag” Step are provided to help you learn more about branch tags. For the example project, you can go to File > New > Example projects > Others > Branch with Tags in the software. |
Parameter Description
Number of Exit Ports
Used to set the number of exit ports for the Step. This parameter should be set in reference to the Tag parameter of the “Set Tag for Branch” Step.
The number of the “Set Tag for Branch” Step should be the same as the value of “Number of Exit Ports.” If two “Set Tag for Branch” Steps are used, the “Number of Exit Ports” should be set to 2. Branch tag 1 corresponds to Exit 0 of the “Branch by Tag” Step, Branch tag 2 corresponds to Exit 1 of the “Branch by Tag” Step, and so on.
Application Examples
Example 1
In the following example,
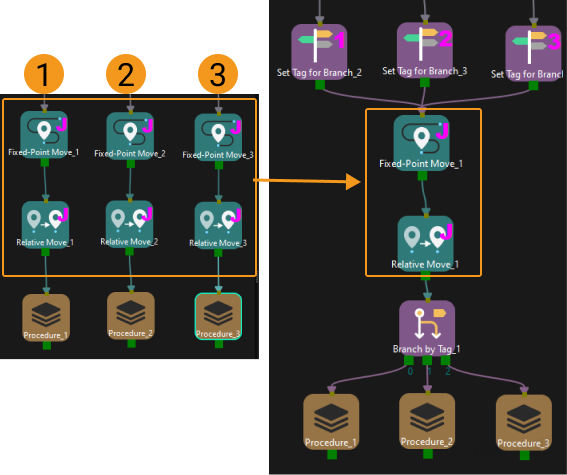
In the three branches (①, ②, ③), there are identical Steps (Fixed-Point Move, Relative Move) with identical parameter settings. Therefore, the “Set Tag for Branch” Step can be used to tag each of the three branches separately. Then, one set of Fixed-Point Move and Relative Move can be applied, followed by using “Branch by Tag” to return to different branches.

Example 2
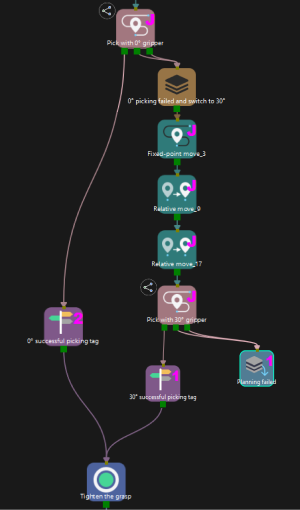
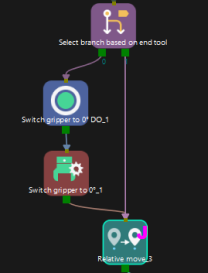
In the “Branch by Tag” example project, the robot will attempt to pick the target object using two tools at different angles. When placing the target object, it is necessary to switch back to the angle of 0°.
-
During the picking process, the workflow of picking the target object with the tool at 30° is tagged as 1, and the workflow of picking the target object with the tool at 0° is tagged as 2.

-
During the placement process, the “Branch by Tag” Step determines whether it is necessary to adjust the tool pose based on the tags from the previous workflow, i.e., switching the tool from 30° back to 0°.
