Save 3D Data
Description
Save the selected 3D data (surface data, point clouds, profiles) in the selected file type to the specified path. Other types of 3D data are not supported for saving.
Workflow
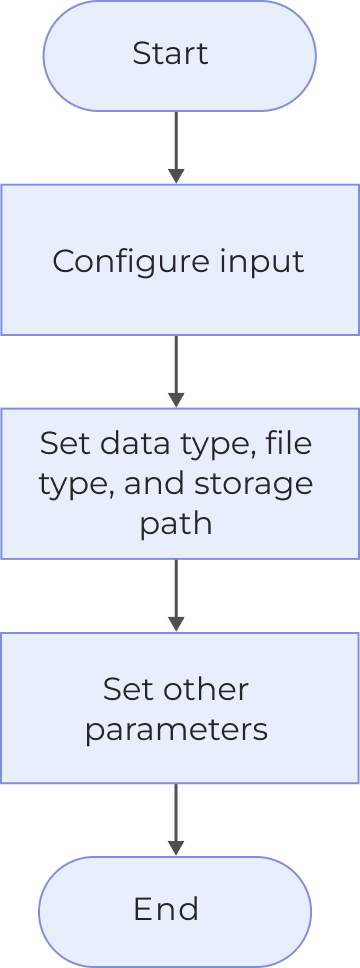
The process of configuring this Step is shown below:
-
Configure the input. Connect the Step ports in the graphical programming workspace or select the input under Input in the parameter configuration panel.
-
Set the data type, file type, and storage path for data to be saved.
-
Set other parameters.
-
Run the Step, and then you can view saved files in the specified path.
Parameter Description
| Parameter | Description | ||
|---|---|---|---|
Data type |
Select the data types to be saved. The currently supported types mainly include surface data, point clouds, and profiles. |
||
Save as type |
Select the file type for saving the surface data or profiles. This parameter is not required when saving the point cloud.
|
||
Storage path |
The path where files will be stored. |
||
Custom file name prefix |
Set the prefix automatically added to the file name when saving. |
||
Auto-delete old data when space is low |
When saving data, the system will automatically delete old data if the disk space is low.
|
||
Normal Search Radius |
Points within a circle with the set search radius will be used to calculate normals. The unit is millimeters (mm). The default value is 1.000. |
||
Half Kernel Size |
Points within a square with a side length twice the set half kernel size will be used to calculate the normals. The unit is pixels (px), and the default value is 5. |
Troubleshooting
|
For common errors, see Error Code List. |
Failed to Save as MRAW File: Compression Error
Symptom:
Failed to save the surface data, and the error message “Failed to save as the MRAW file: compression error” appeared.
Possible cause:
The Windows 10 version in use is earlier than 1903.
Solutions:
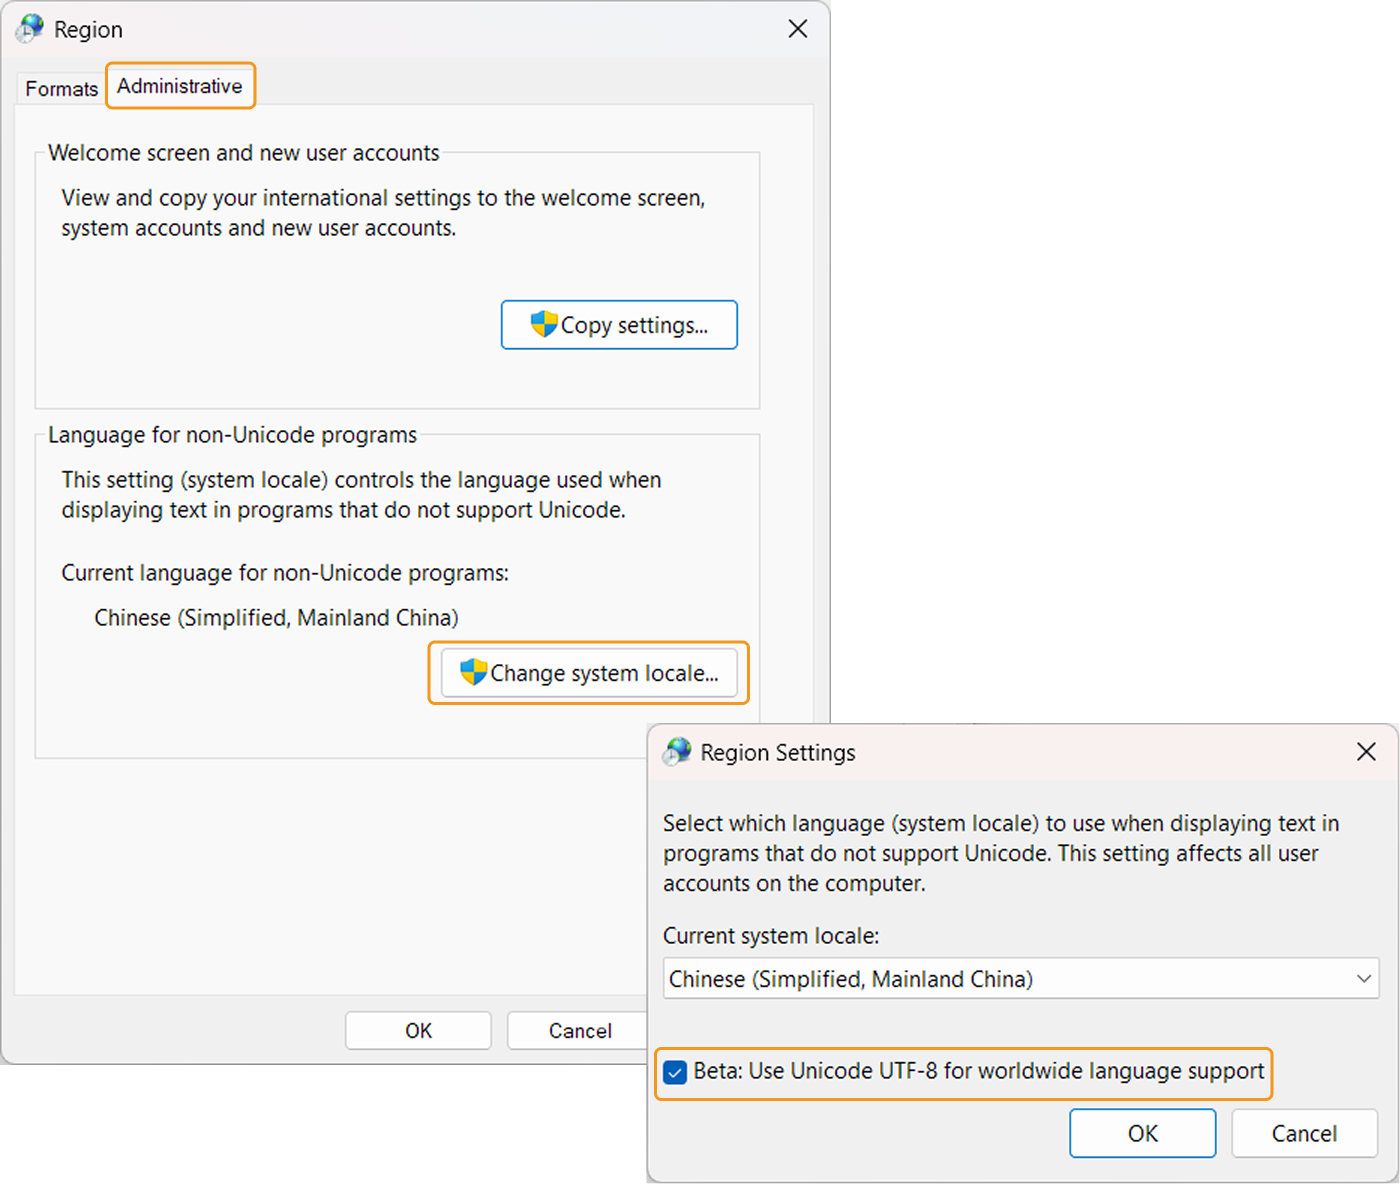
Follow the steps below to resolve the issue:
-
Check the Windows version: Open the Settings window, select (or menu: System[About] for Windows 10), and check the version in the Windows specifications section:
-
If the version is Windows 10 1903 or later, contact Technical Support.
-
If the version is earlier than Windows 10 1903, continue with the steps below.
-
-
Open the Control Panel and click . In the Region window, go to the Administrative tab and click the Change system locale button. In the pop-up Region Settings window, select the option Beta: Use Unicode UTF-8 for worldwide language support and then click the OK button.
-
Restart your computer to apply the change.