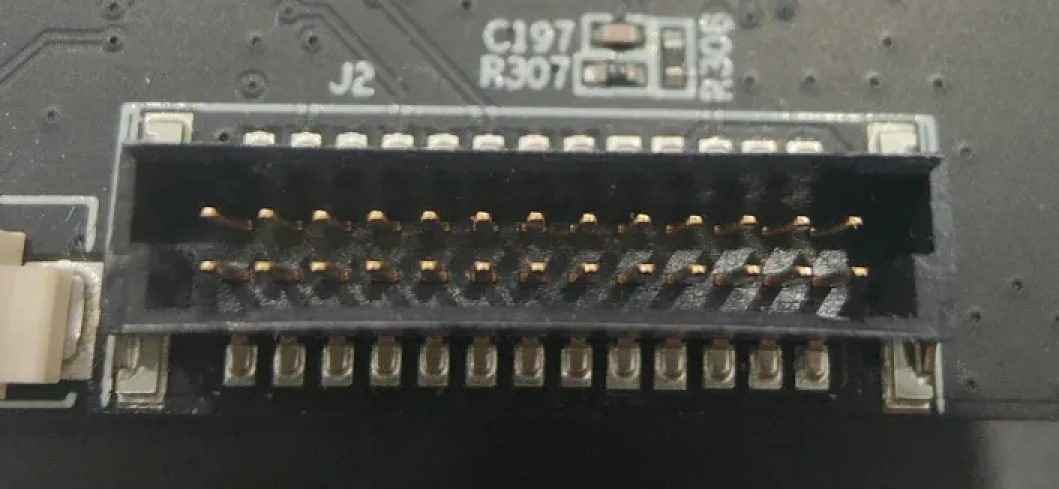
Connector Pin Position Inspection
About the Solution
The solution is designed for precision manufacturing to accurately measure and inspect the positions of pins to ensure their installation and processing accuracy in circuit boards or connectors. The accurate inspection of the pin position can help ensure that the pins function properly in the circuit boards or connectors.
Inspection Target
-
Pin position
The solution should be able to measure the horizontal distance from the pins to the edges of the connector to ensure that pins are in the correct positions to avoid deviation or poor contact during installation or operation.

Inspection Challenges
This solution can meet the following challenges:
-
Data acquisition: Due to the limited size of the pin tip, it is difficult to obtain accurate point cloud data.
-
Measurement precision: High-precision measurements are required. Thus, effective data preprocessing is required to ensure the stability and accuracy of the results.
-
Layout scheme: Pins are deep, and the surrounding structures may block the camera’s view, resulting in poor imaging clarity during conventional flat scans.
Key Technical Specifications
The key technical specifications of the solution are as follows:
-
Repeatability: <30 μm
-
Cycle time: The cycle time of measurement should be no more than 2 seconds.
| In different application scenarios, key technical specifications may vary and should be adjusted flexibly according to the actual situation. |
Solution Design
According to project requirements, the sensor head of a Mech-Eye 3D laser profiler should be fixed above the pins. Make sure the sensor head is facing the pin tips and adjust its tilt to fit the working space and scan all pins as much as possible.
Hardware and Software Requirements
-
Mech-Eye 3D Laser Profiler + Mech-Eye Viewer software
Quickly scans the surface of an object and generates surface data (including depth map and intensity image).
-
Mech-MSR software
Obtains and processes surface data and calculates the pin position.
Deployment Process
| Before deploying the solution, you need to get the Connector Pin Position Inspection solution from Mech-MSR’s solution library. See Quick Guide to Solution Library to learn how to get the solution. |
The deployment process of the solution is as follows:

-
Build the software and hardware environment to acquire and view image data.
-
Filter the surface data after alignment and obtain the surface data of pin tips.
-
Measure the positions of pins.
-
Set acceptable ranges for pin positions and obtain measurement and inspection results.
Next, you can get started with solution deployment.