EFORT Automatic Calibration
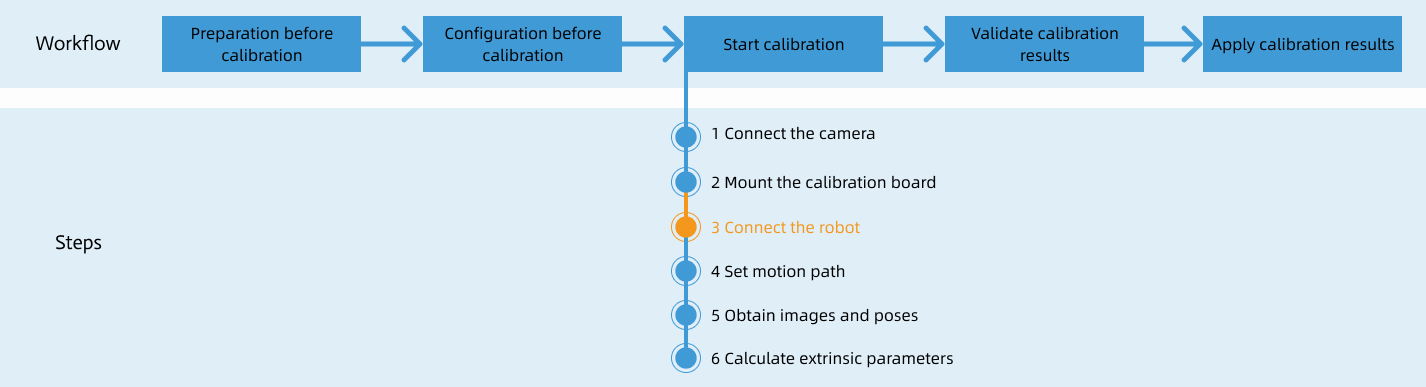
After you set up Standard Interface communication, you can connect the robot to perform automatic calibration. The overall workflow of automatic calibration is shown in the figure below.
Special note
During the calibration procedure, when you reach the Connect the robot step and the Waiting for robot to connect... button appears in Mech-Vision, perform the steps below on the robot side. After you perform the steps, proceed with the remaining steps in Mech-Vision.
|
1. Select and Modify Calibration Program
-
On the teach pendant, press the icon in the upper left corner, and then press TCP IP.
If TCP IP is not displayed on the teach pendant interface, click Settings on the taskbar; in the left navigation pane, click App Selection; in the right-side application list, check TCP IP, then click Save. After the robot restarts, TCP IP will appear on the teach pendant interface.
-
On the screen shown, set the communication parameters, then click Save.
-
Protocol Type: Select Client.
-
Socket number: Select Socket 1. The socket number here must match the first parameter value of the MM_Init_Socket instruction.
-
Server IP: Enter the IPC IP address.
-
Port: 50000. If the host port number set in Mech-Vision is modified, the port number 50000 here should be modified accordingly to make it consistent with the host port number set in Mech-Vision.
-
Timeout: 50,000 microseconds.
-
Heartbeat interval: 10,000 microseconds.
-
First character: Set to empty.
-
End character: Check CR($R).
-
-
On the screen shown, select the imported
MM_Module.XPL, then press Open. -
In the Program interface, select MM_Auto_Calib, click Edit, modify the parameters of the first and fifth instructions as needed, then click Save.
-
MM_InitSocket: The first parameter value must match the socket number.
-
MM_Calibration: For the meaning of each parameter, please refer to the instruction description.
-
2. Teach Calibration Start Point
-
Manually move the robot to the calibration start point.
You can use the position of the robot in the Check the Point Cloud Quality of the Calibration Board step as the calibration start point.
-
On the screen shown, select the third row, then click Edit.
-
Click Confirm to store the calibration start point position into the Calibration variable, then click Save.
3. Run Calibration Program
-
Move the cursor to the first line of the program, then click Set PC.
-
Switch the key to Auto mode; press the PWR function key on the teach pendant to power the servos; press the ▸ (Start) key on the teach pendant to run the program.
-
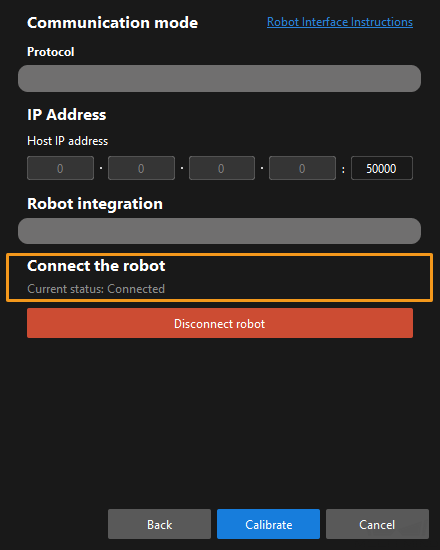
When, in the Calibration window in Mech-Vision, the current status changes to connected and the button Waiting for the robot to connect... changes to Disconnect robot, click Next at the bottom.
-
Perform Step 4 of Start calibration (which is Set motion path) and the subsequent operations based the following links.
-
If the camera mounting mode is eye to hand, see this document and proceed with the relevant operations.
-
If the camera mounting mode is eye in hand, see this document and proceed with the relevant operations.
-