Master-Control Communication Setup
This guide shows you how to set up Master-Control communication with a TM (Techman) robot.
Preparation
Before you perform any operation on the TM robot, please make sure that the following requirements have been met:
-
The controller software (TMflow) version is 1.84.
-
The Master-Control program currently does not support communication with the robot controller with a version of TMFlow2.
-
Version 1.84 is the one used for adaptation. For other versions, you may refer to this guide for operation. If any issues occur, please contact Mech-Mind Technical Support.
-
-
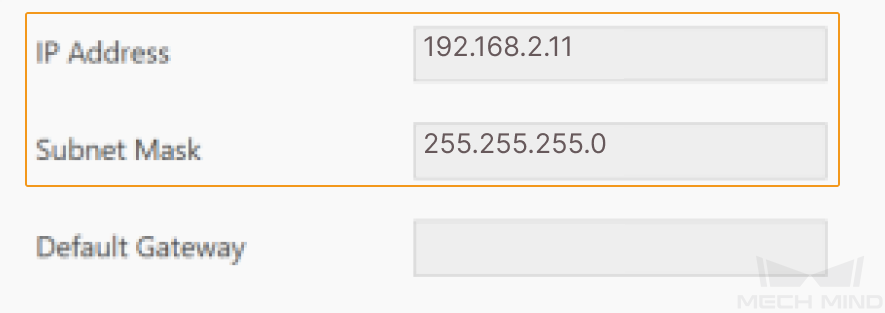
You have known the IP address of the robot, e.g., 192.168.2.10.
Get Control of the Robot
There are two ways to control the robot, and you can choose either one according to the actual situation.
Control the Robot via the Controller
-
Connect the monitor, keyboard, and mouse to the controller through the controller’s USB and HDMI ports accordingly.
-
Click
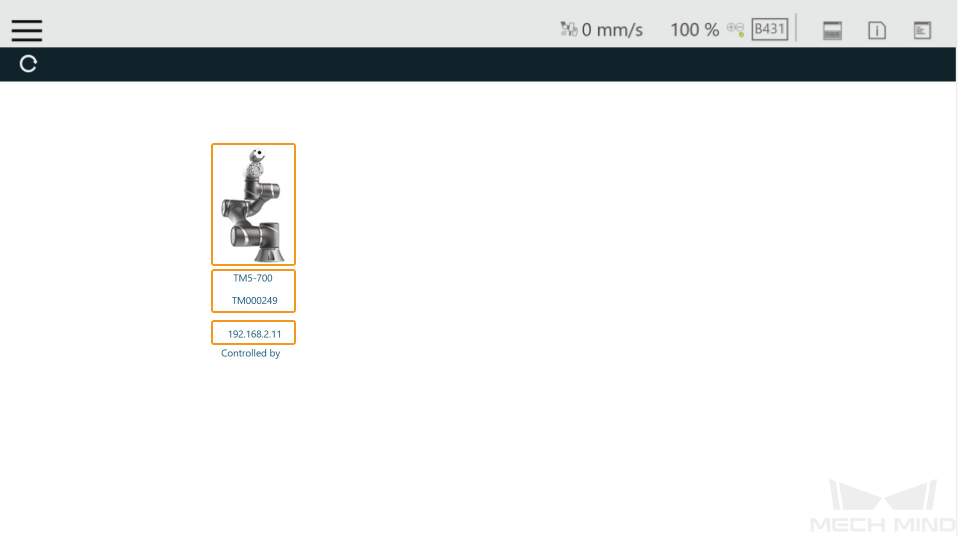
 , and wait for the corresponding robot ID to appear in the window.
-
Connect the robot in any of the following ways:
-
Double-click the robot icon
-
Double-click the robot ID
-
Double-click the IP address of the robot
-
-
Enter your ID and password in the Log in window, and click OK. You can use the default ID administrator to log in without a password.
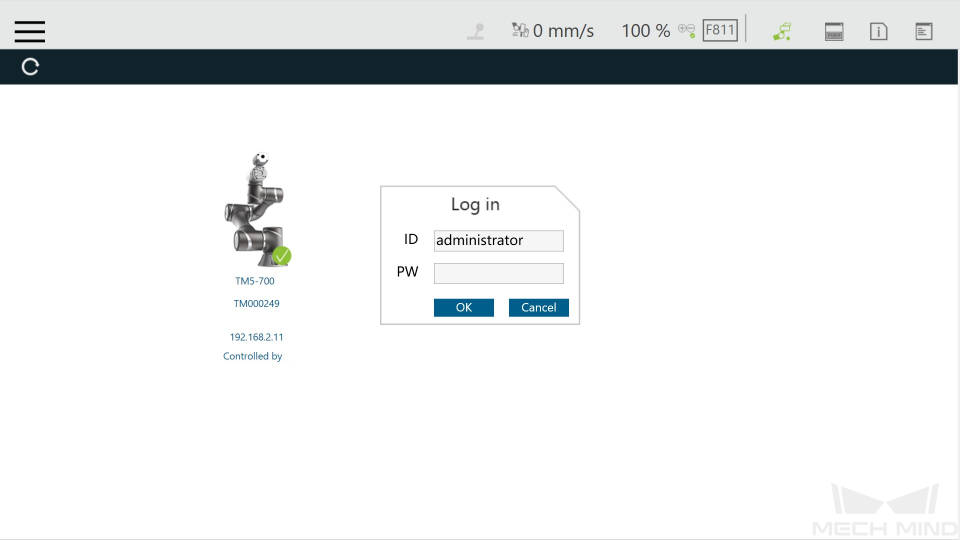
-
Click Get Control to control the robot.
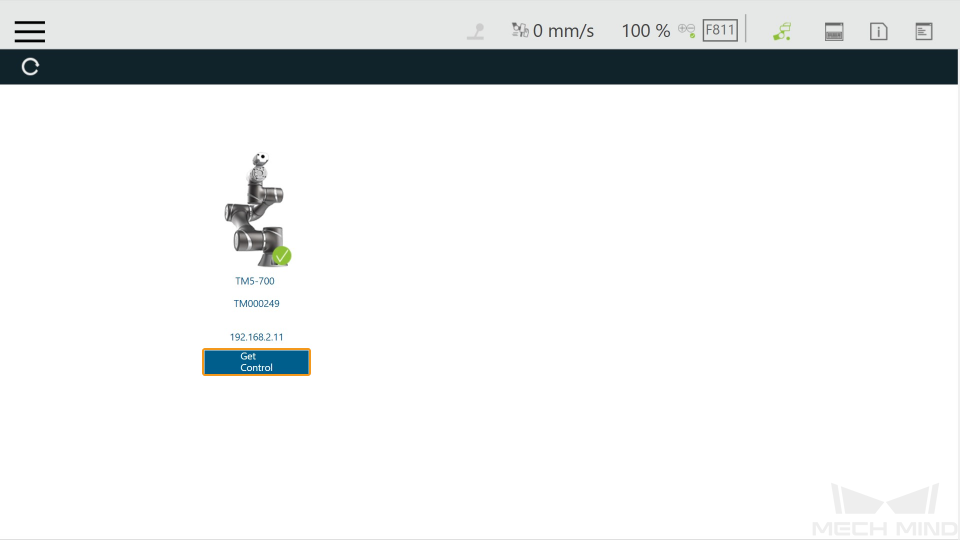
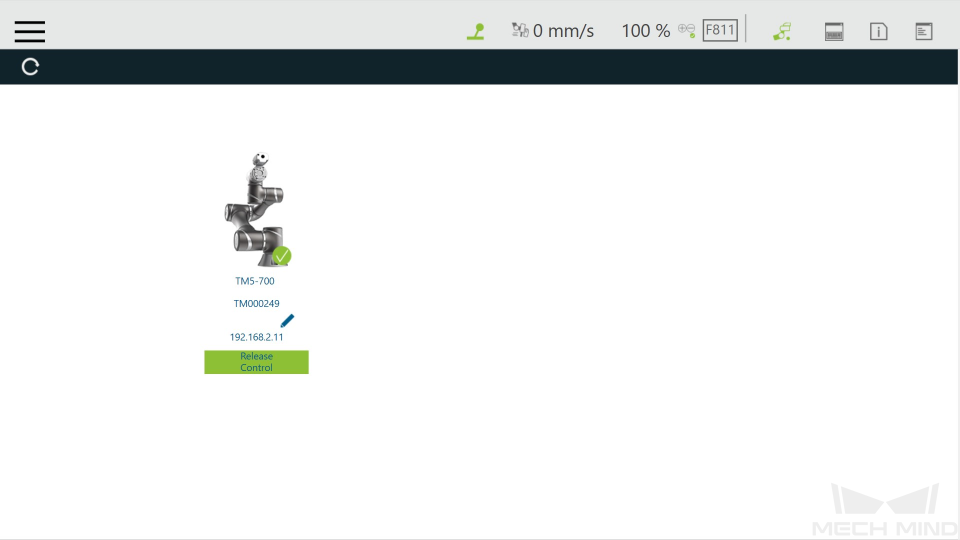
If the robot is controlled successfully, the window will be as shown below.
Control the Robot via the IPC
Connect the Hardware
Plug the Ethernet cable into the LAN port of the robot controller to connect it with the IPC.

Set the IP Address of the IPC
In the IPC, set the IP address of the IPC.
| Set the IP addresses of the IPC and robot to be in the same subnet. Or else the robot cannot be connected successfully. |
Control the Robot with the IPC
-
Download and install the TMflow software on your IPC from Techman Robot’s website.
If the robot brand is Omron TM, please download TMFlow 1.8.4 or above from the Omron official website and complete the upgrade process. -
Open TMflow, click
, and wait for the corresponding robot ID to appear in the window.
-
Connect the robot in any of the following ways:
-
Double-click the robot icon
-
Double-click the robot ID
-
Double-click the IP address of the robot
-
-
Enter your ID and password in the Log in window, and click OK. You can use the default ID administrator to log in without a password.
-
Click Get Control to control the robot.
If the robot is controlled successfully, the window will be as shown below.
Load the Program Files to the Robot
The example below uses an IPC to load the program files, and the method to load the program files with a controller is similar.
Prepare Program Files
-
Plug the USB flash drive into the USB port of the IPC.
-
Rename the USB flash drive to TMROBOT, or else the USB flash drive cannot be recognized by the robot controller.
-
Copy the program files to the USB flash drive. The files are stored in
Communication Component/Robot_Server/Robot_FullControl/tmin the installation directory where Mech-Vision and Mech-Viz are installed.Please copy the entire TM_Export folder to your USB flash drive. -
Plug the USB flash drive with the program files into the USB port of the robot controller.
Back up Robot System Files
It is recommended to back up robot system files before loading Standard Interface program files to avoid system corruption that may be caused by the loading operation. In case any issue occurs, you can use the backup file to restore the robot system.
-
Open the TMflow software, click the icon
 in the upper left corner of the window, and select .
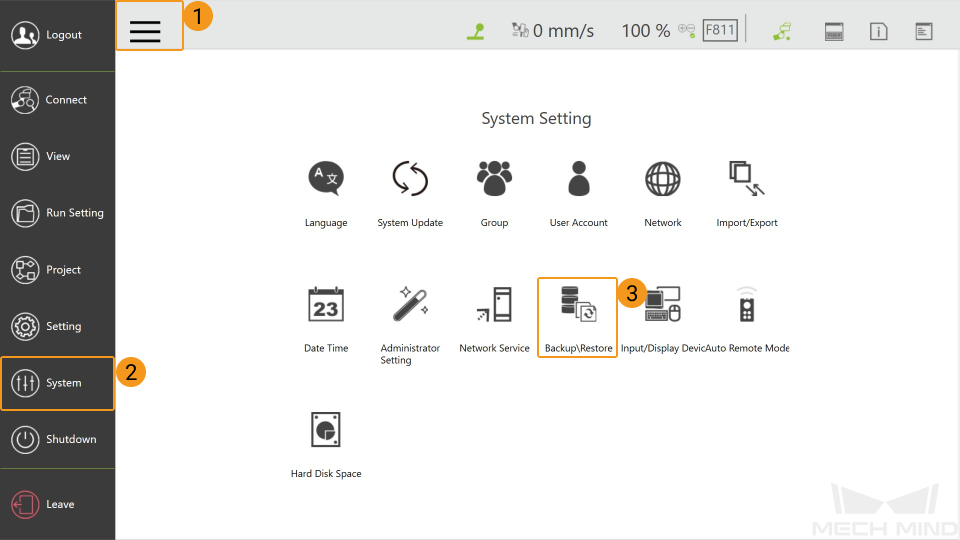
-
Click Backup, enter a File Name for the backup file, and then click Backup.
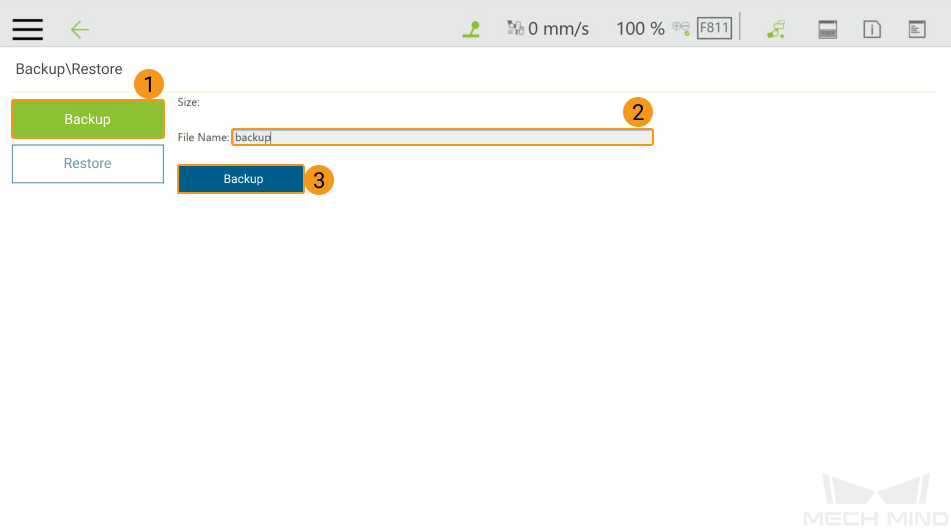
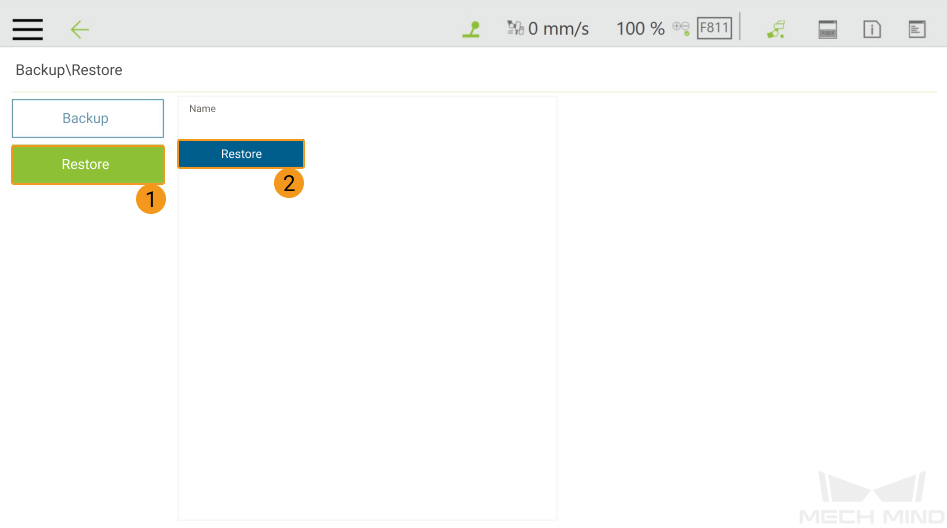
If you need to restore the robot system with the backup file, click Restore and then Restore.
Load the Files to the Robot
Before loading the files to the robot, please press and hold the M/A button on the Robot Stick to switch the robot to the Manual mode (the green Manual light is on).

-
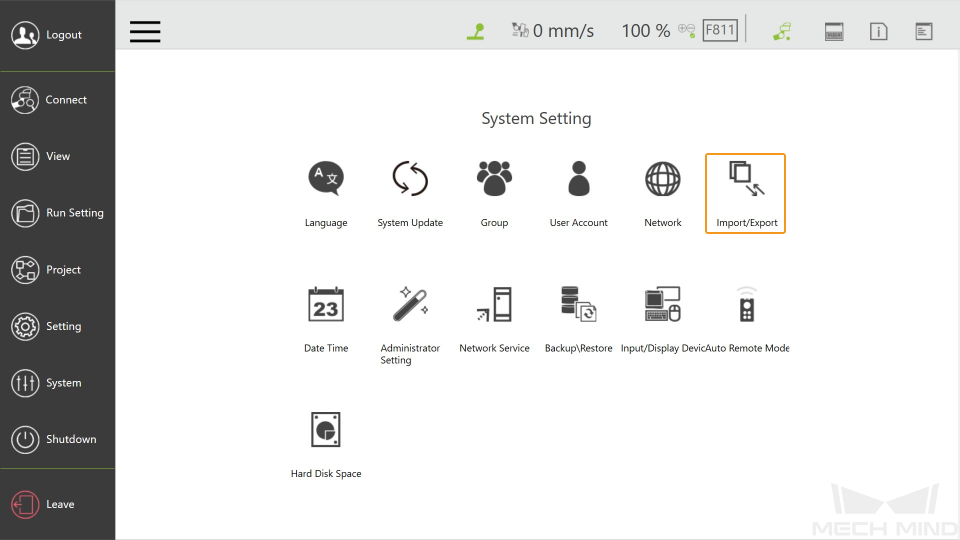
Open the TMflow software, click
and then select System.
-
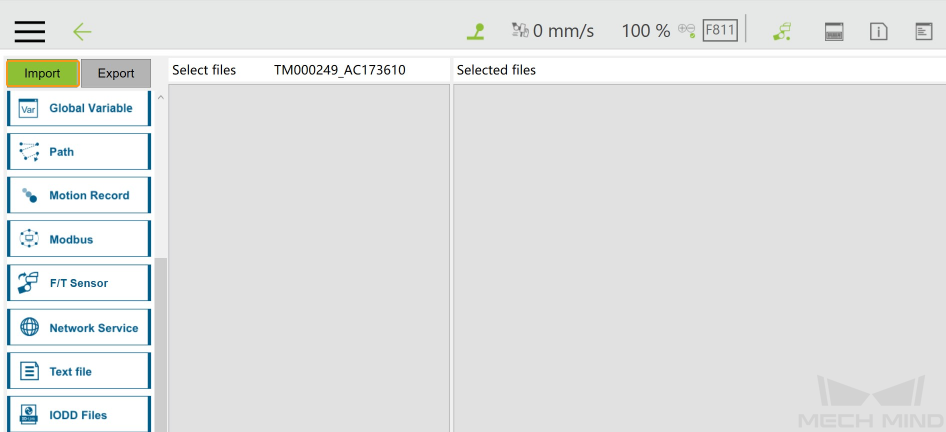
Click Import/Export.
-
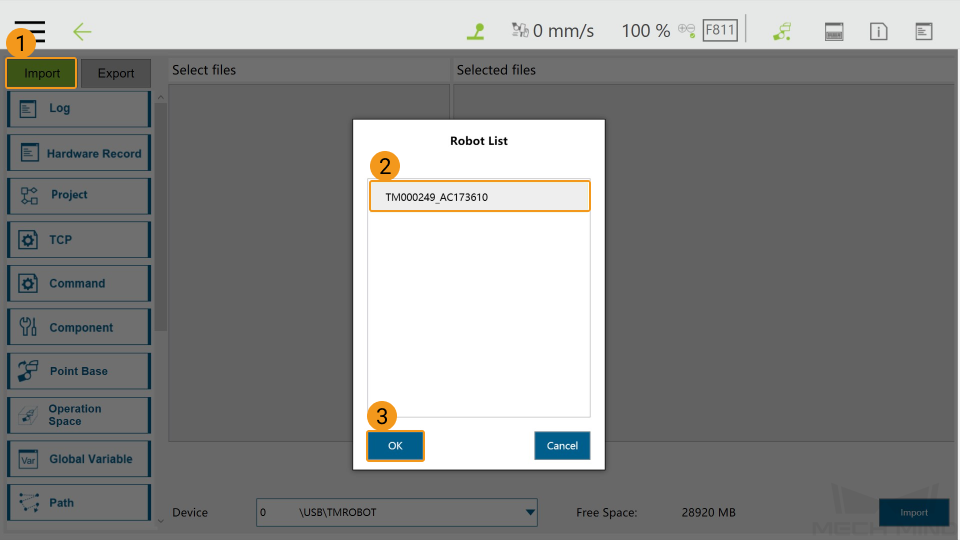
Click Import
-
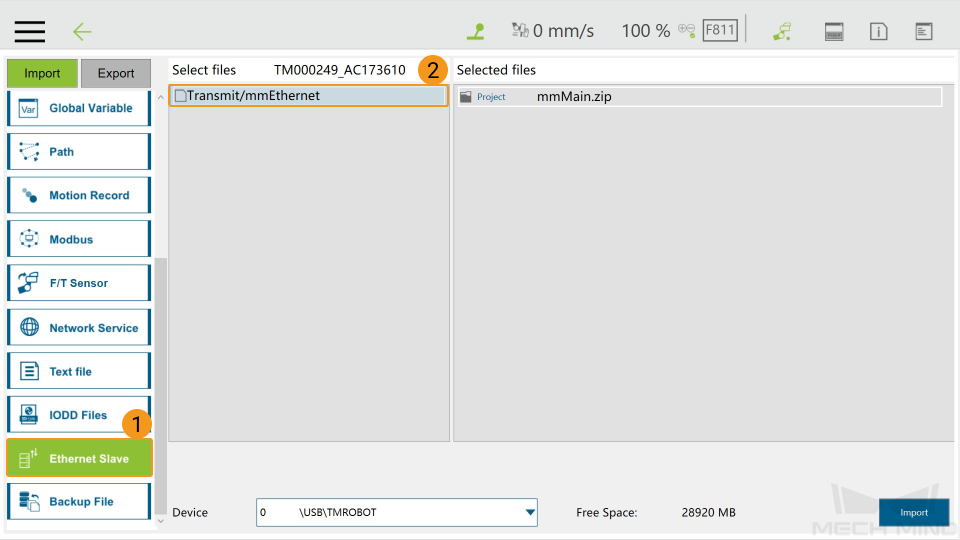
A Robot List window will pop up, and then select the program file TM000249_AC173610 and click OK.
-
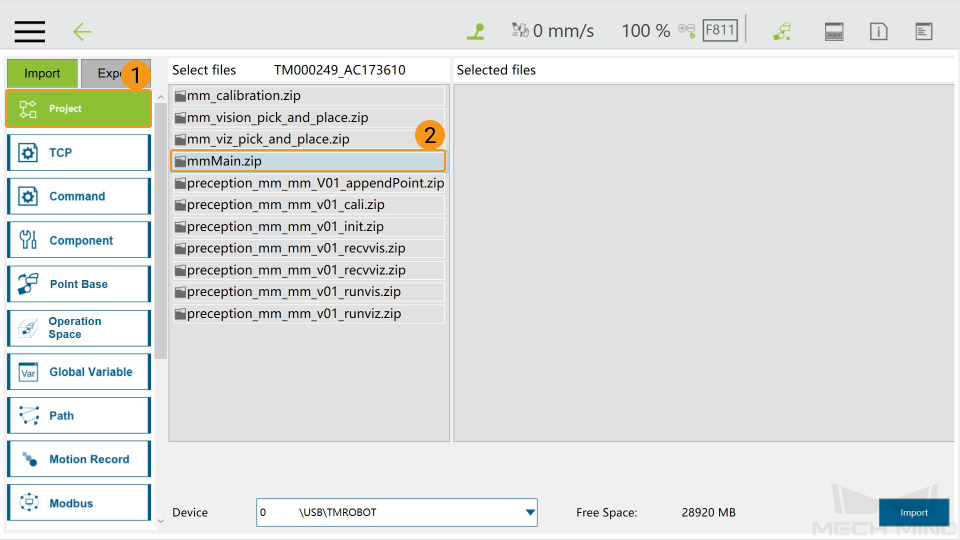
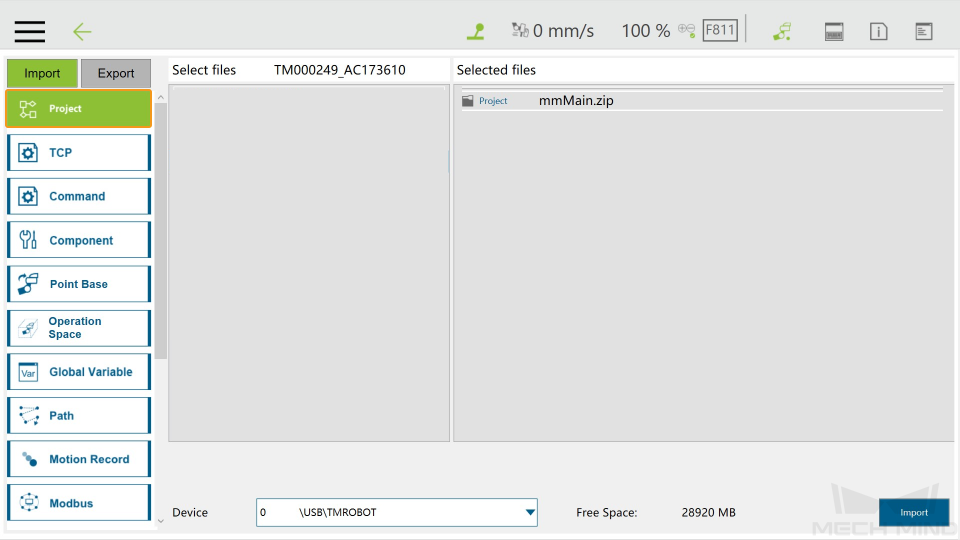
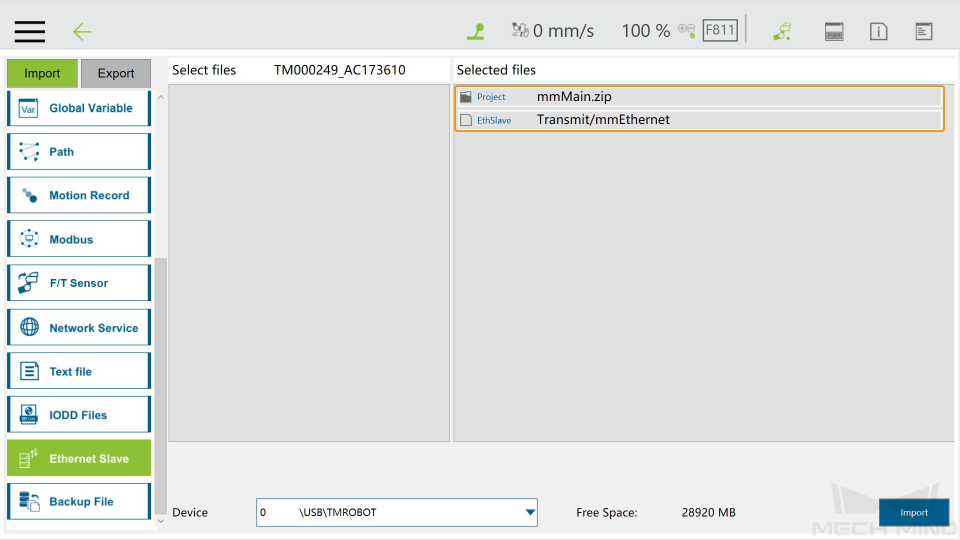
Click Project, and select mmMain.zip in the Select files, and then it will be displayed in the Selected files panel on the right.
-
Click Ethernet Slave, and select Transmit/mmEthernet, and then it will be displayed in the Selected files panel on the right.
-
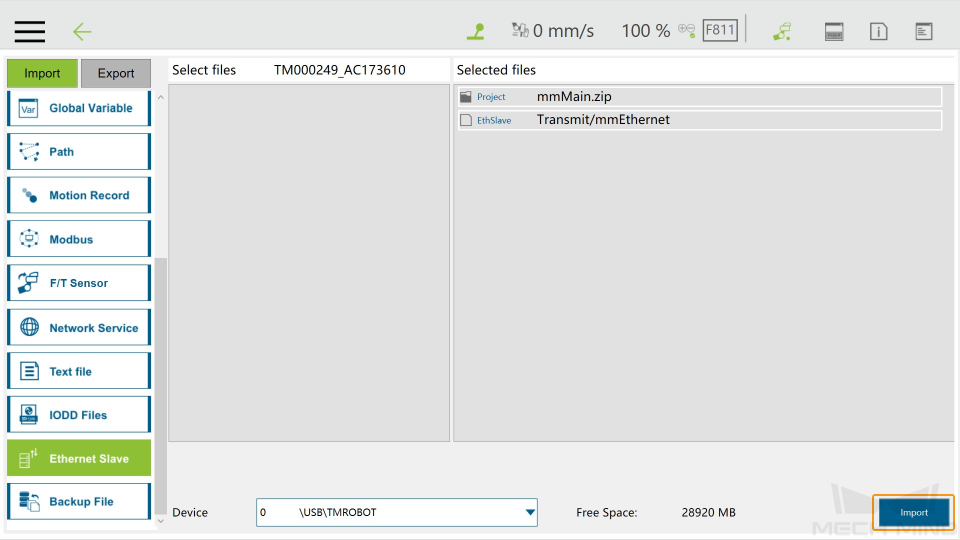
Click Import
-
After the files have been imported successfully, click OK in the “Import complete” window.

-
Unplug the USB flash drive from the IPC after you have completed the above steps.
Run the Program
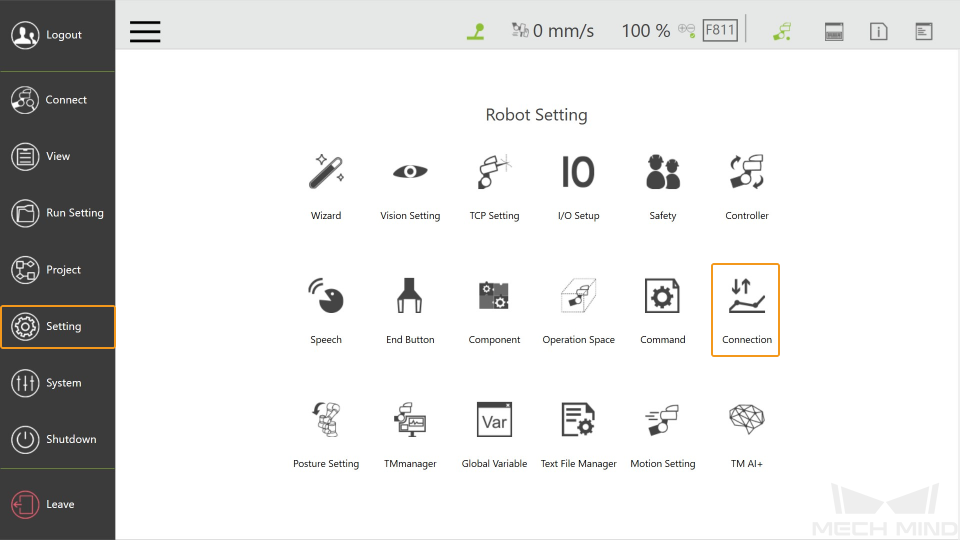
Enable the Ethernet Slave Service
-
Select .
-
Select .
The Ethernet Slave should be in a disabled state. In other words, the STATUS is displayed as Disable. If the Ethernet Slave is in the enabled state, please click Disable. 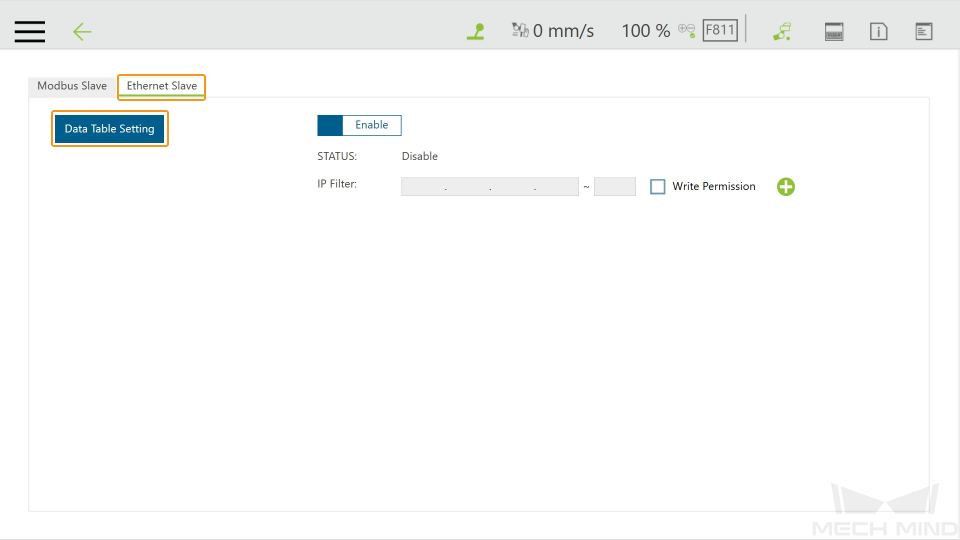
-
Set the Communicate Mode to JSON, and click Open.
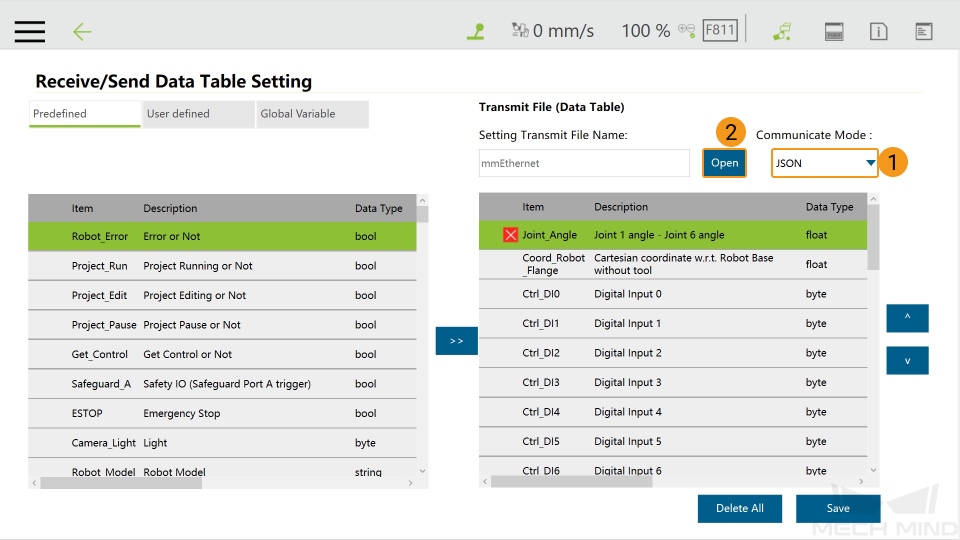
-
Select mmEthernet in the pop-up Save Transmit File Name window, and click OK.

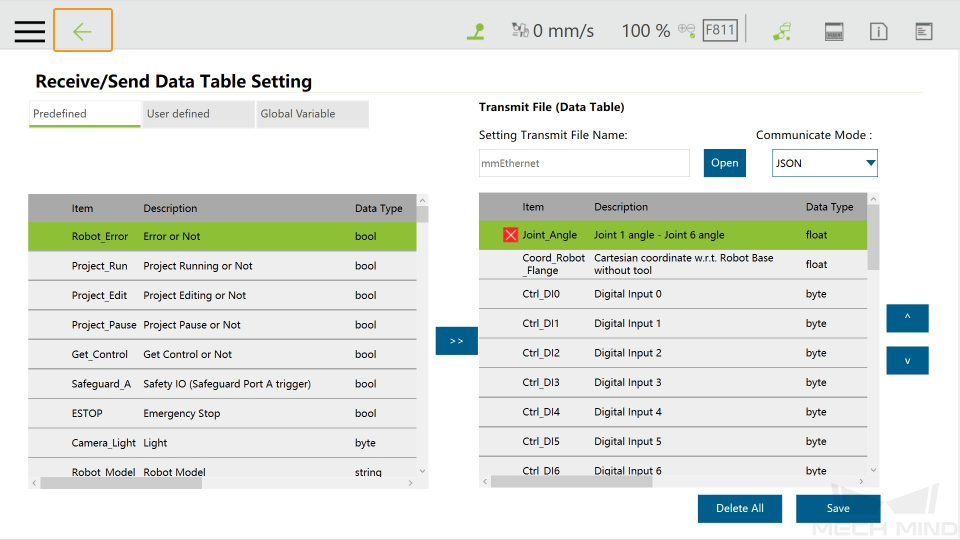
-
Click ← in the Receive/Send Data Table Setting window.
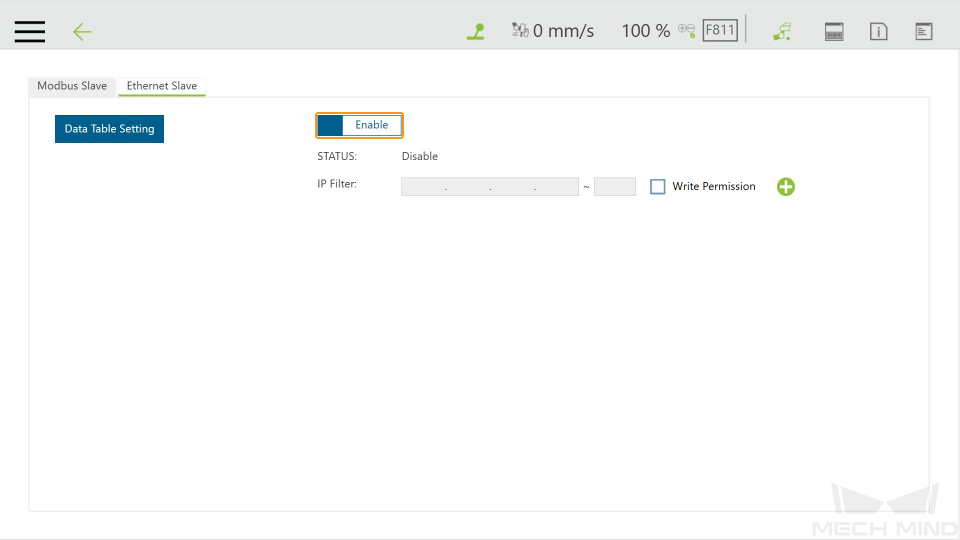
-
Click Enable.
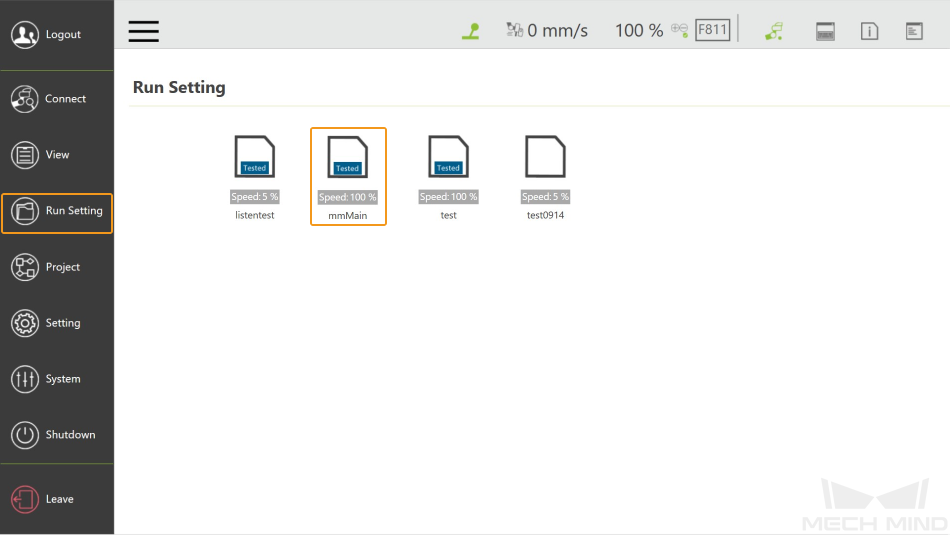
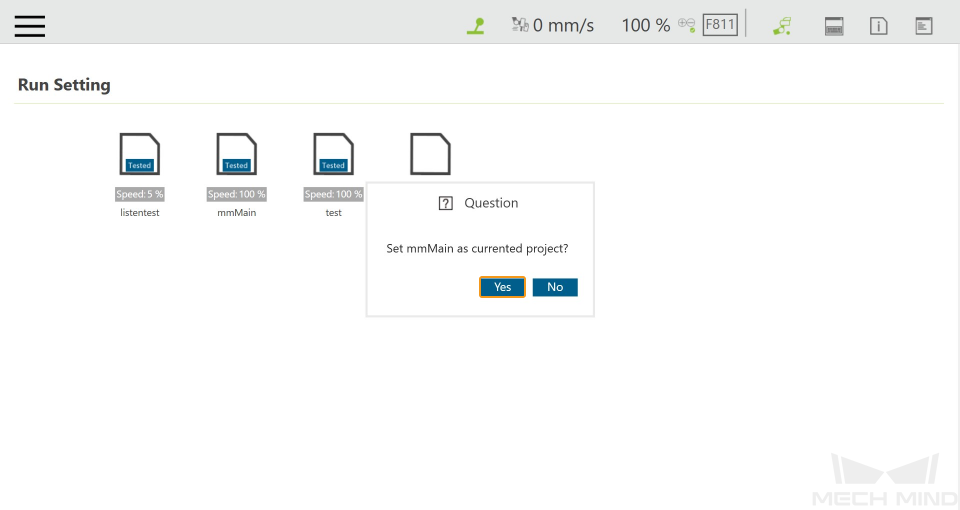
Run the mmMain Program
-
Select .
-
Click Yes in the pop-up window to set mmMain as the current project.
-
Press the
M/Abutton on the Robot Stick until you hear a beep, which suggests that the Manual mode has been disabled. Press the buttons + - + + - in sequence, and the blue Auto light will be on, suggesting that the robot has been switched to the Auto mode.
-
Then press the
Runbutton on the Robot Stick, and the program will run after three beeps.
Test Master-Control Communication
Create a Mech-Viz Project
-
Open Mech-Viz, press Ctrl + N on the keyboard to create a new project. Select the robot model corresponding to your real robot brand and model on the interface as shown below.

-
Press Ctrl + S and create or select a folder to save the project.
-
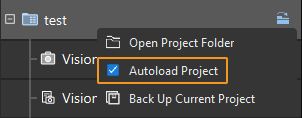
Right-click the project name in the left panel in Mech-Viz and select Autoload Project.
Connect to the Robot
-
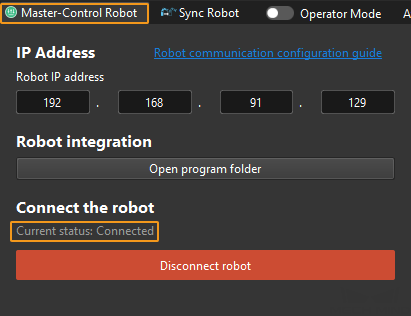
Click Master-Control Robot on the toolbar of Mech-Viz.
-
Input the IP address of the real robot in Robot IP address (the IP address in the picture is only an example). Click Connect the robot.

If Mech-Viz successfully connects the real robot, the current status will change to Connected. Meanwhile, the icon in the toolbar will turn from blue to green.
If the connection fails, please double-check the robot IP address.
Move the Robot
-
In the toolbar of Mech-Viz, change the “Vel.” (velocity) and “Acc.” (acceleration) parameters to 5%.

-
Click Sync Robot in the toolbar, and you can synchronize the poses of the simulated robot in the 3D simulation space with the poses of the real robot. Then click Sync Robot again to unselect it.

-
In the Robot tab, slightly adjust the value of “J1”, for example, from 0˚ to 3˚. This operation will move the simulated robot.
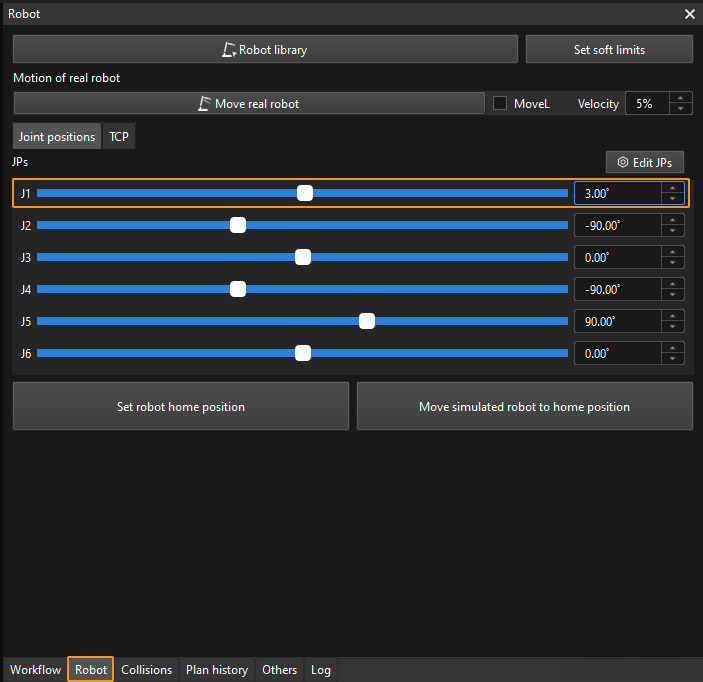
-
Click Move real robot and check if the real robot has moved. If the real robot has reached the JPs set for the simulated robot, the master-control communication is working.
When moving the robot, please ensure the safety of personnel. In the case of an emergency, press the emergency stop button on the teach pendant! 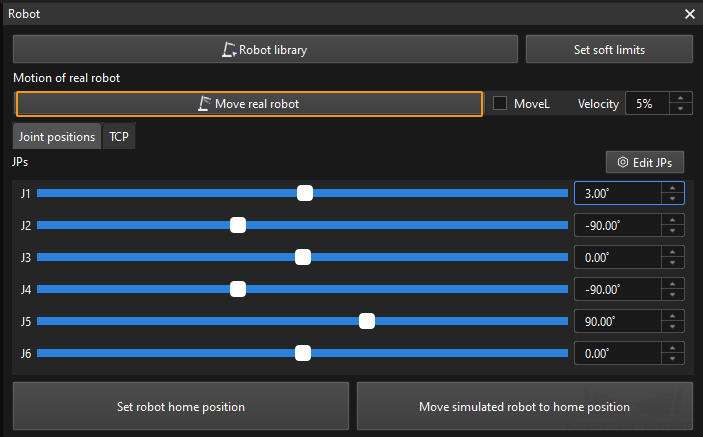
|
After running the mmMain program on the robot side but Mech-Viz fails to connect the robot, you can use NetAssist in the xxx\Mech-Mind Software Suite-x.x.x{product-center}\tool directory as a client to connect the 5890 and 5891 ports of the robot to check if these two ports are opened successfully.
|