FANUC Automatic Calibration
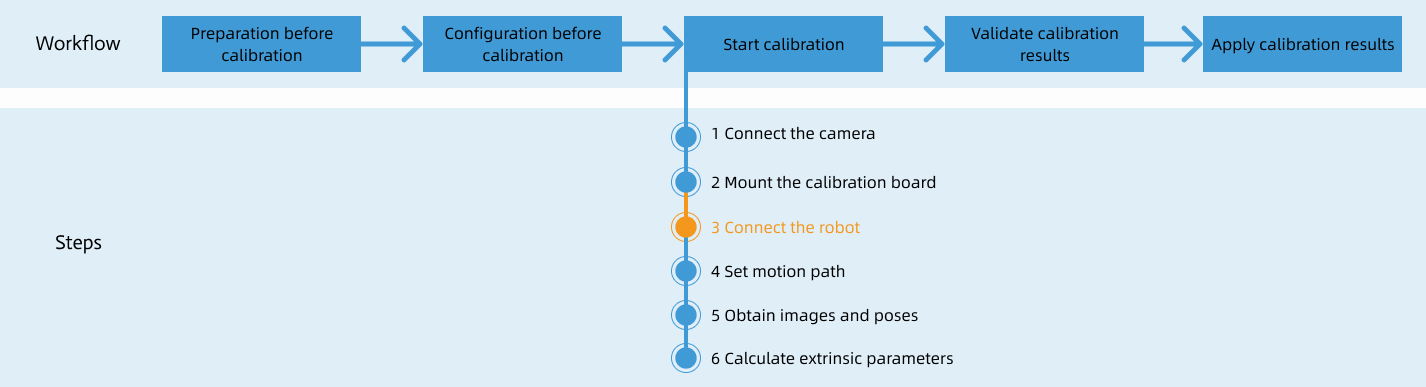
After you set up Standard Interface communication, you can connect the robot to perform automatic calibration. The overall workflow of automatic calibration is shown in the figure below.
Special note
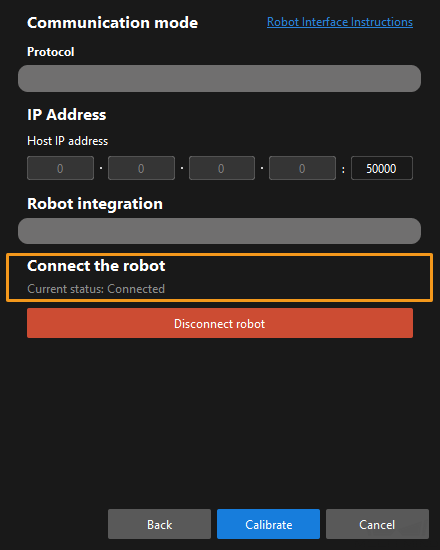
During the calibration procedure, when you reach the Connect the robot step and the Waiting for robot to connect... button appears in Mech-Vision, perform the steps below on the robot side. After you perform the steps, proceed with the remaining steps in Mech-Vision.
|
1. Select and Modify Calibration Program
-
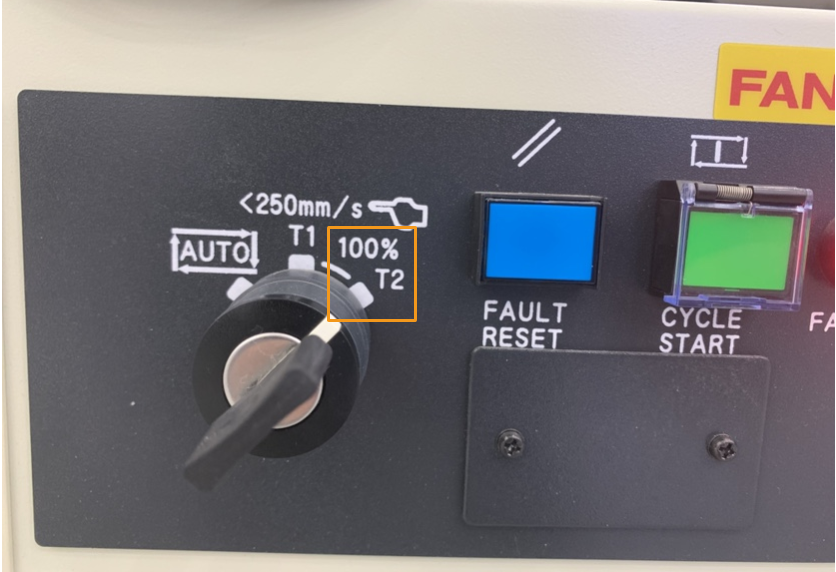
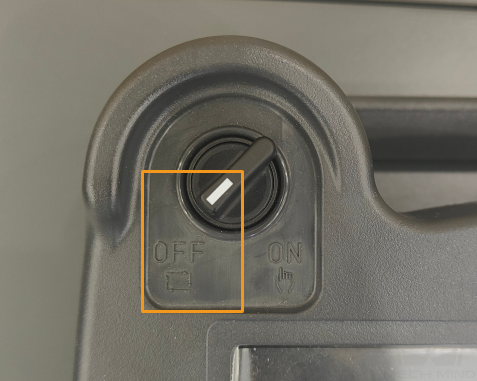
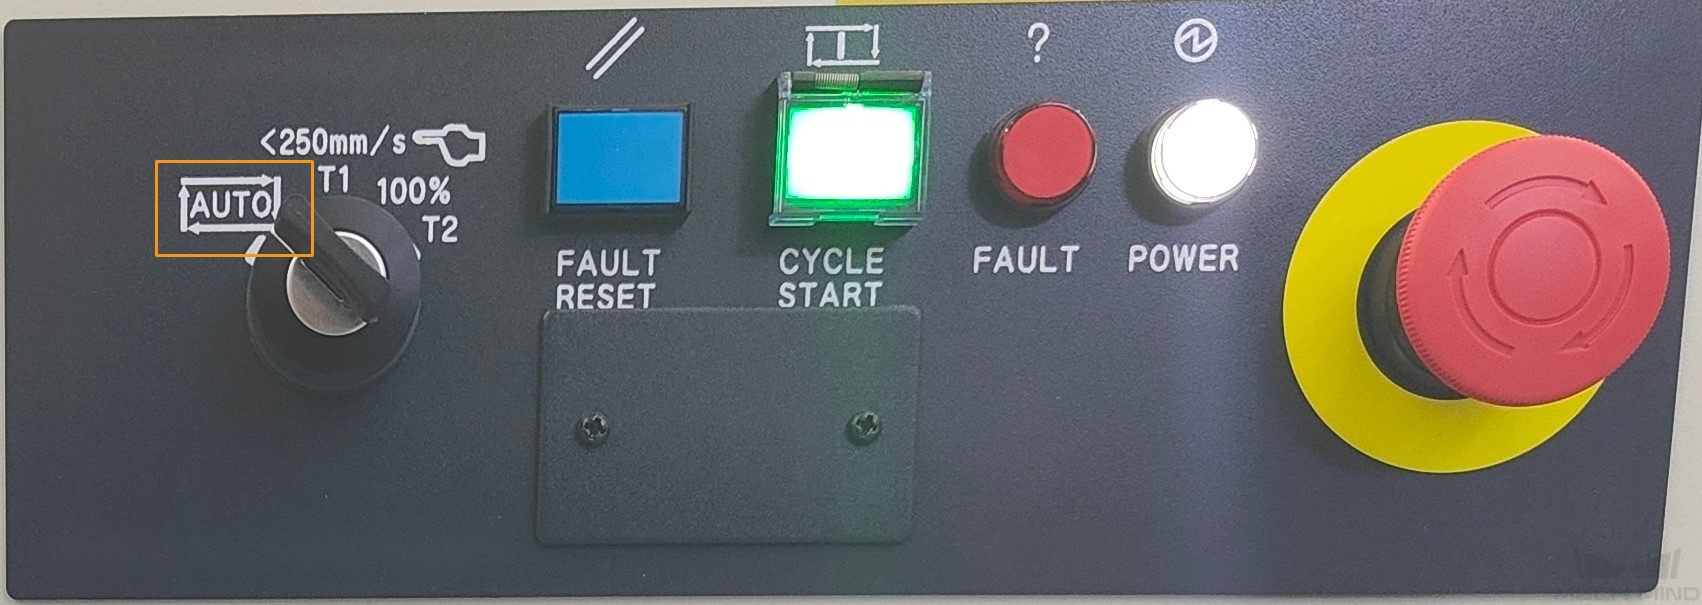
Switch the robot to the manual mode: Turn the switch of the teach pendant to ON, and turn the switch of the controller to T1 or T2.
T1 is the low-speed mode, and T2 is the high-speed mode. It is recommended that beginners use T1 mode. 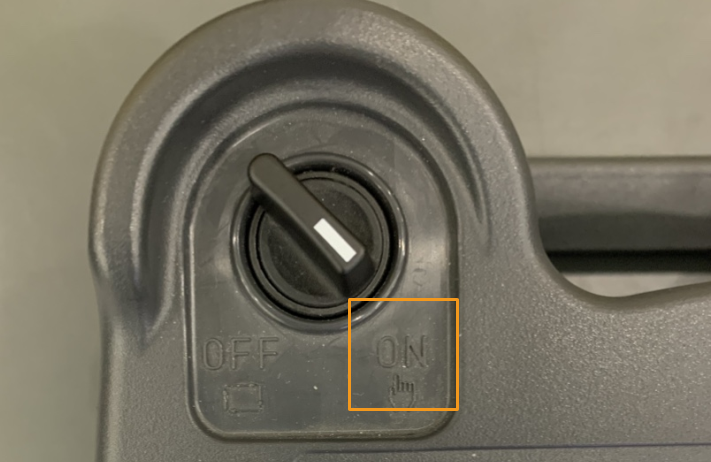
-
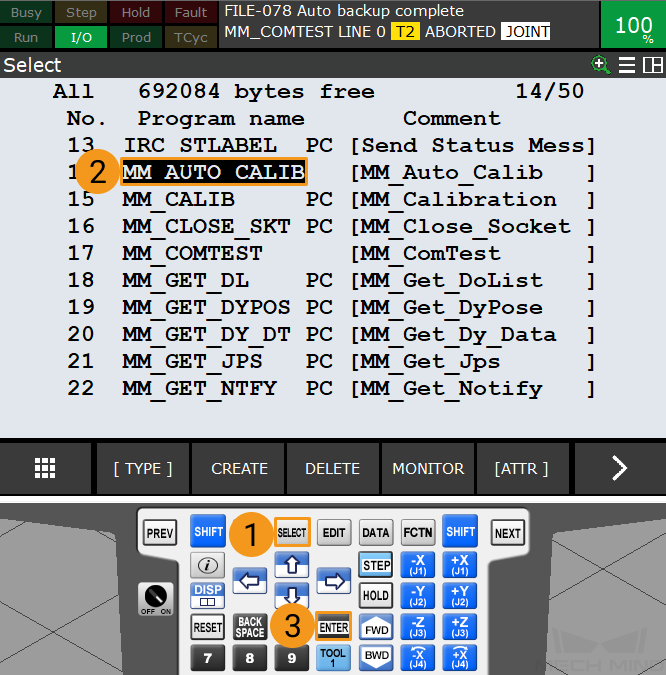
After loading the program files, press SELECT key on the teach pendant to enter the program selection interface. Select MM_AUTO_CALIB using the arrow keys and then press ENTER to open the program.
-
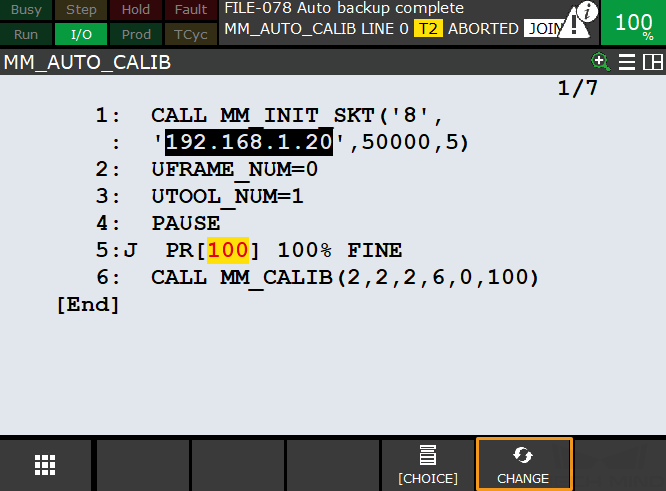
Set the parameters of the function CALL MM_INIT_SKT in the program MM_AUTO_CALIB. This function has four parameters. Select one of the parameters by using the arrow keys, press F5 to select CHANGE, and then change the value as needed.
-
Parameter 1: Robot port number. Please select a robot port from ports 1 to 8.
-
Parameter 2: IP address of the IPC
-
Parameter 3: IPC (server) port number, which should be the same as the setting in Mech-Vision
-
Parameter 4: Timeout (min)
-
Parameter 5: For detailed parameters, refer to the Standard Interface Commands.
-
2. Teach Calibration Start Point
-
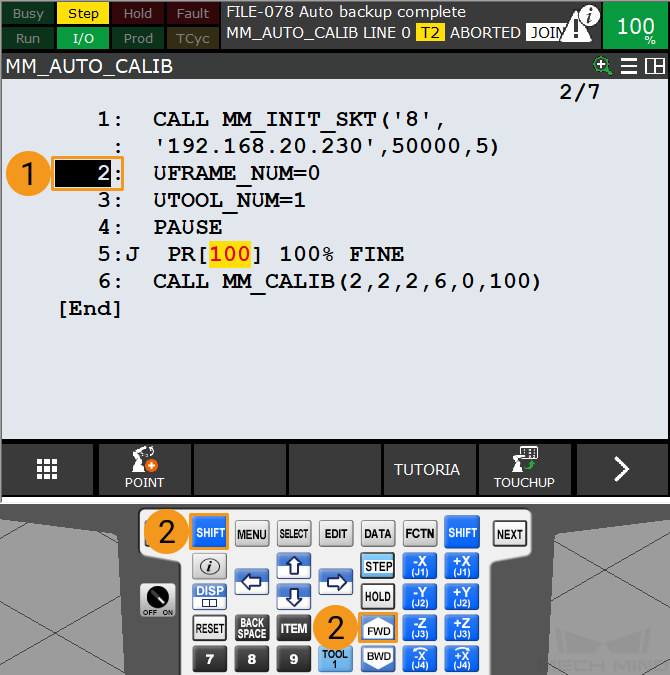
After opening the program, press the STEP key on the teach pendant to switch to Step mode. Then the Step icon on the screen will turn yellow.

-
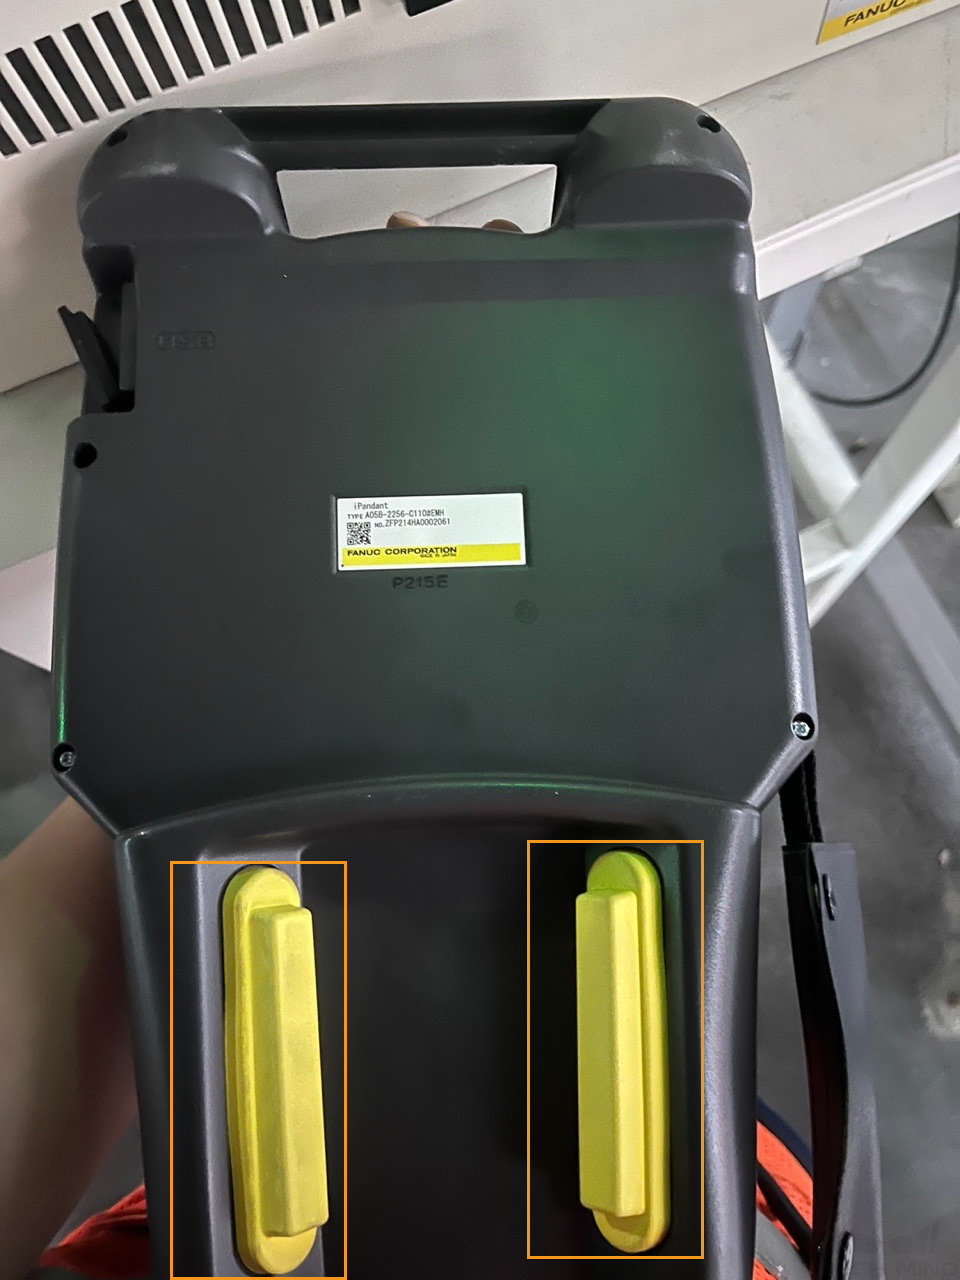
Press and hold either one of the deadman switches on the back of the teach pendant. Move the robot to the start point for calibration.
You can use the position of the robot in the Check the Point Cloud Quality of the Calibration Board step as the calibration start point.
-
Move the cursor to the second line using the arrow keys, and press the SHIFT and FWD keys at the same time to run the command on the second line. Then the user reference frame 0 will be used.
-
Move the cursor to the third line, and press the SHIFT and FWD keys at the same time to run the command on the third line. Then the tool reference frame 1 will be used.
Tool coordinate system No.1 cannot be modified and must be set to (0, 0, 0, 0, 0, 0). 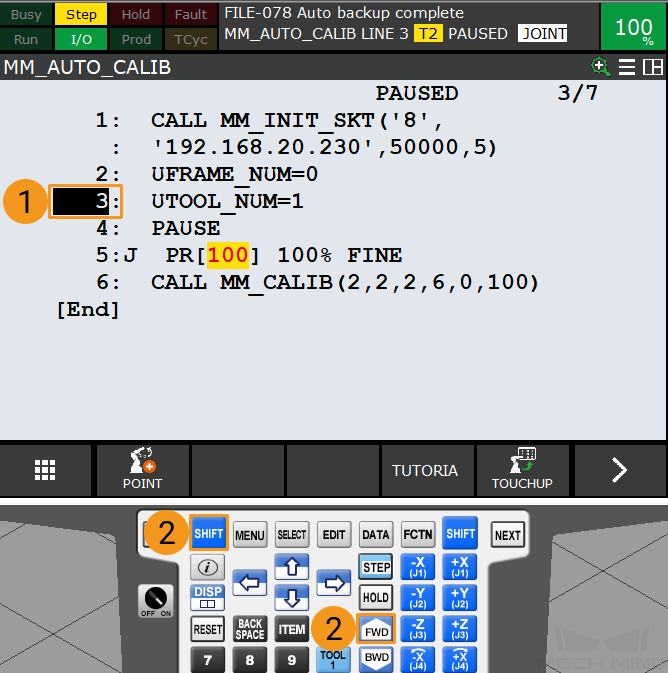
-
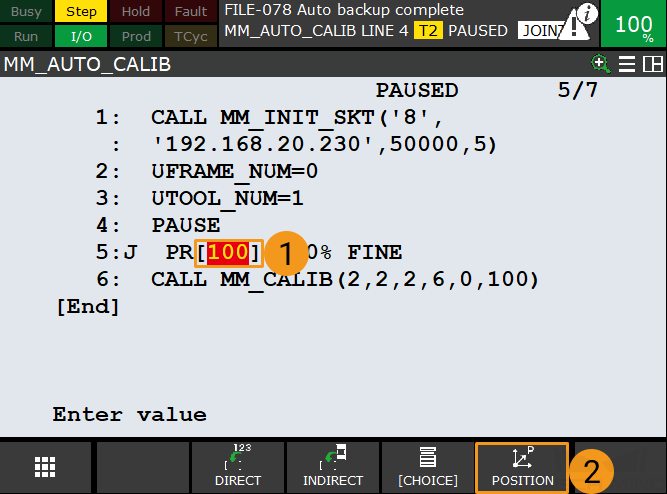
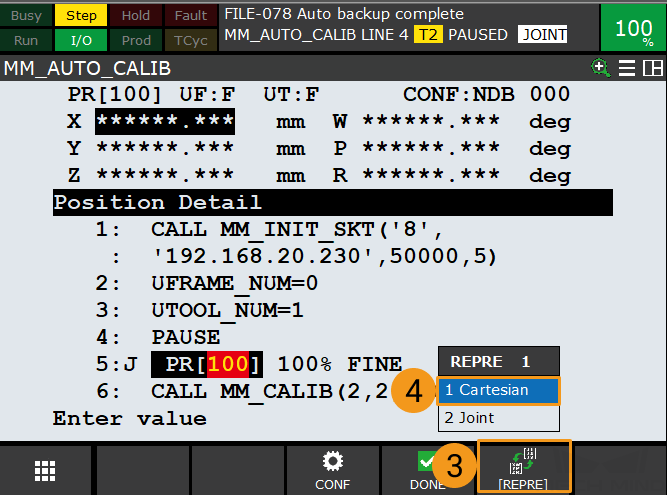
Select [100] using the arrow keys, and press F5 to select POSITION. Then, press F5 again to select REPRE. Select Cartesian using the arrow keys and press ENTER to confirm.
-
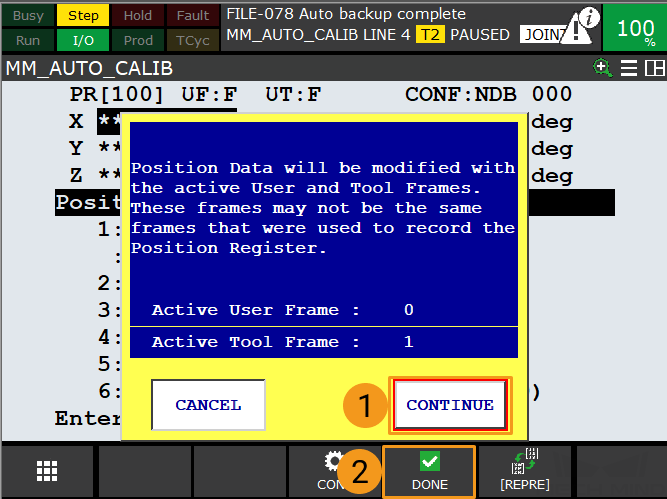
Select CONTINUE in the dialogue box below, and then press F4 to select DONE.
-
Select the line number of line 5. Then, press SHIFT and F5 (to select TOUCHUP) together. When the teach pendant displays the message “Position has been recorded to PR[100]”, the robot’s pose is stored in PR[100].

-
Press STEP on the teach pendant to exit the Step mode. Then the Step icon on the screen will turn grey.

3. Run Calibration Program
-
Switch the robot to the automatic mode: Turn the switch of the teach pendant to OFF, and turn the switch of the controller to AUTO.
-
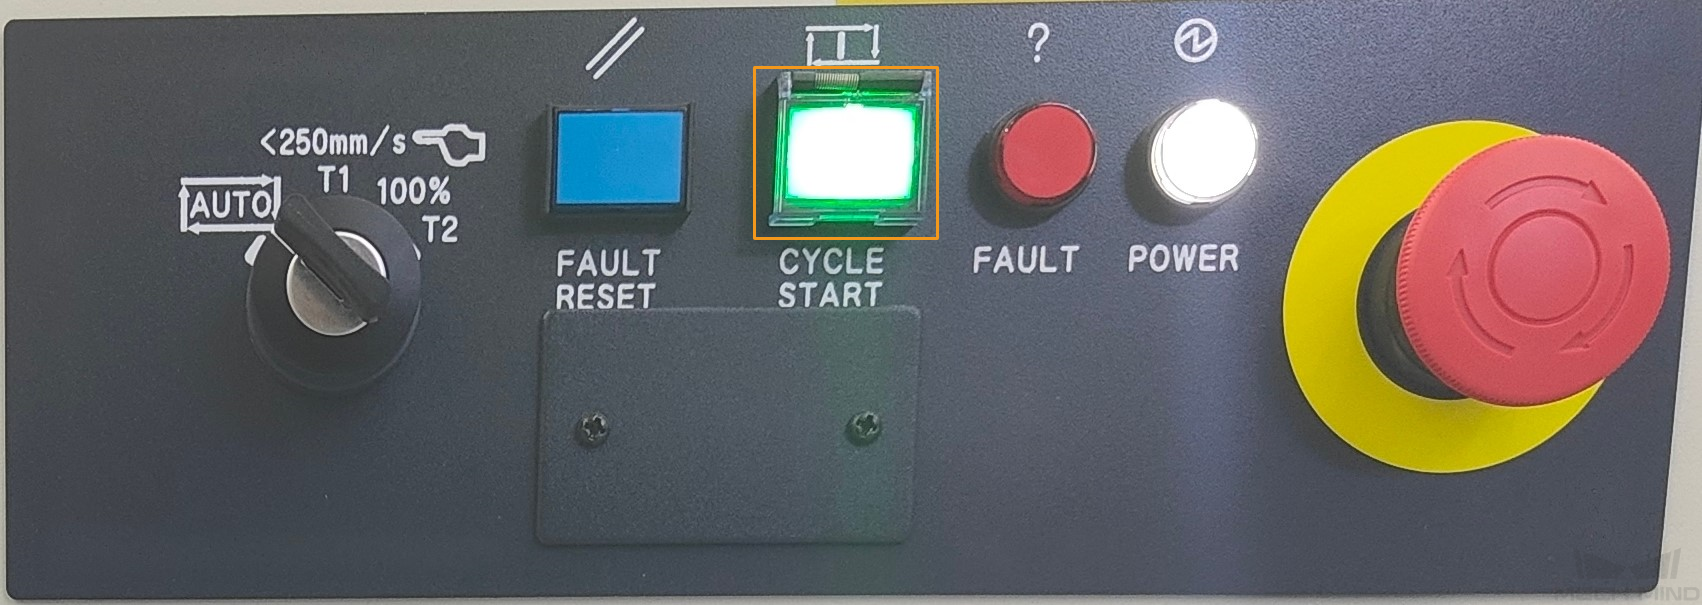
Press RESET on the teach pendant to dismiss all alarms. Then, adjust the robot speed to between 10% and 20% with the keys +% and -%.

-
Press the green button on the controller to auto-run the calibration program.
-
When, in the Calibration window in Mech-Vision, the current status changes to connected and the button Waiting for the robot to connect... changes to Disconnect robot, click Next at the bottom.
-
Perform Step 4 of Start calibration (which is Set motion path) and the subsequent operations based the following links.
-
If the camera mounting mode is eye to hand, see this document and proceed with the relevant operations.
-
If the camera mounting mode is eye in hand, see this document and proceed with the relevant operations.
-