ROKAE Automatic Calibration
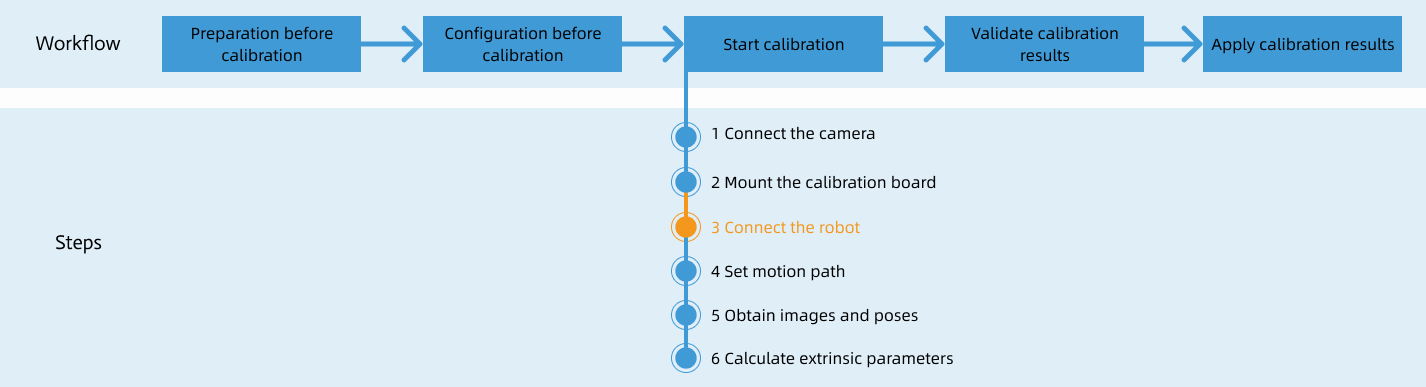
After you set up Standard Interface communication, you can connect the robot to perform automatic calibration. The overall workflow of automatic calibration is shown in the figure below.
Special note
During the calibration procedure, when you reach the Connect the robot step and the Waiting for robot to connect... button appears in Mech-Vision, perform the steps below on the robot side. After you perform the steps, proceed with the remaining steps in Mech-Vision.
|
1. Teach Calibration Start Point
-
Manually move the robot to the calibration start point.
You can use the position of the robot in the Check the Point Cloud Quality of the Calibration Board step as the calibration start point.
-
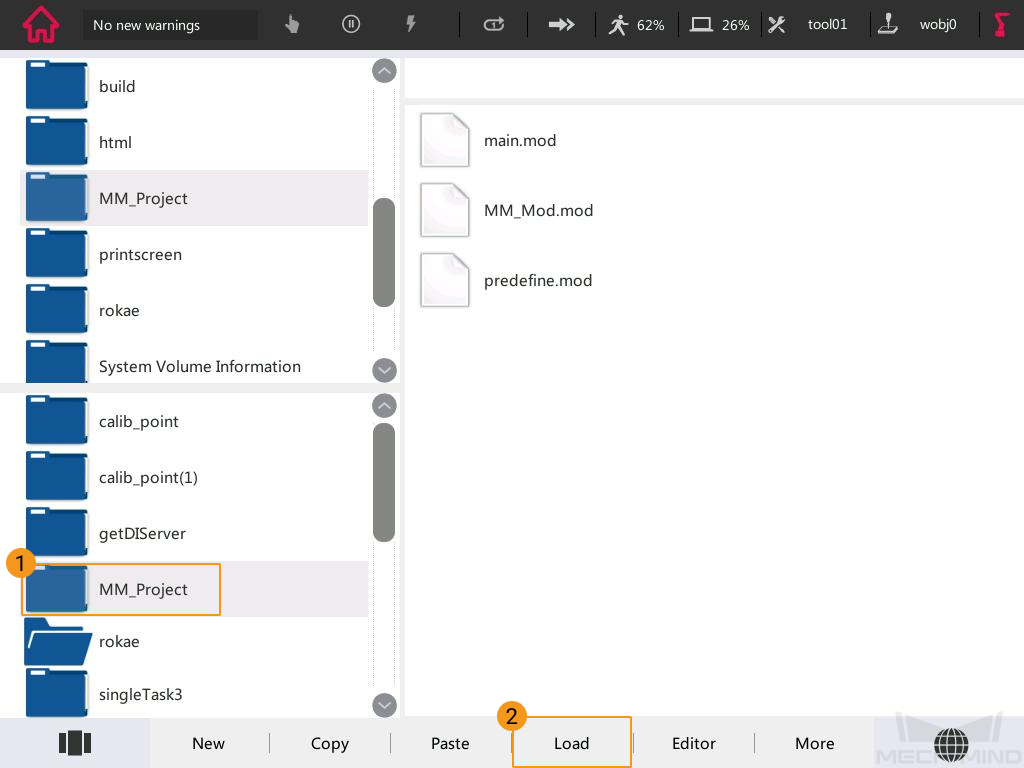
In the Project Manager window on the teach pendant, select the MM_Project folder and press Load.
-
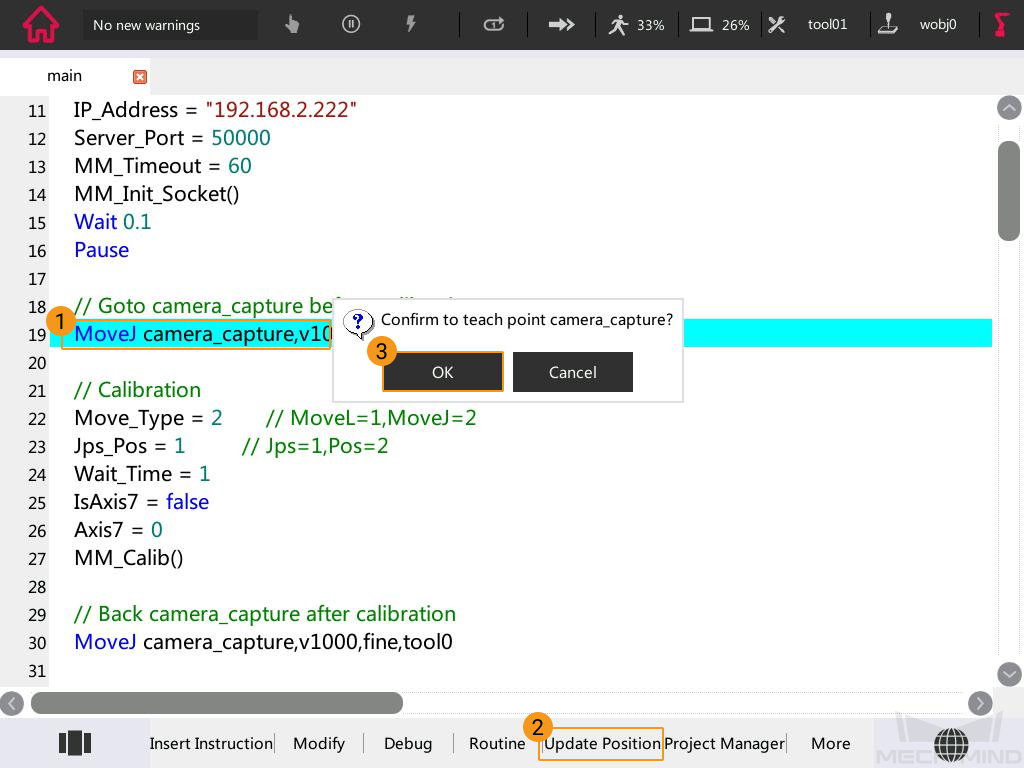
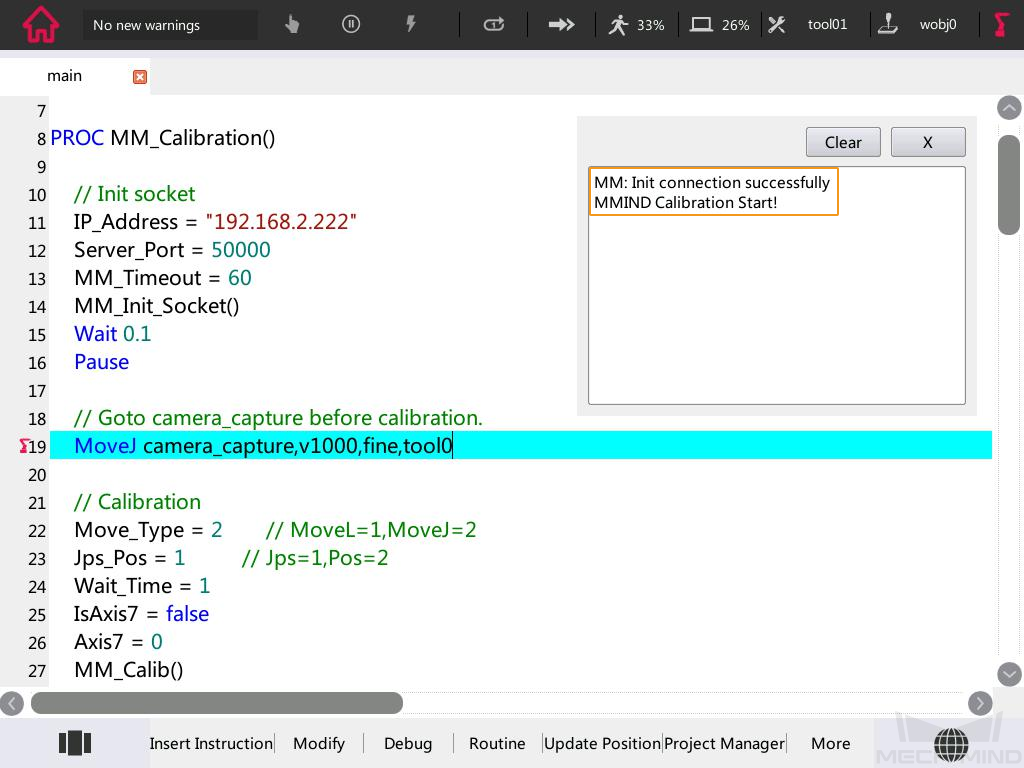
Select the “MoveJ camera_capture,v1000,fine,tool0” line, press Update Position, and then select OK in the pop-up window.
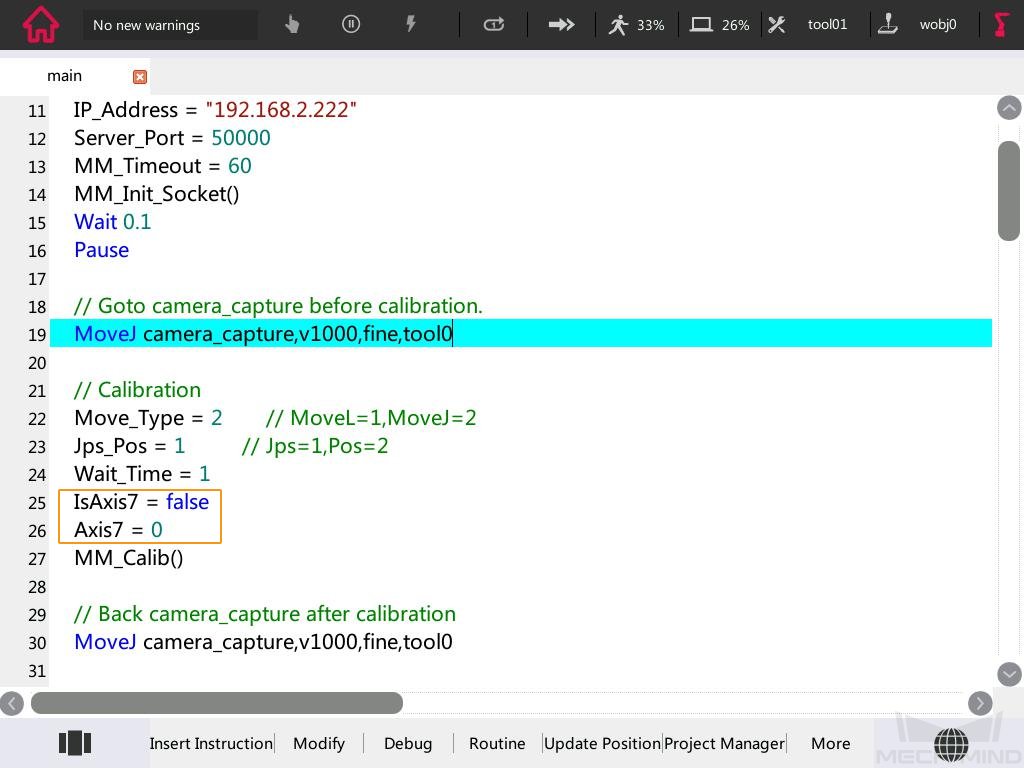
If there is a 7th axis which is controlled by the robot on site, modify “IsAxis7 = false” to “IsAxis7 = true” and modify the value of Axis7 accordingly (Axis7 = XX, XX refers to the current value of the 7th axis). If there is not a 7th axis, or the 7th axis is controlled by a PLC, you can skip this step.
2. Run Calibration Program
-
Please refer to Test Standard Interface Communication to run the calibration program.
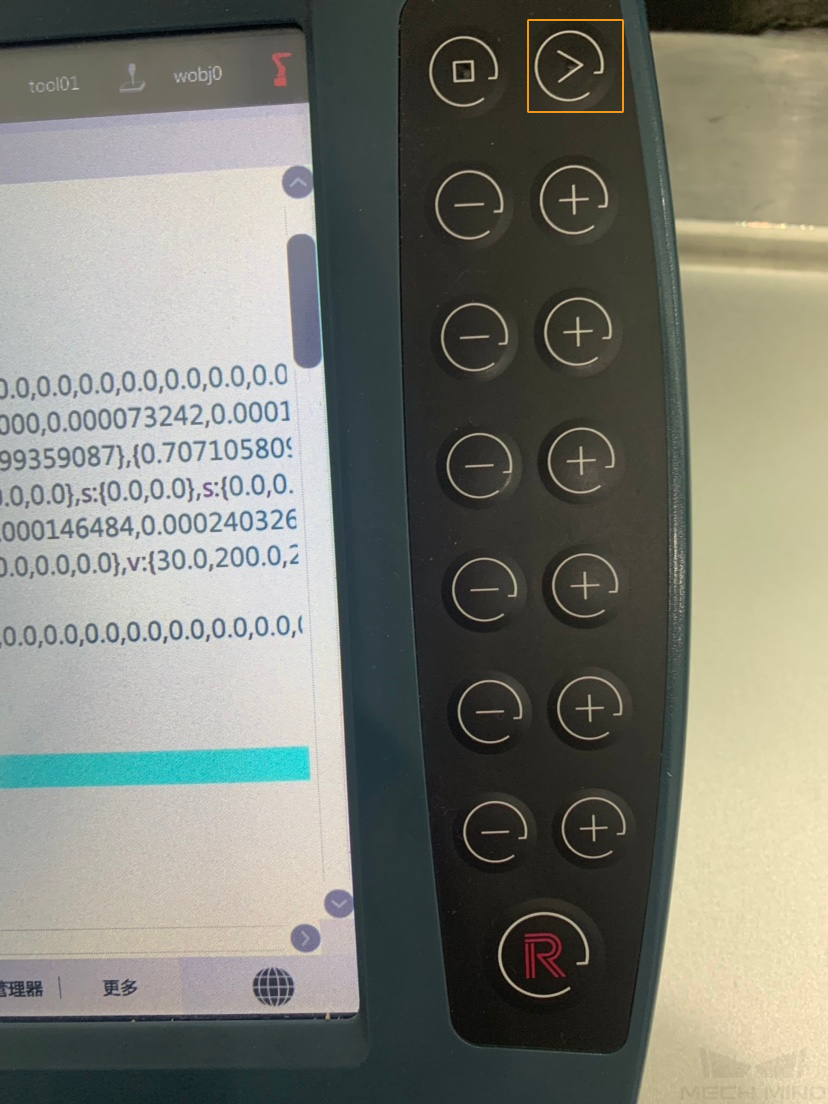
When the message “MM:Init connection successfully” appears in the dialog box on the teach pendant, press the Execute button as shown below again to continue the calibration program.
The following message will be displayed in the print window of the teach pendant interface: “MMIND Calibration Start!”.
-
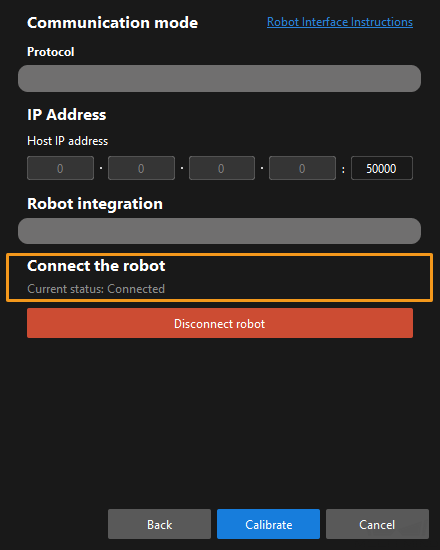
When, in the Calibration window in Mech-Vision, the current status changes to connected and the button Waiting for the robot to connect... changes to Disconnect robot, click Next at the bottom.
-
Perform Step 4 of Start calibration (which is Set motion path) and the subsequent operations based the following links.
-
If the camera mounting mode is eye to hand, see this document and proceed with the relevant operations.
-
If the camera mounting mode is eye in hand, see this document and proceed with the relevant operations.
-