Master-Control Communication Setup
This guide shows you how to set up Master-Control communication with a STAUBLI robot.
|
Account password:
|
Check Hardware and Software Versions
|
The models and versions listed below are tested and can be used. For other models and versions, you may refer to this guide for operation. If any issues occur, please contact Mech-Mind Technical Support. |
-
Controller series: CS8 or CS9
Load the Program Files to the Robot
Obtain the Program Files
The program files are stored in Communication Component/Robot_Server/Robot_FullControl/staubli in the installation directory where Mech-Vision and Mech-Viz are installed.
Prepare for Loading Program Files
Set IO before copying the program files. On the teach pendant, find the IO board and view its number.
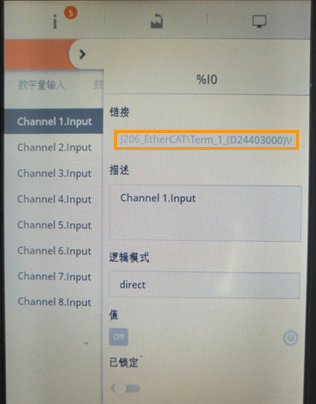
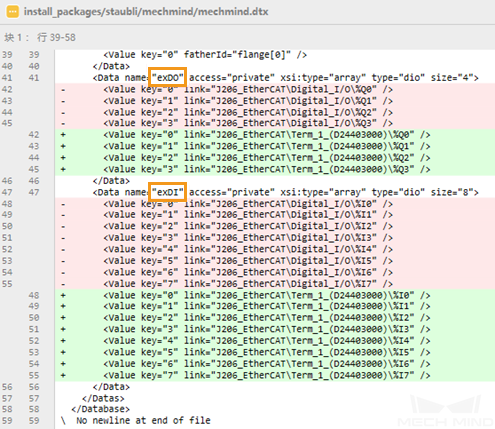
The standard etherCAT IO board from STAUBLI provides four DOs (exDO) and eight DIs (exDI). You can set the IO by modifying the mm_control.dtx file in the mm_control folder. Change the “Digital_I/O” string to “Term_1_(D24403000)” as shown in the following figure.
Load the Program Files to the Robot
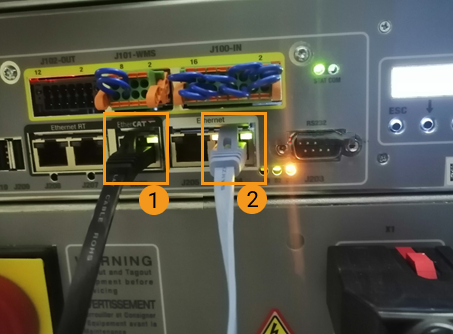
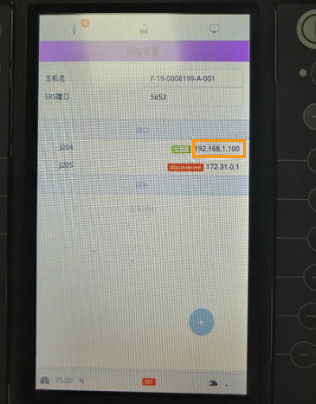
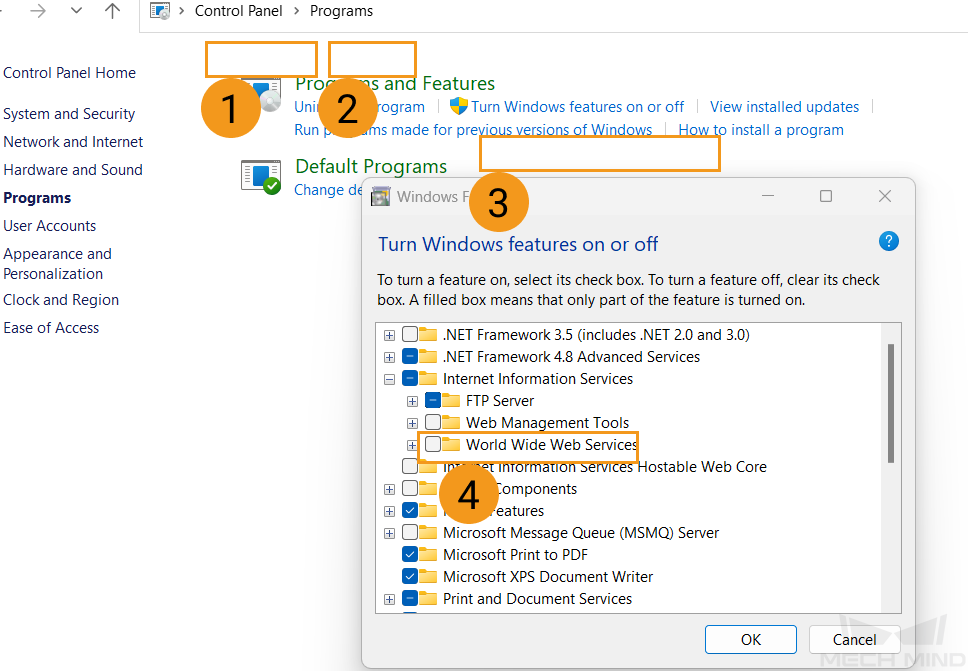
You can copy the program files to the robot via FTP. Before copying them, make sure that the IP addresses of the IPC and the robot are in the same subnet, and you can ping the robot from the IPC successfully. In addition, make sure that the FTP service has been enabled on the IPC.
Then, perform the following steps:
-
Copy program files, for example: ftp://192.168.0.254/usr/usrapp/mm_control
-
Back up and replace the following file or folder:
-
ftp://192.168.0.254/usr/configs/sio.cfx (related to network settings)
-
ftp://192.168.0.254/usr/configs/J206_EtherCAT (related to IO setting. This folder applies to the standard etherCAT IO board from STAUBLI. If you use the IO board from other vendors, please contact STAUBLI Technical Support for setting instructions, and then contact Mech-Mind Engineering to modify the program files.)
-
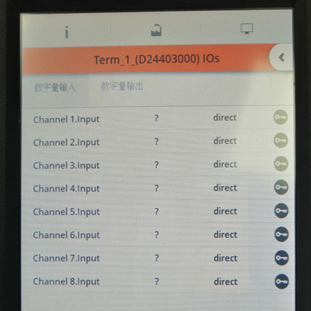
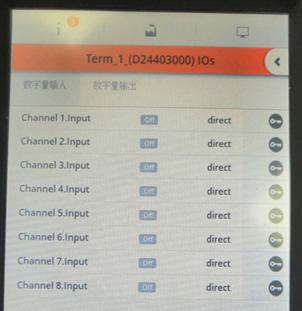
Reboot the robot and check whether the IO board is set successfully. The following figures show the settings of IO board before and after the IO setting respectively:
Further Configuration
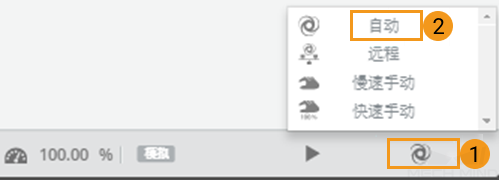
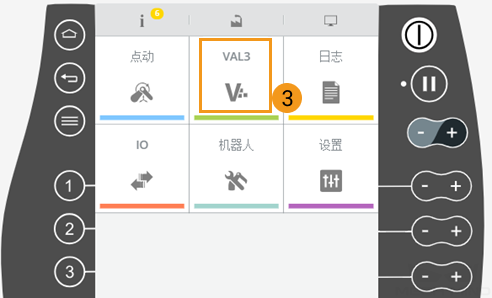
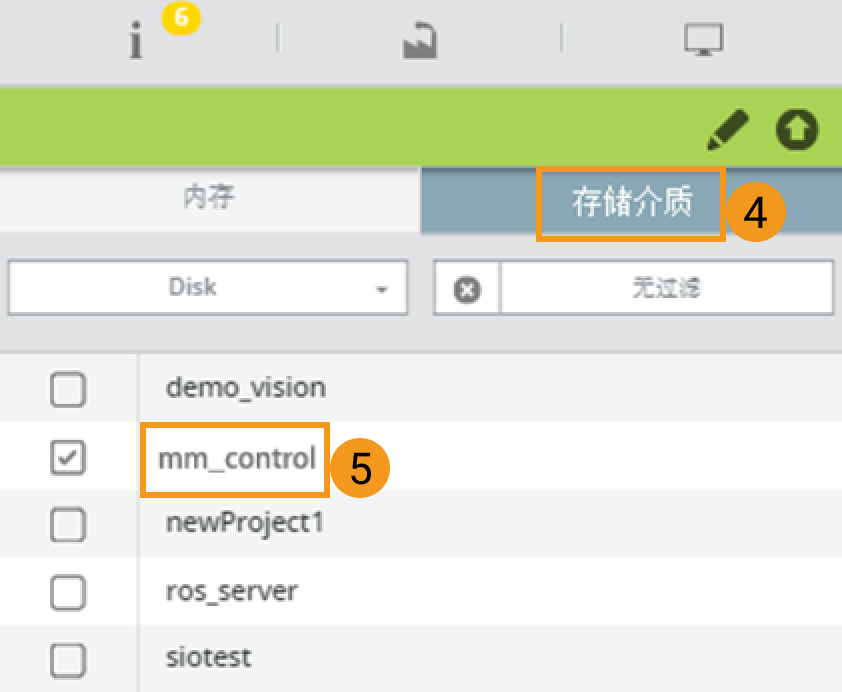
Switch to the Automatic mode and load the program. Select VAL3 and then double-click mm_control under Storage.
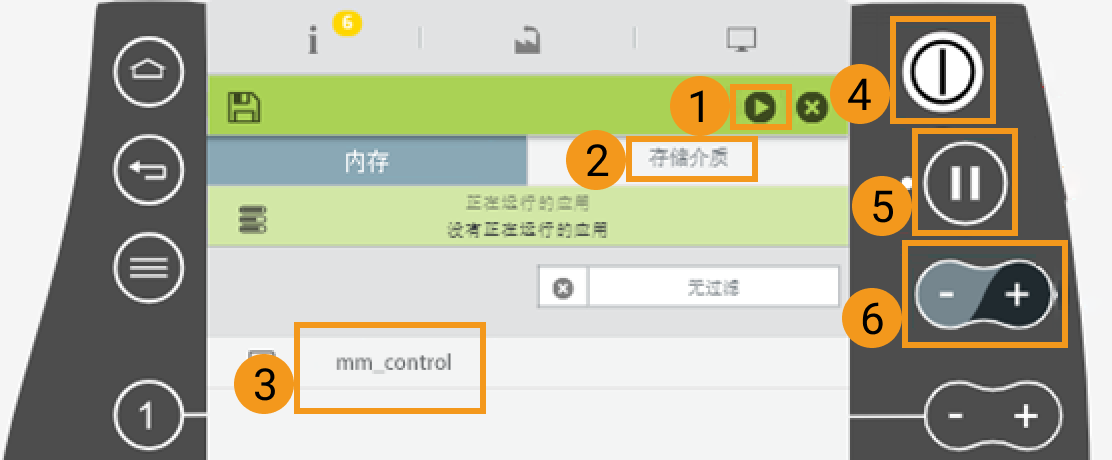
Perform steps indicated by ①-③ of the following figure. If any errors occur, fix them before proceeding. The errors are mostly caused by IO settings. Then power on the robot by pressing the button indicated by ④. When the blue light blinks, press the button indicated by ⑤. The blue light becomes solid. The button indicated by ⑥ is used to adjust the speed.
Test Master-Control Communication
Create a Mech-Viz Project
-
Open Mech-Viz, press Ctrl + N on the keyboard to create a new project. Select the robot model corresponding to your real robot brand and model on the interface as shown below.

-
Press Ctrl + S and create or select a folder to save the project.
-
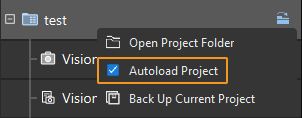
Right-click the project name in the left panel in Mech-Viz and select Autoload Project.
Connect to the Robot
-
Click Master-Control Robot on the toolbar of Mech-Viz.
-
Input the IP address of the real robot in Robot IP address (the IP address in the picture is only an example). Click Connect the robot.

If Mech-Viz successfully connects the real robot, the current status will change to Connected. Meanwhile, the icon in the toolbar will turn from blue to green.
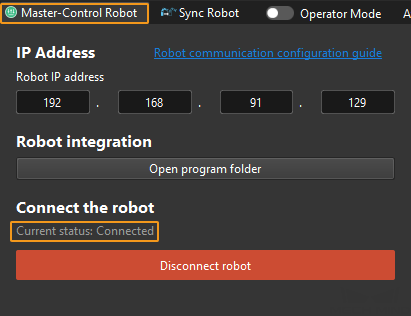
If the connection fails, please double-check the robot IP address.
Move the Robot
-
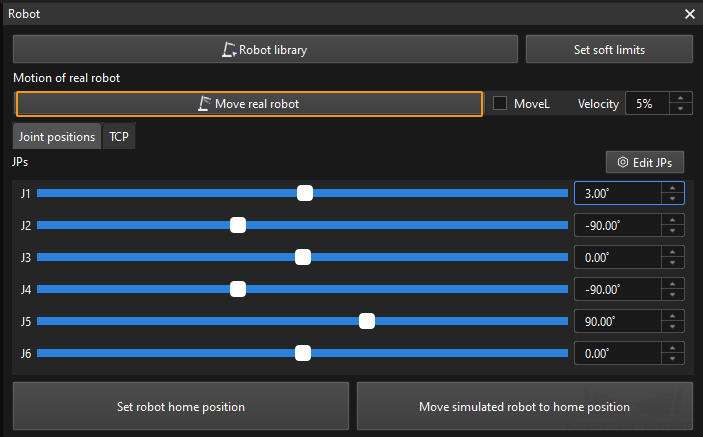
In the toolbar of Mech-Viz, change the “Vel.” (velocity) and “Acc.” (acceleration) parameters to 5%.

-
Click Sync Robot in the toolbar, and you can synchronize the poses of the simulated robot in the 3D simulation space with the poses of the real robot. Then click Sync Robot again to unselect it.

-
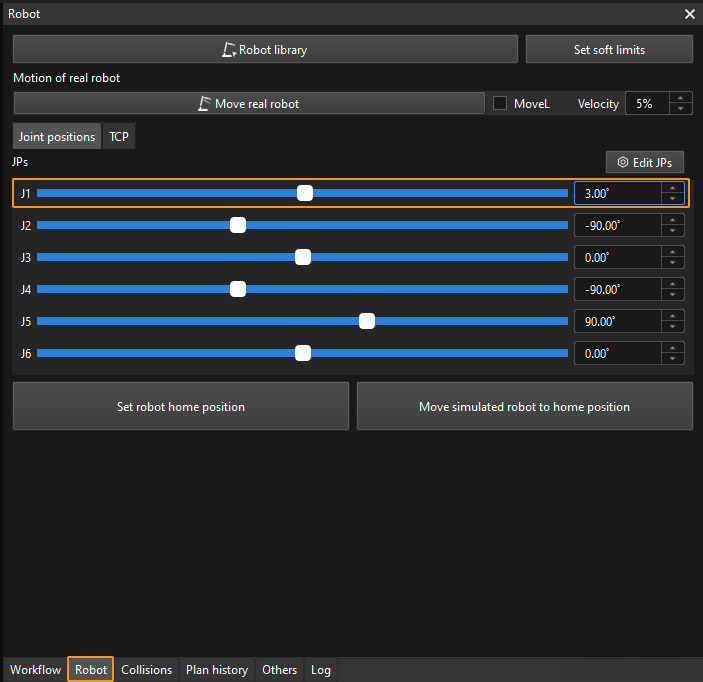
In the Robot tab, slightly adjust the value of “J1”, for example, from 0˚ to 3˚. This operation will move the simulated robot.
-
Click Move real robot and check if the real robot has moved. If the real robot has reached the JPs set for the simulated robot, the master-control communication is working.
When moving the robot, please ensure the safety of personnel. In the case of an emergency, press the emergency stop button on the teach pendant!