Set up Standard Interface Communication with UR e-Series (PolyScope X 10.4 or Above)
This document describes how to load the URCap plugin into a UR e-Series robot by using PolyScope X 10.4 or above and configure the Standard Interface communication between the Mech-Mind vision system and the robot.
Check Controller and Software Compatibility
-
Make sure that the robot is a e-Series robot.
-
Make sure that PolyScope X 10.4 or above is used.
Click here for instructions
-
Select the hamburger menu in the upper-right corner of the teach pendant and select About.

-
Make sure that PolyScope X 10.4 or above is used.

-
Set up Network Connection
Connect the Hardware
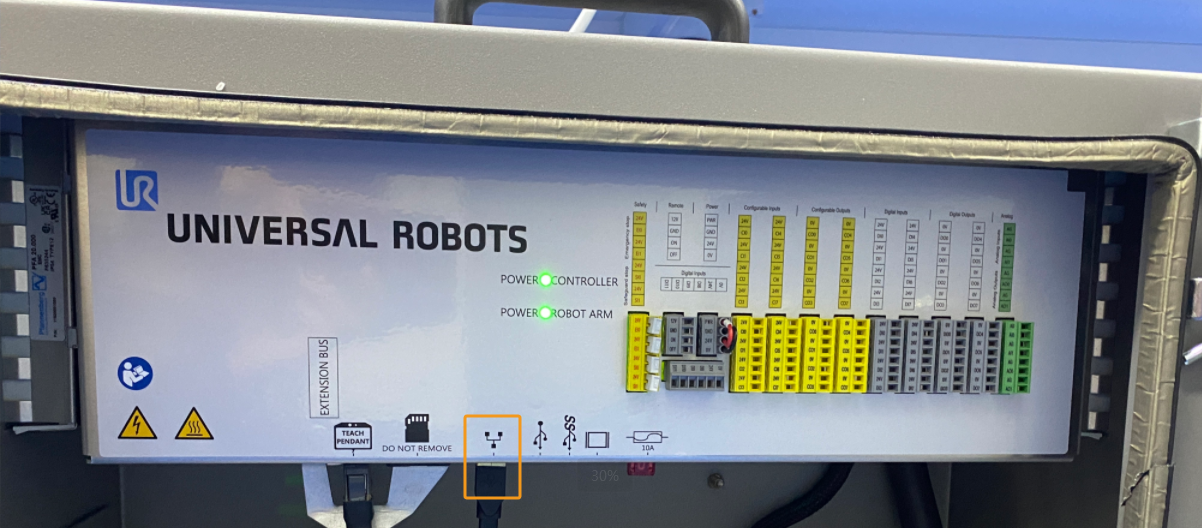
Plug the Ethernet cable of the IPC into the WAN port of the robot controller, as shown below.
Set IP Addresses
-
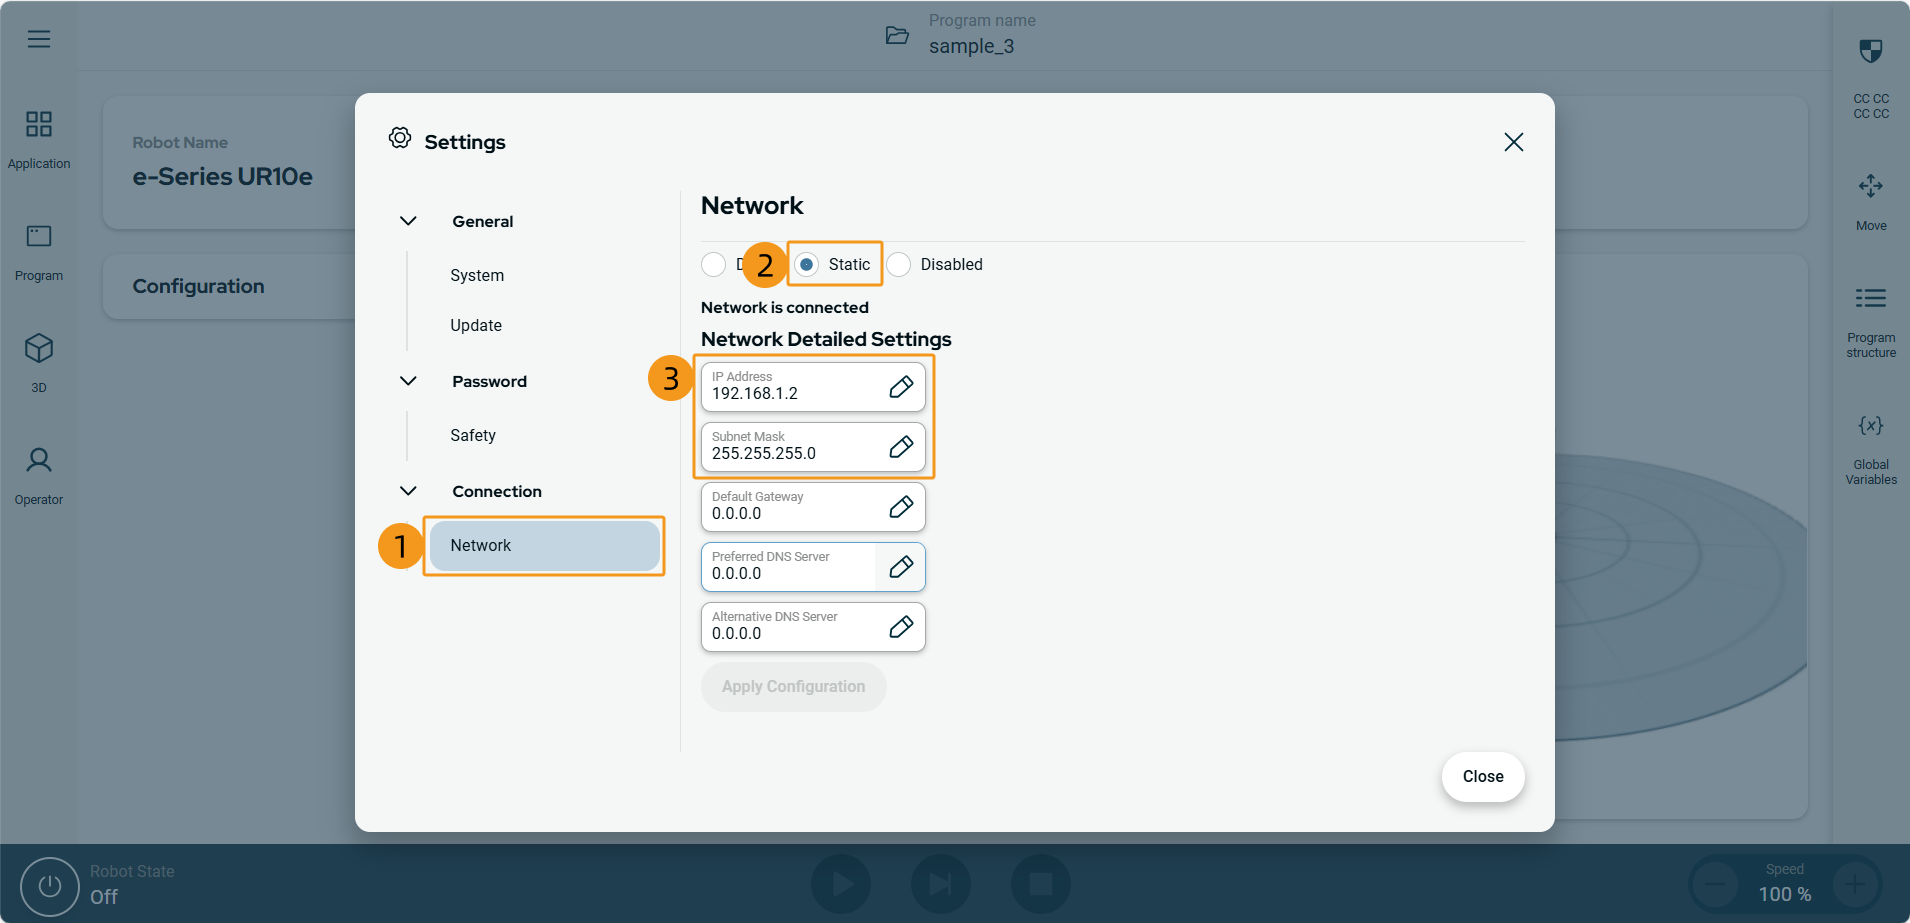
Select the hamburger menu in the upper-right corner of the teach pendant and select Settings.

-
Select > Static and set IP Address and Subnet Mask. After you set the parameters, the specified IP address and subnet mask will be displayed under IP Address and Subnet Mask.
-
In the IPC, set the IP address of the IPC.
To allow communication between the IPC and the robot controller, the IP addresses of the IPC and robot controller must reside in the same subnet. This means that the network portions and subnet masks of the IP addresses should be the same. For example, 192.168.100.169/255.255.255.0 and 192.168.100.170/255.255.255.0 are in the same subnet.
Set up “Robot Communication Configuration”
-
Open Mech-Vision. You may enter different interfaces. Create a new solution according to the instructions below.
-
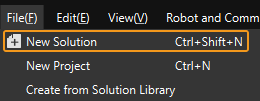
If you have entered the Welcome interface, click New blank solution.

-
If you have entered the main interface, click on the menu bar.
-
-
Click Robot Communication Configuration on the toolbar of Mech-Vision.
-
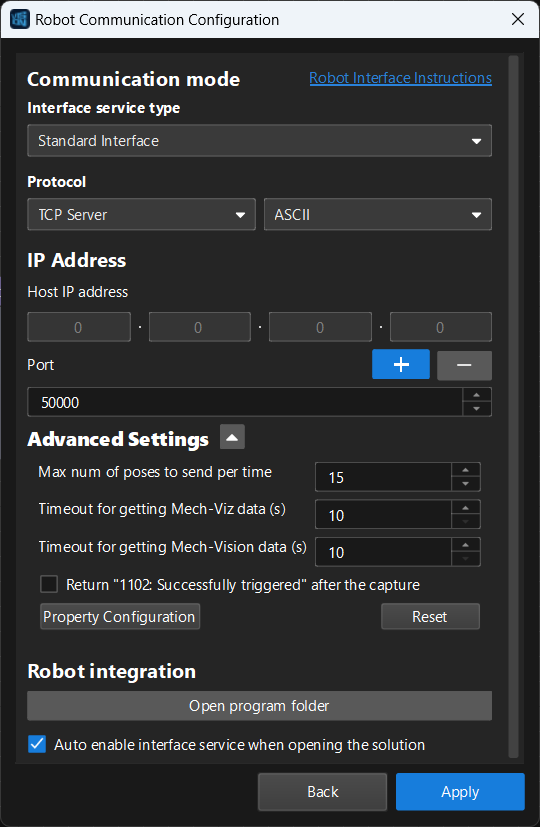
In the Robot Communication Configuration window, complete the following configurations.
-
Click the Select robot drop-down menu, and select Listed robot. Click Select robot model, and select the robot model that you use. Then, click Next.
-
In the Communication mode section, select Standard Interface for Interface service type, TCP Server for Protocol, and ASCII for the protocol format.
-
In the Advanced Settings section, set Max num of poses to send per time to 15.
-
Set the port number to 50000 (fix valued). Ensure that the port number is not occupied by another program.
-
Under Robot integration, click Open program folder.
The files needed for subsequent loading will be copied from this folder. Do not close this folder. -
(Optional) Select Auto enable interface service when opening the solution.
-
Click Apply.
-
-
On the main interface of Mech-Vision, make sure that the Robot Communication Configuration switch on the toolbar is flipped and has turned blue.

Load URCap Plugin to the Robot
-
On the IPC, in the opened program folder (
UR_URCAPfolder), go to thePolyscopeXfolder and copy the file with the.urcapxextension to the root directory of the flash drive (the outermost directory).-
You can also find the program folder in the
Communication Component/Robot_Interface/TM_Plugin_and_Playpath in the installation directory of Mech-Vision and Mech-Viz. -
The
samplefolder stores example program files. You can see the steps in this document to import the example program files into the robot.
-
-
Plug the flash drive into the USB port on the back of the robot teach pendant.
-
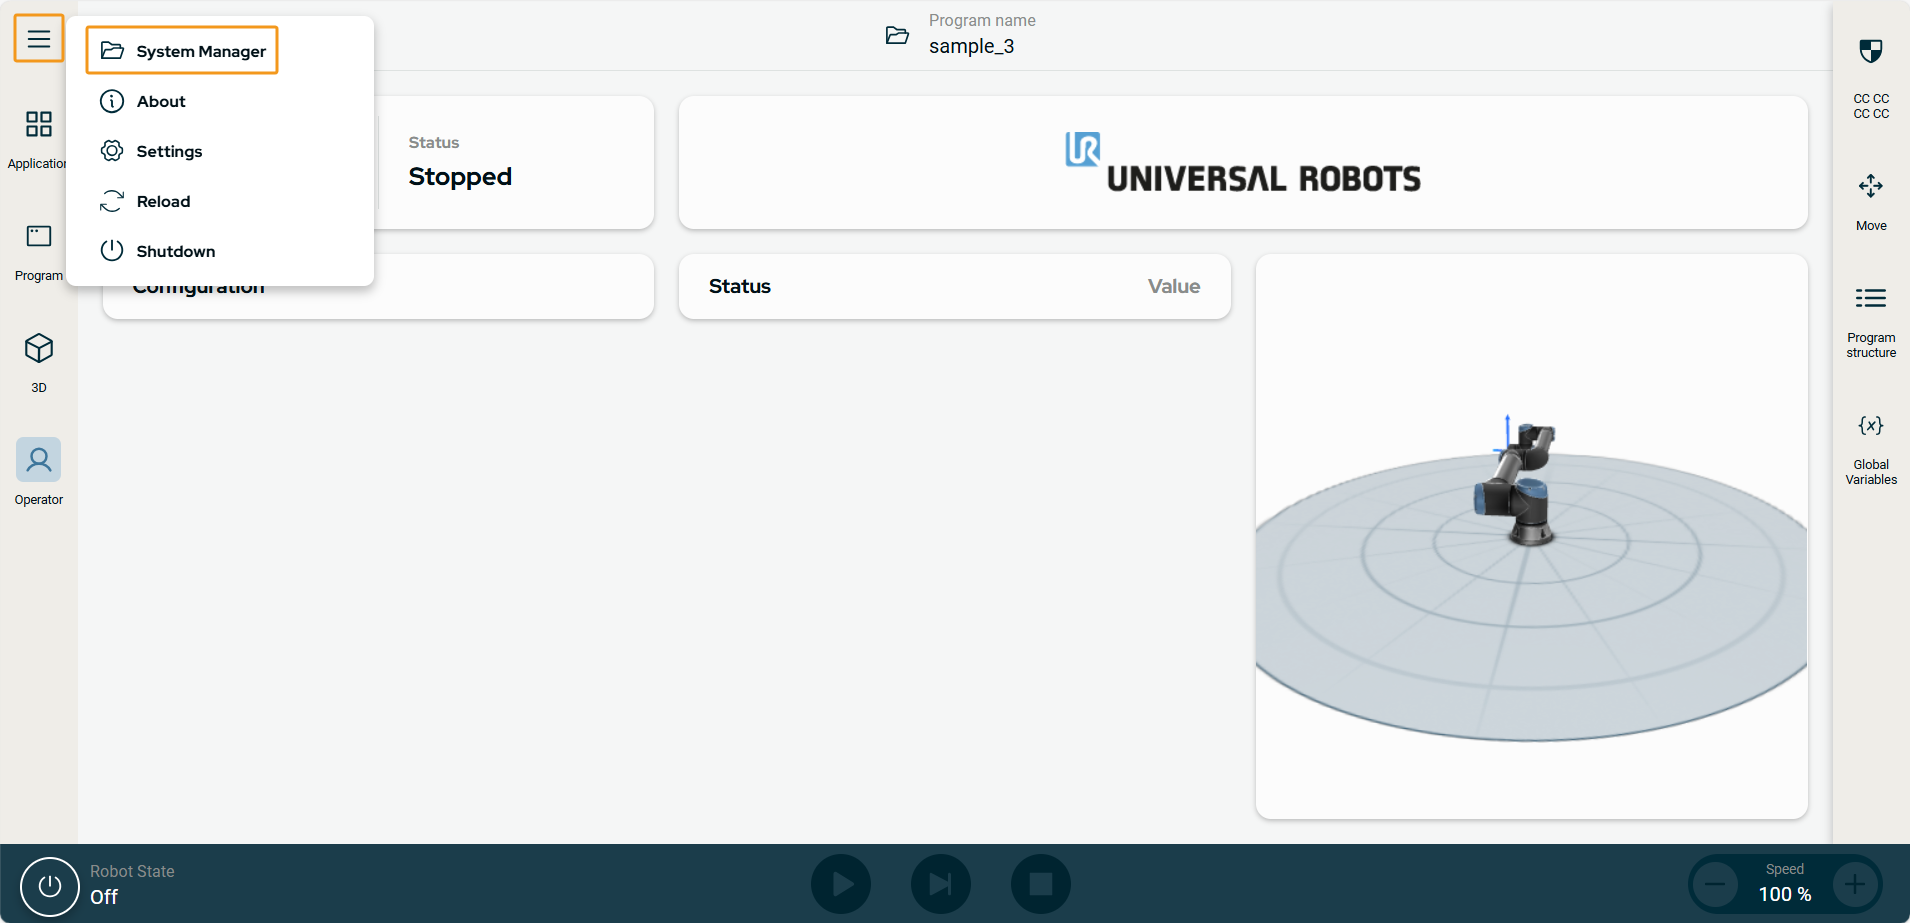
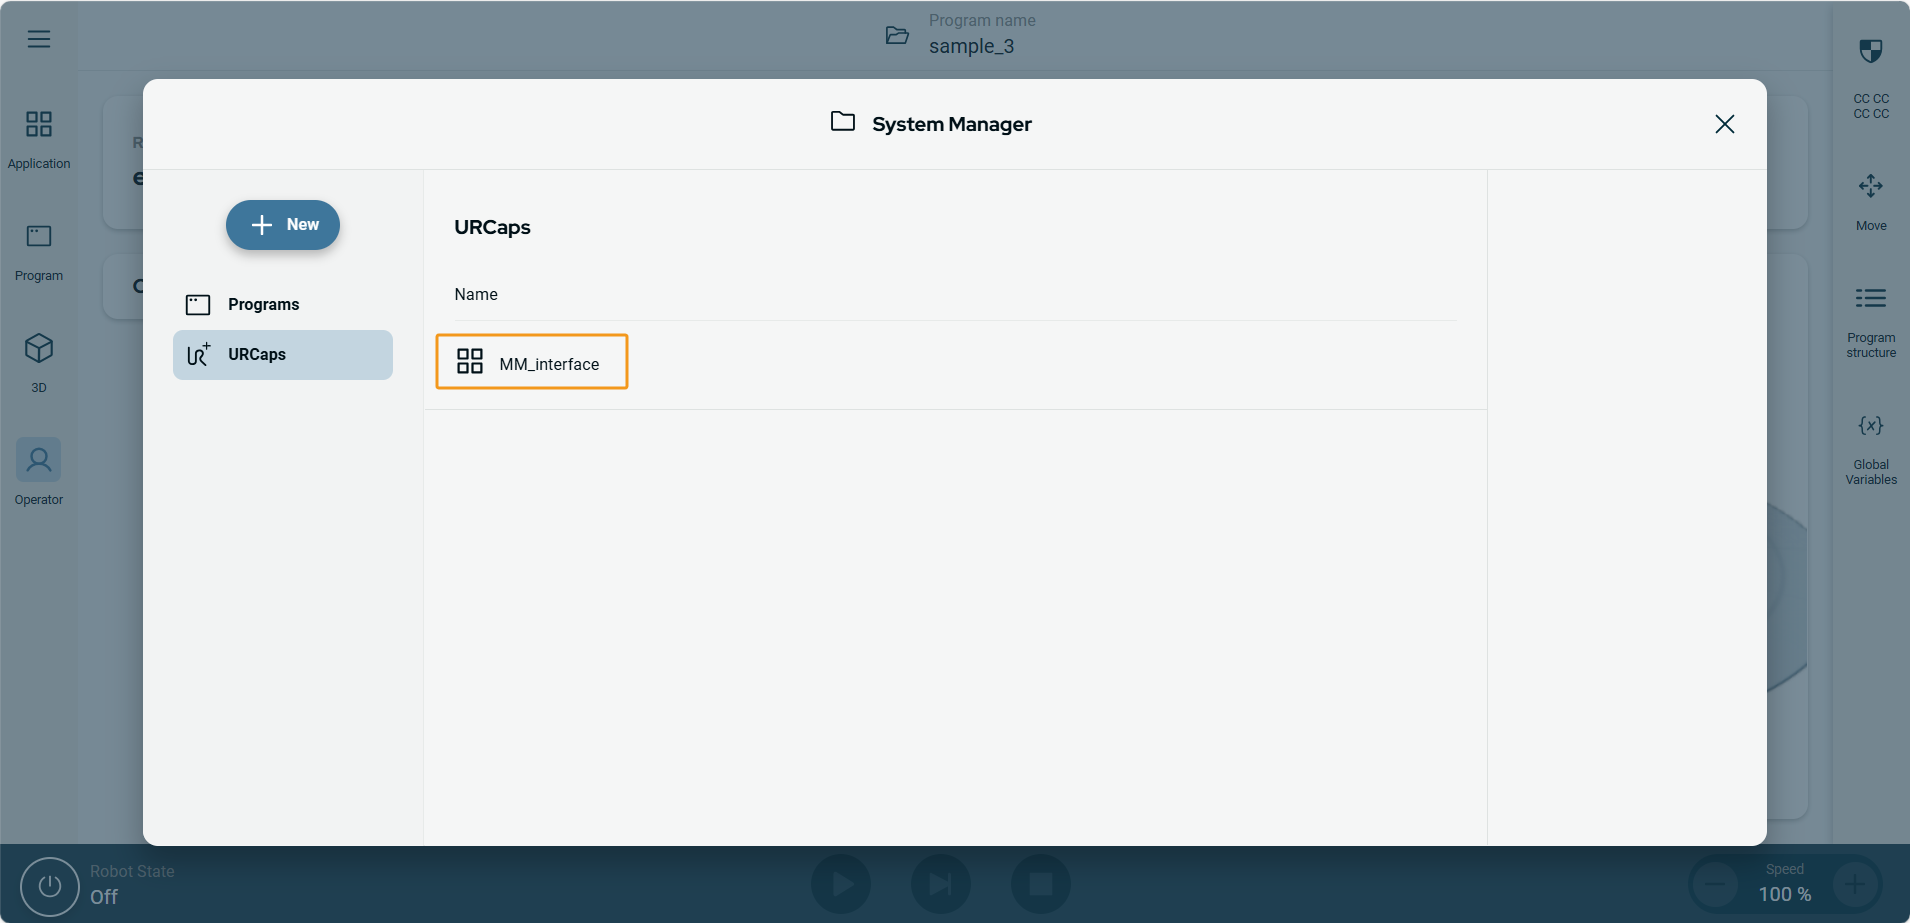
Click the hamburger menu in the top-left corner of the teach pendant and select System Manager.
-
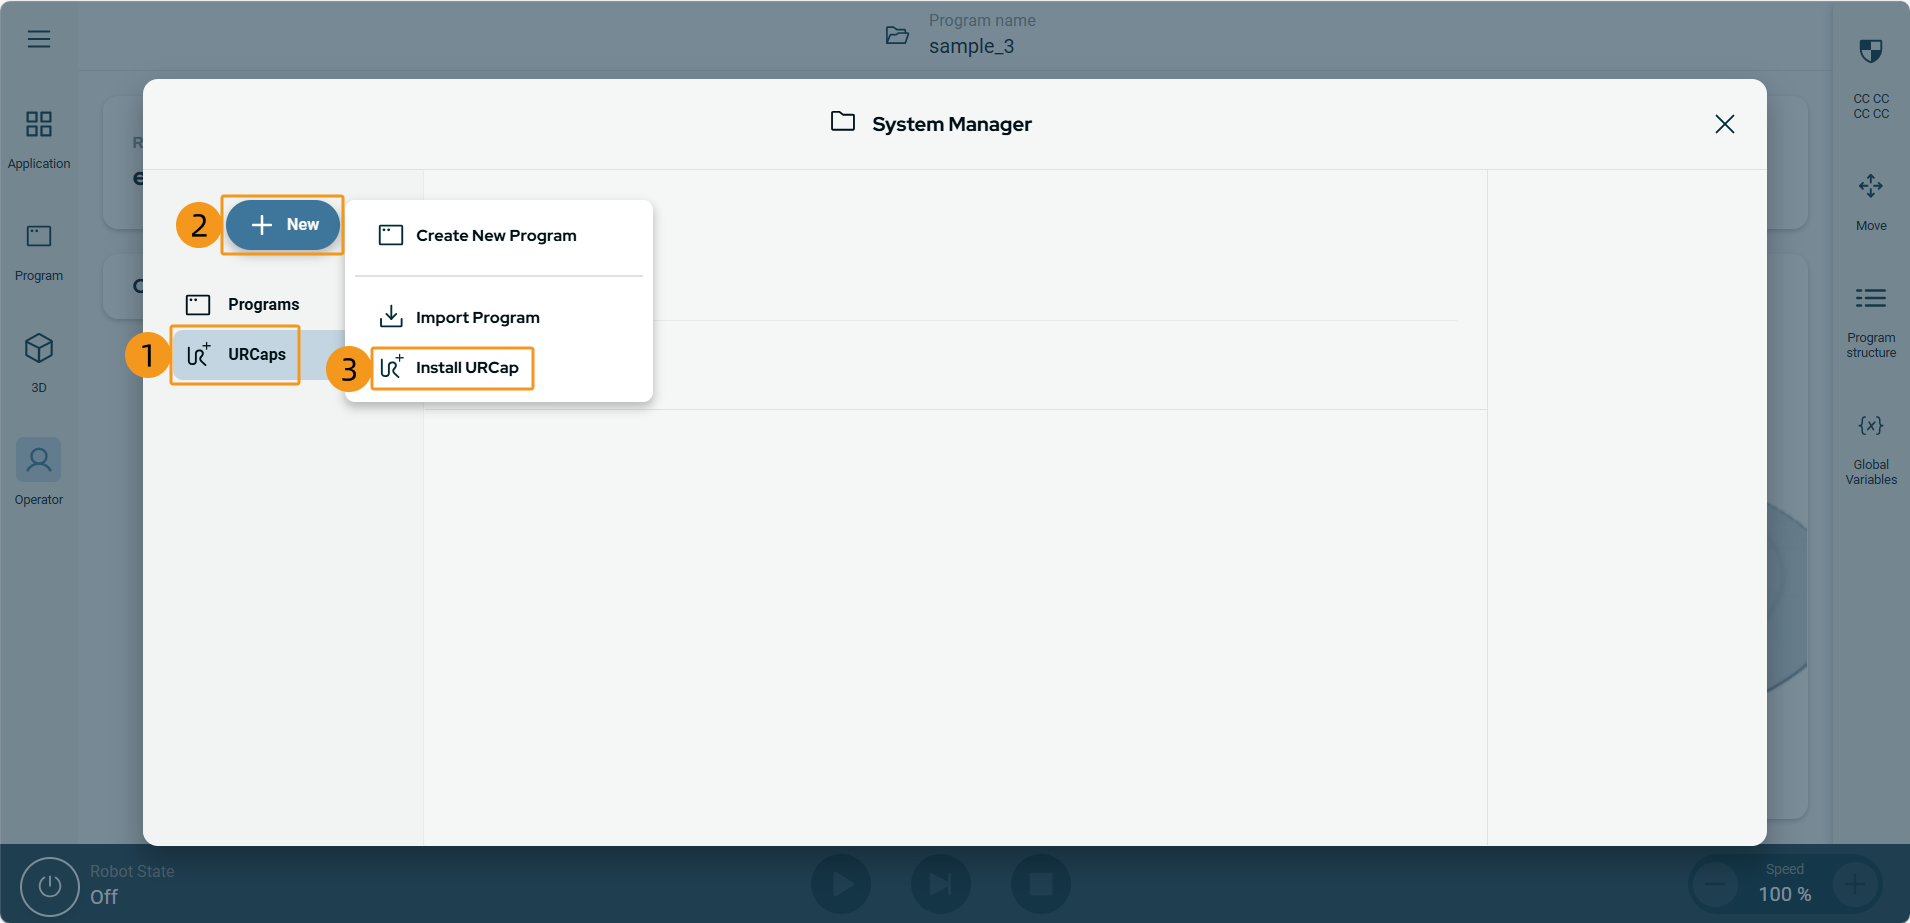
Select .
-
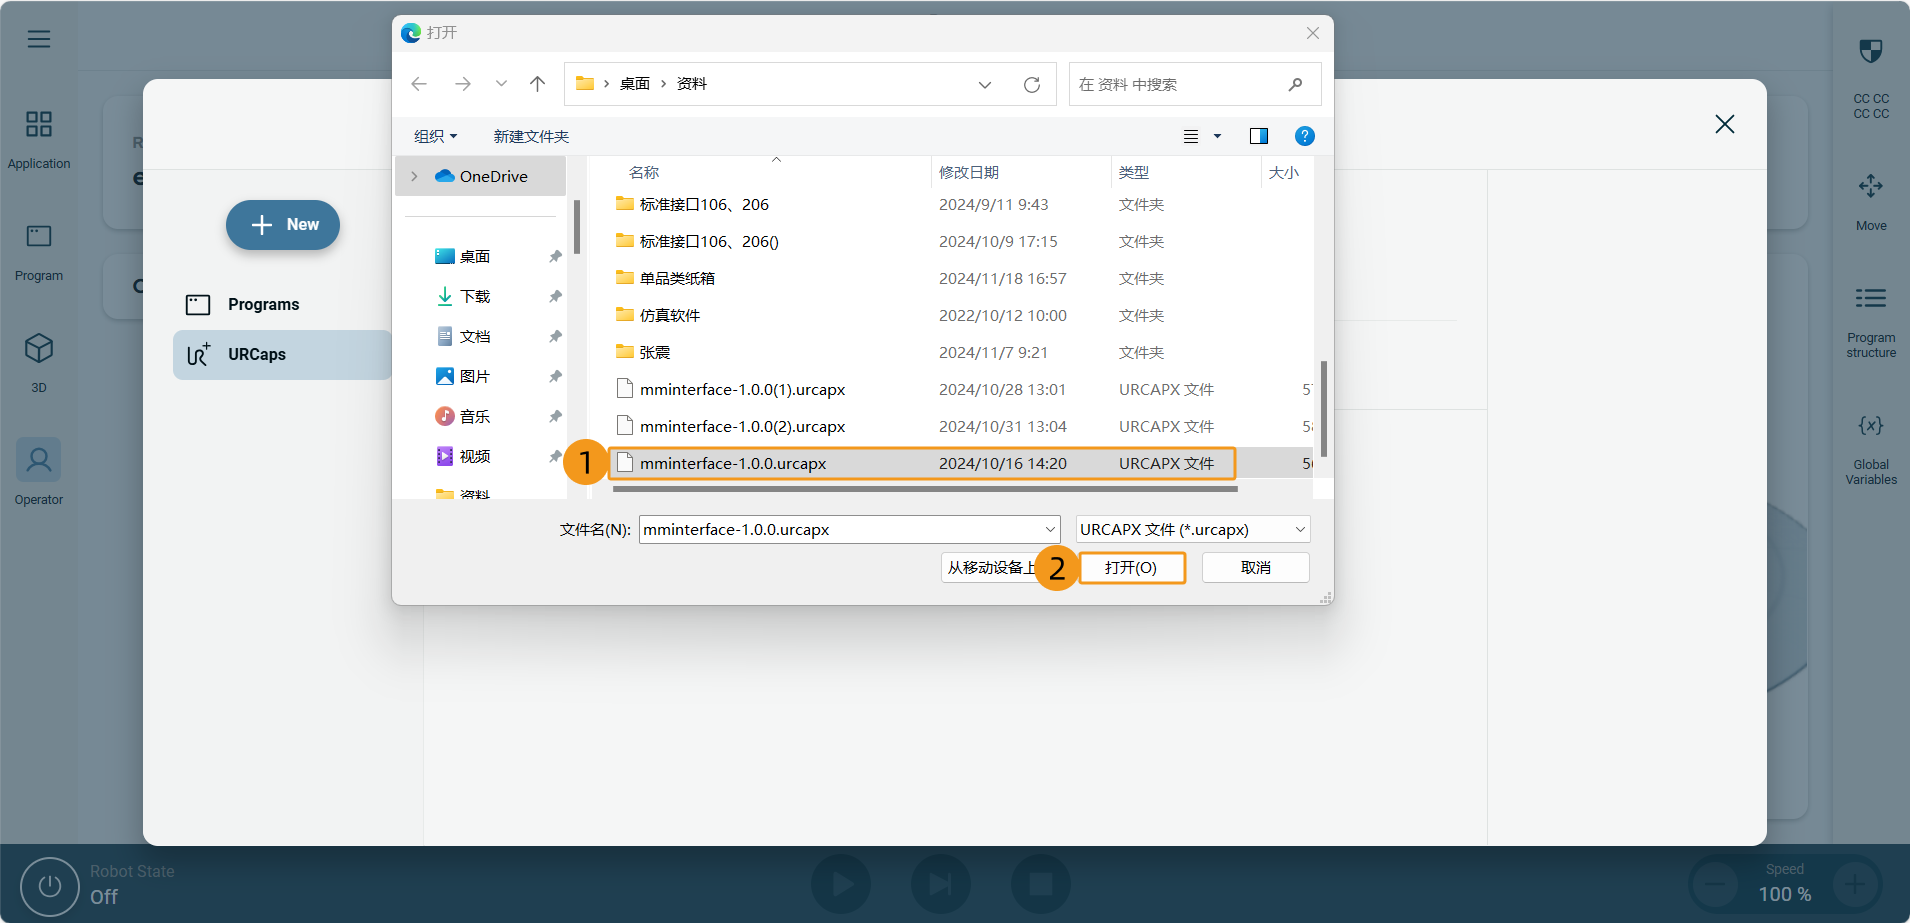
In the pop-up file browser, select the .urcapx file from the root directory of the flash drive and click Open.
-
If the .urcapx file is opened successfully, the URCap plugin is loaded. In this case, MM_interface is displayed in the interface.
Initialize Communication
-
In the teach pendant interface, select .

-
Select Commands and select MMInitSocket.

-
In the following interface, set ipAddress to the IP address of the IPC, Port to 50000 (You must set Port to the host port number set in Mech-Vision). After you set the parameters, the specified IP address and port number will be displayed in ipAddress and Port.

Test Standard Interface Communication
-
In the teach pendant interface, select .

-
Select Commands. Select .
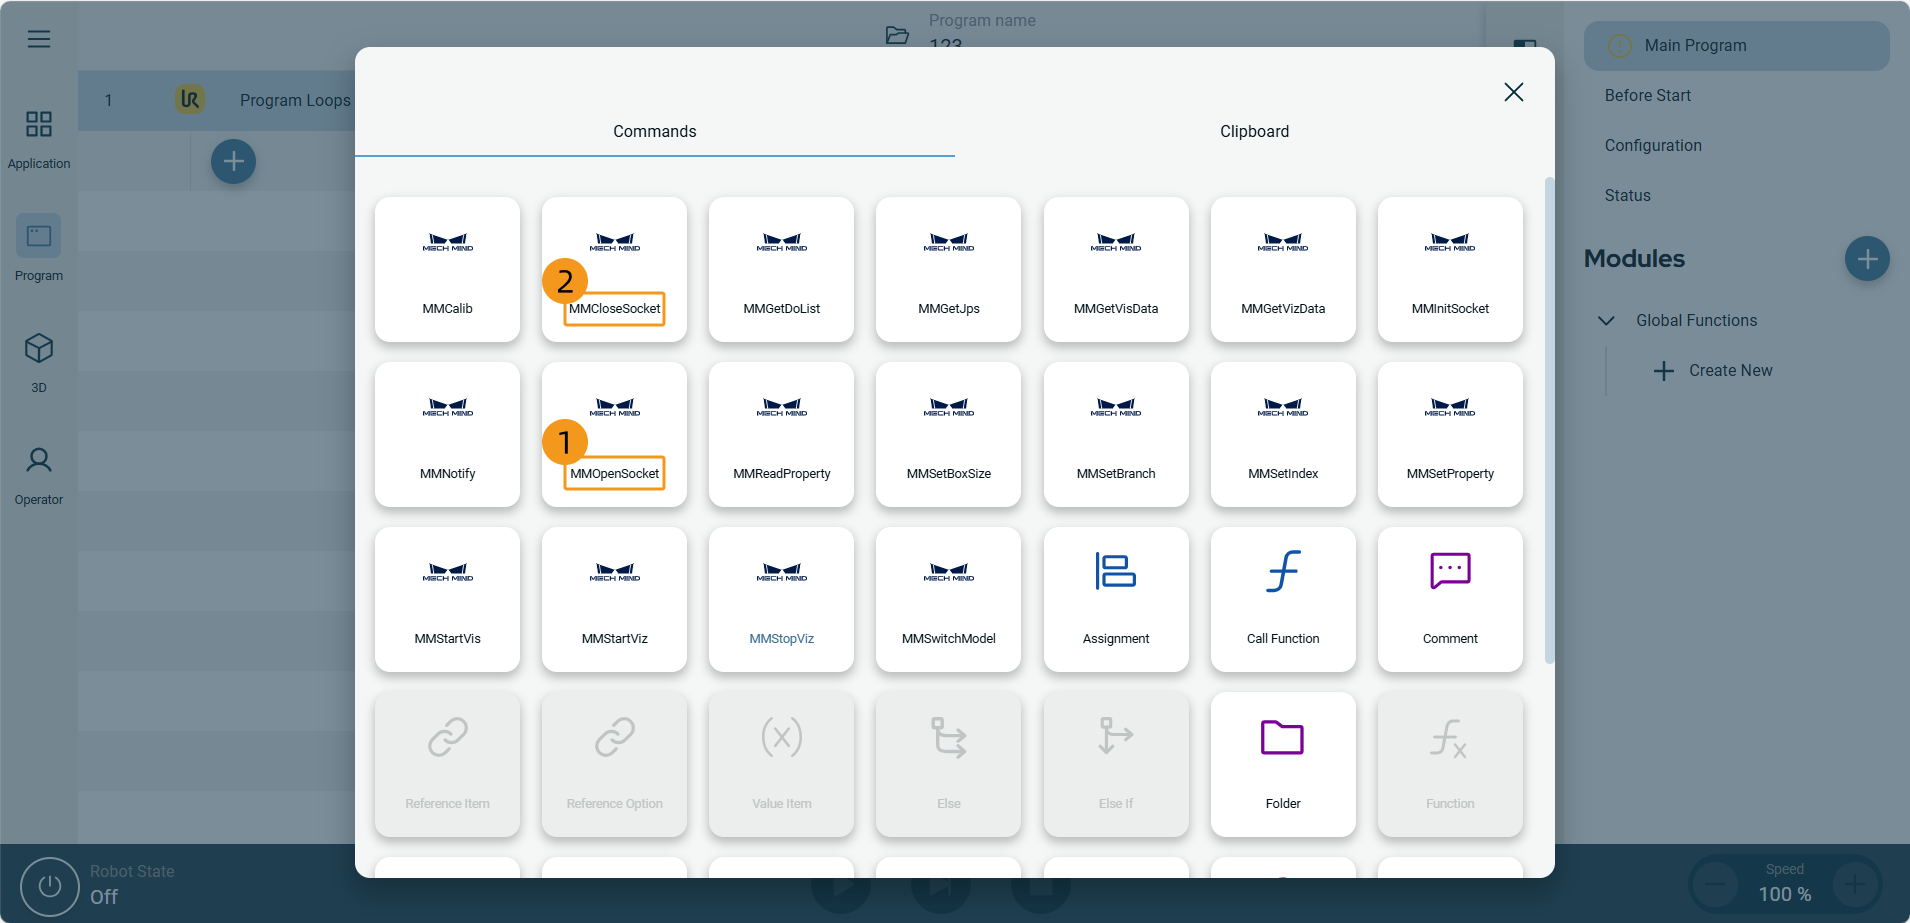
-
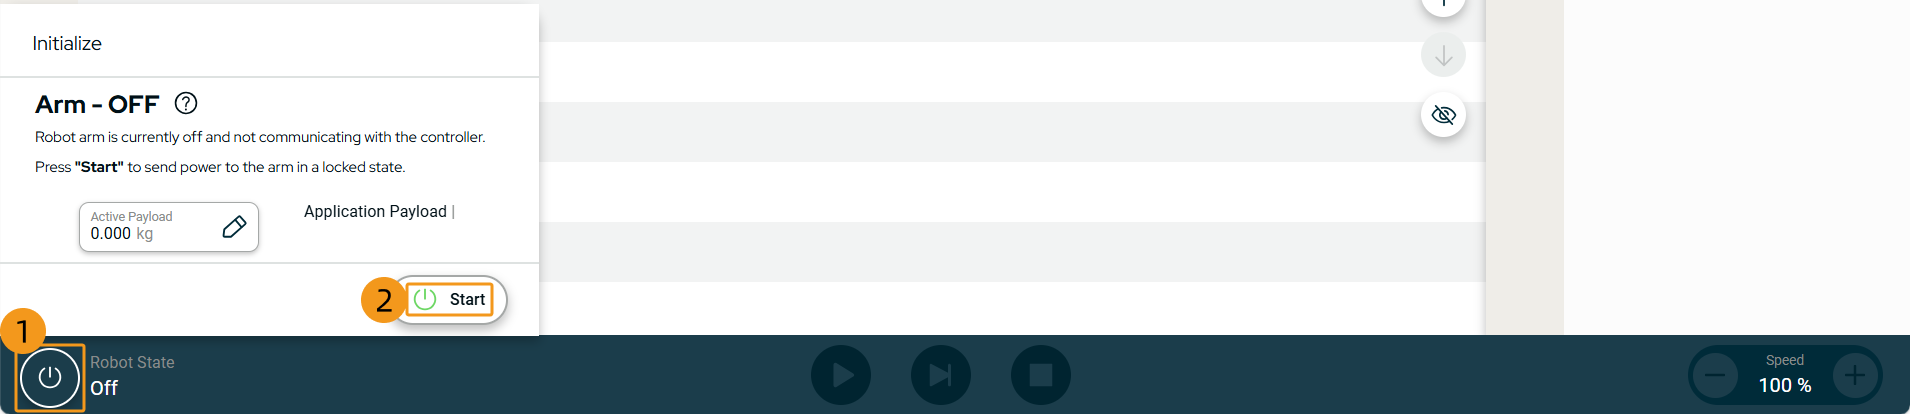
Select the power button in the bottom-left corner and select Start.
-
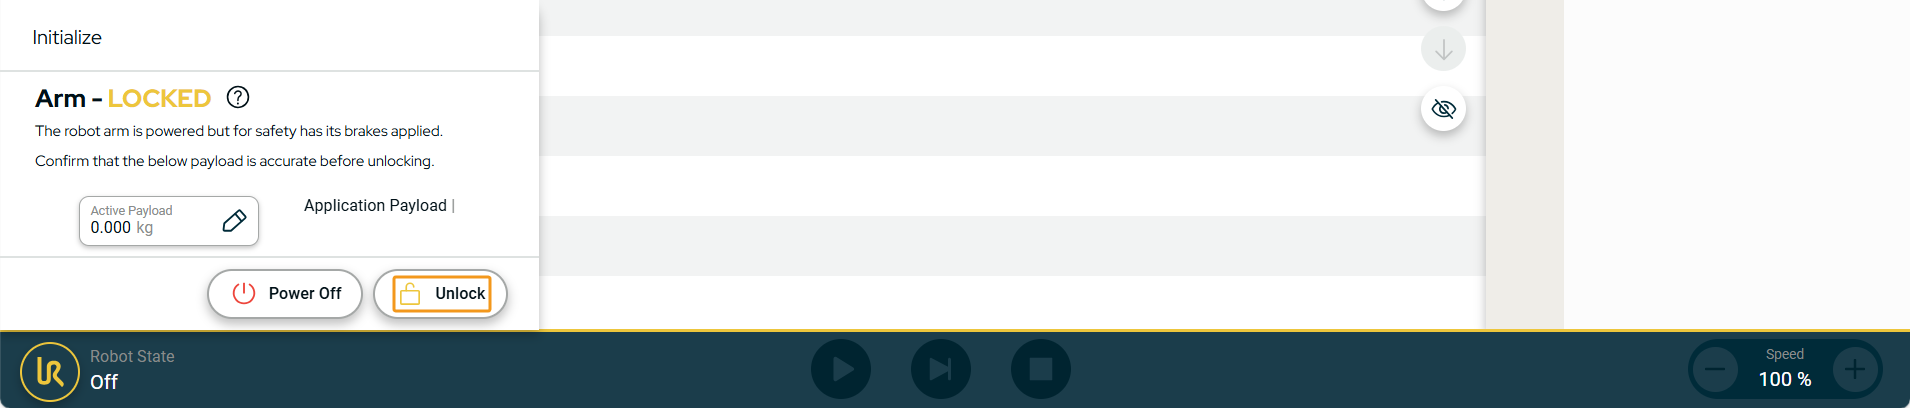
Select Unlock.
-
Click the run button in the lower part.

-
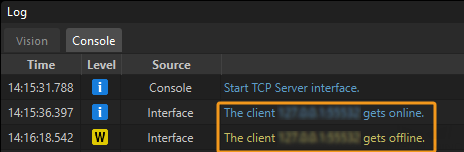
If the communication between the robot and the vision system is set up, a log will be recorded on the Console tab of the Log panel of Mech-Vision.