ESTUN Automatic Calibration
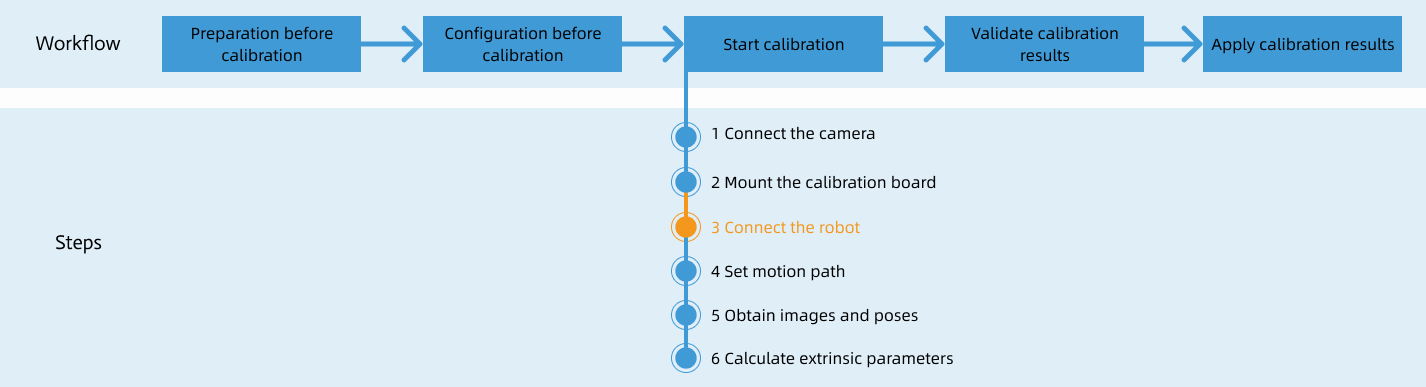
After you set up Standard Interface communication, you can connect the robot to perform automatic calibration. The overall workflow of automatic calibration is shown in the figure below.
Special note
During the calibration procedure, when you reach the Connect the robot step and the Waiting for robot to connect... button appears in Mech-Vision, perform the steps below on the robot side. After you perform the steps, proceed with the remaining steps in Mech-Vision.
|
1. Select and Modify Calibration Program
-
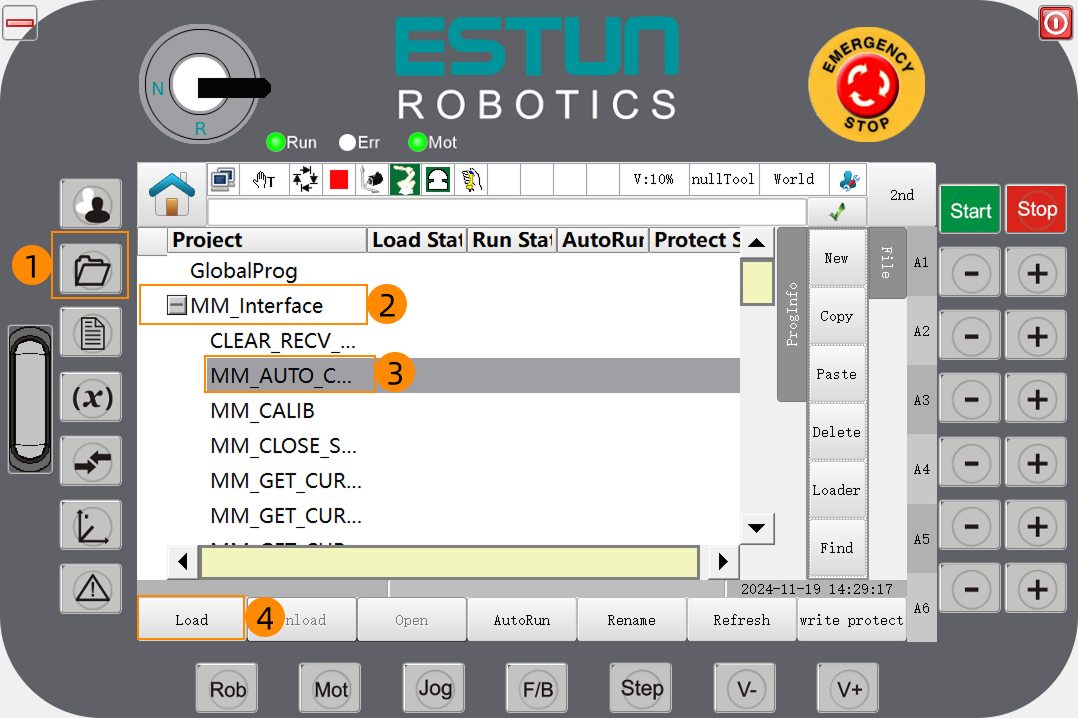
In teach mode, press the folder button on the teach pendant, expand MM_Interface, select MM_AUTO_CALIBRATION, and tap Load to open the program file.
-
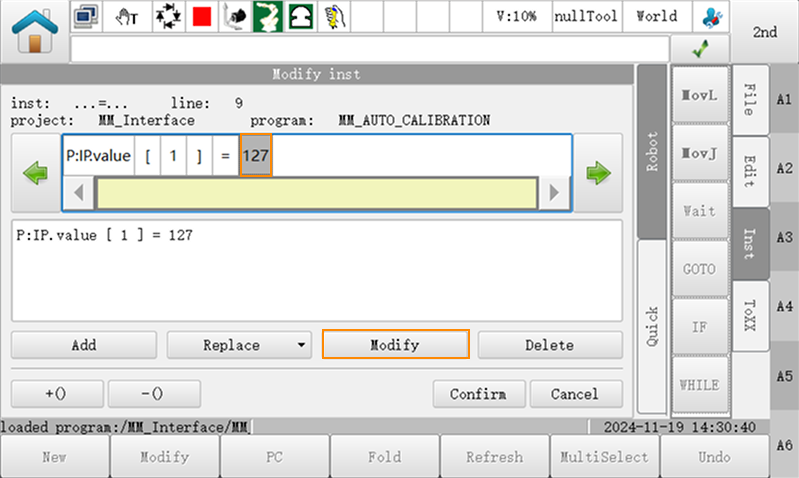
In the opened program file, check the value of P:PORT.value (this value must match the host port number set in Mech-Vision). Then, check the values of P:IP.value[1]~P:IP.value[4] (these four values must correspond to the four segments of the IPC’s IP address).
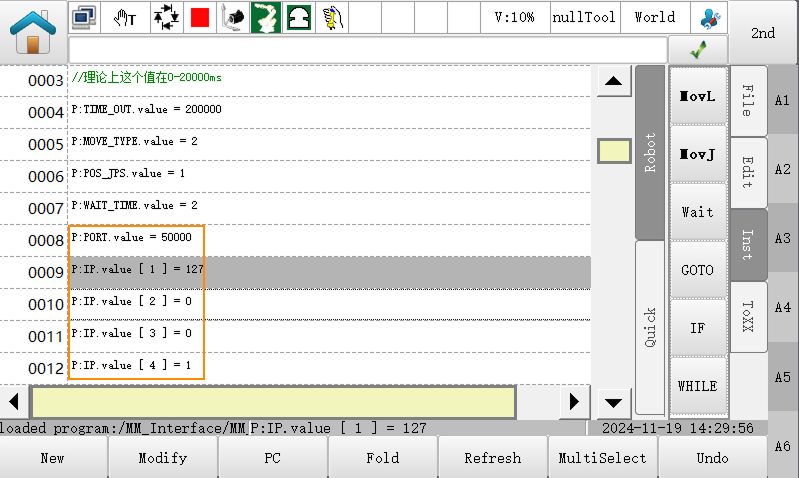
If you need to modify these values, refer to the following example. The example below demonstrates how to change 127 to 192 in line 9.
-
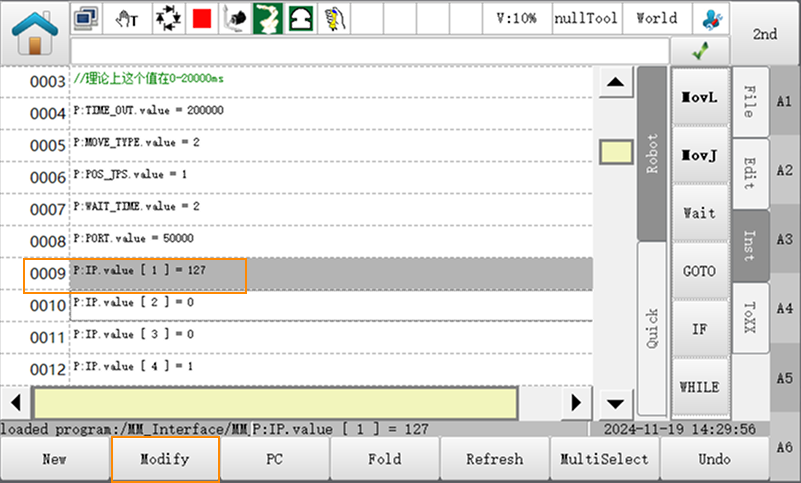
Select line 9 and tap Modify.
-
Place the cursor on 127 and tap Modify.
-
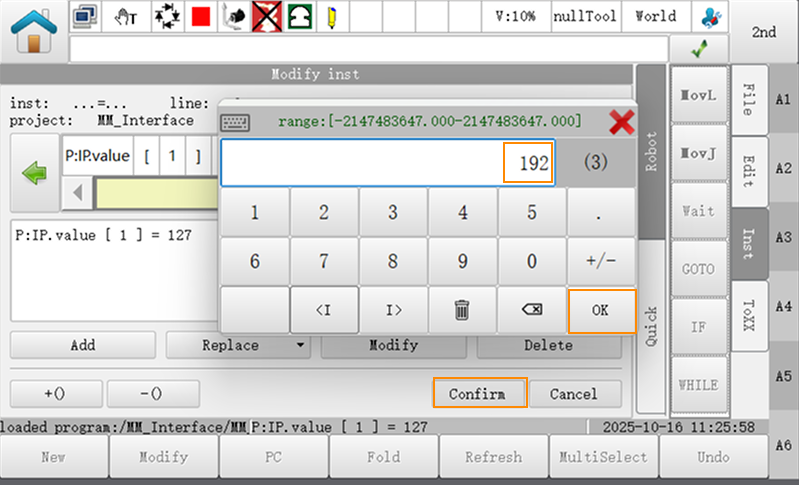
Enter 192, then tap in sequence.
-
-
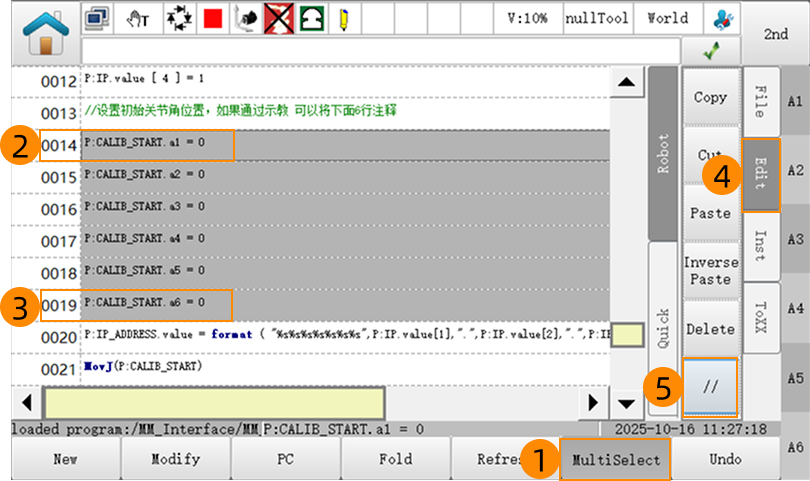
Comment out the code lines where the initial joint positions are defined. Follow these steps:
-
Tap MultiSelect, then tap Line 14, and then tap Line 19 to select lines 14 to 19.
-
Tap on the right pane to comment out lines 14 to 19. The lines will be displayed in green font, indicating that the commenting was successful.
-
2. Teach Calibration Start Point
-
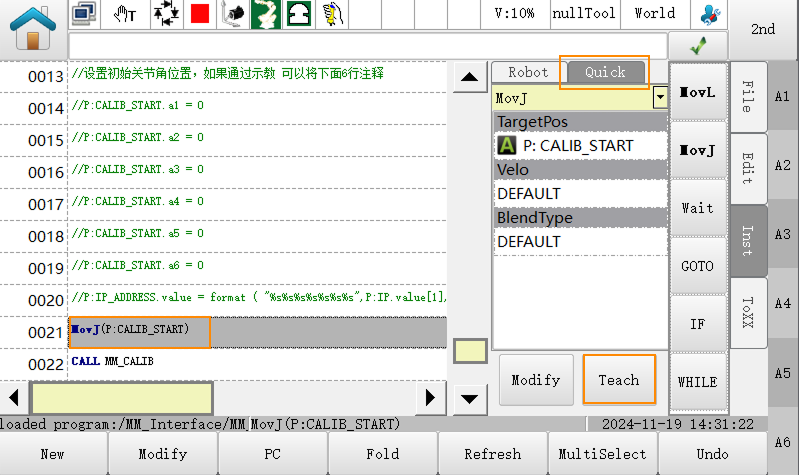
In manual mode, move the robot to the calibration start point.
You can use the position of the robot in the Check the Point Cloud Quality of the Calibration Board step as the calibration start point.
-
Select the line MMovJ(P:CALIB_START), go to the Quick tab, tap Teach, and confirm to continue teaching.
3. Run Calibration Program
-
Turn the key switch on the teach pendant to position A to switch to Auto mode.
-
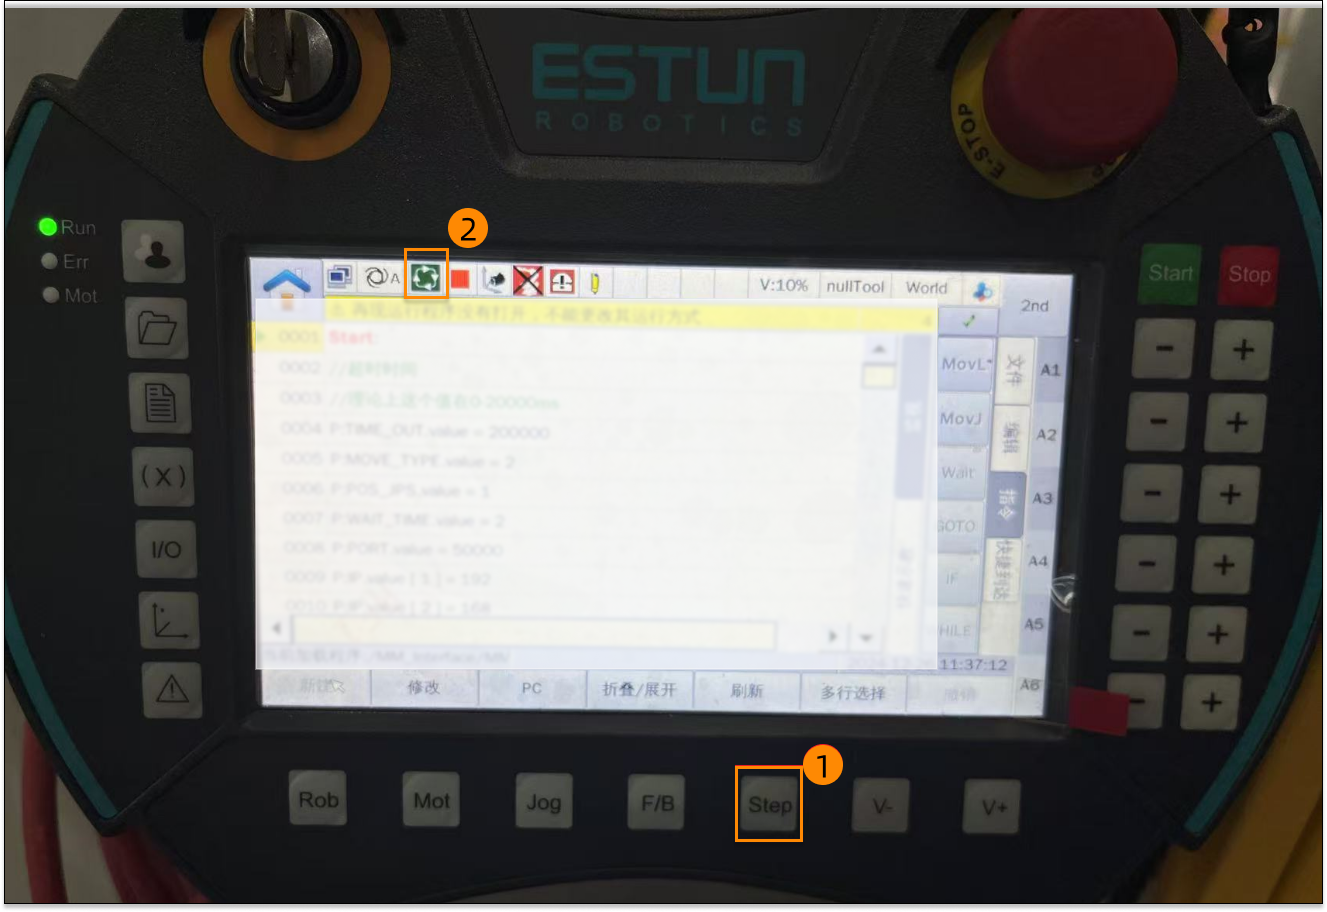
Press the Step button (position 1 in the figure) and confirm that the program is in continuous running mode (position 2 in the figure).
-
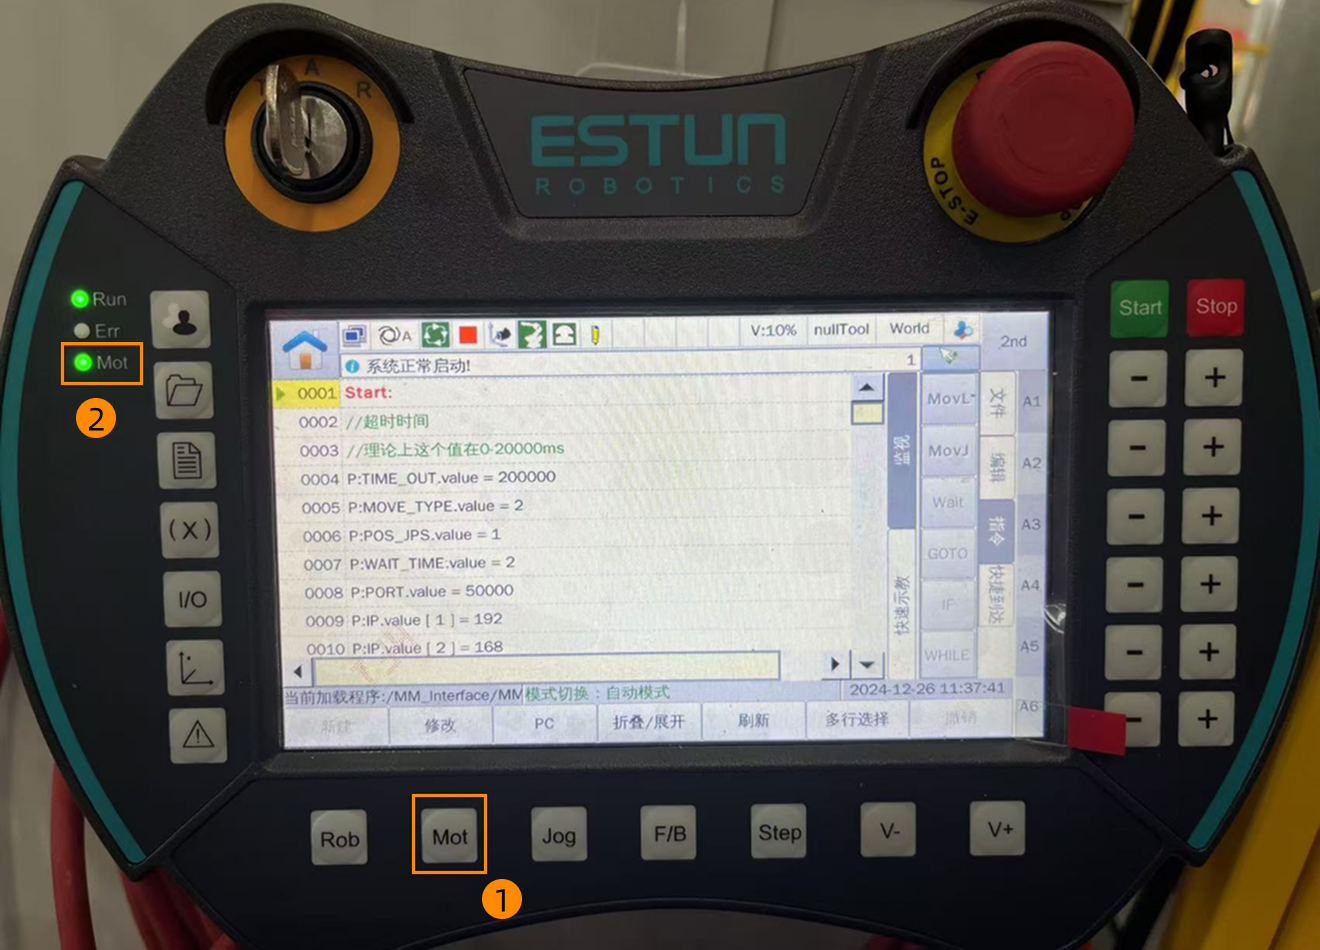
Press the Mot button (position 1 in the figure) and confirm that the enable indicator light (position 2 in the figure) is lit.
-
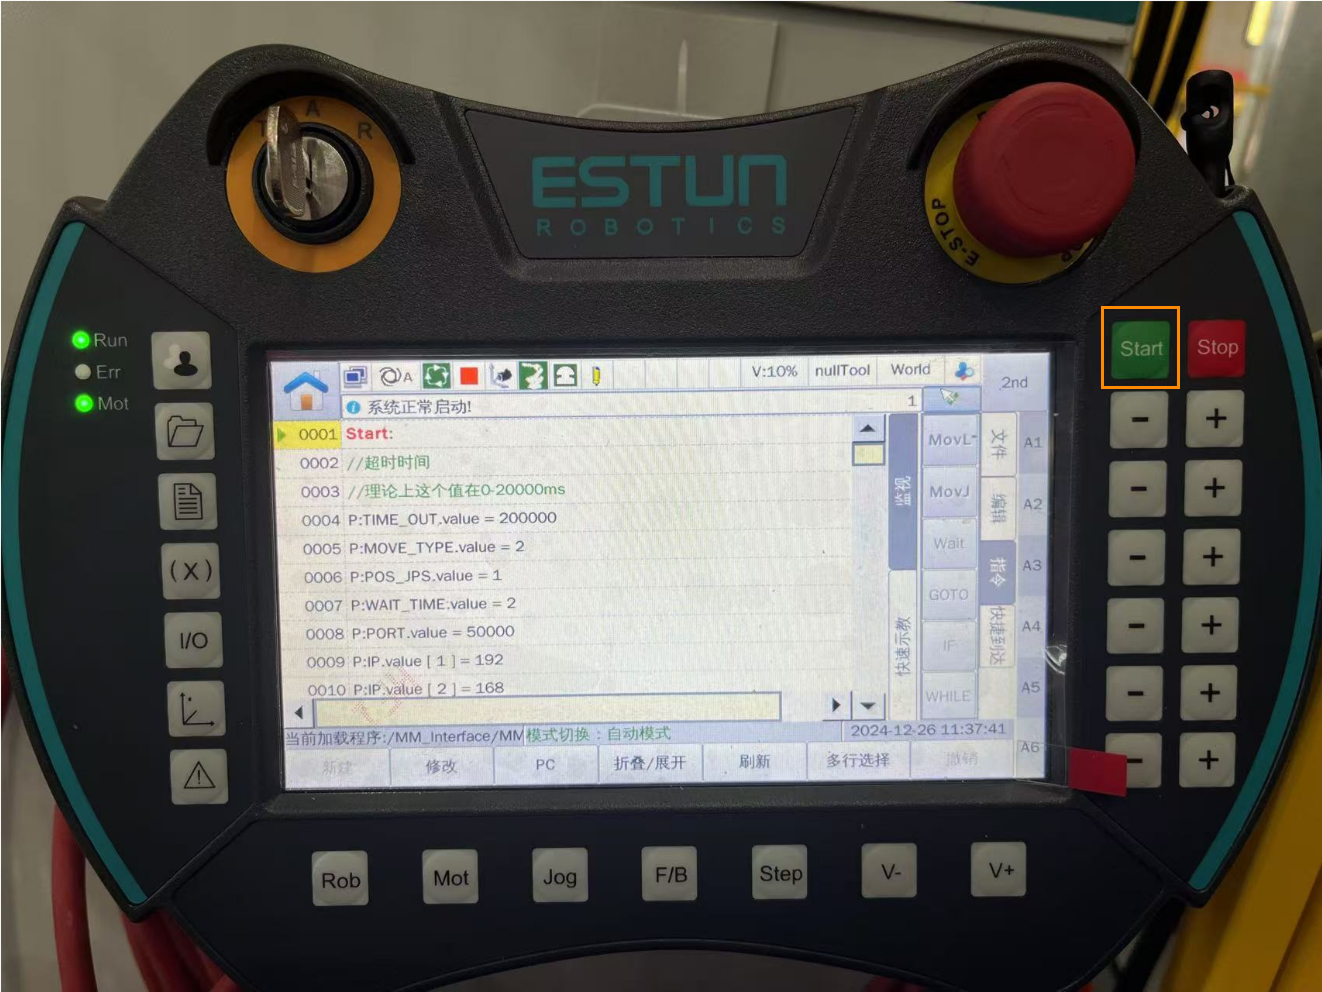
Press the Start button to run the program.
-
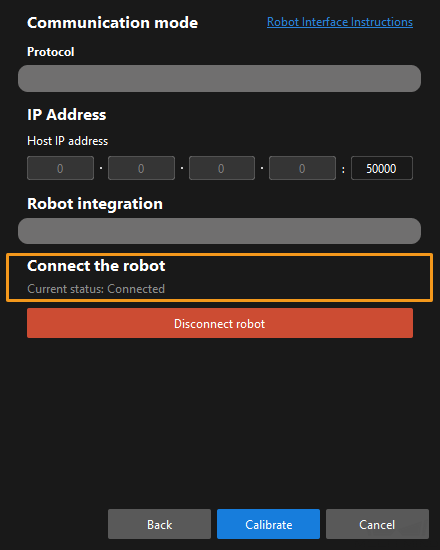
When, in the Calibration window in Mech-Vision, the current status changes to connected and the button Waiting for the robot to connect... changes to Disconnect robot, click Next at the bottom.
-
Perform Step 4 of Start calibration (which is Set motion path) and the subsequent operations based the following links.
-
If the camera mounting mode is eye to hand, see this document and proceed with the relevant operations.
-
If the camera mounting mode is eye in hand, see this document and proceed with the relevant operations.
-