Set up Standard Interface Communication with ELITE
This guide shows how to set up the Standard Interface communication with an ELITE robot.
Check Controller and Software Compatibility
|
The models and versions listed below are tested and can be used. For other models and versions, you may refer to this guide for operation. If any issues occur, please contact Mech-Mind Technical Support. |
-
Robot model: ELITE
-
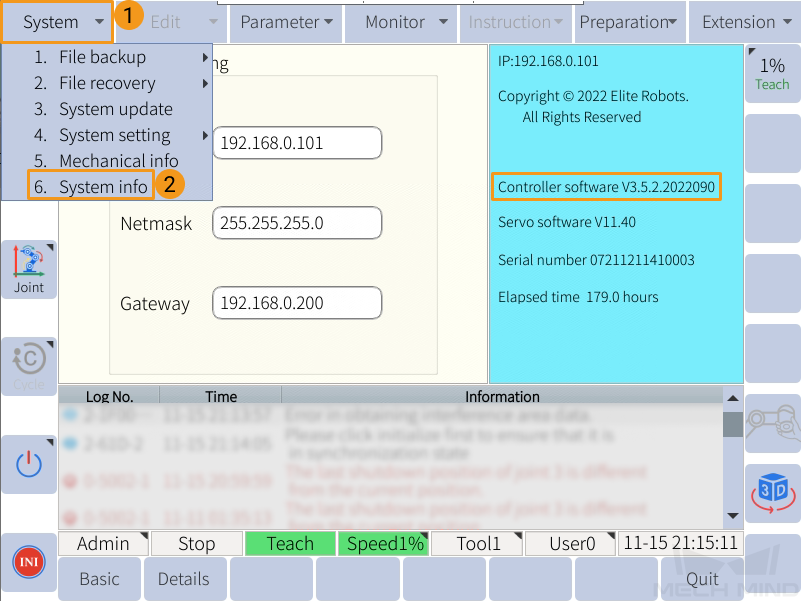
Controller software version: 3.5
The controller software version is 3.5, which can be checked in .
Set up the Network Connection
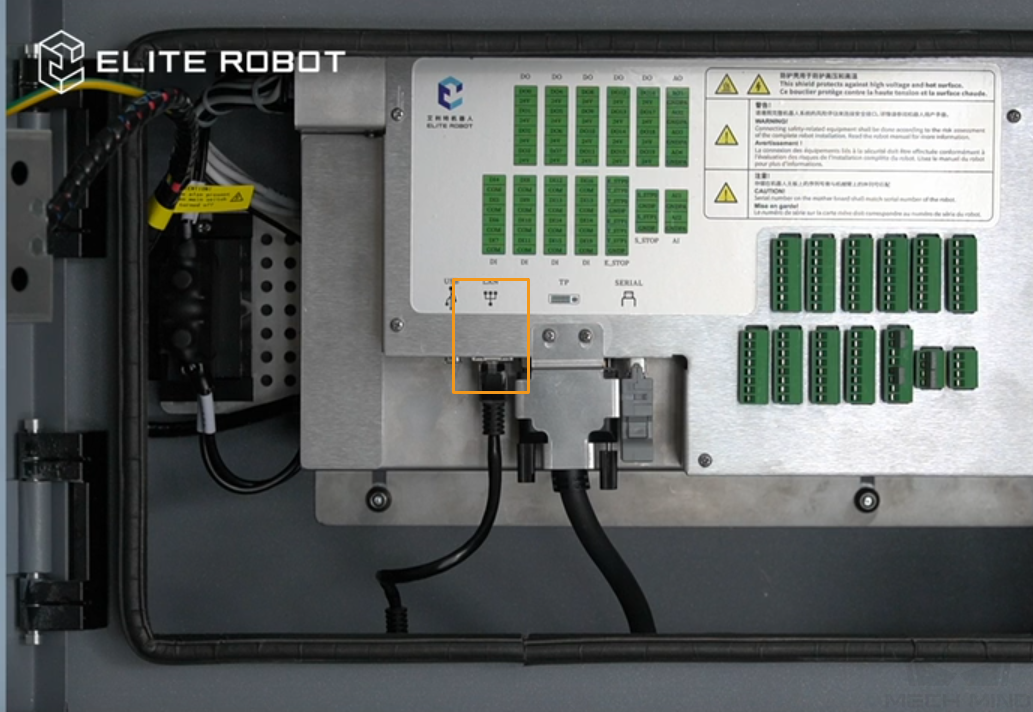
Plug the Ethernet cable into an Ethernet port on the IPC and the LAN port inside the controller.
Modify the IP Address
|
You can change the IP address of either of the following ports, to make sure the IP addresses of the two are in the same subnet.
|
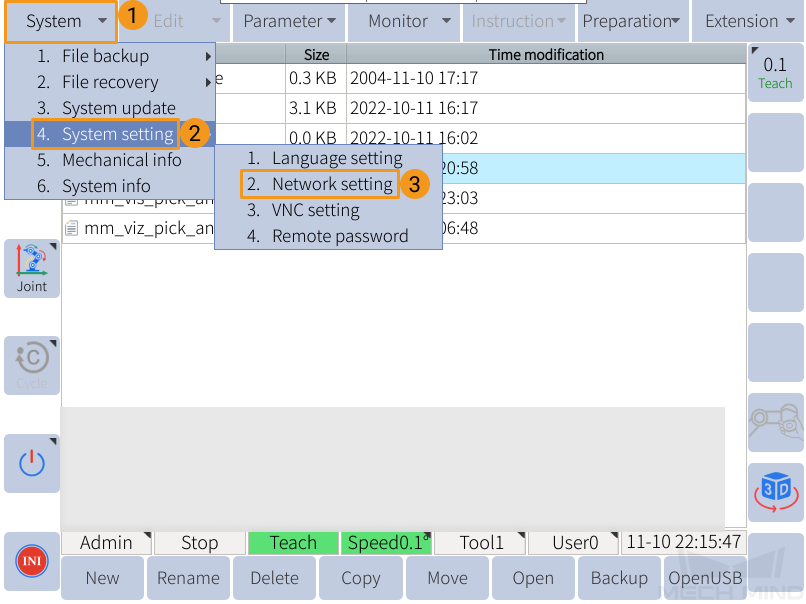
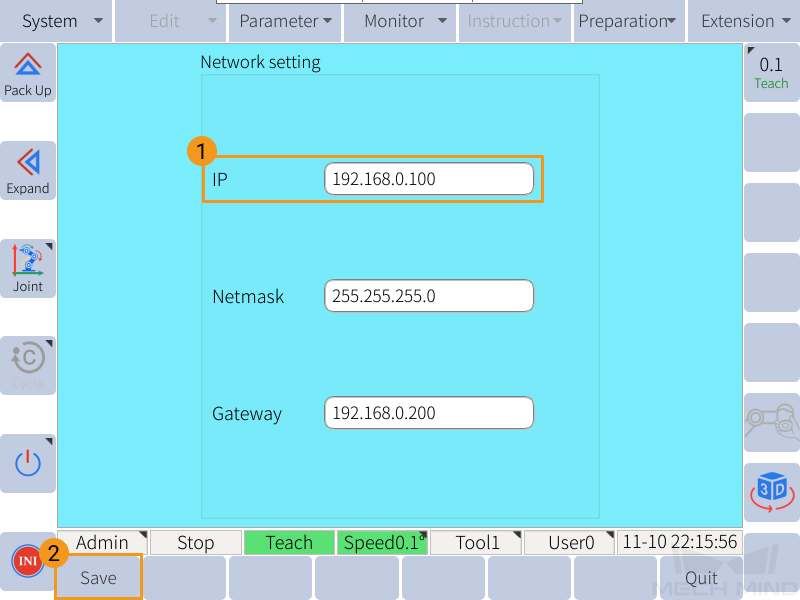
Follow these steps to change the IP address of the controller LAN port.
-
Turn the key to TEACH, and check if the current user account is Admin in the lower left. If it’s not Admin, press the user account and select Admin. Then, enter the password (default password: 333333) and press OK.
-
Select .
-
Set the IP address. Then, press Save to save the change.
Set up Robot Communication Configuration
-
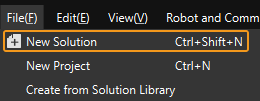
Open Mech-Vision. You may enter different interfaces. Create a new solution according to the instructions below.
-
If you have entered the Welcome interface, click New blank solution.

-
If you have entered the main interface, click on the menu bar.
-
-
Click Robot Communication Configuration on the toolbar of Mech-Vision.
-
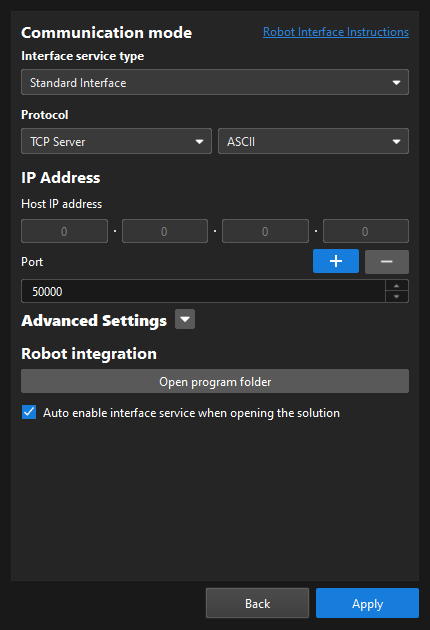
In the Robot Communication Configuration window, complete the following configurations.
-
Click the Select robot drop-down menu, and select Listed robot. Click Select robot model, and select the robot model that you use. Then, click Next.
-
In the Communication mode section, select Standard Interface for Interface service type, TCP Server for Protocol, and ASCII for the protocol format.
-
It is recommended to set the port number to 50000 or above. Ensure that the port number is not occupied by another program.
-
Under Robot integration, click Open program folder.
The files needed for subsequent loading will be copied from this folder. Do not close this folder. -
(Optional) Select Auto enable interface service when opening the solution.
-
Click Apply.
-
-
On the main interface of Mech-Vision, make sure that the Robot Communication Configuration switch on the toolbar is flipped and has turned blue.

Load the Program Files
Load the Standard Interface program files to the robot with the following steps.
-
Copy the
rbctrlfolder in the opened program folder (theELITEfolder) to the flash drive.You can also find the program folder in the
Communication Component/Robot_Interface/ELITEpath in the installation directory of Mech-Vision and Mech-Viz. -
Insert the flash drive to the USB port on the controller.
-
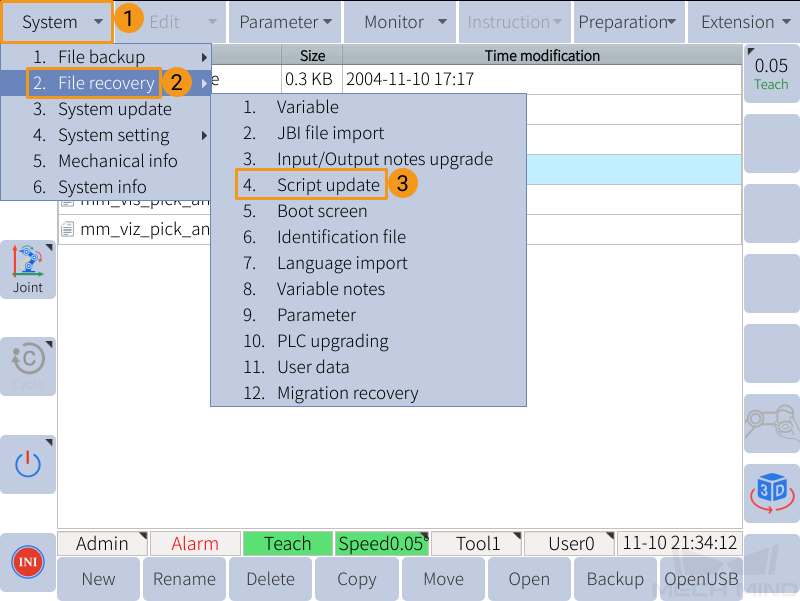
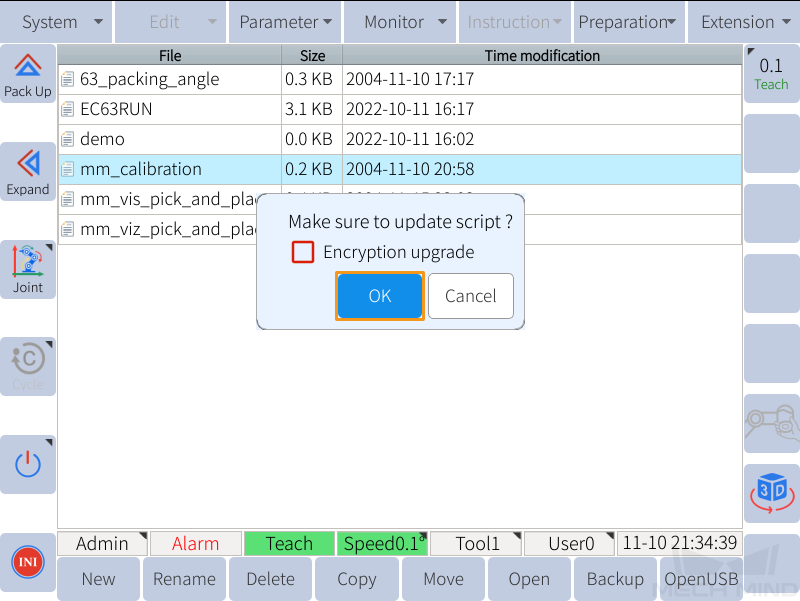
On the teach pendant, press , and select OK in the pop-up window.

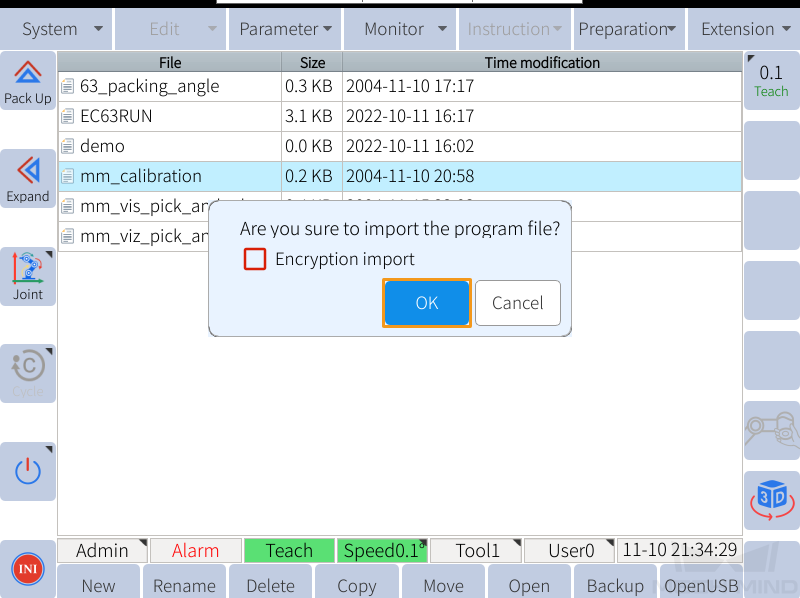
-
Press , and select OK in the pop-up window.
-
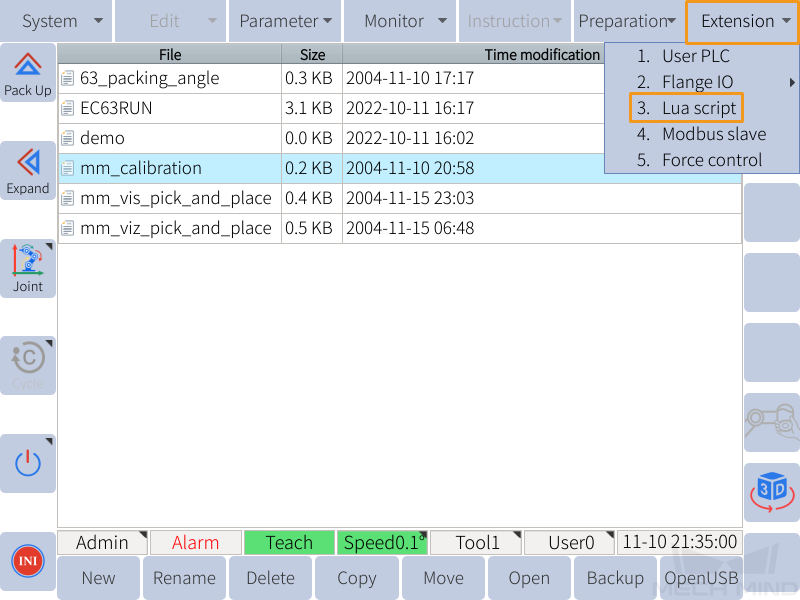
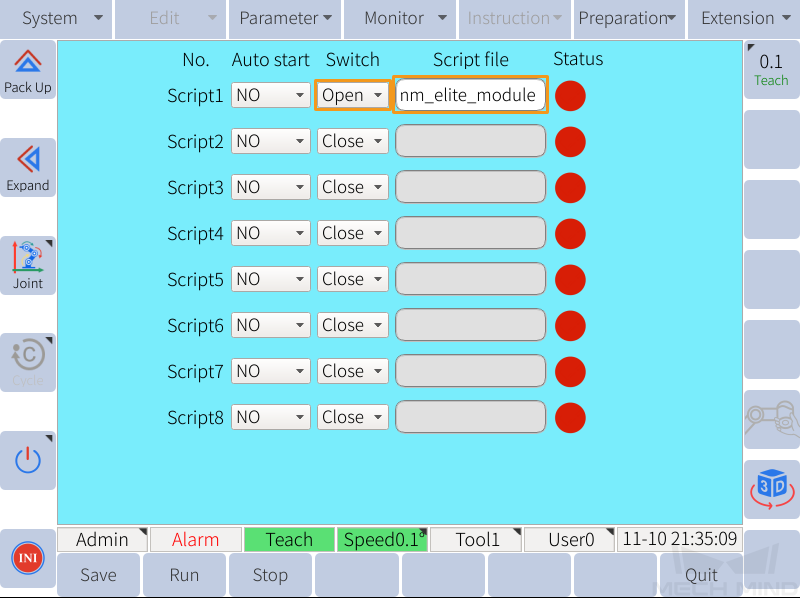
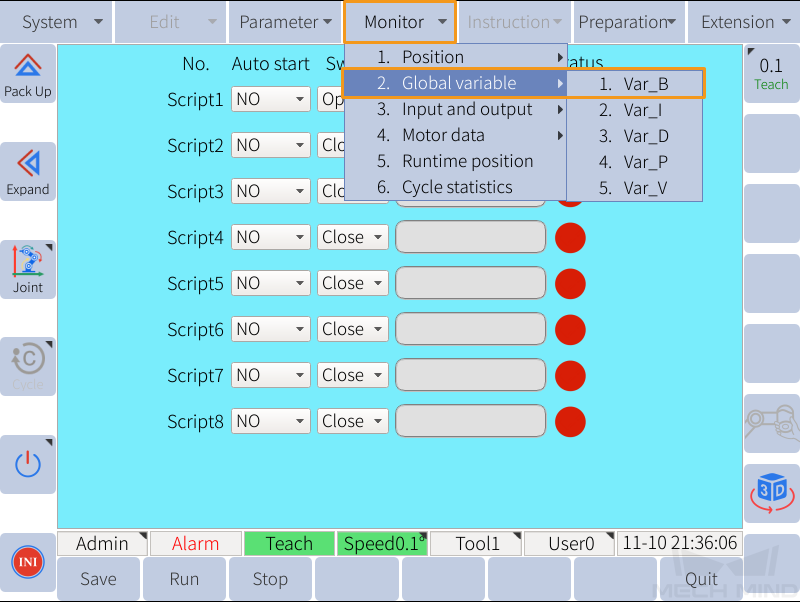
Press .
-
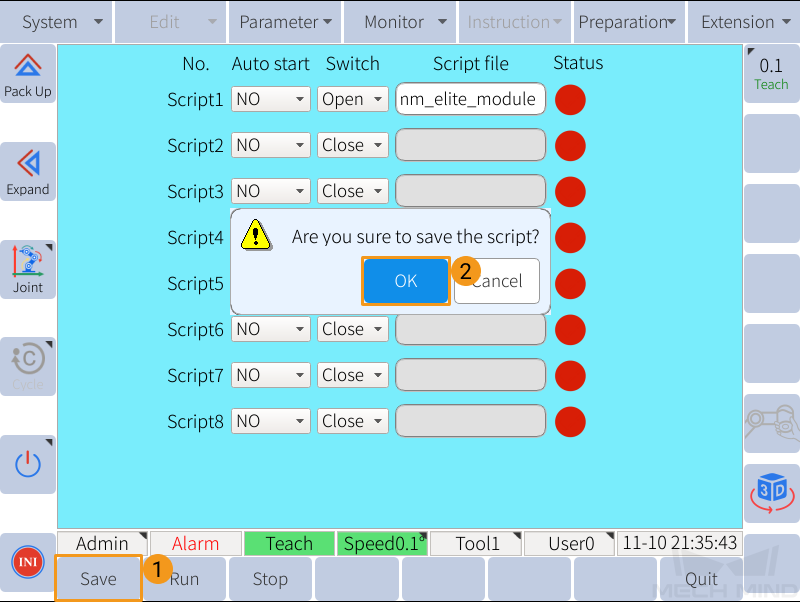
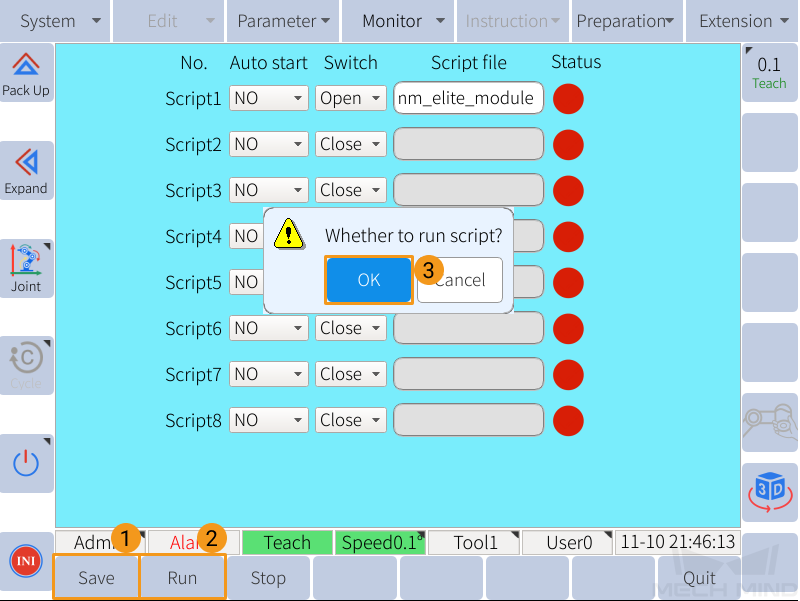
Change the Switch for Script1 to Open, and then select mm_elite_module for Script file.
Test Robot Connection
Set IPC IP Address and Port Number in Robot
Follow these steps to set the IP address and port number of the IPC in the robot global variables.
-
Press .
-
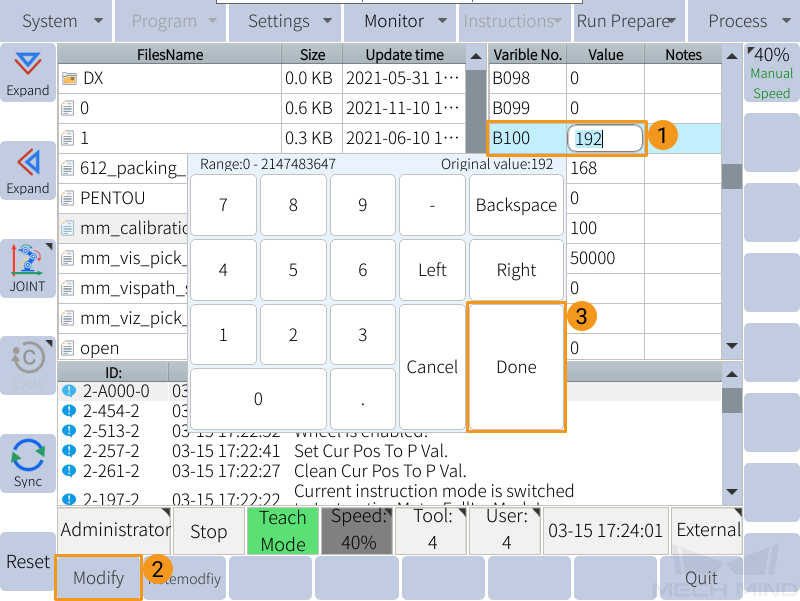
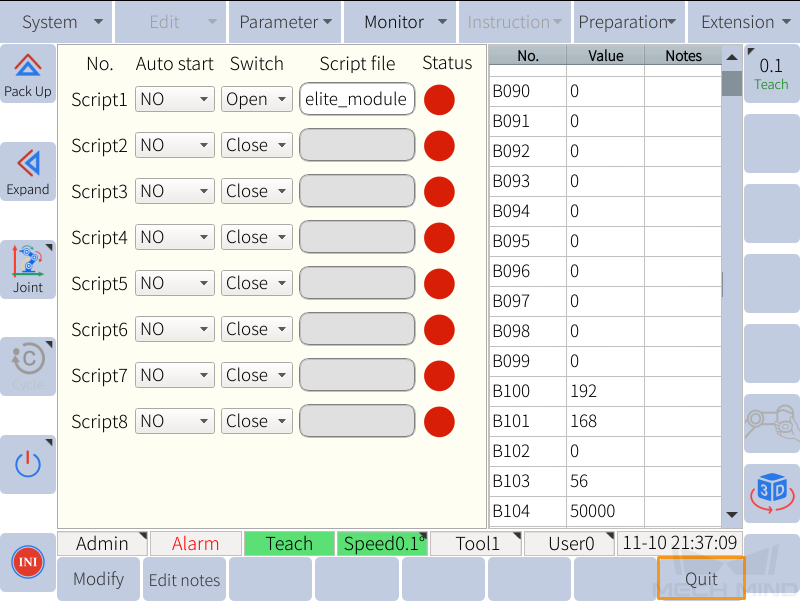
Change the value of variables B100 to B104. Select a variable and then press Modify in the lower left. Press Done after changing the value.
B100 to B103 corresponds to the IP address, and B104 corresponds to the port number. The IP address displayed in the following image is 192.168.0.56, and the port number is 50000.
-
After setting the IP address and port number, press Quit in the lower right. Press Save in the lower left, and select OK in the pop-up window.
Run the Program
-
On the teach pendant, press , and select OK in the pop-up window.
-
If the robot is successfully connected to the IPC, the log on the teach pendant will display a Connect Success message.
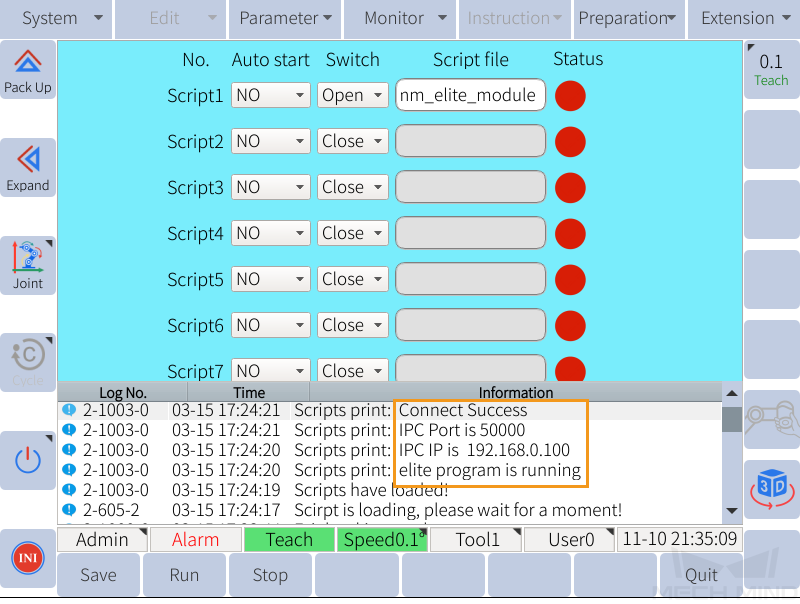
-
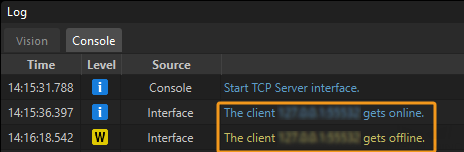
If the robot is connected successfully, the Console tab of Mech-Vision’s Log panel will display a note.