Set up Standard Interface Communication with ELITE
This topic introduces the process of setting up the Standard Interface communication with an ELITE robot.
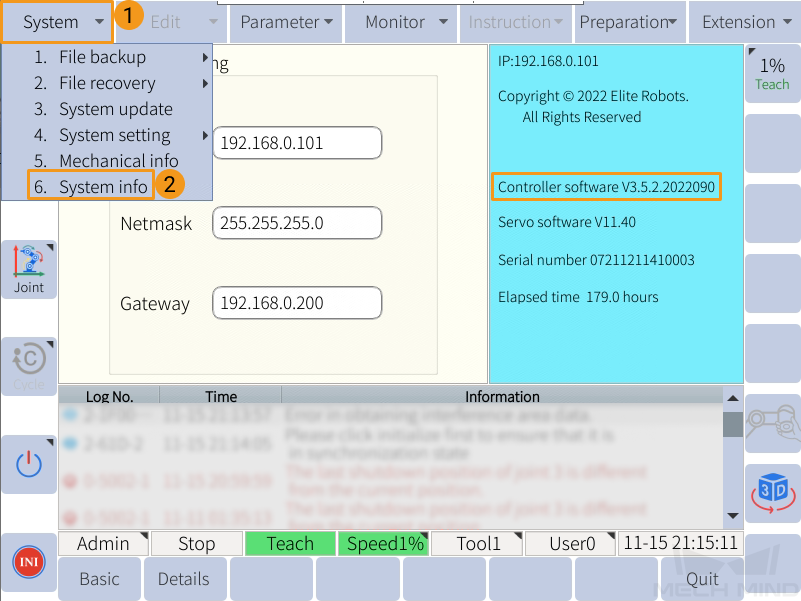
Check Controller and Software Compatibility
-
Controller system software version: 2.17 or above. Can be checked in .
-
Mech-Mind Software Suite version: 1.7.0 or above.
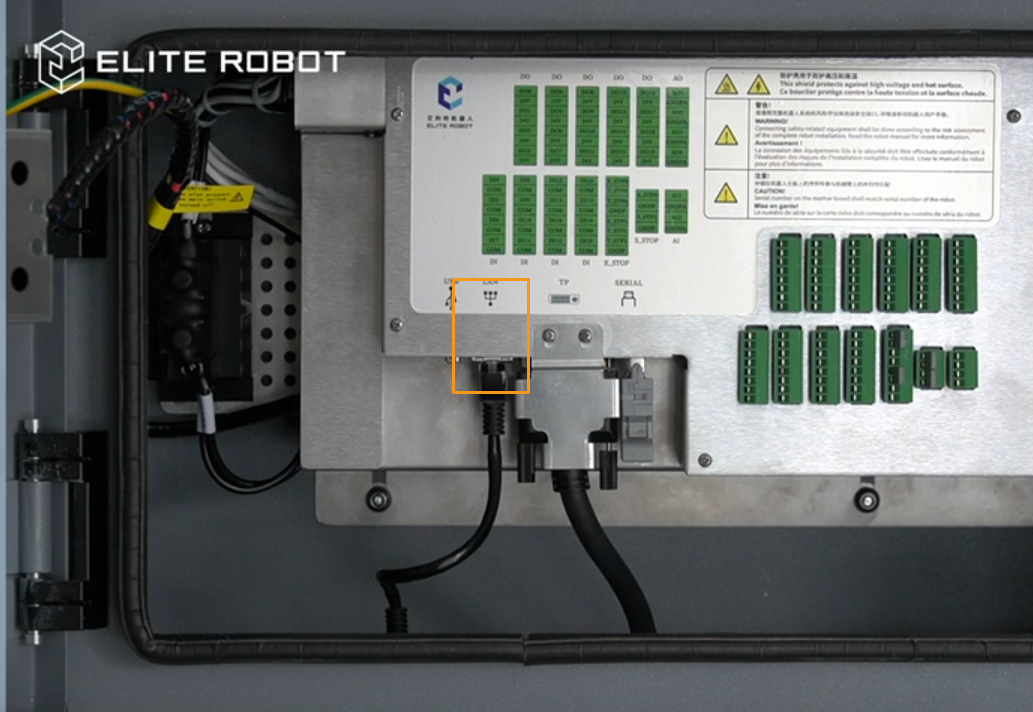
Set up the Network Connection
Plug the Ethernet cable into an Ethernet port on the IPC and the LAN port inside the controller.
Modify the IP Address
|
You can change the IP address of either of the following ports, to make sure the IP addresses of the two are in the same subnet.
|
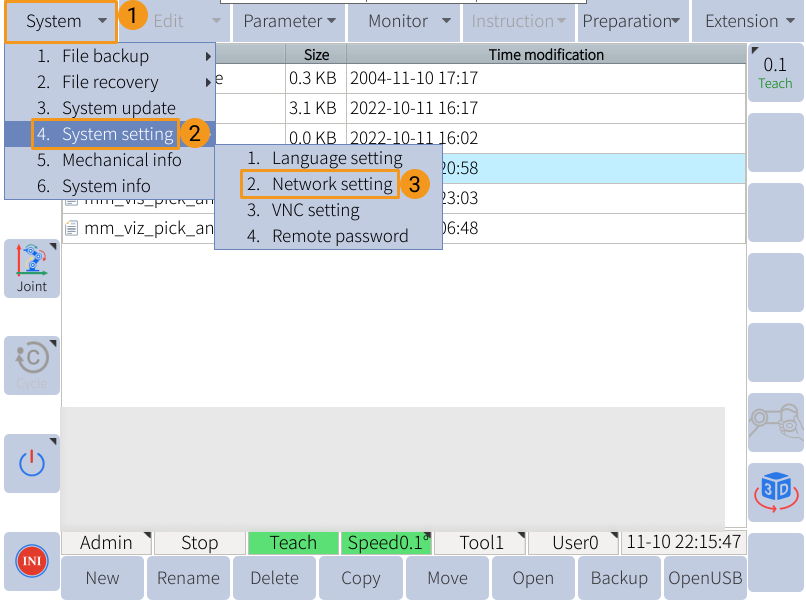
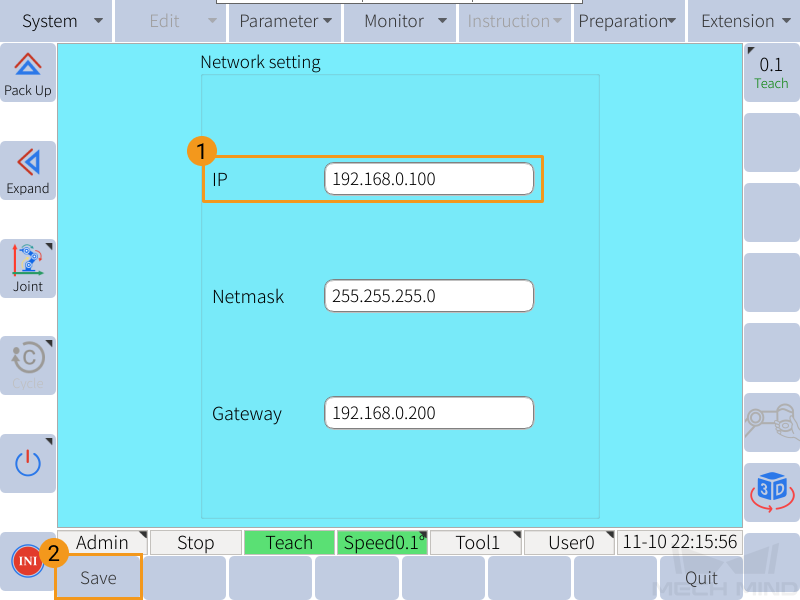
Follow these steps to change the IP address of the controller LAN port.
-
Turn the key to TEACH, and check if the current user account is Admin in the lower left. If it’s not Admin, press the user account and select Admin. Then, enter the password (default password: 333333) and press OK.
-
Select .
-
Set the IP address. Then, press Save to save the change.
Set up “Robot and Interface Configuration” in Mech-Vision
-
Click Robot and Interface Configuration in the toolbar of Mech-Vision.
-
Select Listed robot from the Select robot drop-down menu, and then click Select robot model. Select the robot model that you use, and then click Next.
-
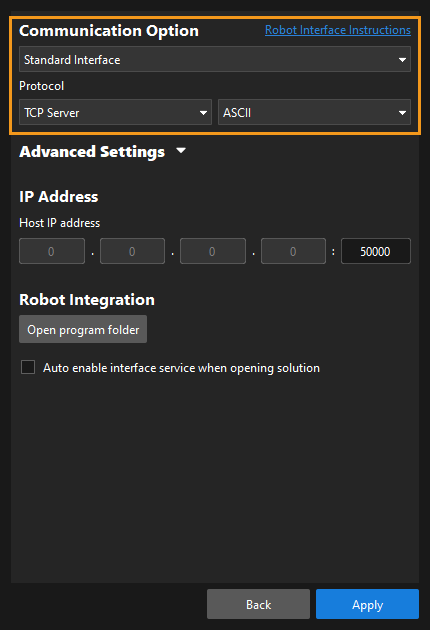
Select Standard Interface for Interface Type, and TCP Server and ASCII for Protocol, and then click Apply.
-
Make sure the Interface Service is started: in the toolbar of Mech-Vision, and the Interface Service switch on the far right is flipped and turned to blue.

Load the Program Files
Load the Standard Interface program files to the robot with the following steps.
-
Open the
Mech-Center\Robot_Interface\ELITEfolder in the installation directory of Mech-Mind Software Suite, and copy the rbctrl folder to your flash drive. -
Insert the flash drive to the USB port on the controller.
-
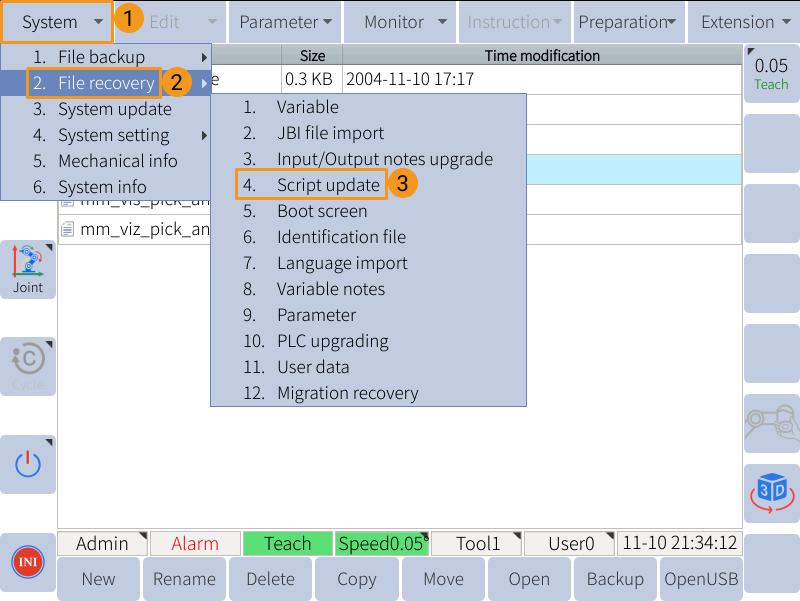
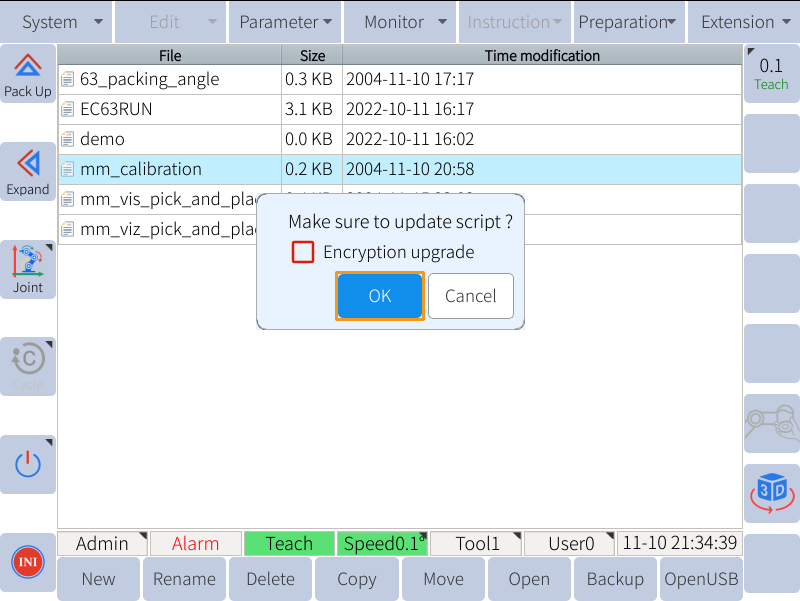
On the teach pendant, press , and select OK in the pop-up window.
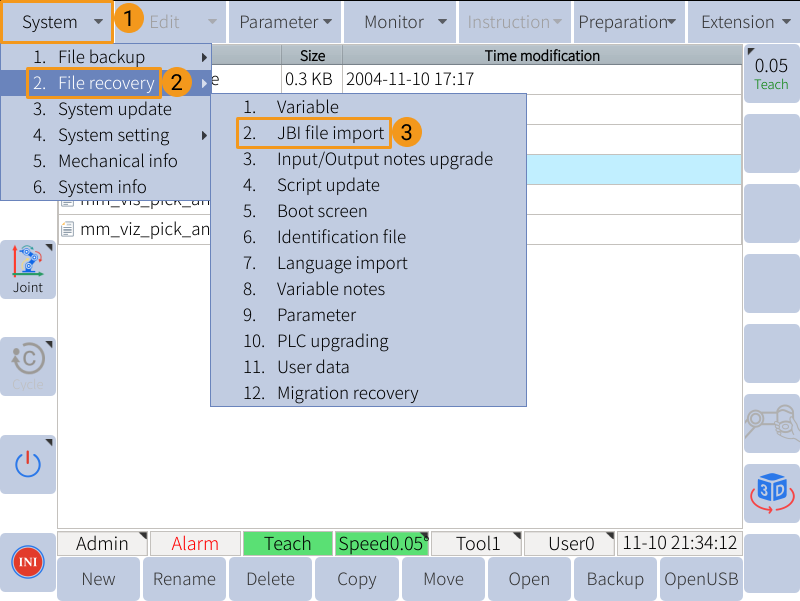
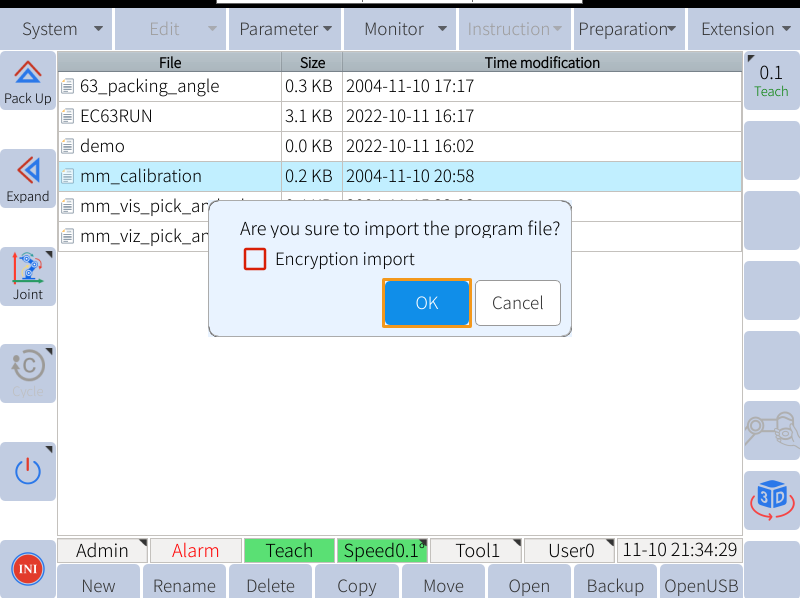
-
Press , and select OK in the pop-up window.
-
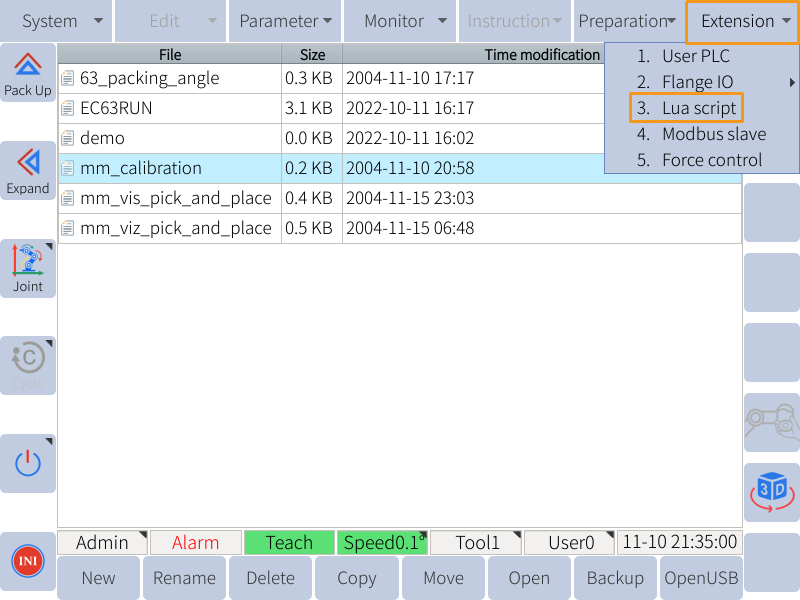
Press .
-
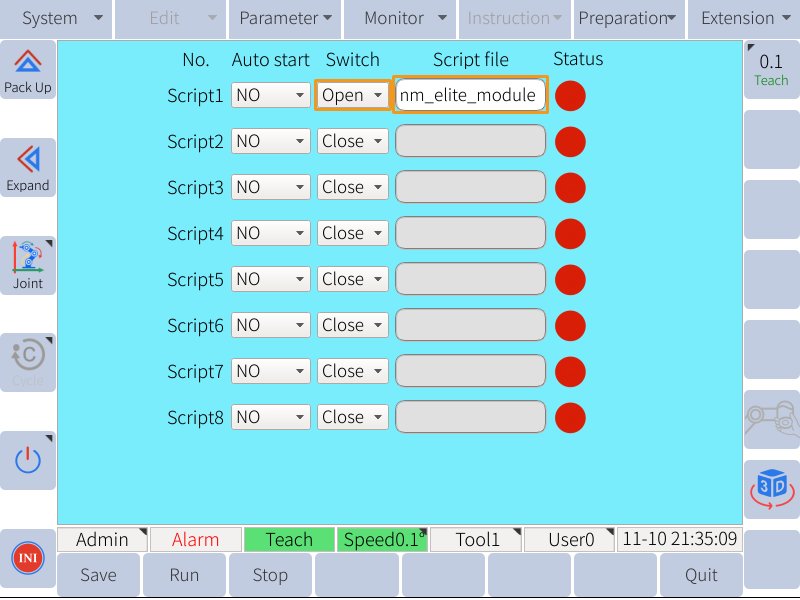
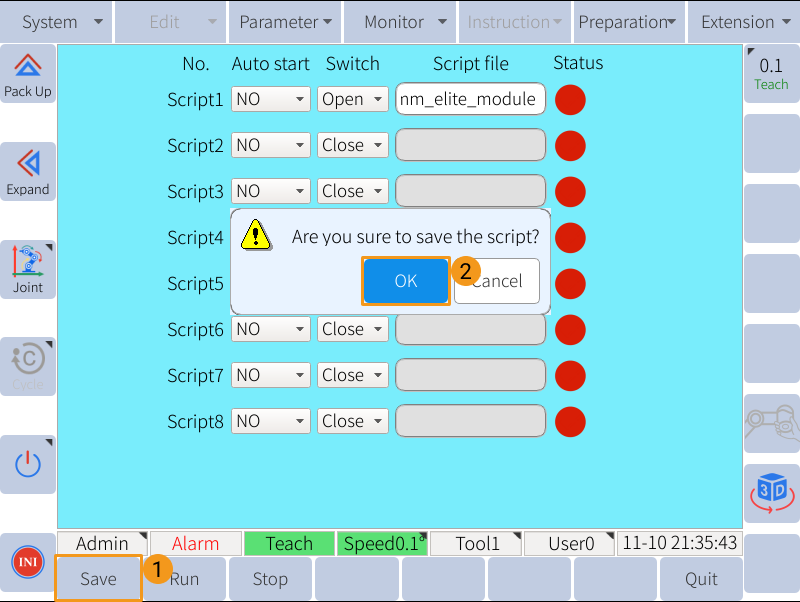
Change the Switch for Script1 to Open, and then select mm_elite_module for Script file.
Test Robot Connection
Set IPC IP Address and Port Number in Robot
Follow these steps to set the IP address and port number of the IPC in the robot global variables.
-
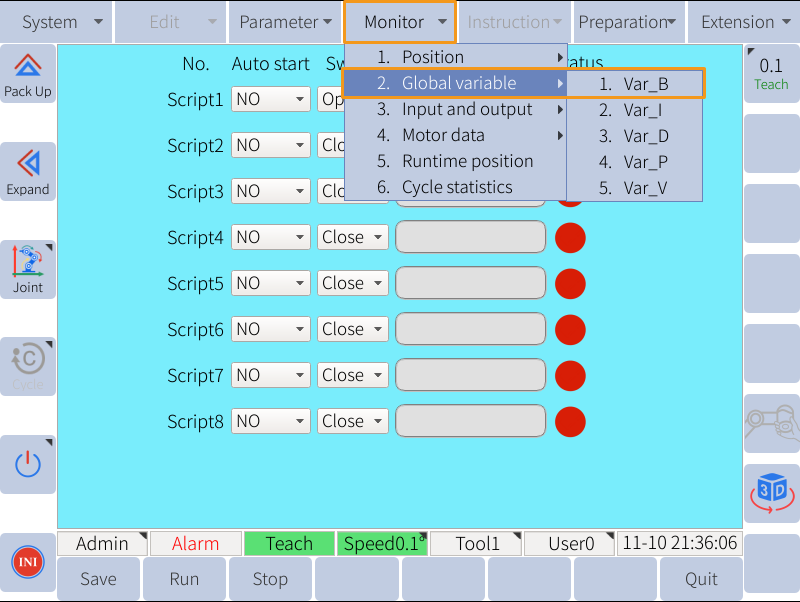
Press .
-
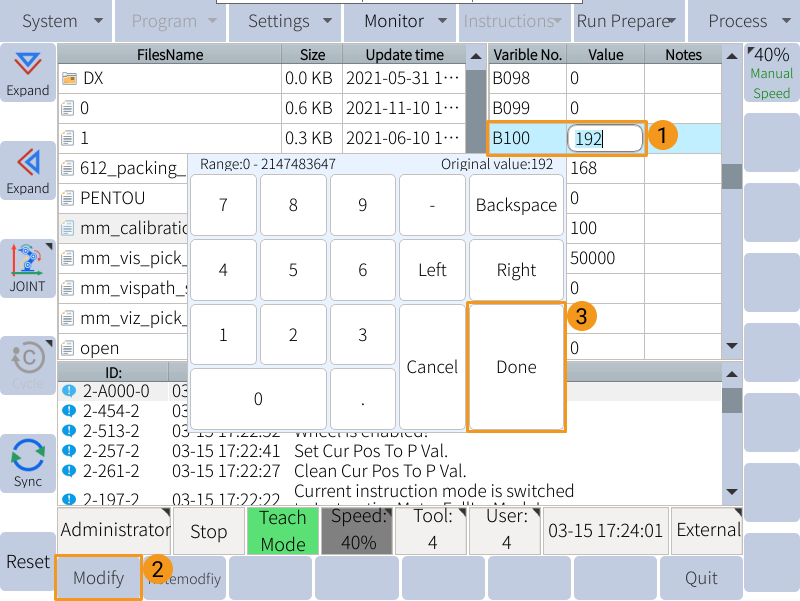
Change the value of variables B100 to B104. Select a variable and then press Modify in the lower left. Press Done after changing the value.
B100 to B103 corresponds to the IP address, and B104 corresponds to the port number. The IP address displayed in the following image is 192.168.0.56, and the port number is 50000.
-
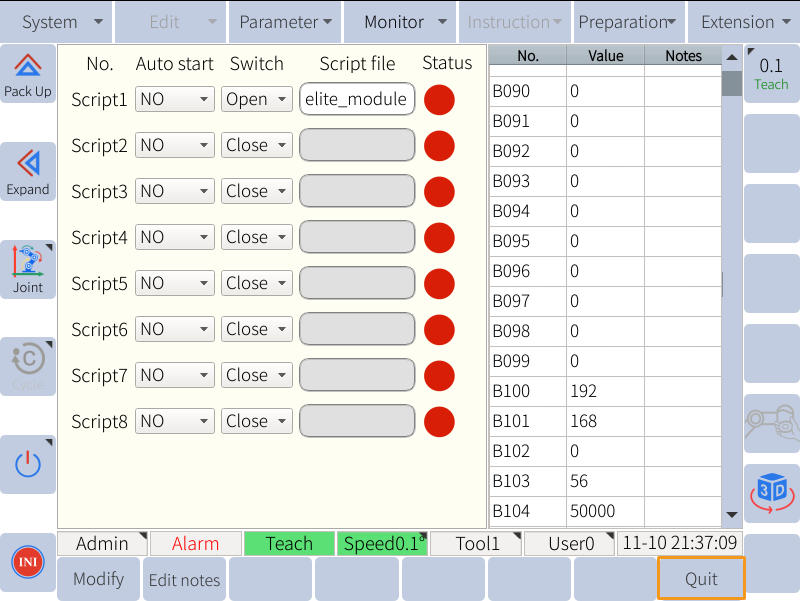
After setting the IP address and port number, press Quit in the lower right. Press Save in the lower left, and select OK in the pop-up window.
Run the Program
-
On the teach pendant, press , and select OK in the pop-up window.

-
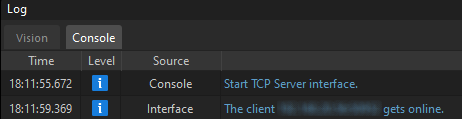
If the robot is successfully connected to the IPC, the log on the teach pendant will display a Connect Success message.

-
The Console tab of Mech-Vision Log panel will also display messages indicating that the client is connected.