Set up Standard Interface Communication with JAKA
This topic introduces the process of setting up the Standard Interface communication with a JAKA robot.
Check Controller and Software Compatibility
Before loading the Standard Interface program, please check whether the version of the controller software is 1.7.
-
If the version of the robot controller is lower than 1.7, please upgrade it to 1.7. The following steps involve the JAKA AddOn program, requiring a controller program version of 1.7.
-
If you are unable to upgrade the version of the controller software, please use JAKA’s programming function to write a Standard Interface program, and you do not need to install the AddOn program.
| Download JAKA 1.7 Controller Software (the file name is 1.7.0.32.zip). After you unzip the file, the controller software is stored in the controller folder and the JAKA Zu APP is stored in the APP folder. |
Connect the Robot with JAKA Zu APP
Please refer to the “Set up the Network Connection” part in JAKA Setup Instructions to connect the robot with the JAKA Zu APP.
| You should use a JAKA Zu APP of version 1.7, the APP software package is stored in the App folder after you unzip the 1.7.0.32.zip file. |
Set up “Robot and Interface Configuration” in Mech-Vision
-
Click Robot and Interface Configuration on the toolbar of Mech-Vision.
-
Select Listed robot from the Select robot drop-down menu, and then click Select robot model. Select the robot model that you use, and then click Next.
-
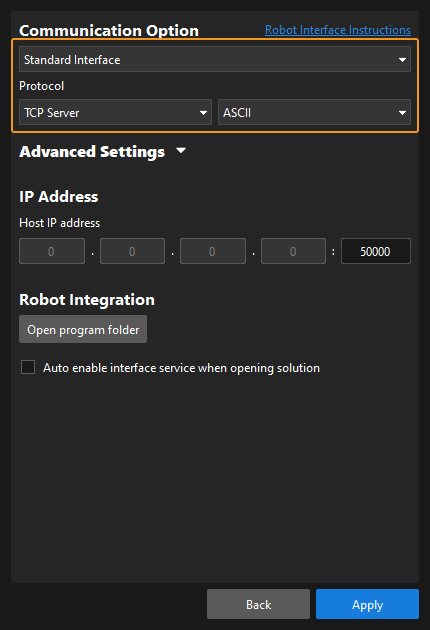
Select Standard Interface for Interface Type, and TCP Server and ASCII for Protocol, and then click Apply.
-
Make sure the Interface Service is started: on the toolbar of Mech-Vision, the Interface Service switch on the far right is flipped and turned to blue.

Load the Program Files to the Robot
Load the AddOn File
-
After you connect the robot with the JAKA Zu APP, click Settings in the upper right corner.

-
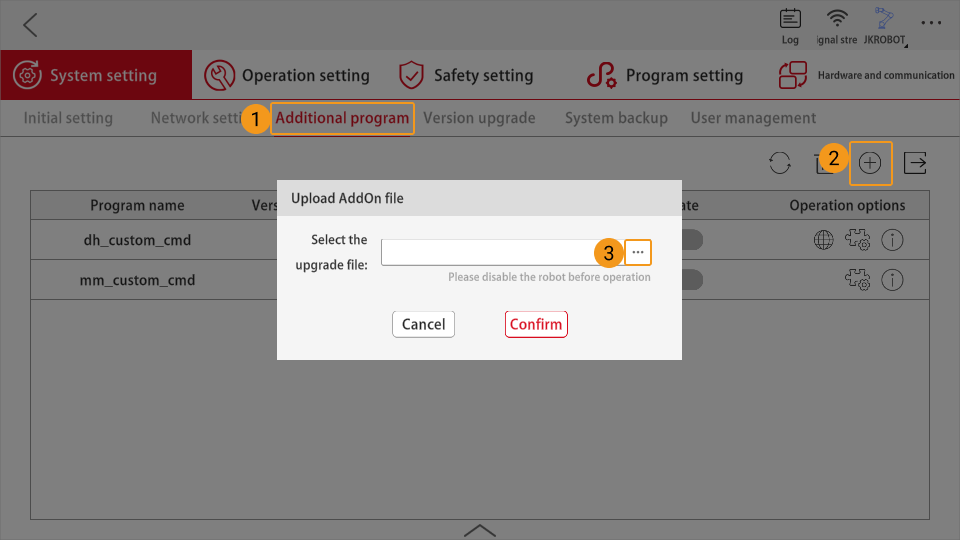
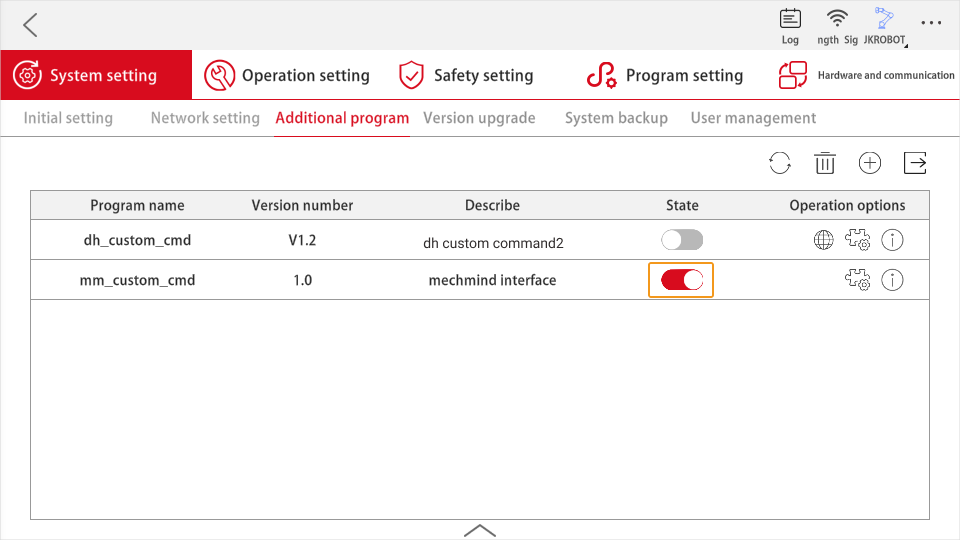
Click Additional program → + → ···.
-
Select the mm_custom_cmd.tar.gz file and click OK. Then the program information of mm_custom_cmd will appear in the list.
The mm_custom_cmd.tar.gz file is stored in Mech-Center\Robot_Interface\Robot_Plugin\JAKA_Addonin the installation directory of Mech-Mind Software Suite. You should copy the file to the device with JAKA Zu APP installed.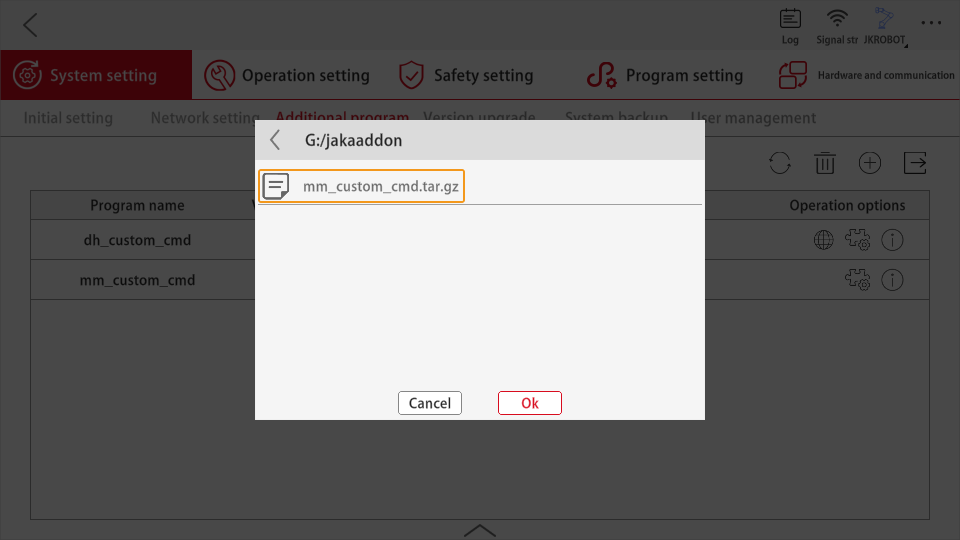
-
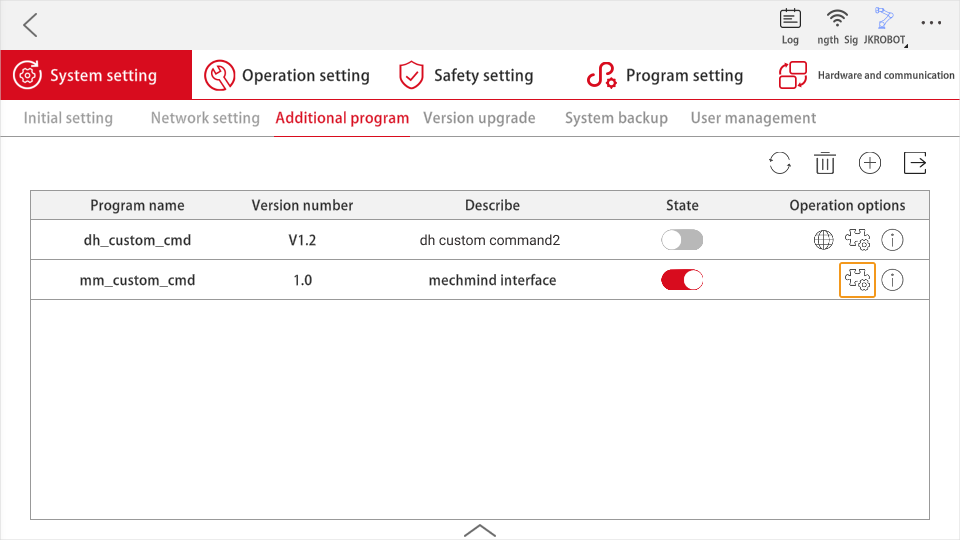
Click the State button of mm_custom_cmd to activate it.
-
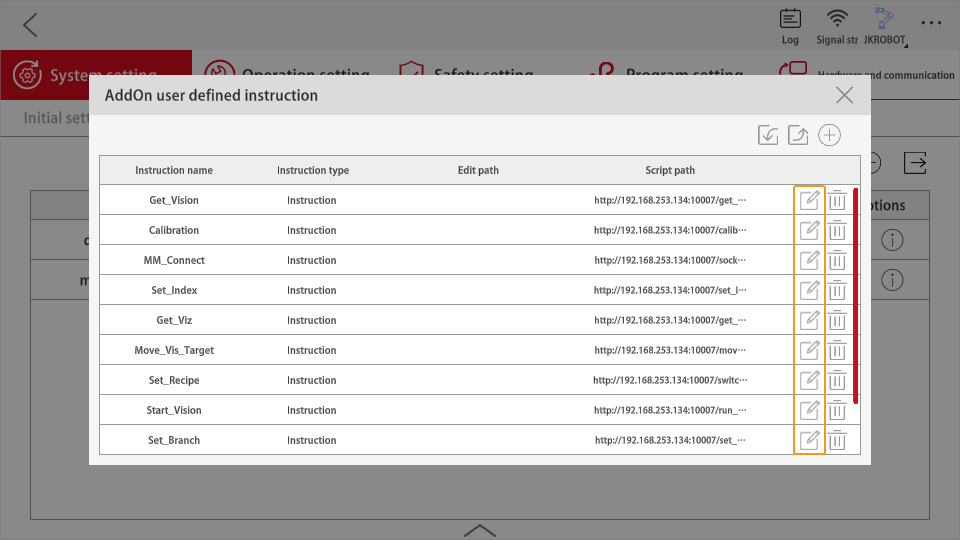
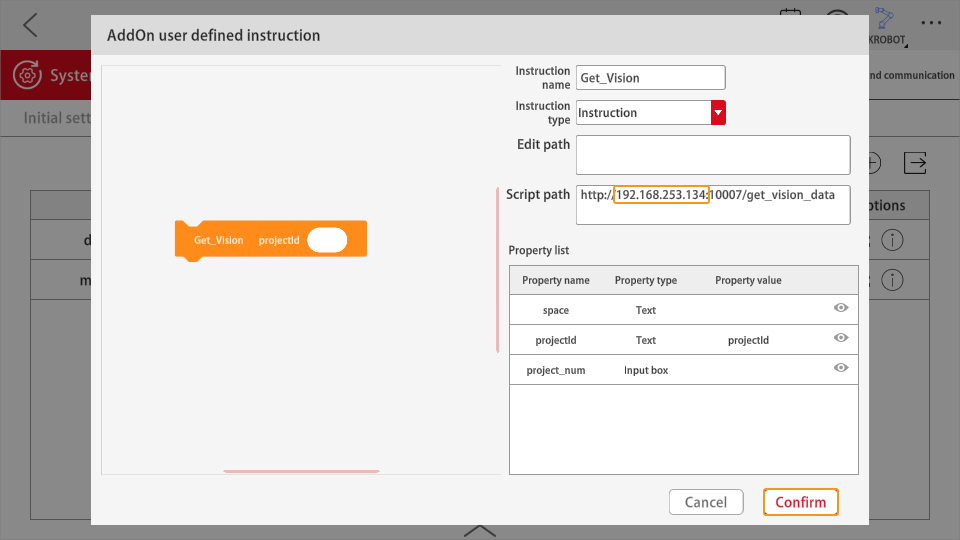
Click the instruction details button and the details will appear.
-
Click the edit button of each instruction one by one, and modify the IP address in the Script path to the IP address of the robot, and then click Confirm.
Load the Example Programs
-
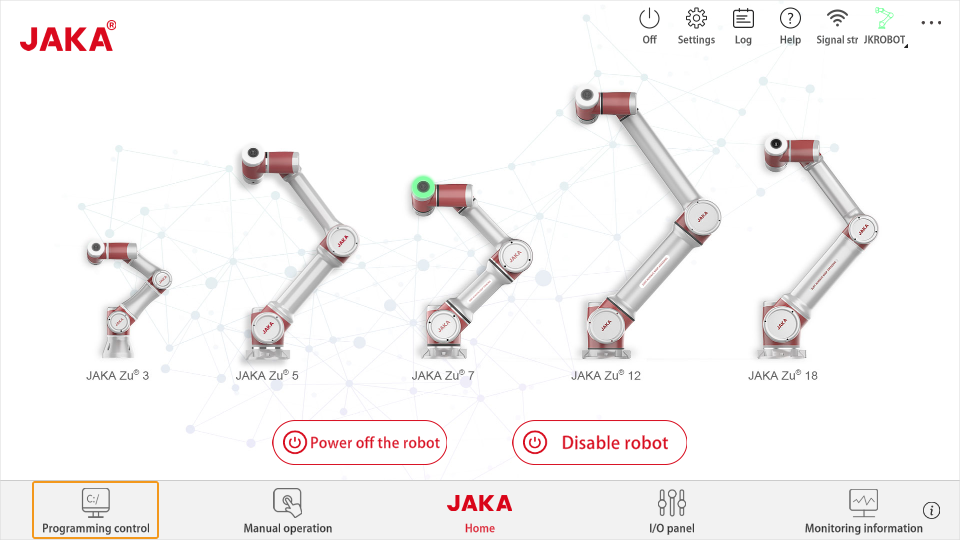
Go back to JAKA’s main interface, click Programming control in the lower left corner.
-
Click the folder icon on the right to open the file, and click Import.

.
+ image::jaka/setup-instructions/jaka_10.png[align="center",width=600]
-
Select the files in the figure below and click Ok.
The files in the figure below are stored in Mech-Center\Robot_Interface\Robot_Plugin\JAKA_Addonin the installation directory of Mech-Mind Software Suite.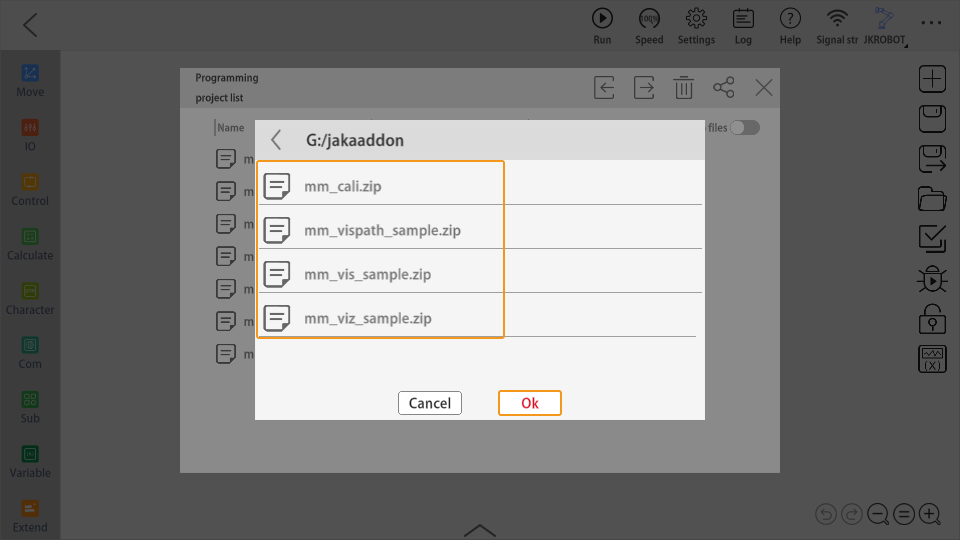
Create System Variables
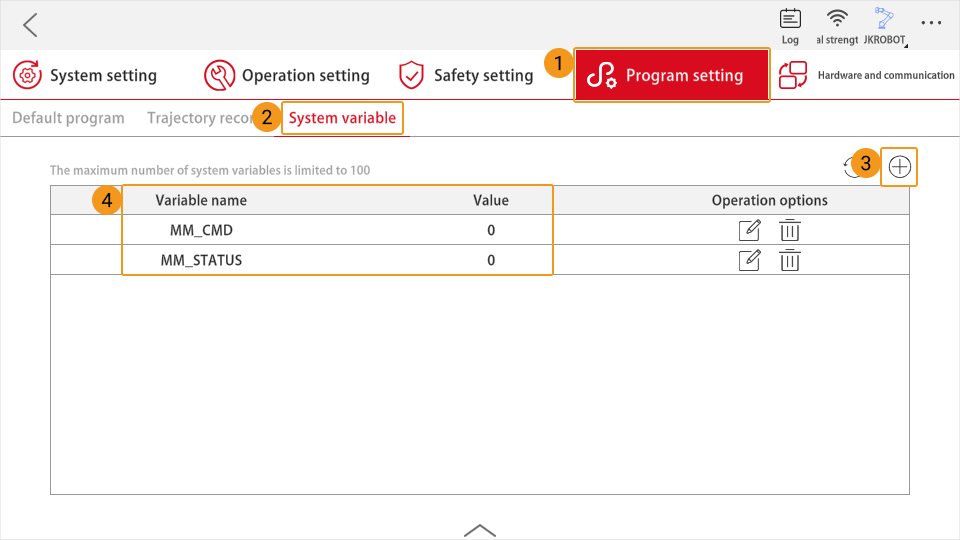
Before running the program, you should create two system variables, or else an error will occur.
-
Go back to JAKA’s main interface, click Settings in the upper right corner.
-
Click Program setting → System variable, and click the + button in the upper right corner. Create two variables (MM_CMD and MM_STATUS) as shown below. The initial values are 0.
Test Robot Connection
-
Go back to JAKA’s main interface, click Programming control in the lower left corner.
-
Click + on the right to create a new program.
-
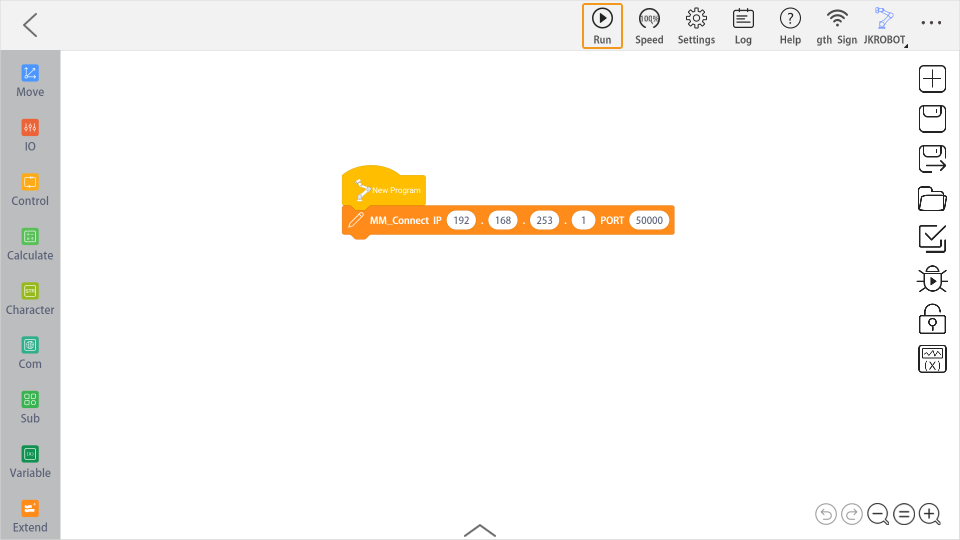
Click Extend in the lower left corner, and drag MM_Connect to add it to the NewProgram, and then set the IP address and port number of the IPC.
The host IP address and the robot IP address must be on the same subnet. 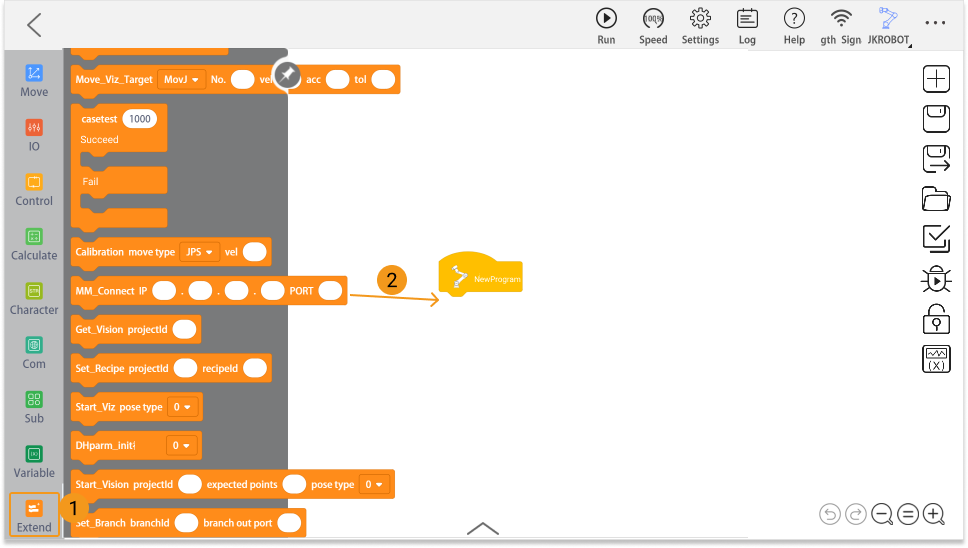
-
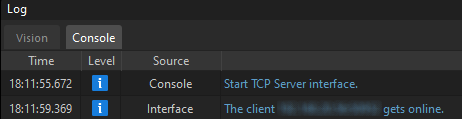
Click Run on the toolbar.
-
If the robot is connected successfully, the Console tab of Mech-Vision Log panel will display a note.