Set up Standard Interface Communication with JAKA
This guide shows how to set up the Standard Interface communication with a JAKA robot.
Check Controller and Software Compatibility
Before loading the Standard Interface program, please check whether the version of the controller software is 1.7.
-
If the version of the robot controller is lower than 1.7, please upgrade it to 1.7. The following steps involve the JAKA AddOn program, requiring a controller program version of 1.7.
Version 1.7 is the one used for adaptation. For versions later than 1.7, you may refer to this guide for operation. If any issues occur, please contact Mech-Mind Technical Support. -
If it is inconvenient to update the controller software version, users can modify the JAKA program to support standard interface communication. This method allows users to avoid installing the JAKA addon plugin program, and it has no specific requirements for the controller software version.
Set up the Network Connection
Connect the Hardware
You can select one of the following two methods to complete hardware setup:
-
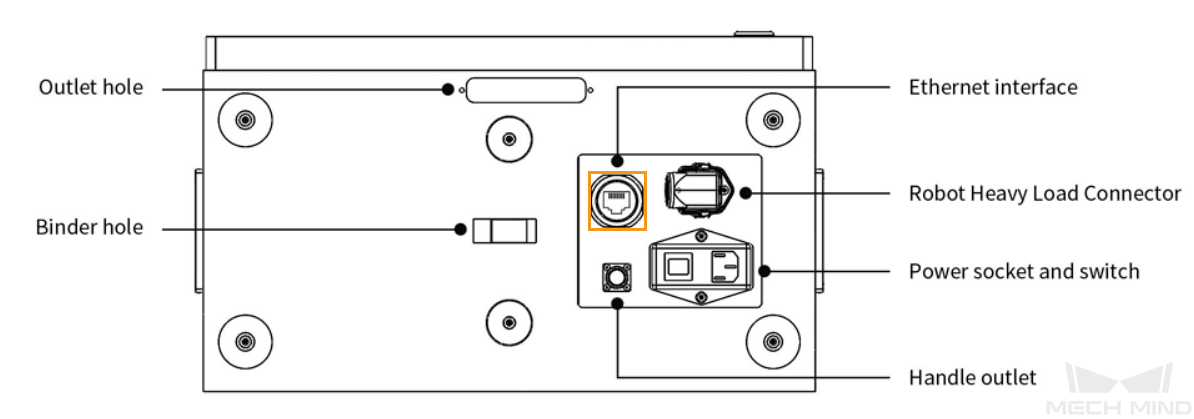
Plug the IPC’s Ethernet cable into the Ethernet interface inside the accessory panel on the front of the controller, as shown below.
-
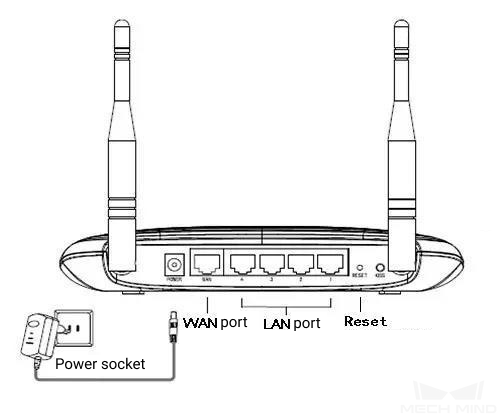
Connect both the IPC and the controller to the same router with Ethernet cables. The IP addresses of the two must be in the same subnet.
Set the IP Address
-
In the IPC, go to the JAKA official website to download the JAKA Zu App software. Please make sure that the JAKA Zu App version is consistent with the controller version.
-
If you are using a teach pendant, you do not need to download JAKA Zu App. In this case, skip this step.
-
In this example, JAKA Zu App V1.7.0 is used. If you are using a different version, the interface and functionality may vary slightly, but this example can still serve as a reference.
-
-
Open JAKA APP, click Disconnected in the upper right to Connect robot, and then click
 to enter the password.
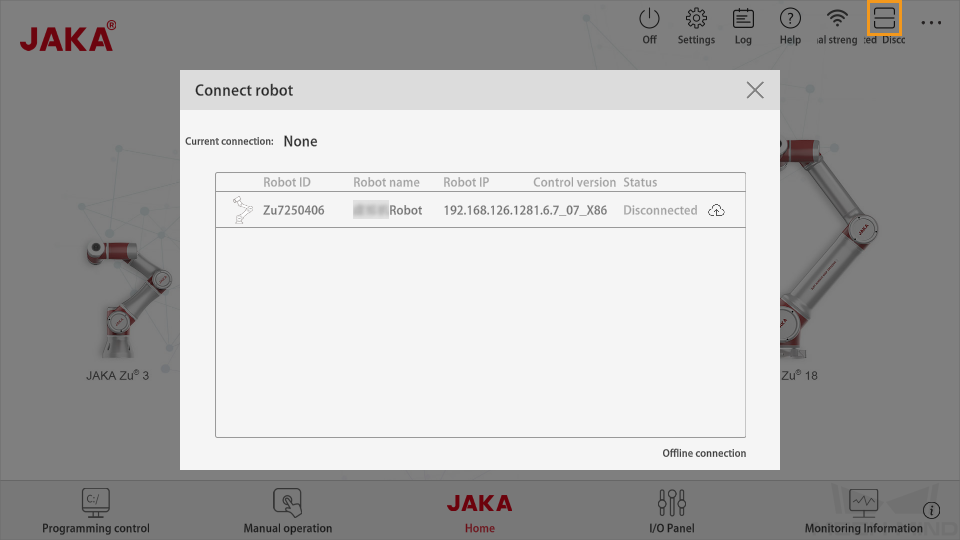
-
Enter the password for administrator (the default password is jakazuadmin), and click Connect robot.

-
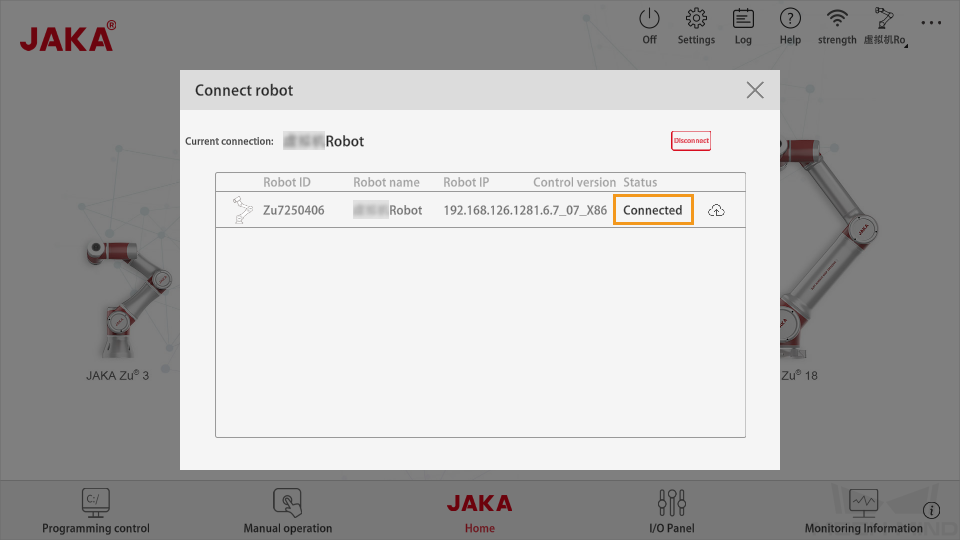
If successfully connected, the Status of the robot should change to Connected.
-
Click Power on the robot and then Enable robot to power on the robot.
After powering on the robot, make sure to enter the end-effector load value. Otherwise, the robot may experience significant up-and-down fluctuation at the moment of startup, which can lead to potential dangers. 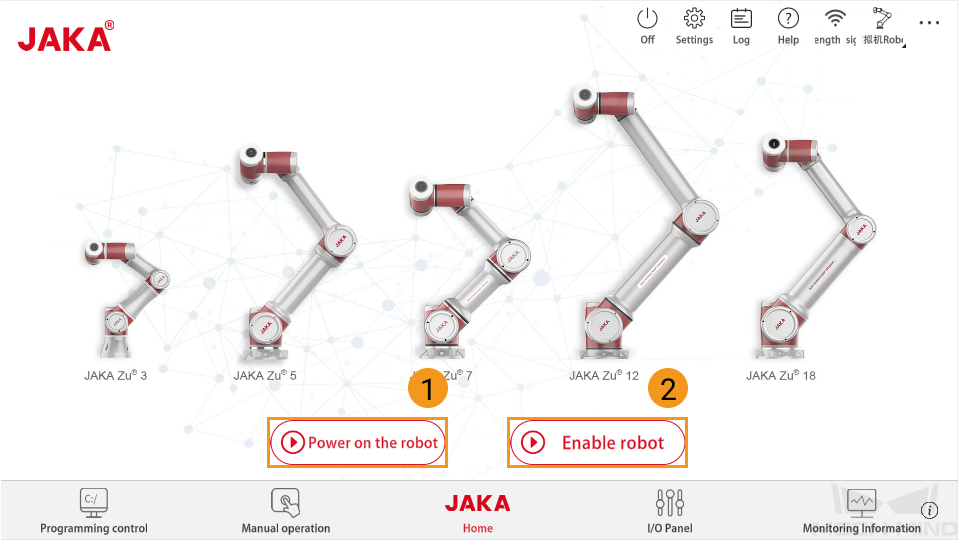
-
Click settings
 in the upper right. Go to to set the IP address. JAKA APP should be in the same subnet as the IPC.
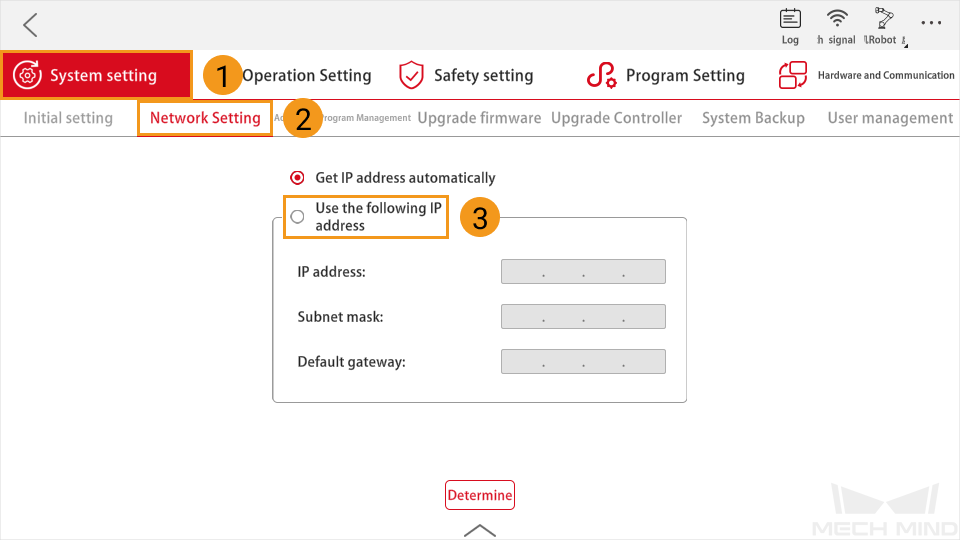
-
In the IPC, set the IP address of the IPC.
Make sure that the IP addresses of the IPC and the robot are on the same subnet.
Set up Robot Communication Configuration
-
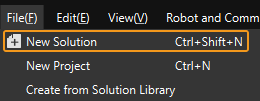
Open Mech-Vision. You may enter different interfaces. Create a new solution according to the instructions below.
-
If you have entered the Welcome interface, click New blank solution.

-
If you have entered the main interface, click on the menu bar.
-
-
Click Robot Communication Configuration on the toolbar of Mech-Vision.
-
In the Robot Communication Configuration window, complete the following configurations.
-
Click the Select robot drop-down menu, and select Listed robot. Click Select robot model, and select the robot model that you use. Then, click Next.
-
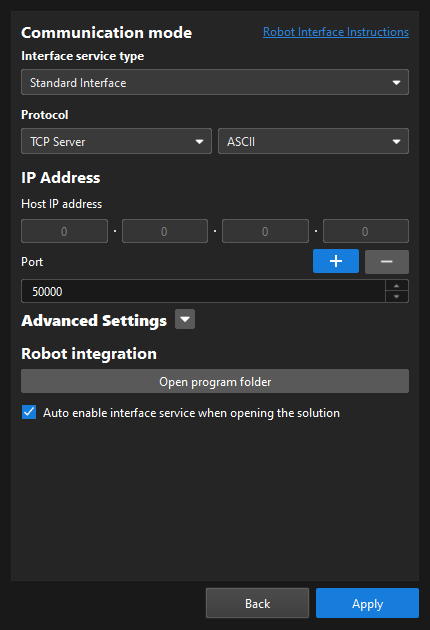
In the Communication mode section, select Standard Interface for Interface service type, TCP Server for Protocol, and ASCII for the protocol format.
-
It is recommended to set the port number to 50000 or above. Ensure that the port number is not occupied by another program.
-
(Optional) Select Auto enable interface service when opening the solution.
-
Click Apply.
-
-
On the main interface of Mech-Vision, make sure that the Robot Communication Configuration switch on the toolbar is flipped and has turned blue.

Load the Program Files to the Robot
Load the AddOn File
-
On the IPC, navigate to
Communication Component\Robot_Interface\Robot_Plugin\JAKA_Addon, open the folder corresponding to your controller version (e.g., 1.7.0), and copy the mm_custom_cmd.tar.gz file to the device where the JAKA Zu APP is located. -
Click Settings in the upper-right corner.

-
Click Additional program → + → ···.
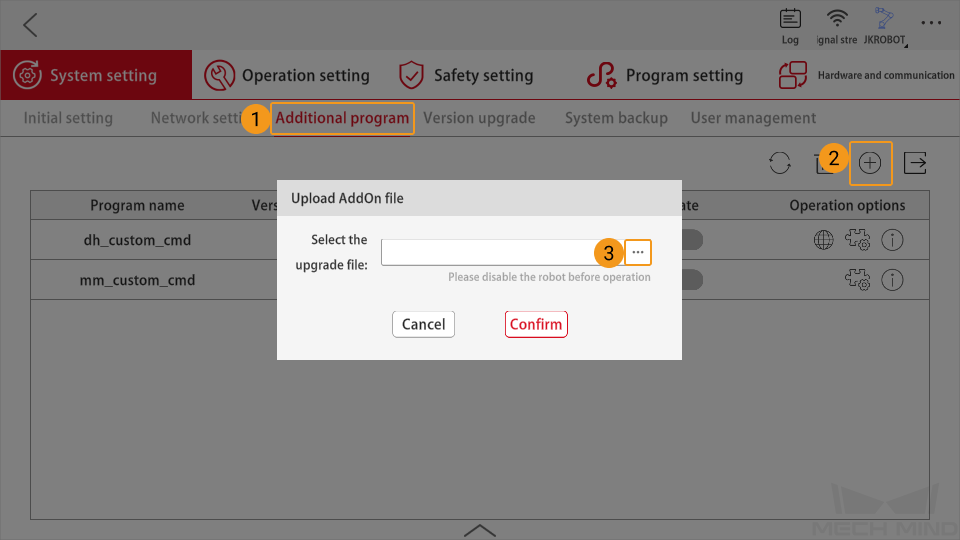
-
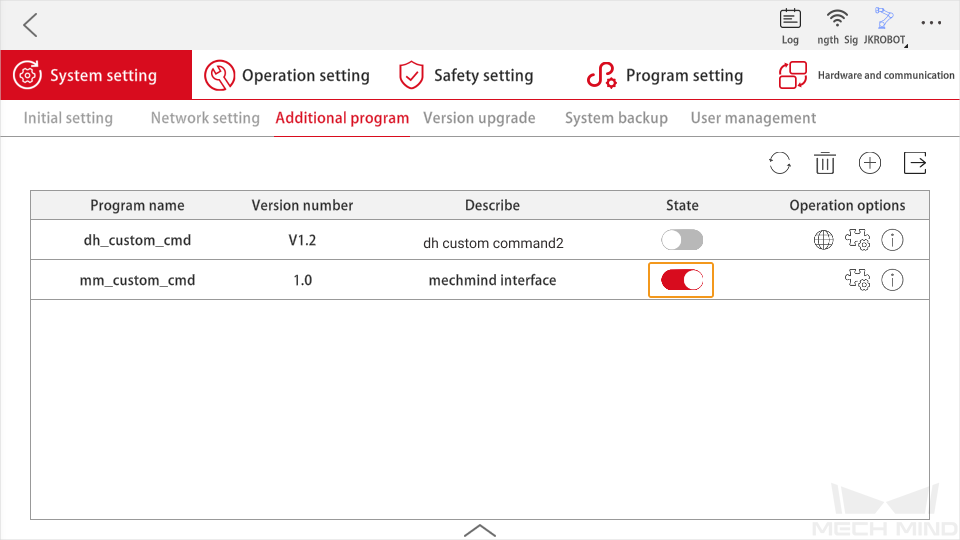
Select the mm_custom_cmd.tar.gz file and click OK. Then the program information of mm_custom_cmd will appear in the list.

-
Click the State button of mm_custom_cmd to activate it.
Load the Example Programs
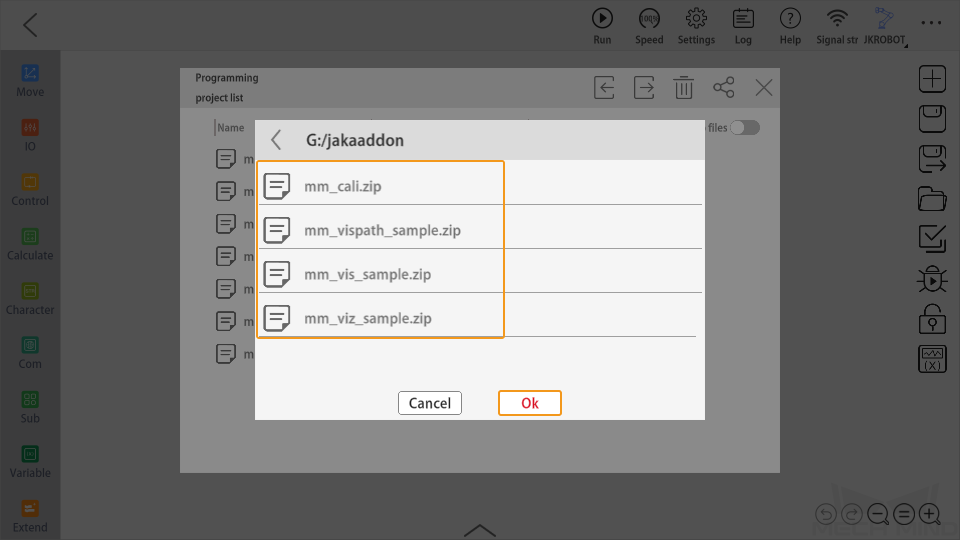
On the IPC, navigate to Communication Component\Robot_Interface\Robot_Plugin\JAKA_Addon and open the folder corresponding to your controller version (e.g., 1.7.0). In the folder, mm_cali.zip, mm_vis_sample.zip, mm_vispath_sample.zip, and mm_viz_sample.zip are example program files. You should copy the program files and paste them to the device with JAKA Zu APP installed.
-
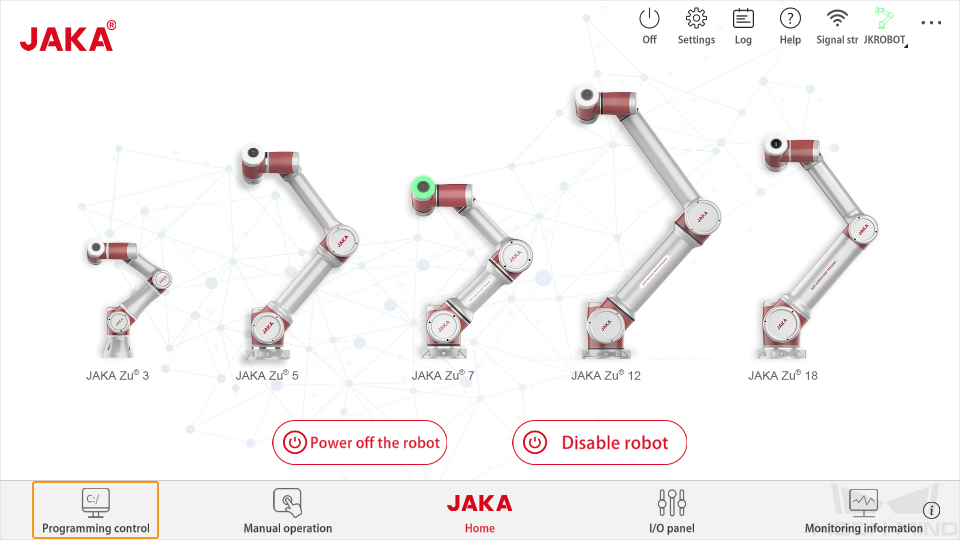
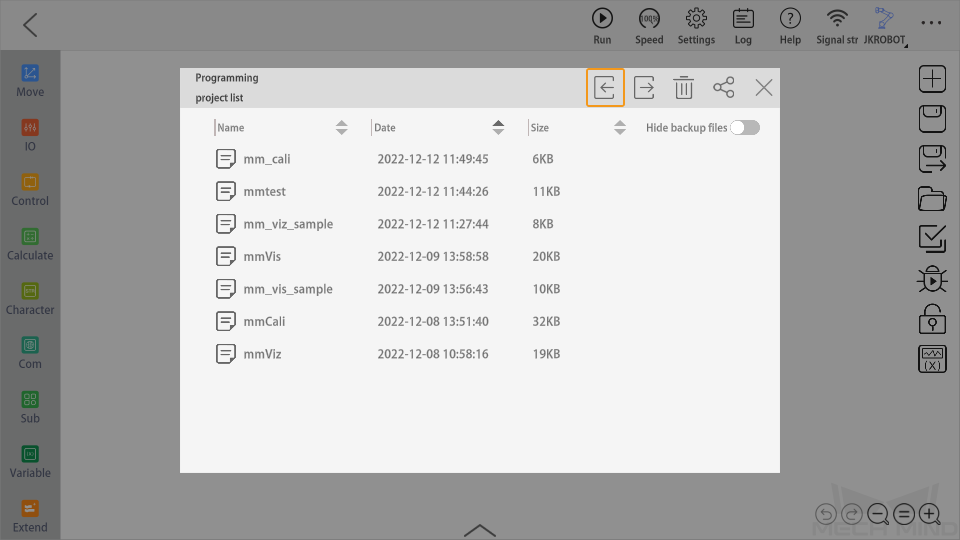
Go back to JAKA’s main interface, and click Programming control in the lower left corner.
-
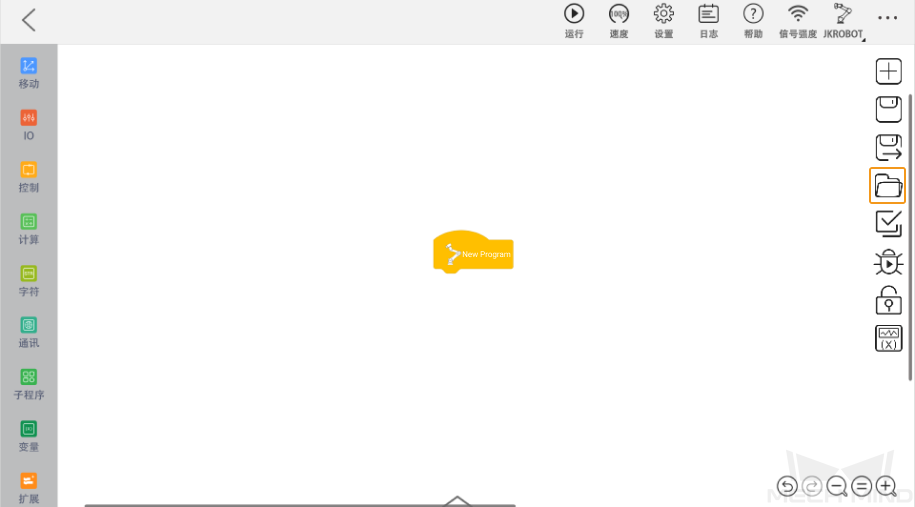
Click the folder icon on the right side.
-
Click the import icon.
-
Select the files in the figure below and click Ok.
Create System Variables
Before running the program, you should create two system variables, or else an error will occur.
-
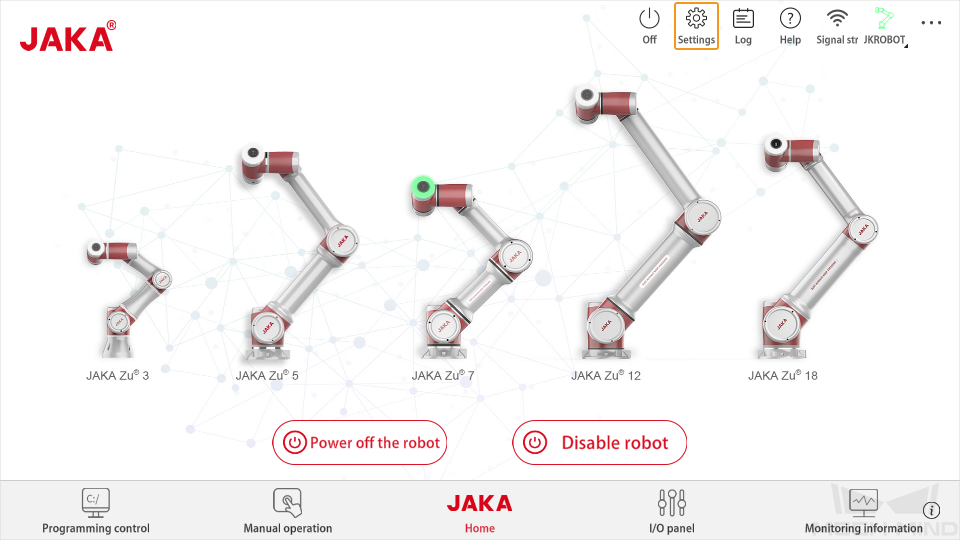
Go back to JAKA’s main interface, and click Settings in the upper right corner.
-
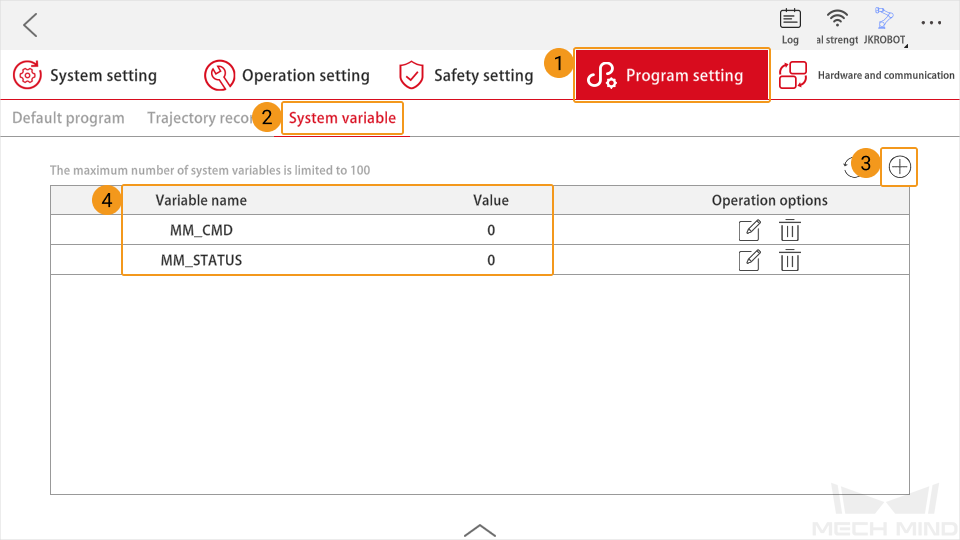
Click Program setting → System variable, and click the + button in the upper right corner. Create two variables (MM_CMD and MM_STATUS) as shown below. The initial values are 0.
Test Robot Connection
-
Go back to JAKA’s main interface, and click Programming control in the lower left corner.
-
Click + on the right to create a new program.

-
Click Extend in the lower left corner, drag MM_Connect to add it to the NewProgram, and then set the IP address and port number of the IPC.
The host IP address and the robot IP address must be on the same subnet. 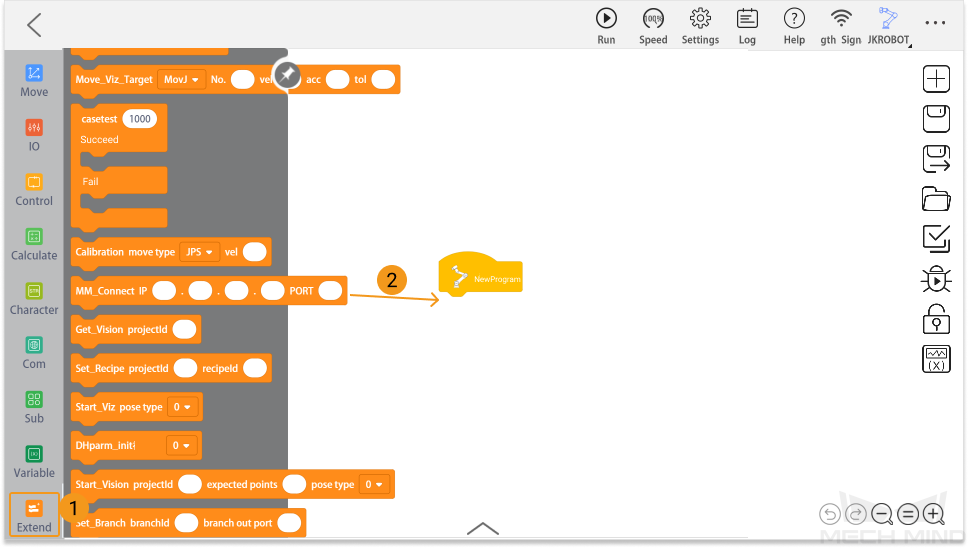
-
Click Run on the toolbar.

-
If the robot is connected successfully, the Console tab of the Log panel of Mech-Vision will display a record.
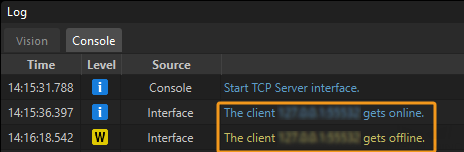
Once the communication test is successful, continue with the next section to set the DH parameters.
Set the DH Parameter
Due to differences between the actual and theoretical DH parameters of each collaborative robot, the simulated robot in Mech-Viz will show a deviation in flange pose after synchronizing joint positions with the real robot. In high-precision applications, please follow the method below to set the DH parameter in order to minimize errors.
-
Open Mech-Viz and create a new blank project. Select the robot model of JAKA you want to use.
-
On the JAKA homepage, click the upper left logo icon 10 times, and then enter the password (default is JAKAAMAZING). The following interface will show up.
-
On the left side of Mech-Viz, right-click the robot name, select Open Robot File Directory, and then open the
xxxx_algo.jsonfile. -
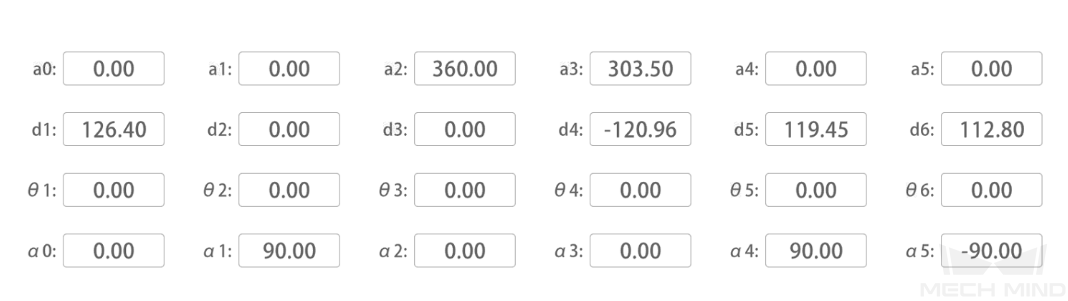
Enter the [d1, a2, a3, d4, d5, d6] values in the above image to the dh field in the
xxxx_algo.jsonfile.Then, open and save thexxxx_algo.jsonfile. -
On the left side of Mech-Viz, right-click the robot name and select Reload Robot.
Due to the inability to adjust the shoulder_offset and elbow_offset values in the file of xxxx_algo.json.json, there may still be some errors in the robot’s motion.