Kawasaki Basic Operations
This topic introduces some basic operations of Kawasaki robots.
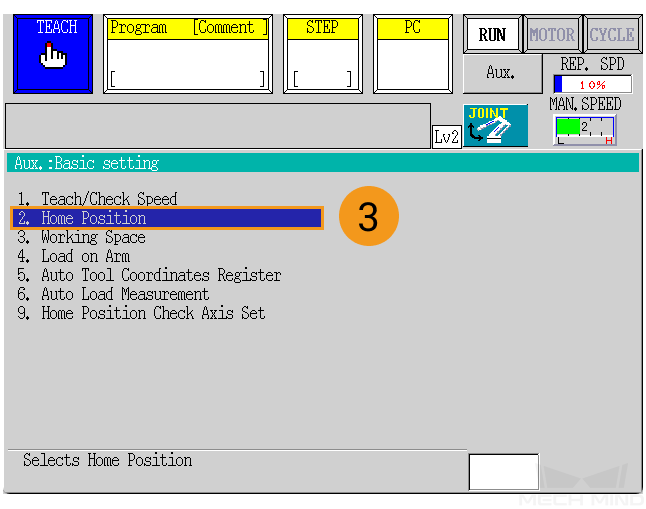
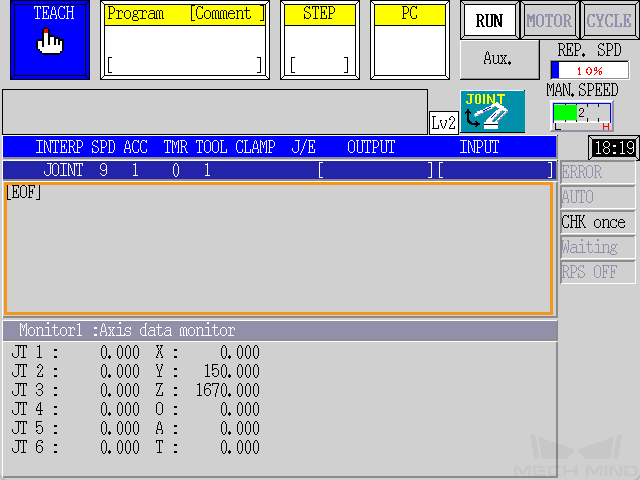
Set the HOME Position
-
Select .
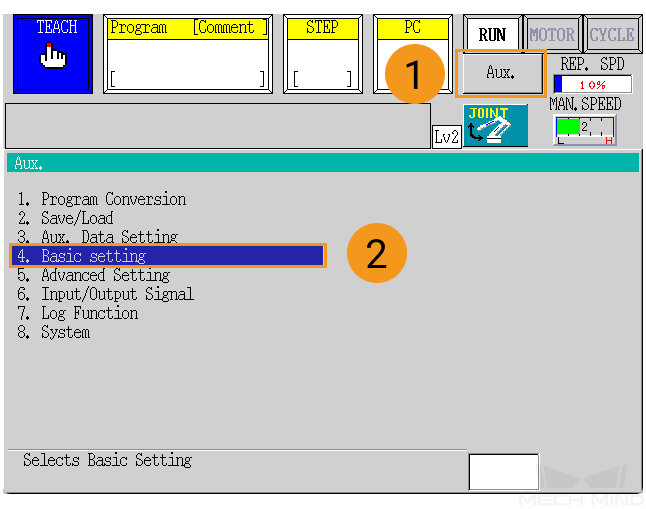
-
Press 2. Home Position.
-
Select the Key Entry checkbox, set the degrees of all joints at the HOME position, and then press the
Enterkey to confirm. The message “Setting Complete” will be displayed at the bottom.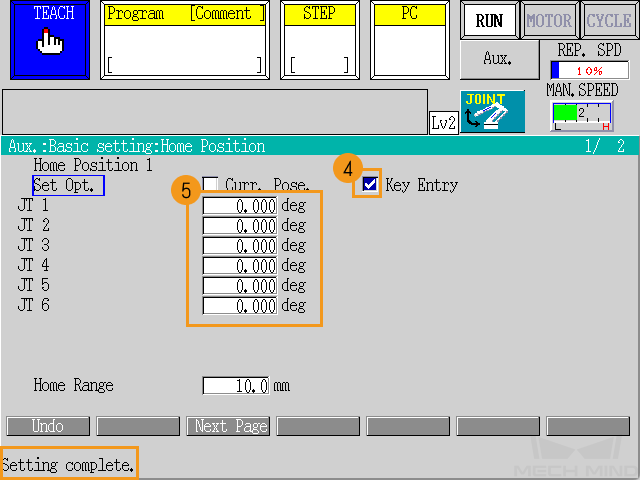
Alternatively, you can manually control the real robot to move to the desired HOME position, and select the Curr. Pose. checkbox and then press the Enter key.
Set the Robot TCP
-
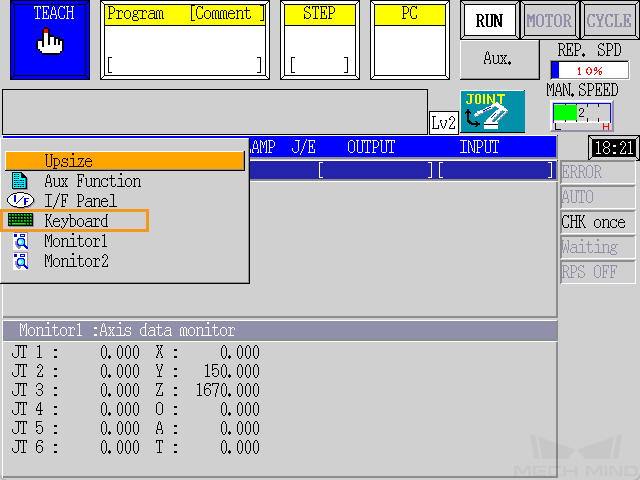
In the TEACH mode, press the blank area in the middle.
-
In the prompted drop-down list, select Keyboard.
-
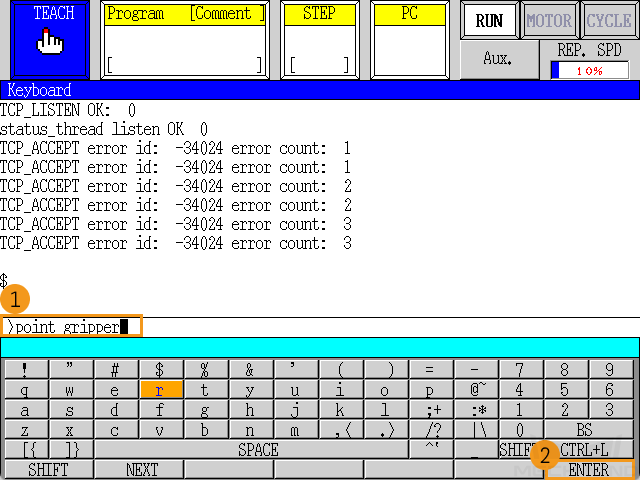
Enter point gripper using the keyboard, and then press the ENTER key on the keyboard.
-
Enter the pose of the robot TCP using the keyboard, for example 0,0,200, and then press the ENTER key on the keyboard.

-
Press the ENTER key, and then press the
Rkey.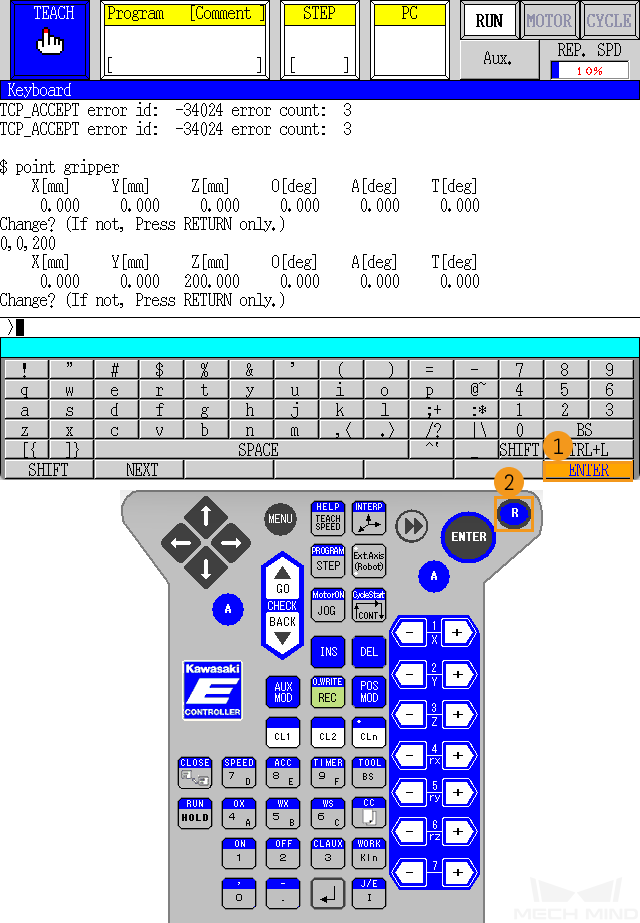
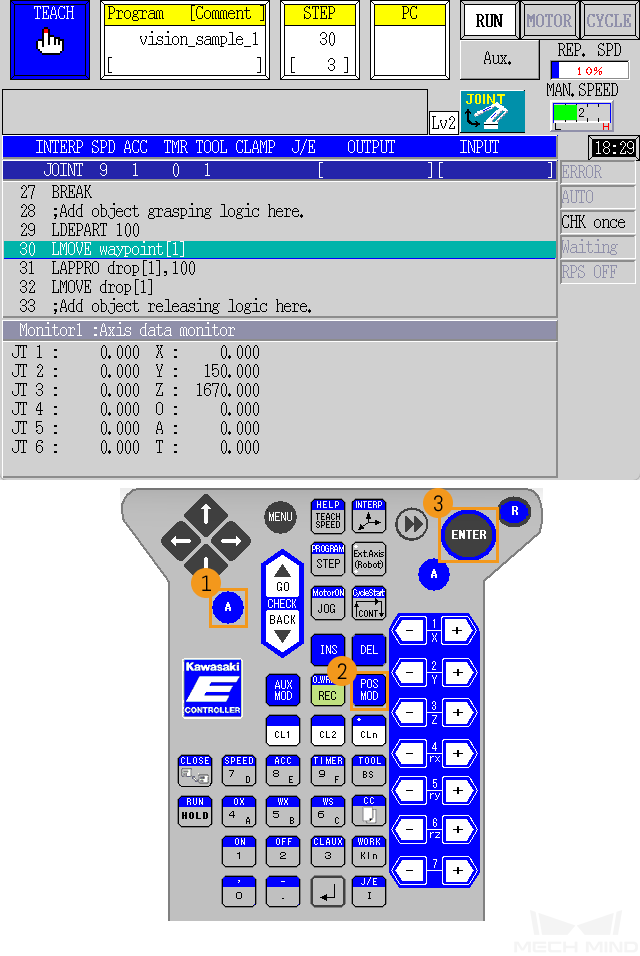
Teach Pose Data to the Robot
| Before performing this operation, you should have set up the Standard Interface communication. |
The following content shows how to teach pose data to the robot by using line 31 lmove waypoint[1] in the example program that obtains vision result from Mech-Vision as an example.
-
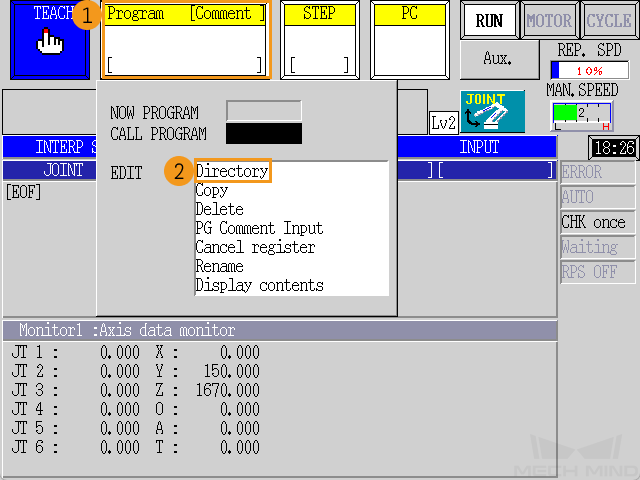
In the TEACH mode, press the Program area, and then press Directory.
-
On the Directory page, press Next Page to find and select the example program vision_sample_1, and press the
ENTERkey on the teach pendant to confirm.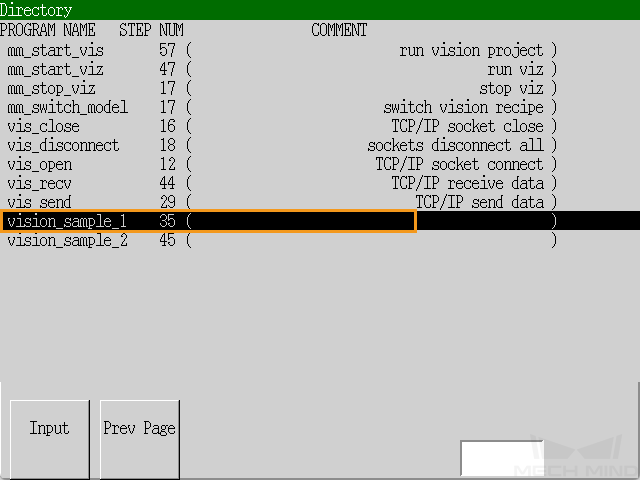
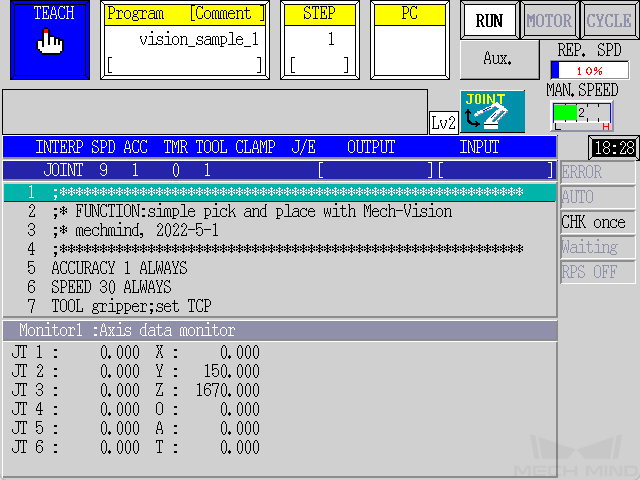
The following figure shows the interface after the program has been added.
-
Press the STEP area, enter 30 using the keyboard of the teach pendant for CALL STEP, and press the
ENTERkey to confirm. This will highlight line 30 on the screen.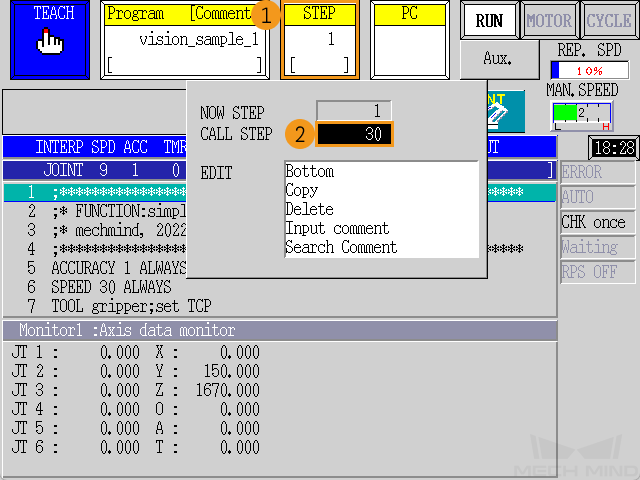
-
Manually move the real robot to the taught position, press the
A+POS MODkeys, and then press theENTERkey to confirm. Now, the value of waypoint[1] has changed to the pose data of the taught position.