Master-Control Communication Setup
This guide shows you how to set up Master-Control communication with a Doosan robot.
Preparation
Check Hardware and Software Versions
|
The models and versions listed below are tested and can be used. For other models and versions, you may refer to this guide for operation. If any issues occur, please contact Mech-Mind Technical Support. |
-
The robot belongs to the M-series, and the robot controller of this series is shown below.

-
Controller firmware version: V2.8.
Start the Robot and Teach Pendant
-
Open the power switch under the controller.
-
Press the power button at the upper left corner of the teach pendant.

-
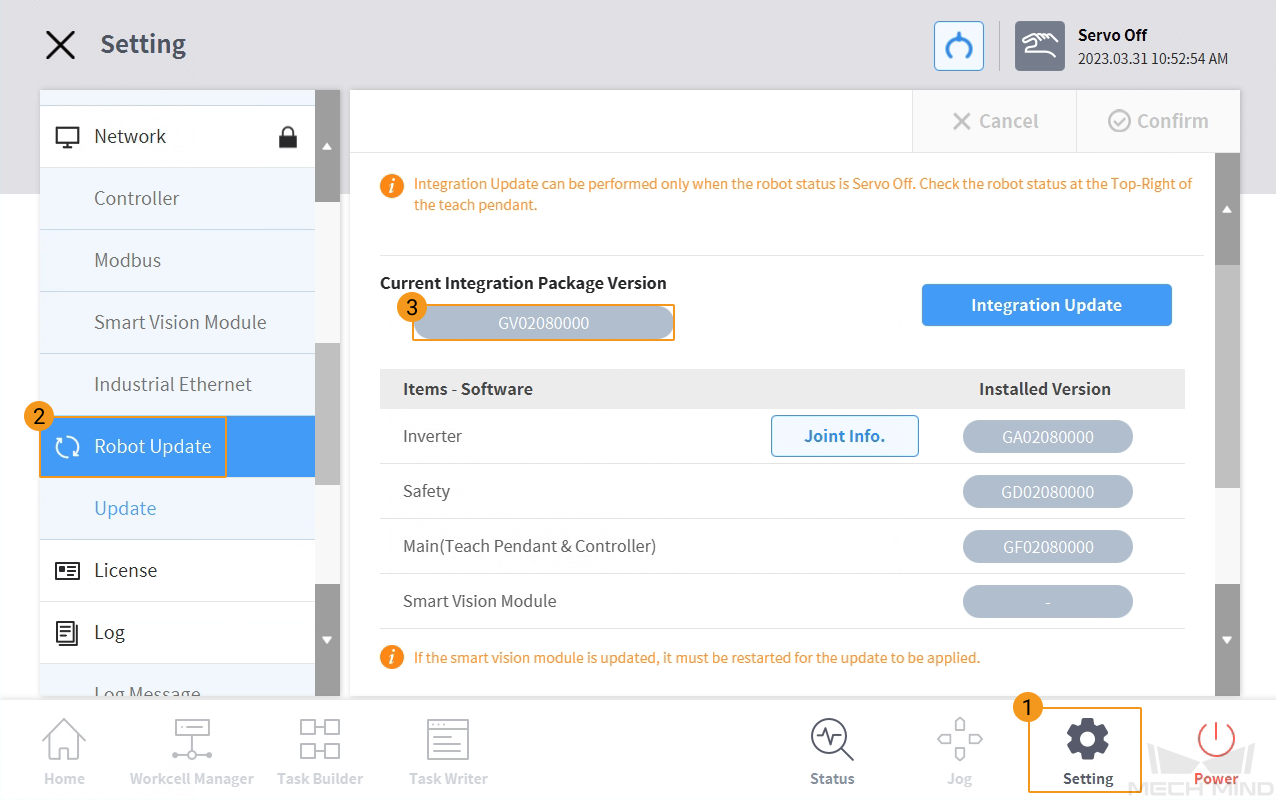
On the home screen of the teach pendant, press Setting in the bottom panel, and then press Robot Update to confirm whether the firmware, which is GV02080000 in the figure below, version is V2.8.
-
On the teach pendant, press Status in the bottom panel and then select On. A Safety Message window will pop up.
Before you press any options in the bottom panel, make sure you have closed windows of other options on the screen. 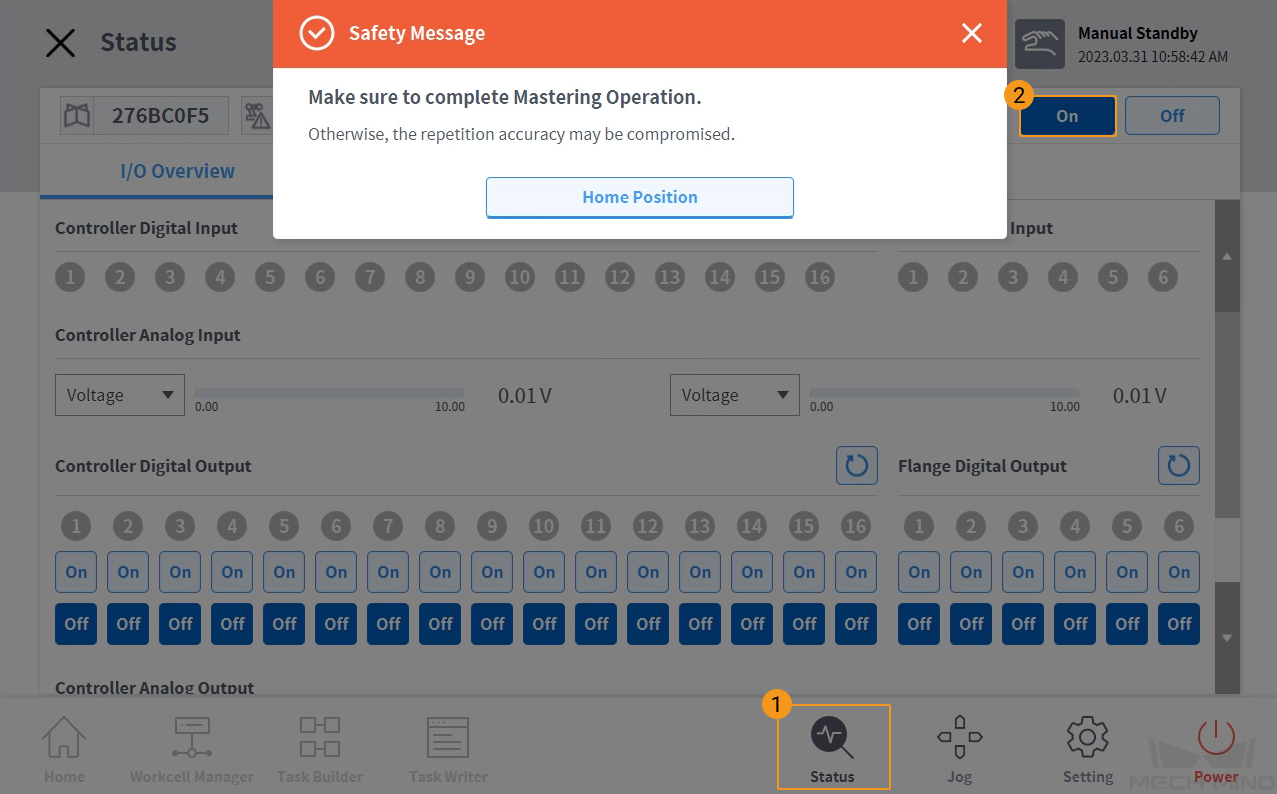
-
Press and hold the Home Position button until an Information Message window pops up. The pop-up window will disappear after a few seconds, which indicates that the robot has moved to the home position. Then press the exit button to close the Safety Message window.
Before performing this step, please make sure the safety of the personnel and robot to avoid collisions when the robot is moving. 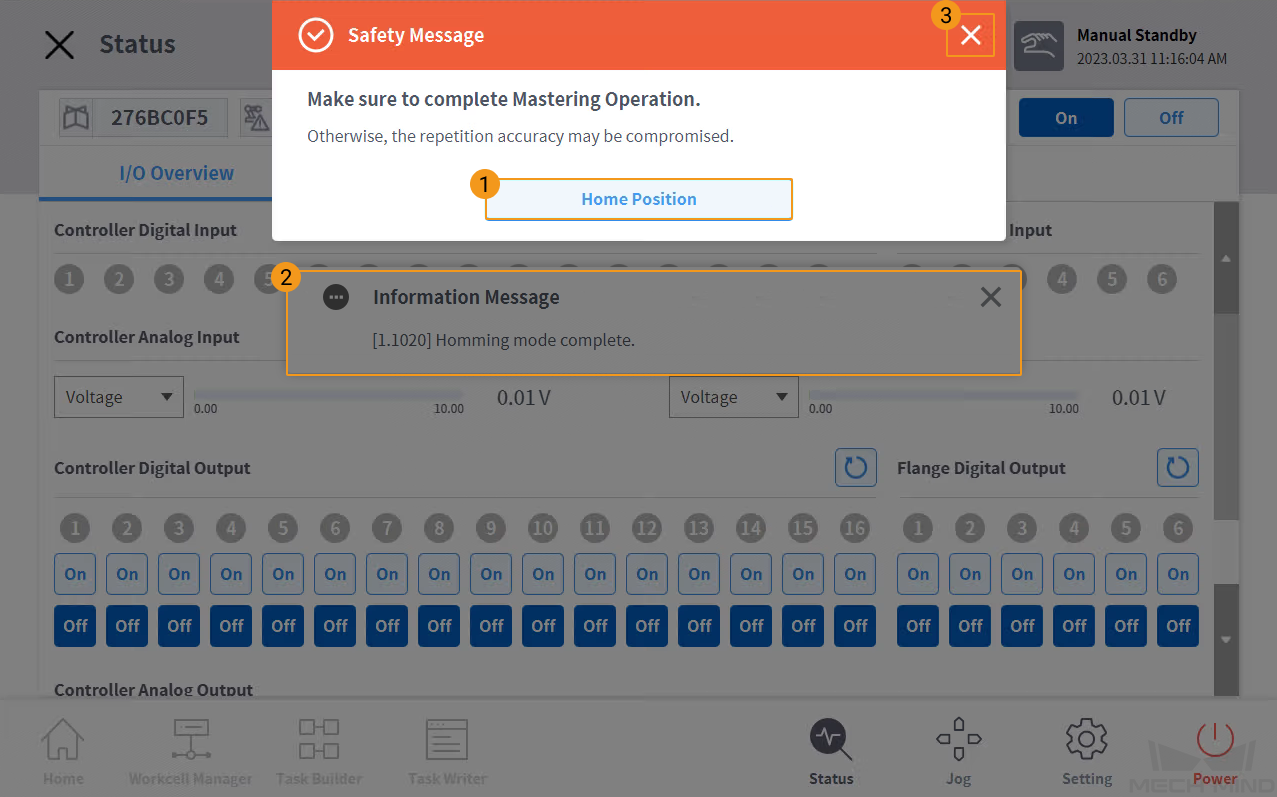
After the above operations, the status light of Servo in the upper right corner becomes green.
Set up the Network Connection
Connect the Hardware
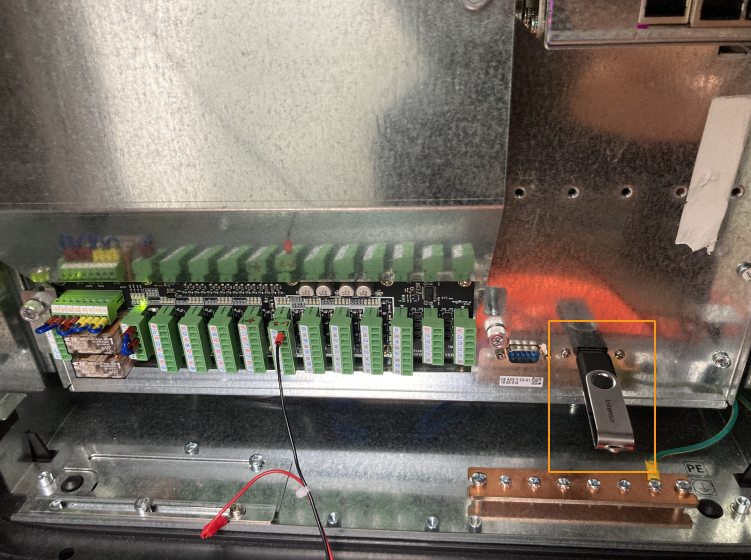
Use the Ethernet cable to connect the network ports of the IPC and the robot controller. All three network ports marked in the figure below can be used in TCP communication, and you can choose any one of them.

Set the IP Address
-
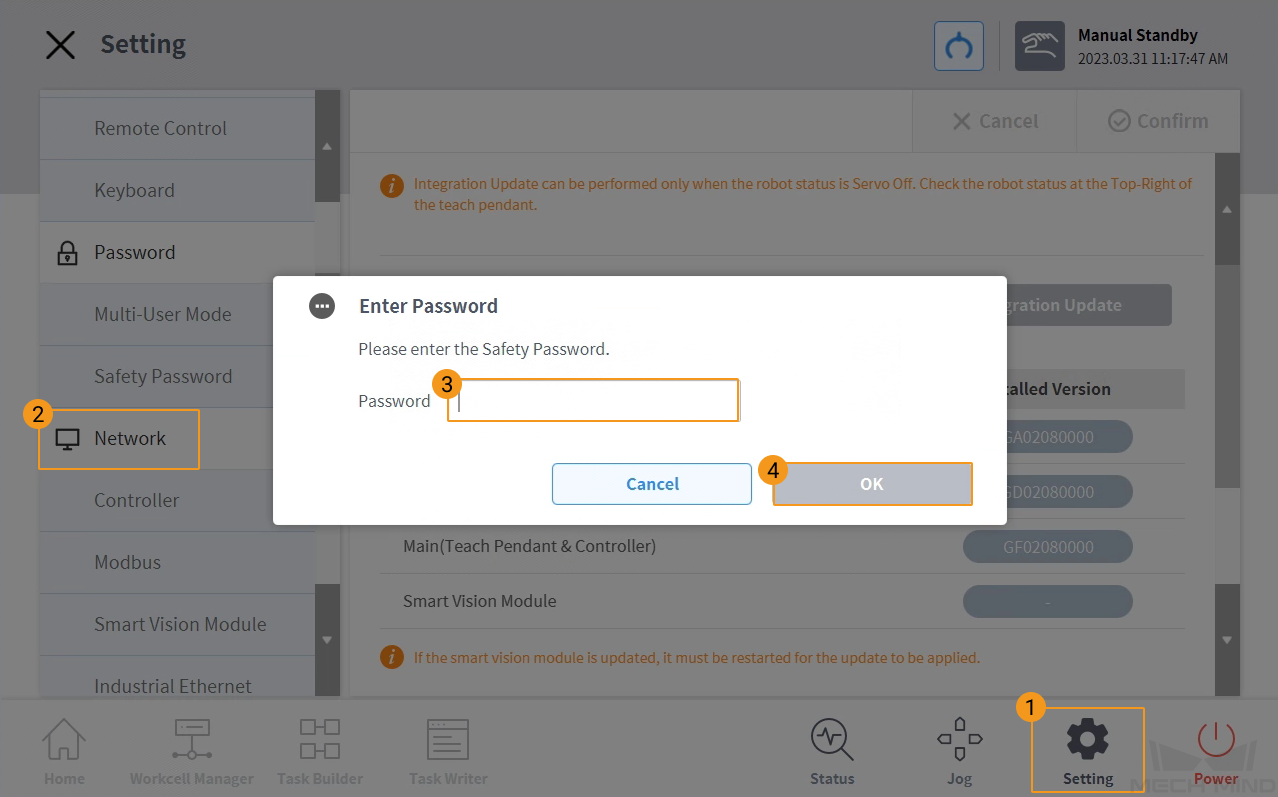
On the teach pendant, press Setting in the bottom panel and then press Network. Then enter the password and press OK. The default password is admin.
-
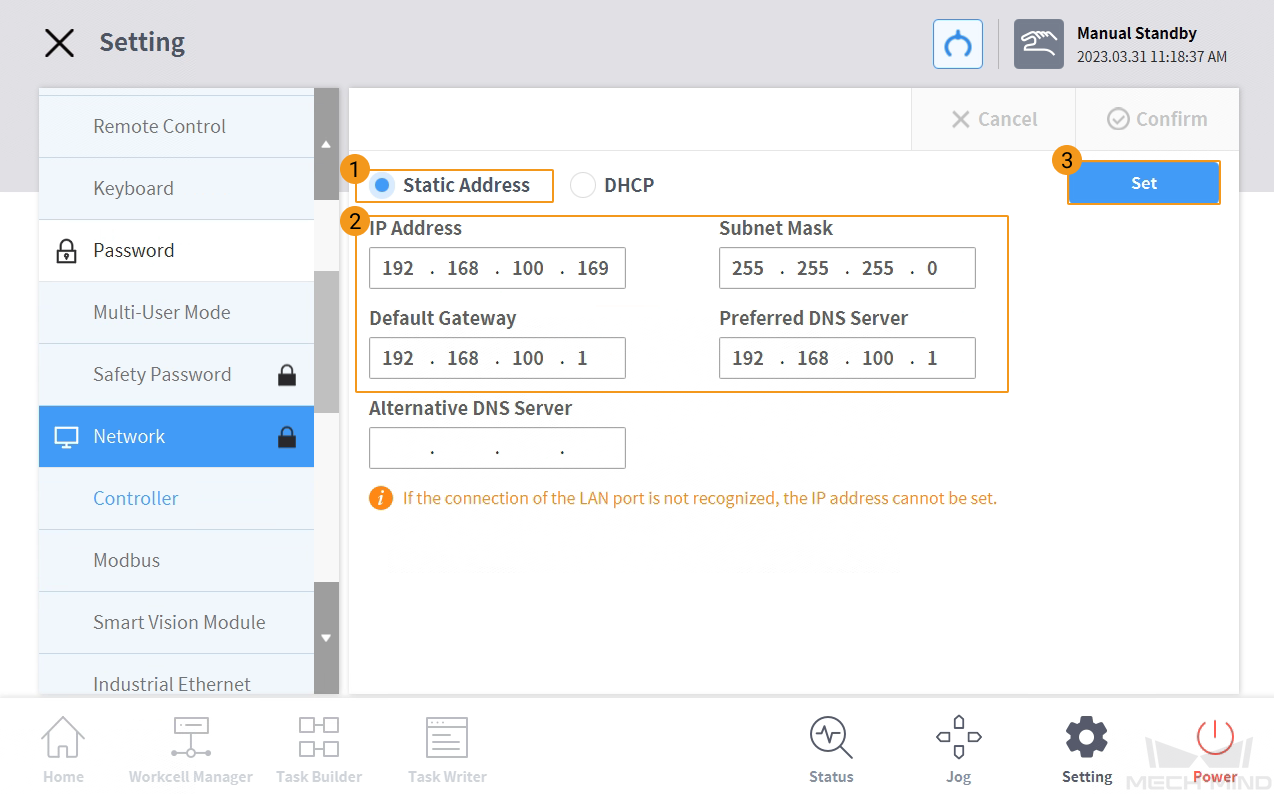
Press Static Address, set the IP address of the robot, and then press Set.
-
Set the IP address of the IPC.
To allow communication between the IPC and the robot controller, the IPC’s network port connected to the robot controller should be in the same subnet as the robot. This means that the network portions and subnet masks of the IP addresses should be the same. For example, 192.168.100.169/255.255.255.0 and 192.168.100.170/255.255.255.0 are in the same subnet.
Prepare Program Files
-
On the IPC, go to
Communication Component/Robot_Server/Robot_FullControl/doosan/Backup_Scriptfrom the installation directory where Mech-Vision and Mech-Viz are installed. -
Plug the USB flash drive into the USB port of the IPC. Copy the MM_Server.txt file in the Backup_Script folder to the USB flash drive and then remove the USB flash drive safely.
Load the Program Files to the Robot
| It is recommended to back up robot system files before loading Master-Control program files to avoid system corruption that may be caused by the loading operation. In case any issue occurs, you can use the backup file to restore the robot system. Please refer to Backup and Restore Robot Files for detailed instructions. |
-
Plug the USB flash drive with the program file into the USB port of the robot controller.
-
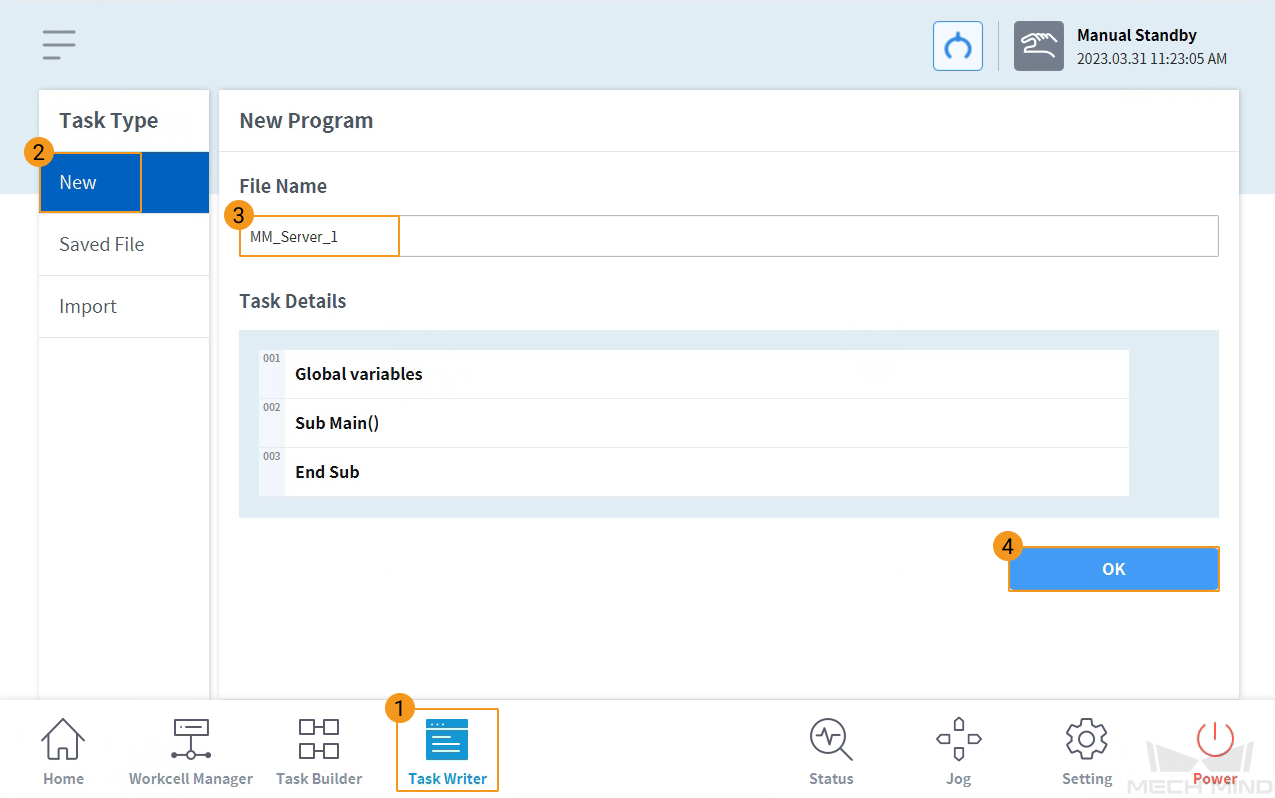
On the teach pendant, press Task Writer → New, enter a file name (e.g., MM_Server_1), and then press OK.
-
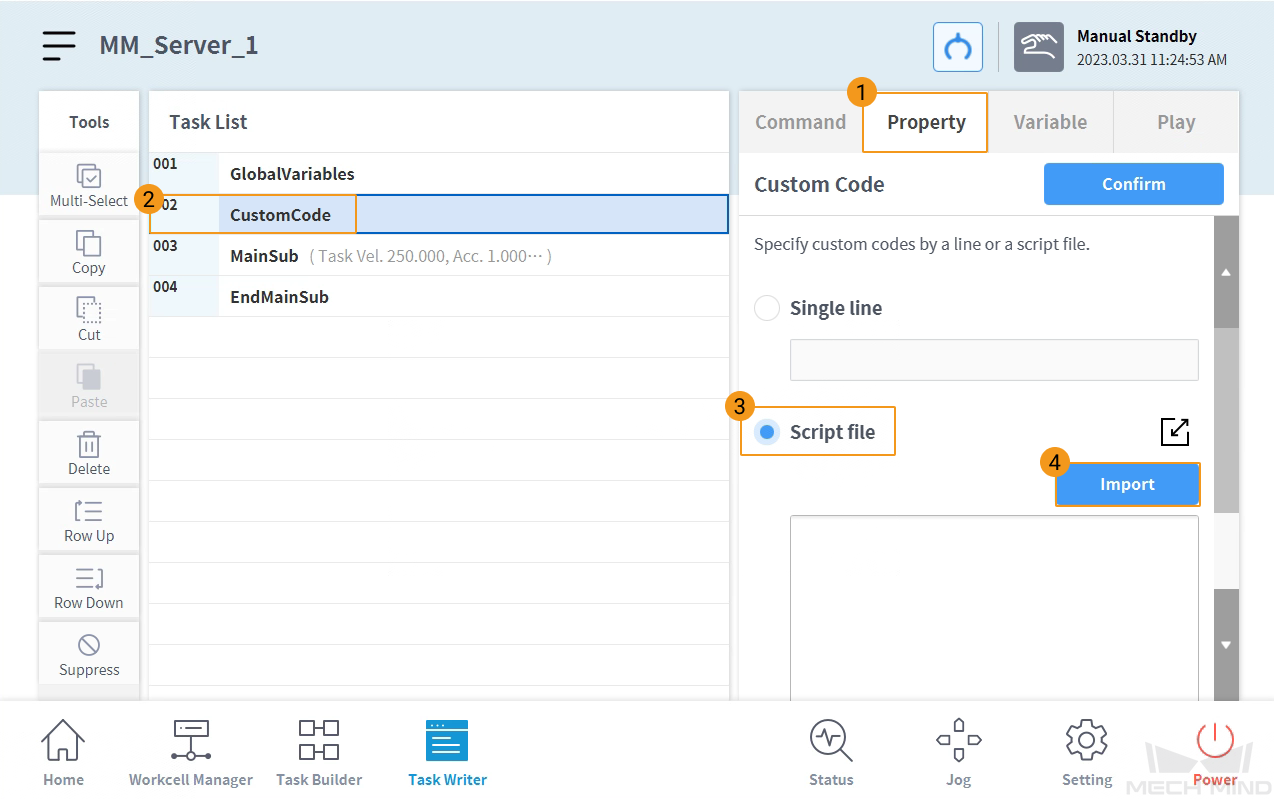
Press Property and select CustomCode. Then press Script file and Import in turn.
-
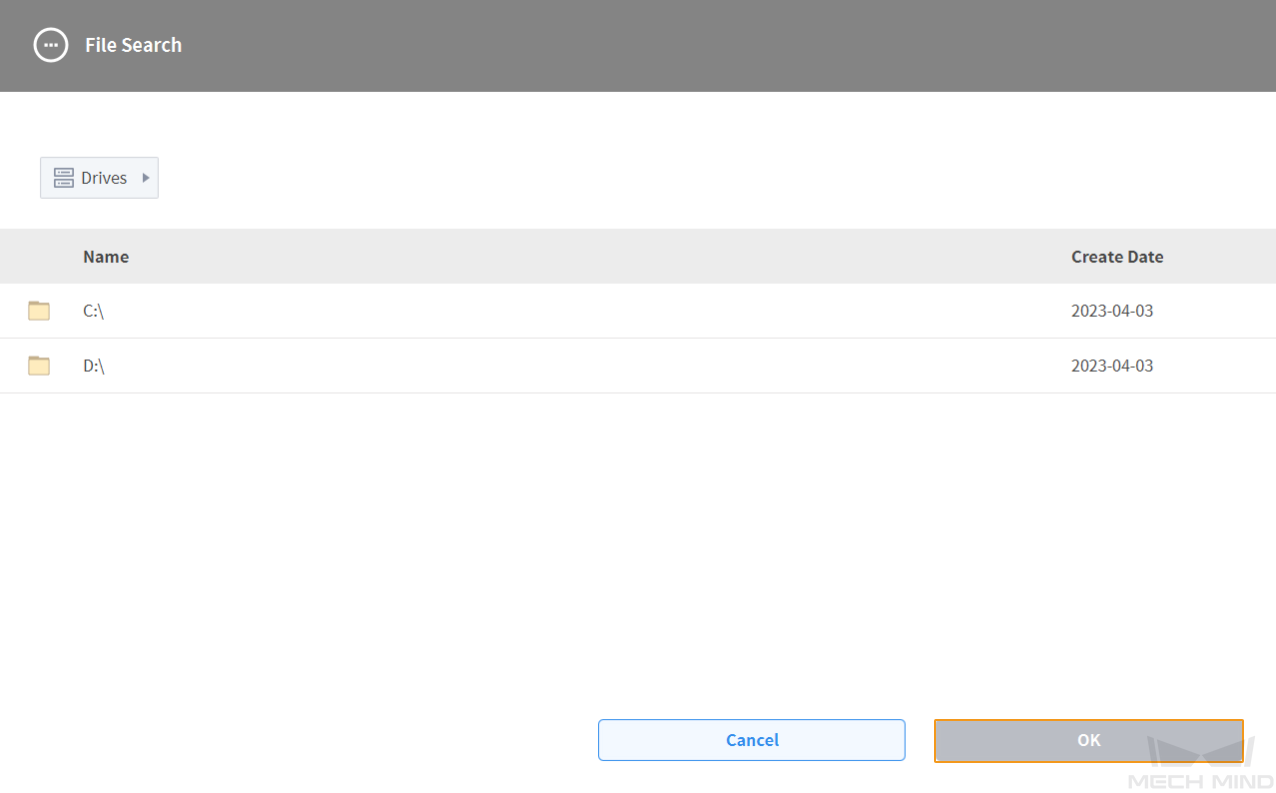
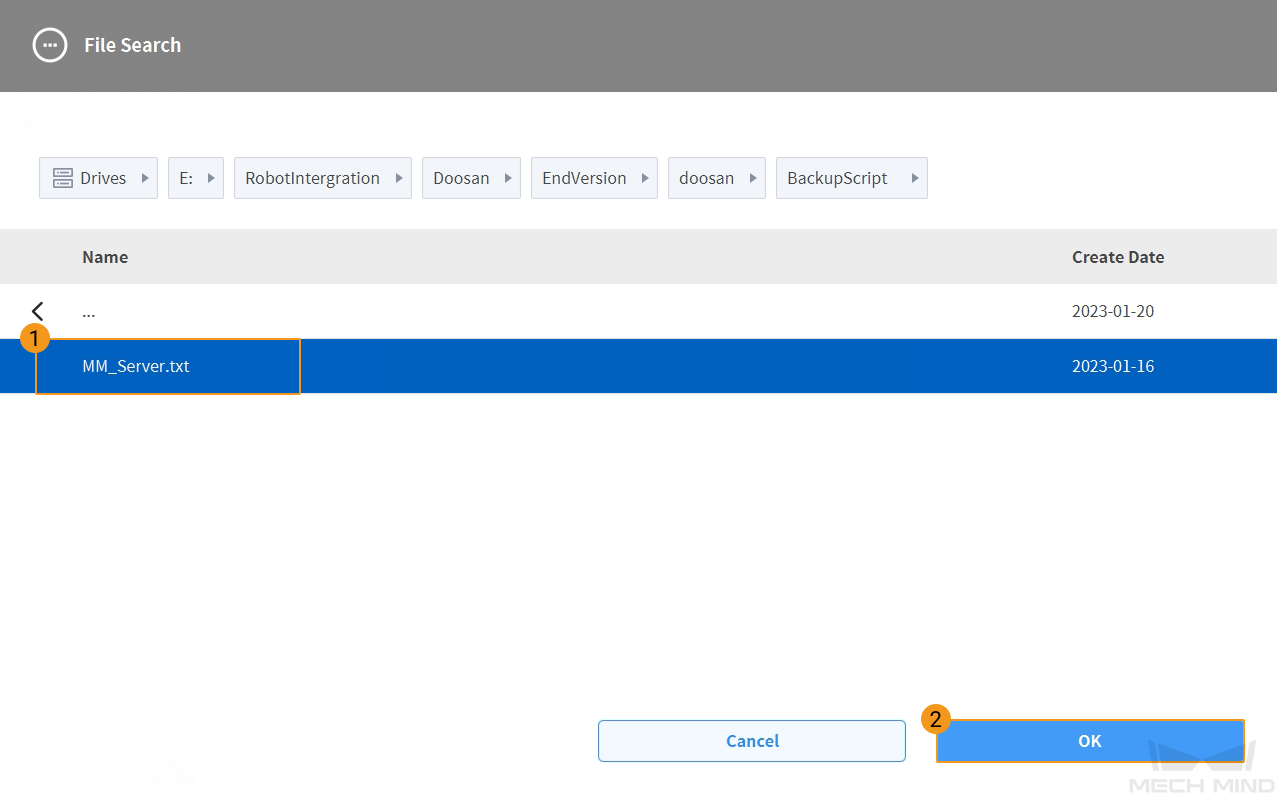
In the pop-up window, locate and select the MM_Server.txt file, and press OK at the end.
-
Press Confirm and then Save.

Test Master-Control Communication
-
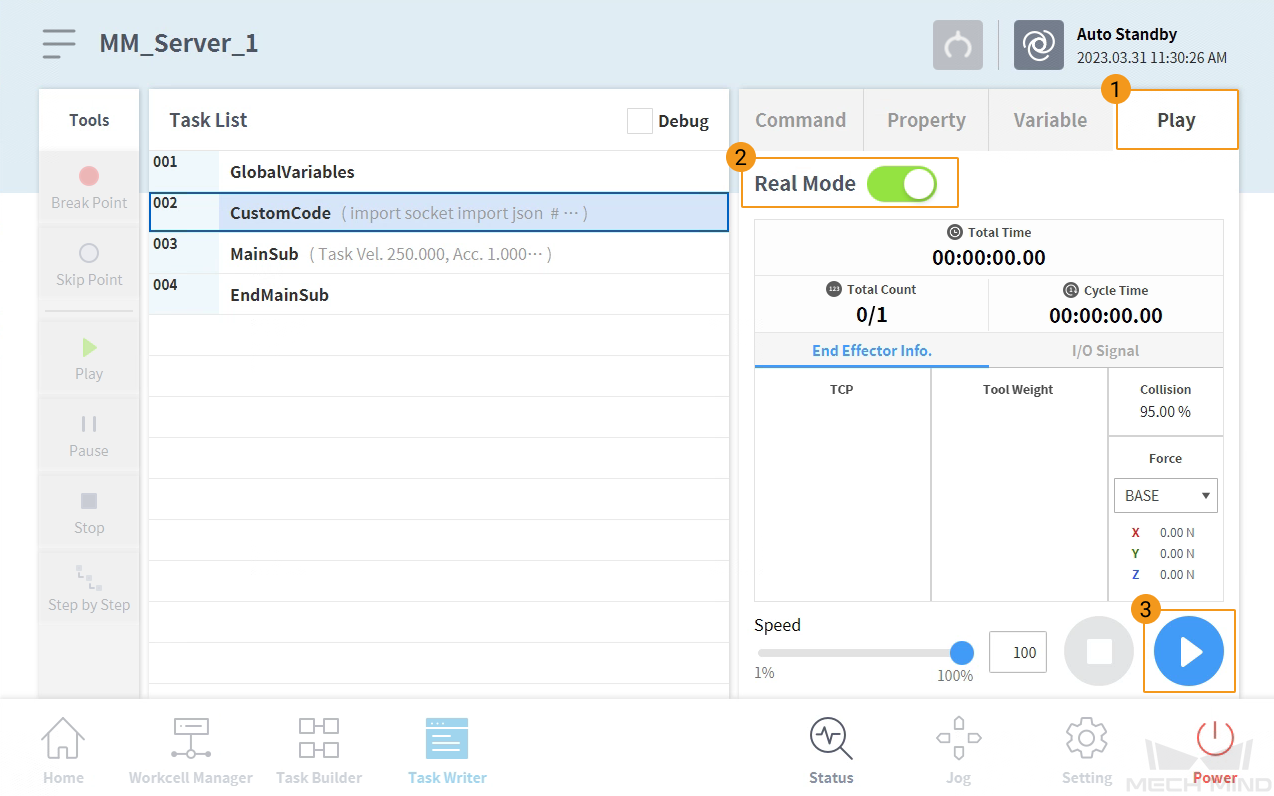
On the teach pendant, press Play and enable the Real Mode. Reduce the robot speed appropriately and press the run button to run the Master-Control program.
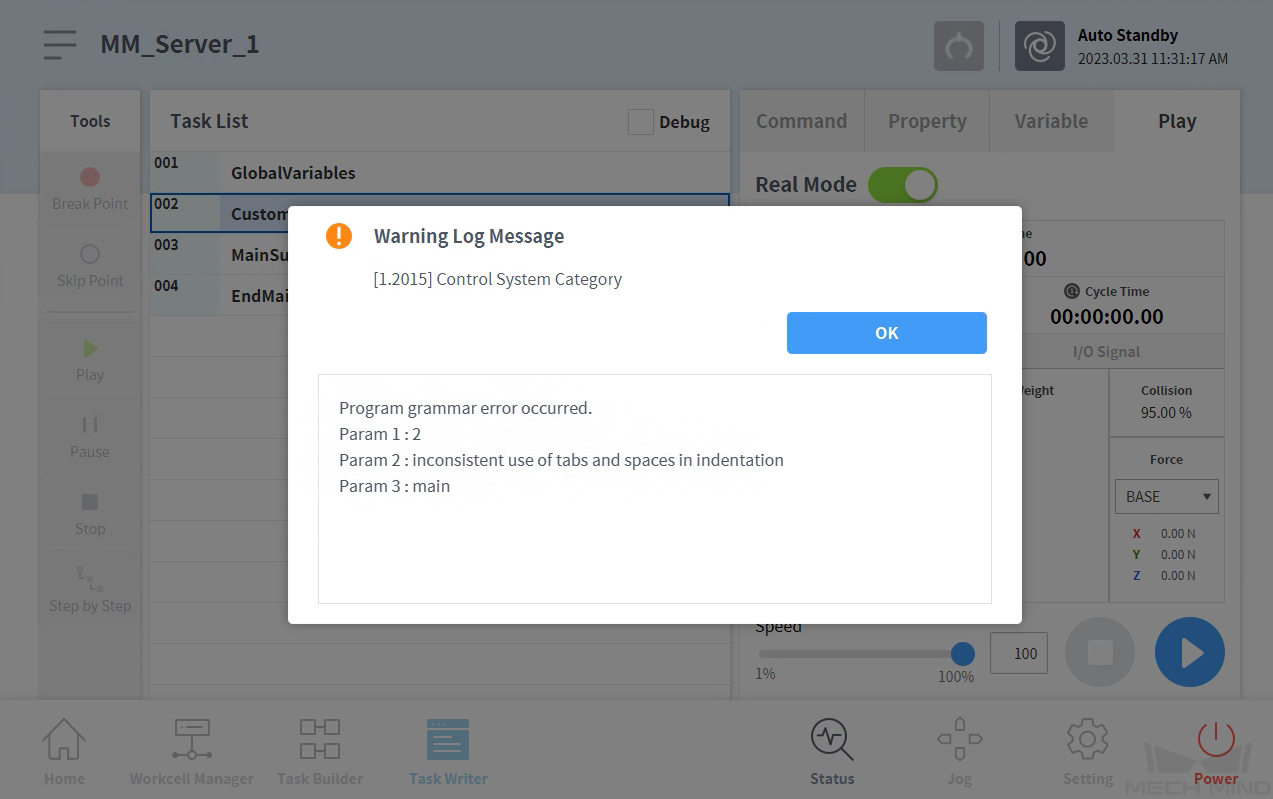
If a warning message as shown below pops up, please check if there is any inconsistent use of tabs and spaces in indentation in the MM_Server_1 Python script. Python uses indentation to distinguish different code blocks and therefore has a strict requirement for indentation.
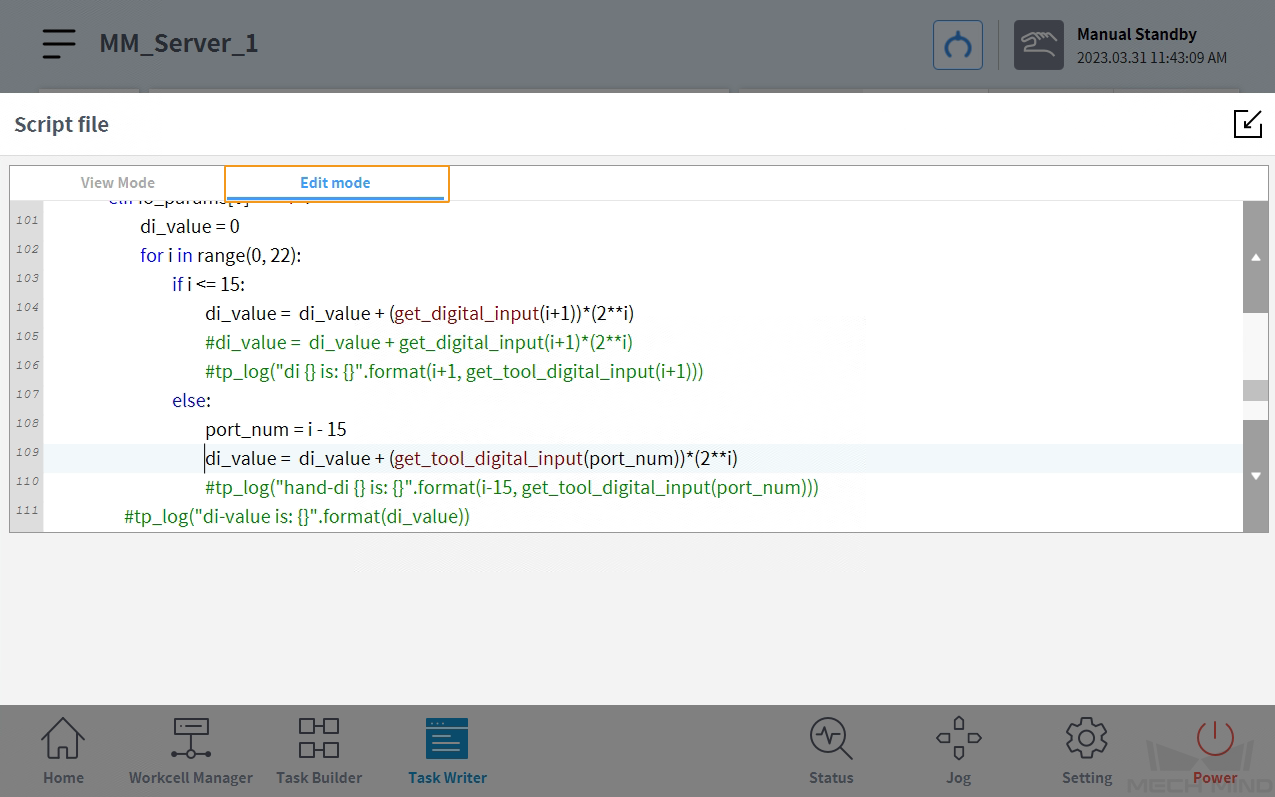
Follow the steps as shown in the figure below to edit the script on the teach pendant. You can also modify the MM_Server.txt file on your PC to fix the indentation problem and then re-import the file.

-
Refer to Test Robot Connection to proceed with the following steps.
| If Mech-Viz is disconnected, the program on the robot side should be stopped as well. That is, the above “MM_Server_1” task should be stopped. If you want to reconnect and control the robot, please re-execute the program. |
Common Operations
Set TCP
When an end tool is used in the Mech-Viz project, please set the Tool Center Position according to the following instructions. A gripper is used as an example in the following instructions.
-
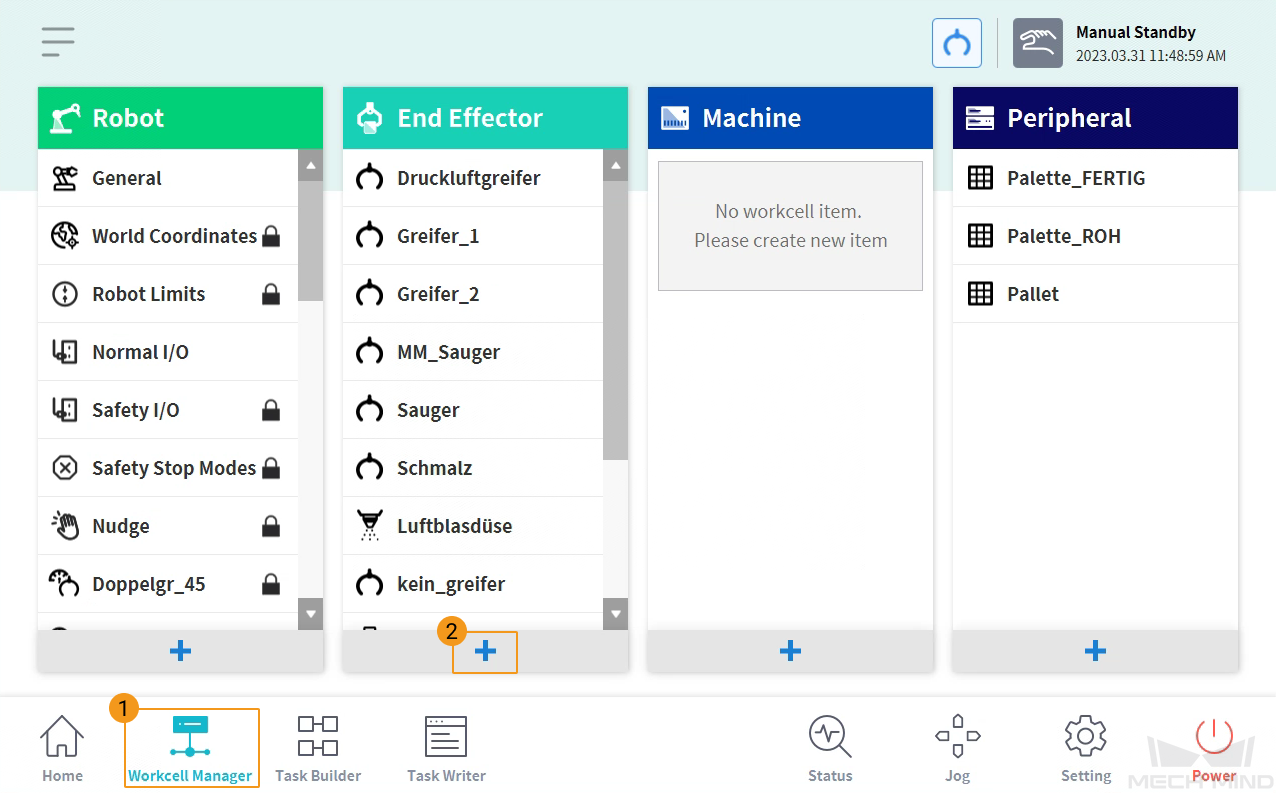
On the teach pendant, press Workcell Manager in the bottom panel and then press +.
-
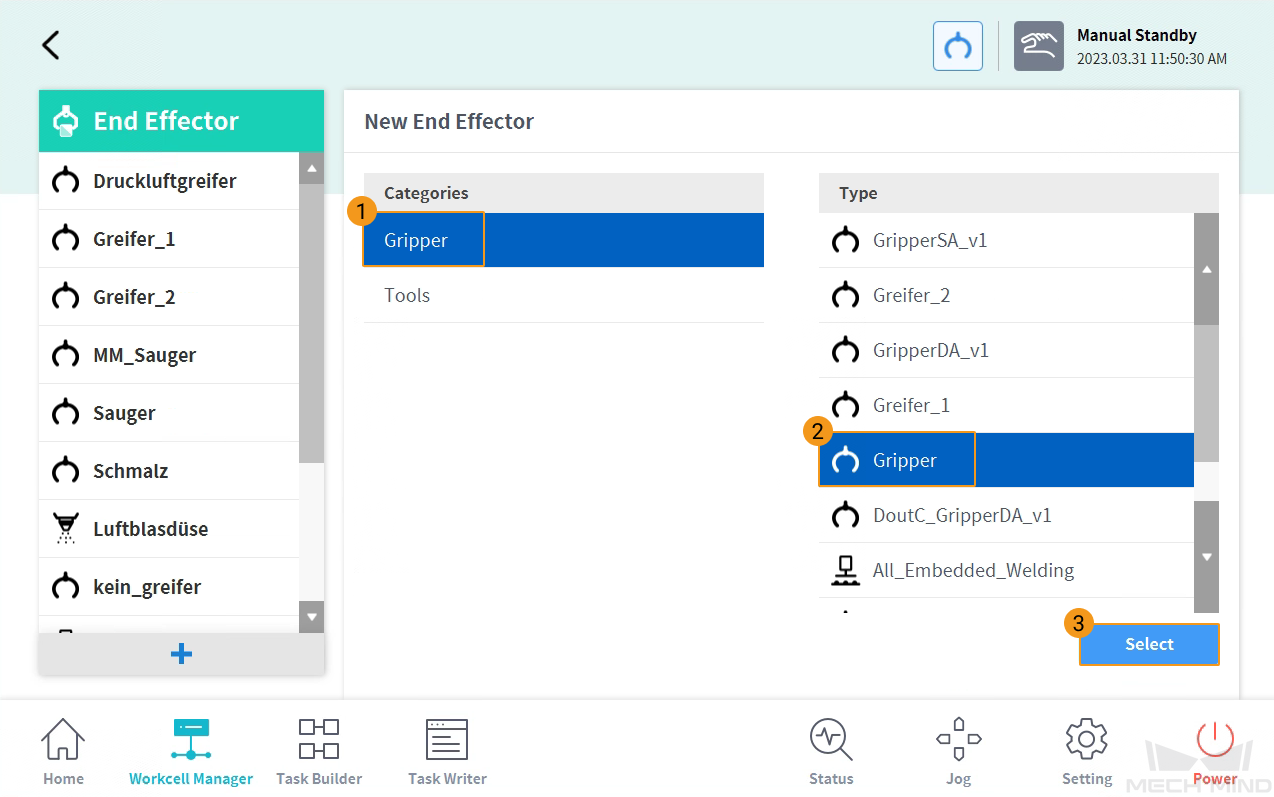
Select Gripper in Categories and Gripper as the Type, and then press Select.
-
Name the gripper and press Tool Center Position to set Position parameters. Z value in this example is set to 200 mm. After finishing the settings, press Confirm.
Since the TCP in Mech-Viz cannot be synchronized to the teach pendant, please ensure the Position parameters set here are the same as the TCP values set in Mech-Viz. Otherwise, the robot’s linear motion will be problematic when there are special offsets and rotations of the end tool. 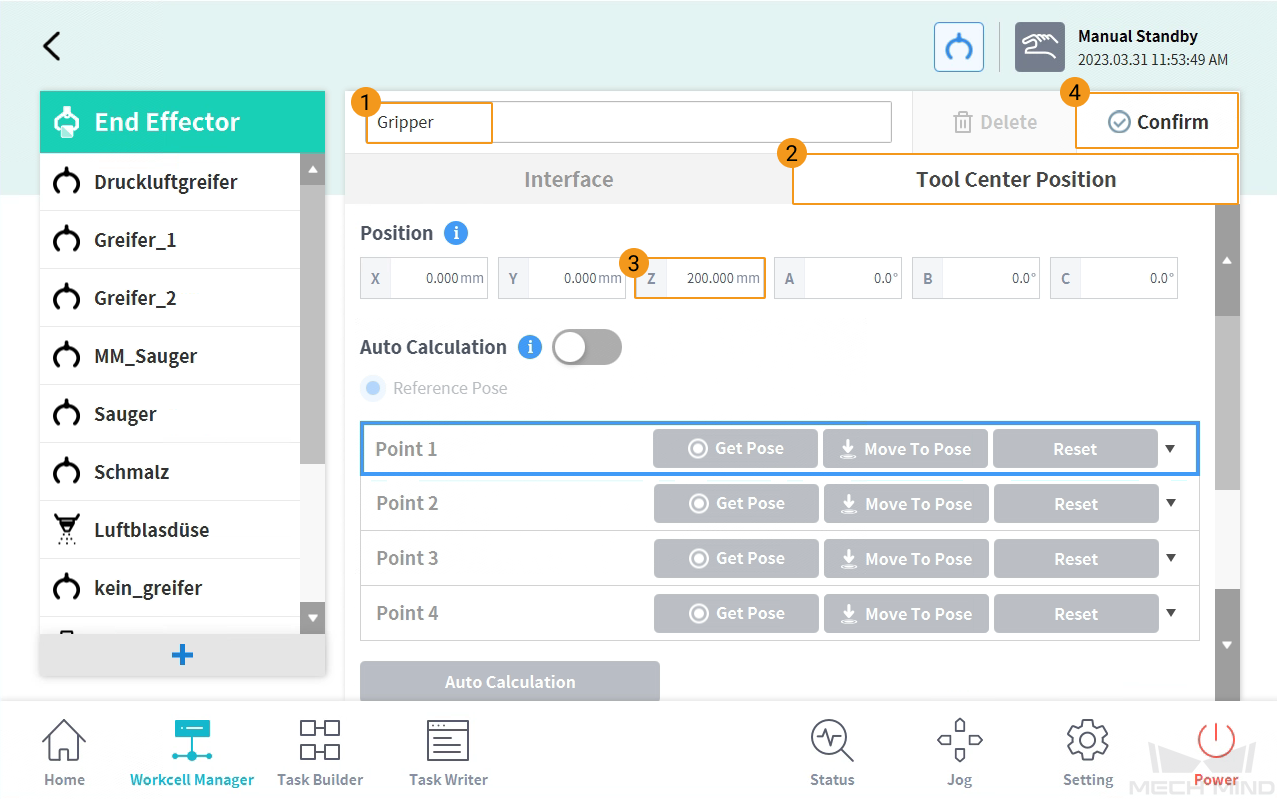
-
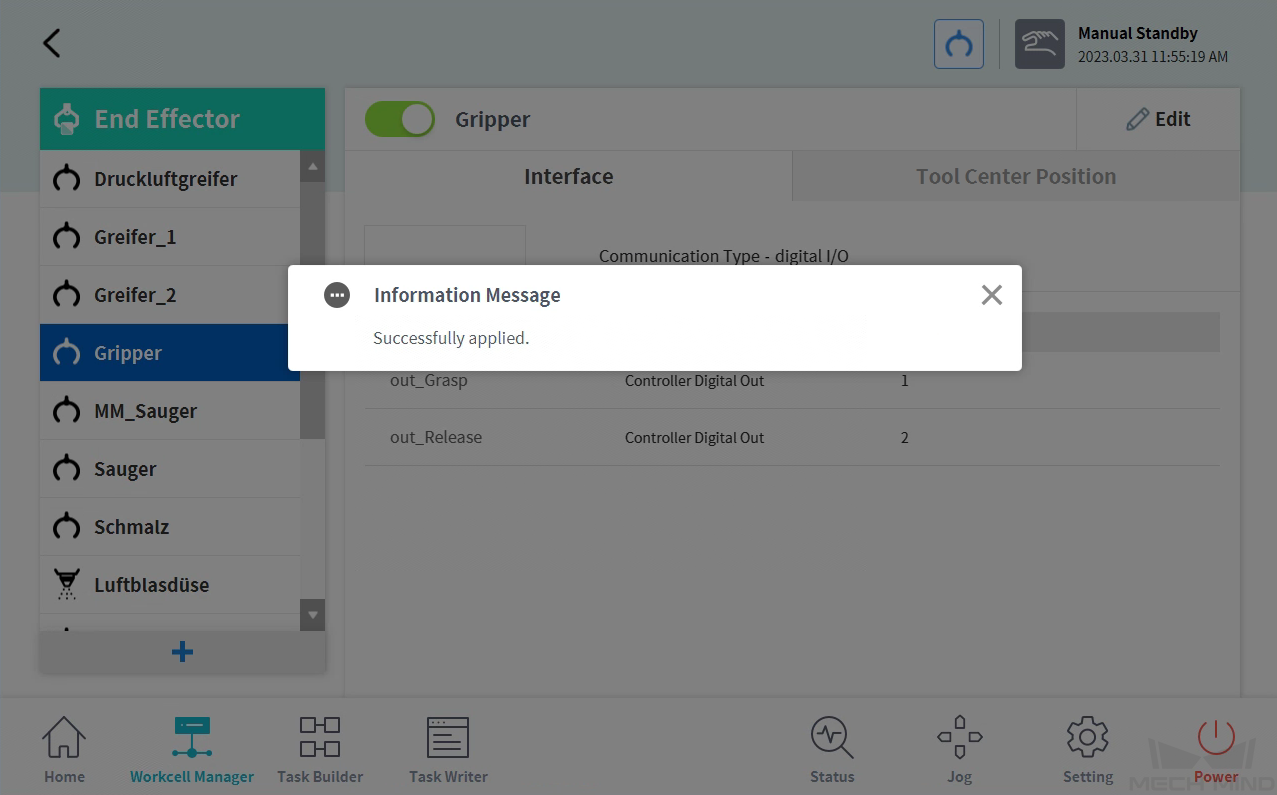
Press OK to save the settings, and a “Successfully applied” message will pop up.

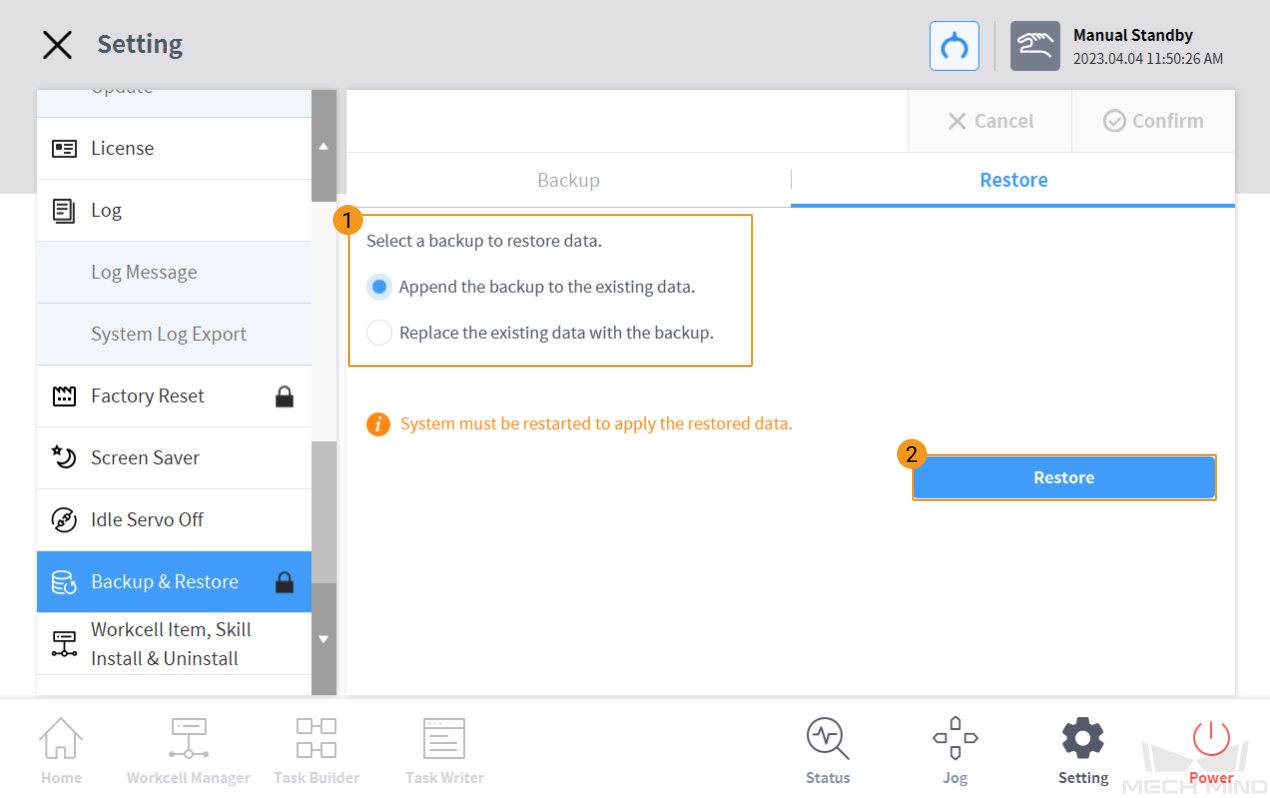
Backup and Restore Robot Files
It is recommended to back up robot system files before loading Master-Control program files to avoid system corruption that may be caused by the loading operation. In case any issue occurs, you can use the backup file to restore the robot system.
Backup
-
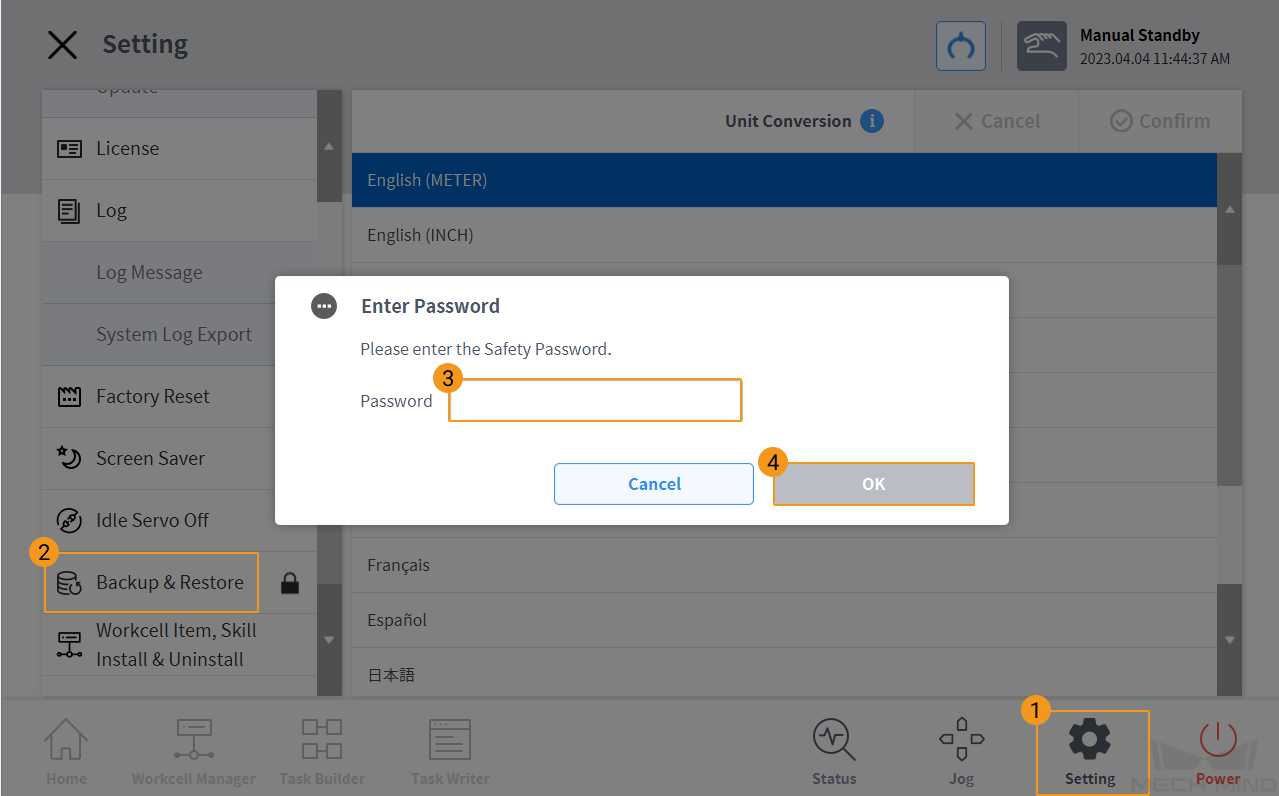
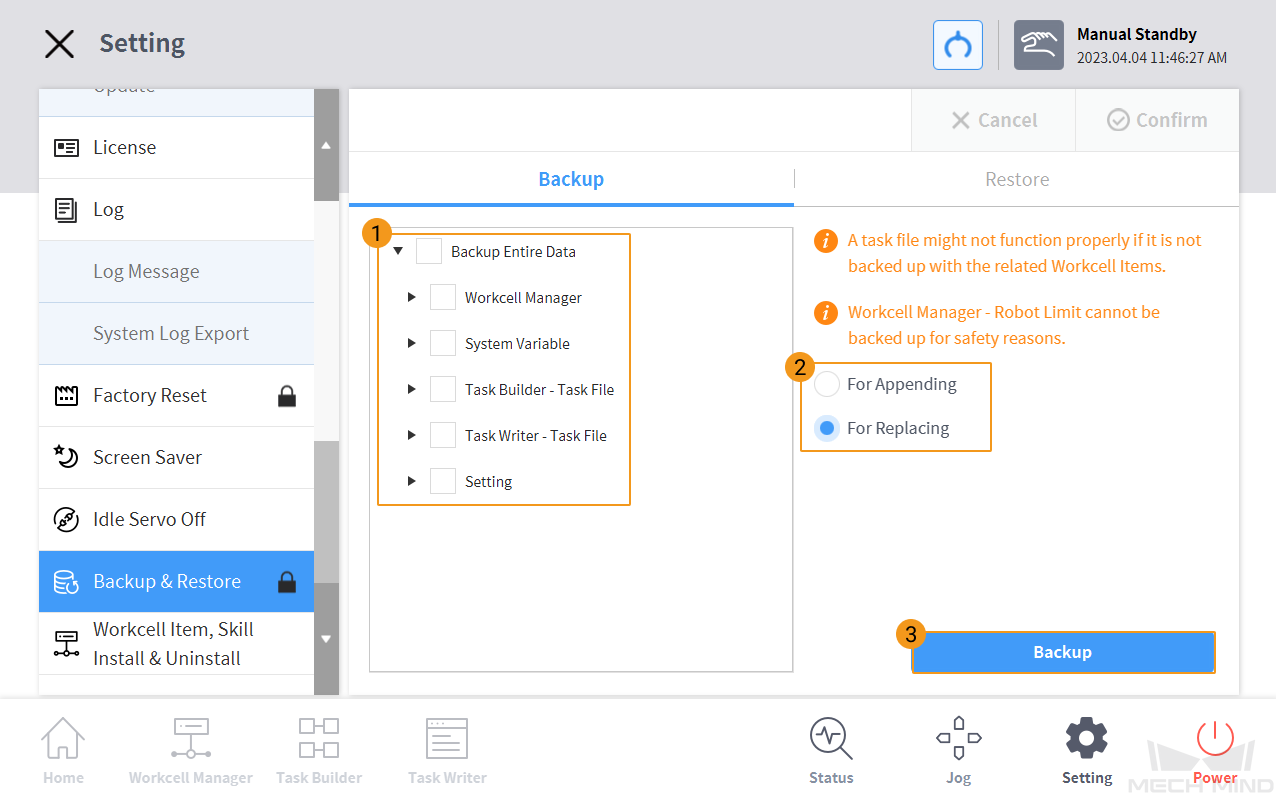
On the teach pendant, press Setting in the bottom panel, and select Backup & Restore on the left panel. An Enter Password window will pop up. Then enter the password and press OK. The default password is admin.
-
In the Backup tab, select the items you want to backup, select For Replacing or For Appending, and then press Backup.
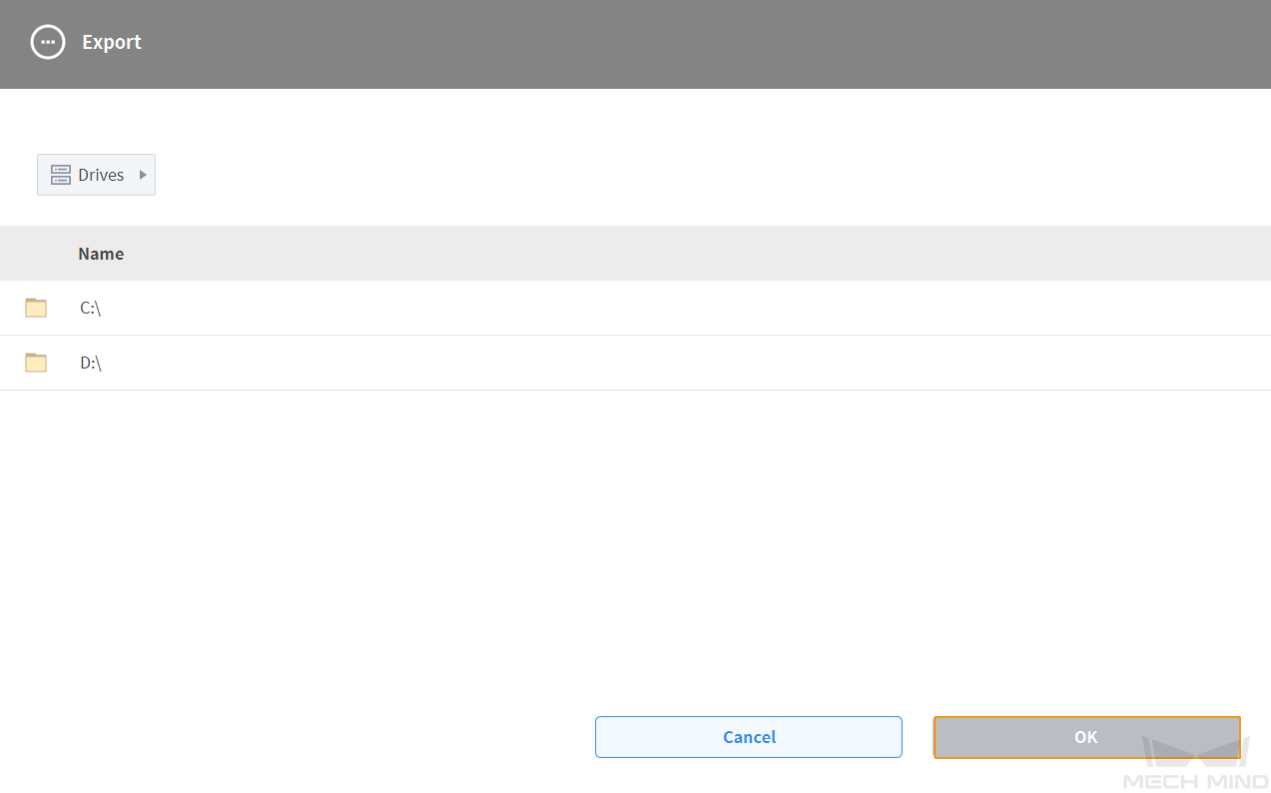
-
In the pop-up window, select the directory where you want to store the backup files, and press OK.