Set up Standard Interface Communication with SIASUN GCR
This guide shows how to load the Standard Interface program to a SIASUN GCR robot and set up the Standard Interface communication.
Preparation
Before loading the Standard Interface program files, you need to check hardware and software versions, establish the network connection between the robot and IPC, turn on the interface service in Mech-Vision, and copy the program files.
Check Hardware and Software Versions
|
The models and versions listed below are tested and can be used. For other models and versions, you may refer to this guide for operation. If any issues occur, please contact Mech-Mind Technical Support. |
-
Robot model: GCR5
-
Controller Version: 2.7.0
Instructions
-
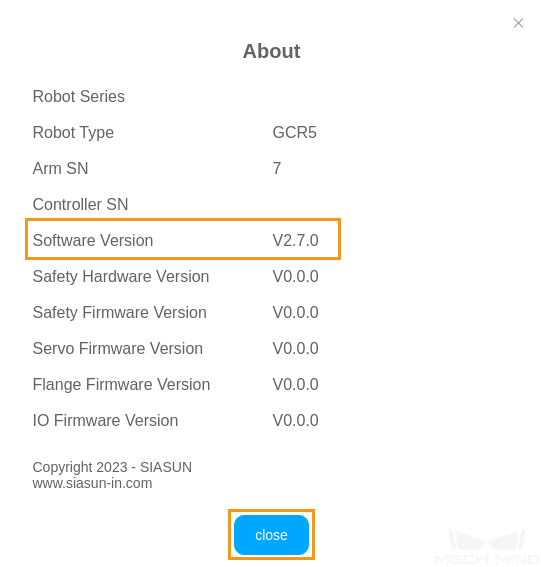
Click the profile icon in the upper right corner of the teach pendant, and select About in the drop-down menu.

-
Software Version is the controller version.
Set up the Network Connection
-
Plug the other side of the IPC’s Ethernet cable into the Ethernet port of the robot controller.
-
Check the robot’s IP address and make sure it is on the same subnet as the IPC.
Instructions
-
Click the user profile icon on the upper-right corner of the teach pendant. Click System Setting in the drop-down menu.

-
Click Network in the pop-up “System Setting” window, and check the IP address and subnet mask of the robot in the “Local IP” area.

-
-
If the IP address of the robot and that of the IPC are in different subnets, please modify the IPC’s IP address.
Set up Robot Communication Configuration
-
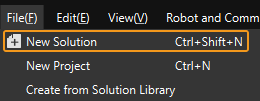
Open Mech-Vision. You may enter different interfaces. Create a new solution according to the instructions below.
-
If you have entered the Welcome interface, click New blank solution.

-
If you have entered the main interface, click on the menu bar.
-
-
Click Robot Communication Configuration on the toolbar of Mech-Vision.
-
In the Robot Communication Configuration window, complete the following configurations.
-
Click the Select robot drop-down menu, and select Listed robot. Click Select robot model, and select the robot model that you use. Then, click Next.
-
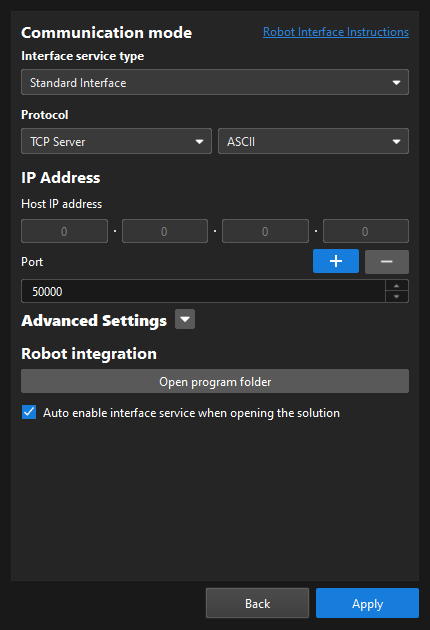
In the Communication mode section, select Standard Interface for Interface service type, TCP Server for Protocol, and ASCII for the protocol format.
-
It is recommended to set the port number to 50000 or above. Ensure that the port number is not occupied by another program.
-
Under Robot integration, click Open program folder.
The files needed for subsequent loading will be copied from this folder. Do not close this folder. -
(Optional) Select Auto enable interface service when opening the solution.
-
Click Apply.
-
-
On the main interface of Mech-Vision, make sure that the Robot Communication Configuration switch on the toolbar is flipped and has turned blue.

Prepare Program Files
-
Plug the flash drive into the USB port of the IPC.
-
On the IPC, you can find the following three files in the opened program folder (the
SIASUNfolder).You can also find the program folder in the
Communication Component/Robot_Interface/SIASUNpath in the installation directory of Mech-Vision and Mech-Viz.-
mm.pro
-
mm.program
-
mm_siasun.script
-
-
You can choose to load a project or load programs when configuring the Standard Interface communication for a SIASUN robot.
Loading a project means to load the whole project which contains the calibration program, Visual Recognition program, Path Planning program, etc., into the robot.
Loading programs means to load the specific programs that enable the robot to establish communication with the Mech-Mind vision system and to access and process data, into an existing project.
-
If you need to load the whole project, copy the following files to the root directory of the USB flash drive:
-
mm.pro: the whole project file
-
-
If you need to load individual programs, copy the following files to the root directory of the USB flash drive:
-
mm.program: example program of the Standard Interface communication and calibration program
-
mm_siasun.script: robot script for the socket communication and data processing
-
-
Load the Program Files to the Robot
You can choose to load a project or load programs when configuring the Standard Interface communication for a SIASUN robot.
Refer to the Load Project section if you need to load a whole project to the robot; and refer to the Load Project section if you need to import the Standard Interface communication feature to an existing project.
Load Project
-
Plug the USB flash drive into the USB port on the back of the teach pendant.
-
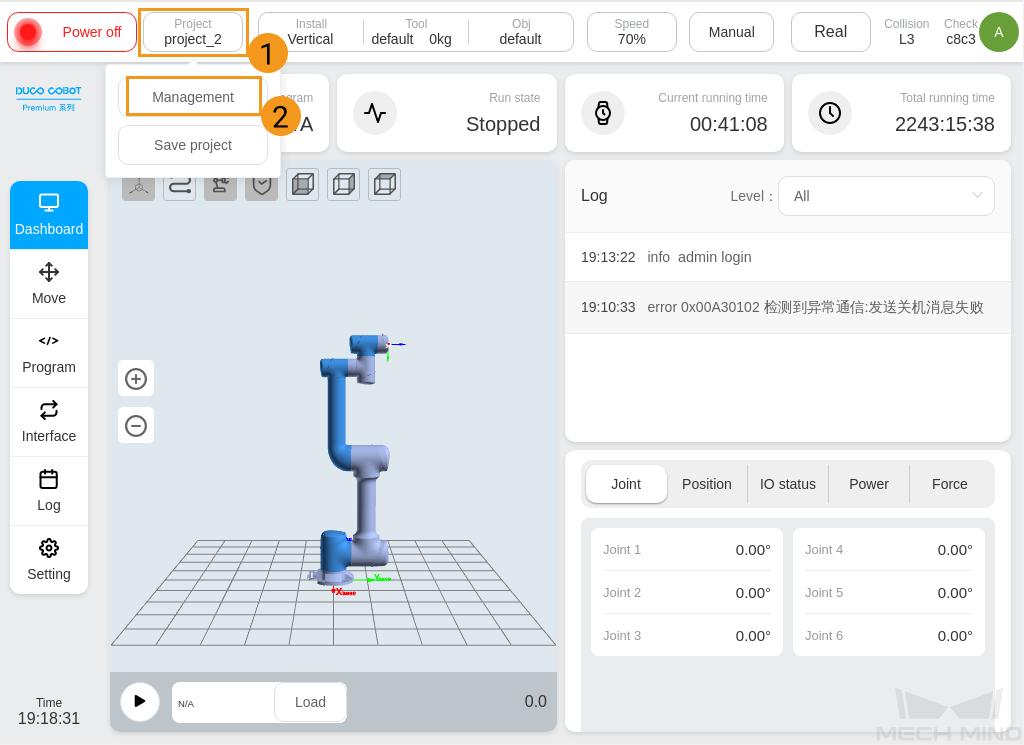
Click Project on the upper-left of the teach pendant. Select Management in the drop-down menu.
-
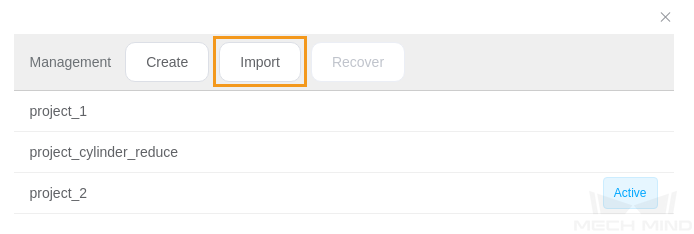
Select Import in the pop-up “Management” window.
-
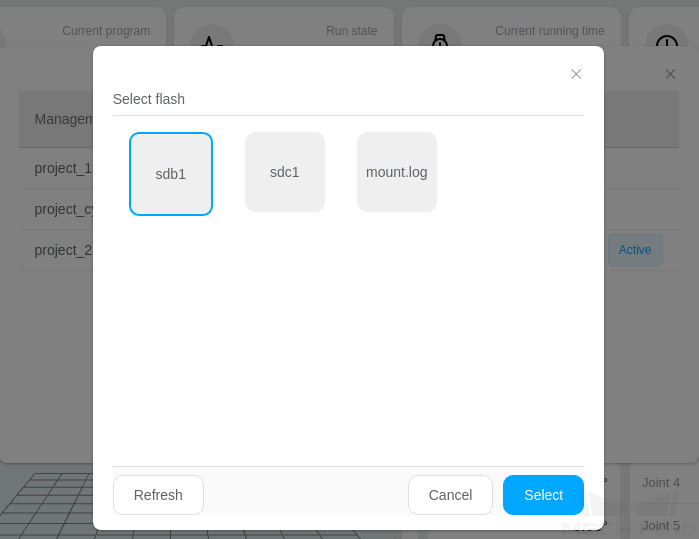
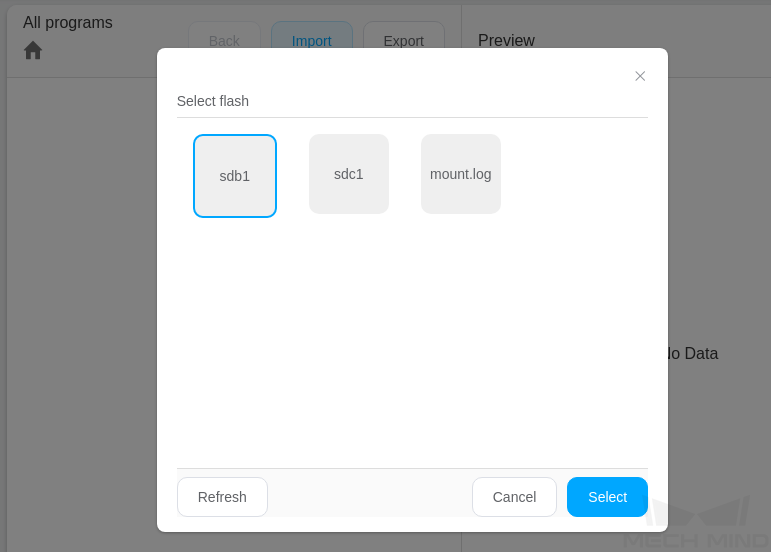
Select the USB flash drive which you plugged into the teach pendant in the pop-up “Select flash” window, and click Select.
-
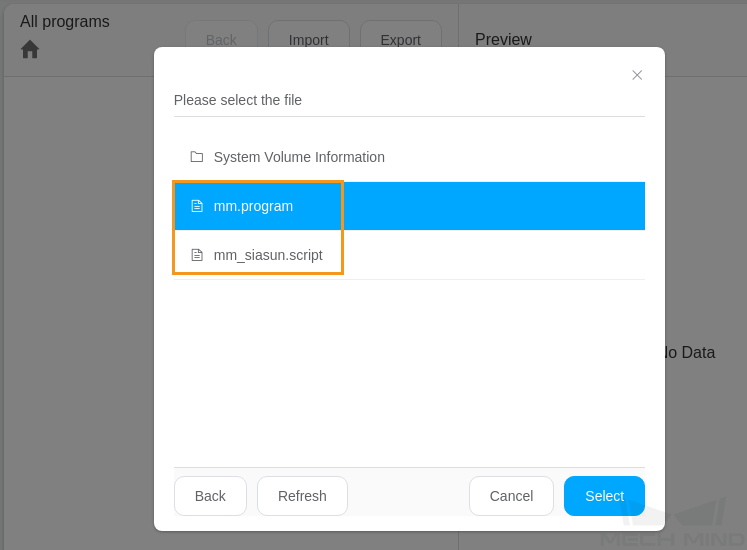
Select mm.pro in the pop-up “Please select the file” window, and click Select. The interface returns to the “Management” window and prompts “Import successfully”.

-
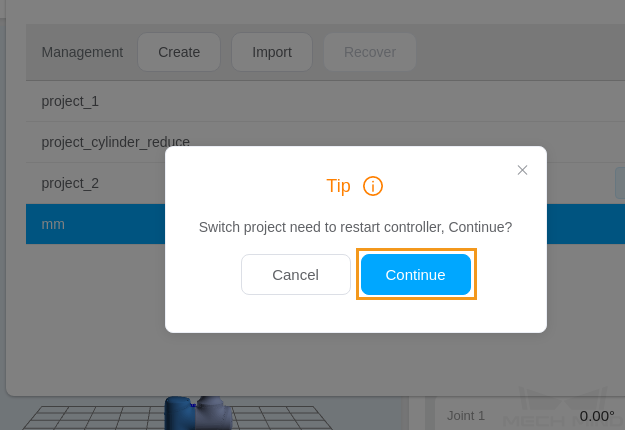
Click the mm project. Click Switch in the pop-up operation menu.

-
Click Continue in the pop-up dialogue box to restart the controller and finish loading the project.
Load Programs
-
Plug the USB flash drive into the USB port on the back of the teach pendant.
-
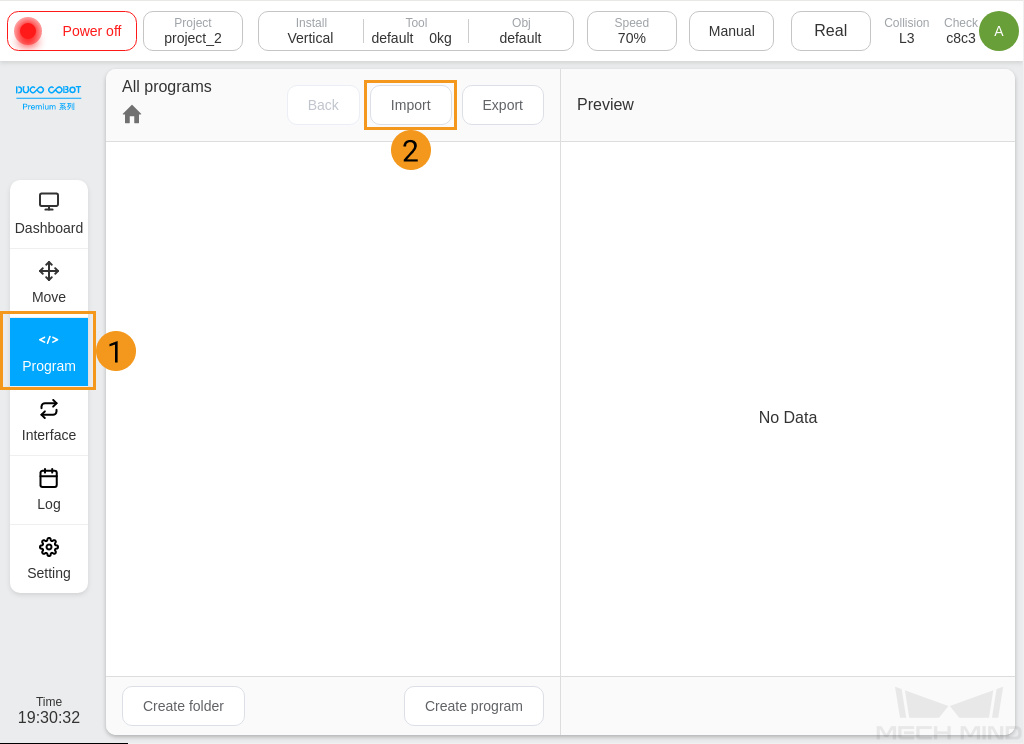
Click Program on the left side panel of the teach pendant. Click Import on the “All programs” panel.
-
Select the USB flash drive which you plugged into the teach pendant in the pop-up “Select flash” window, and click Select.
-
Select mm.program in the pop-up “Please select the file” window, and click Select. The interface prompts “Import successfully” and returns to the “Program” page.
-
Refer to Step 2~4 and import the mm_siasun.script file.
-
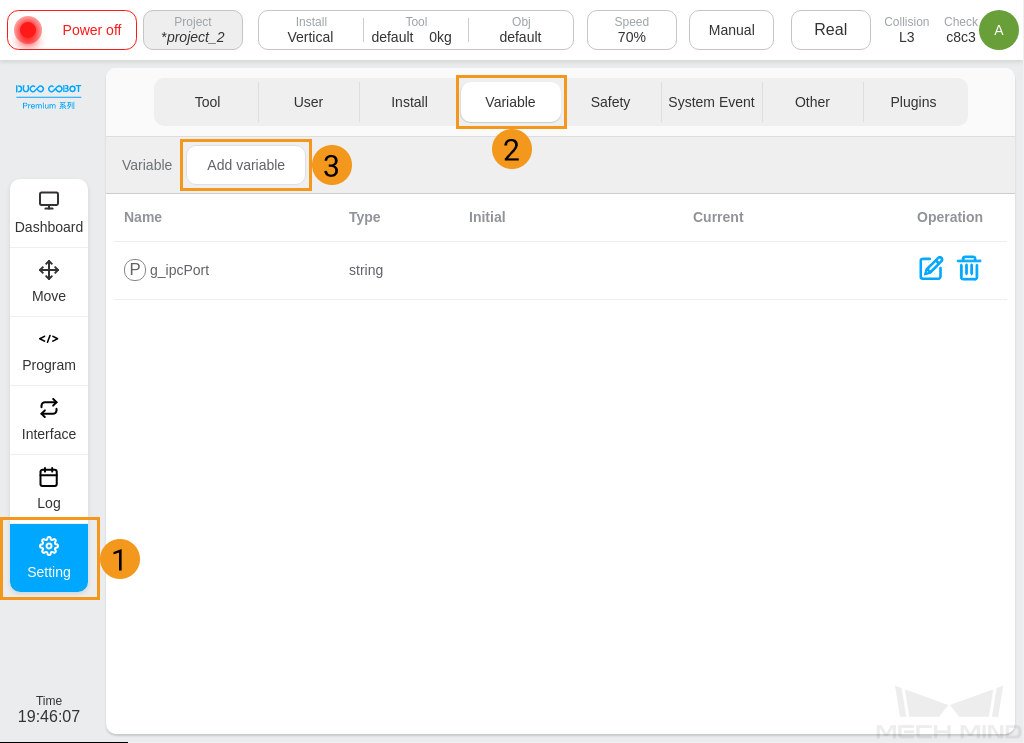
After loading the two files mentioned above, you need to add global variables manually. Click Setting on the left side panel of the teach pendant. Click on the operation panel.
-
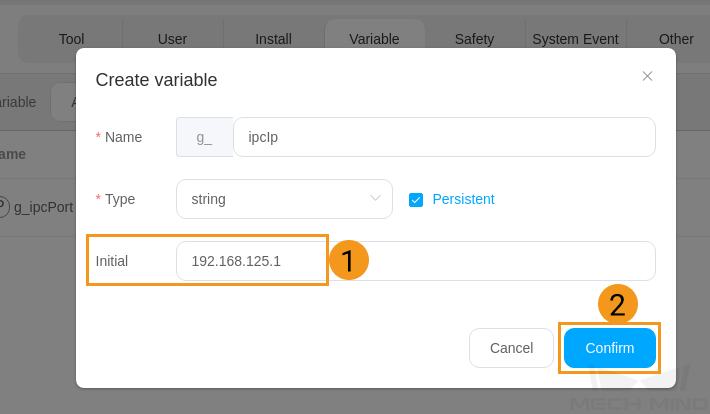
Enter Name and Type for the new variable in the pop-up “Create variable” window, and select Persistent.

The variables that you need to create are listed in the following table.
-
The variable name is case-sensitive.
-
“g_” is already in the text box of the “Create variable” window. Do not input repeatedly.
Variable Name Type g_ipcIp
string
g_ipcPort
number
g_mmCmd
number
g_mmStatus
number
g_mmProjectId
number
g_mmExceptPose
number
g_mmRecipeId
number
g_mmPoseType
number
g_mmBranchId
number
g_mmBranchPort
number
g_mmIndexId
number
g_mmIndexPort
number
g_mmRecvList
num_list
g_mmTarget
num_list
g_mmNum
number
g_mmConfigId
number
g_mmBoxSize
string
g_mmPosSend
string
-
-
Click Project in the upper-left corner, and click Save project in the drop-down menu.

Input the IPC’s IP Addresses
After loading the project or programs, you need to configure the IPC’s IP address and port on the teach pendant, so that the robot can communicate with the IPC.
-
Click Setting on the left side panel of the teach pendant, and then select Variable. Find g_ipcIp and click the editing icon
 to its right.
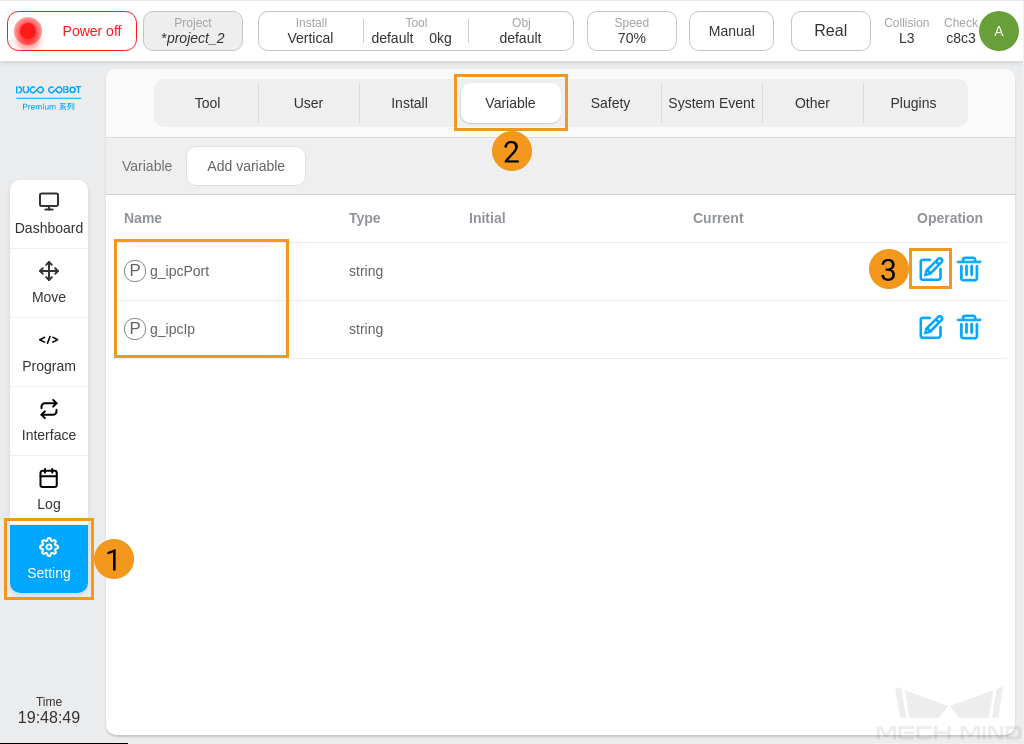
-
The “Create variable” window pops up. Input the IP address of the IPC in the text box of Initial, and click Confirm. This guide takes 192.168.125.1 as an example. Please input the IP address of the IPC in use.
-
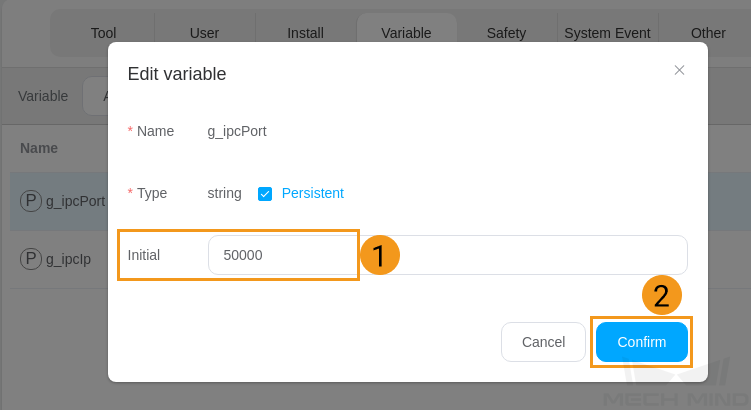
Find g_ipcPort in the “Variable” panel, and click the editing icon
to its right. -
The “Create variable” window pops up. Input the port number of the IPC in the text box of Initial. This guide takes 50000 as an example. Please input the IP address of the IPC in use. Then, click Confirm.
Test Standard Interface Communication
Before testing the Standard Interface communication between the robot and the vision system, make sure that the interface service is started. Then, run a test program on the teach pendant to test the Standard Interface communication.
-
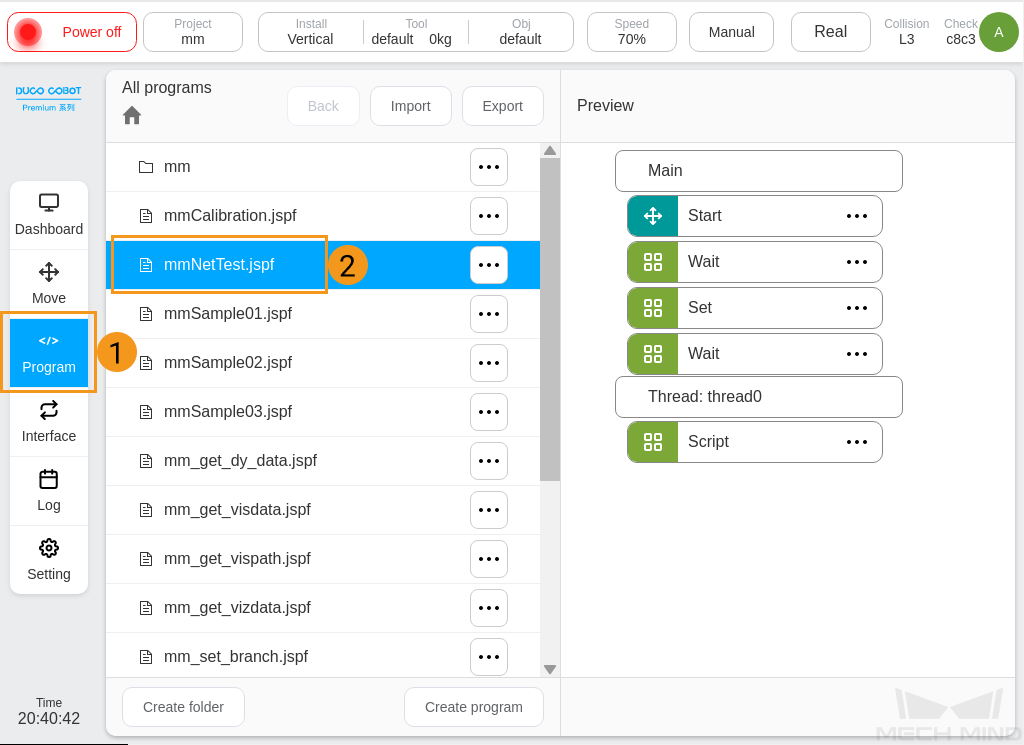
Click Program on the left side panel. Find and double-click the mmNetTest.jspf program in the “All programs” panel.
-
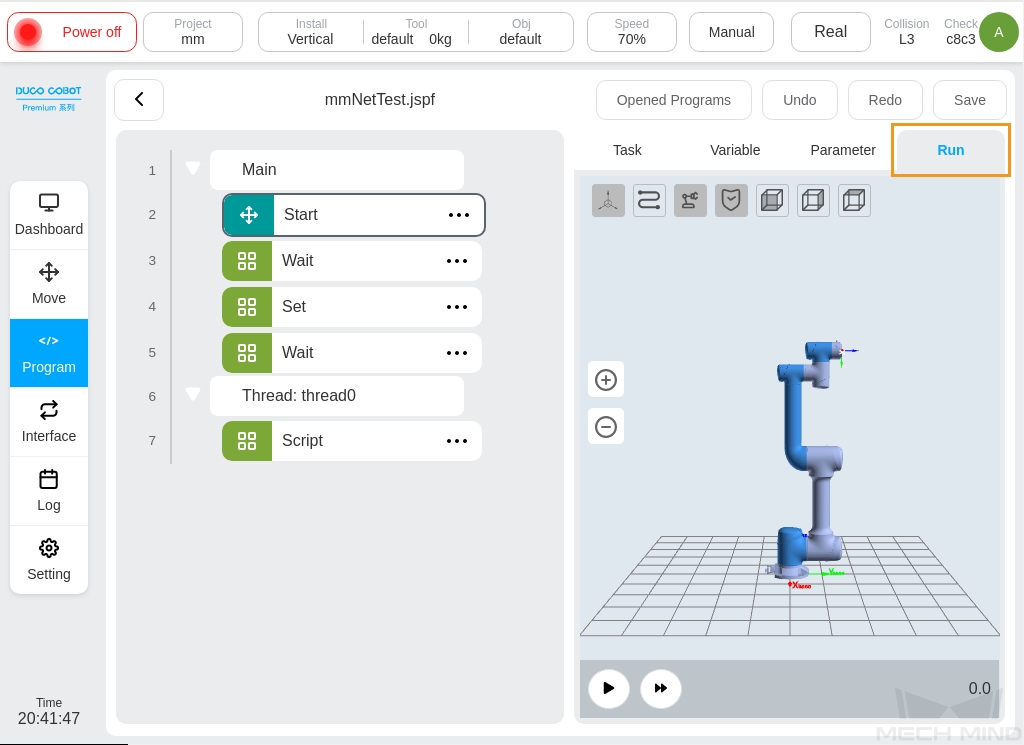
Click Run on the simulated robot panel.
-
If the SIASUN robot successfully establishes the Standard Interface communication with Mech-Vision, the corresponding log will be recorded on the Console tab of the log panel in Mech-Vision.
