KUKA Setup Instructions
This guide shows you how to set up Master-Control communication with a KUKA robot.
Check Controller and Software Compatibility
-
Controller model: KUKA KR C4, C5
-
Controller system software version: KSS 8.2, 8.3, 8.5 or 8.6
-
Add-on software package: Ethernet KRL (V 2.2.8, 3.0.3 or 3.1.2.29)
The correspondence between KSS and Ethernet KRL versions is as follows:
| KSS version | Ethernet KRL version |
|---|---|
8.2 or 8.3 |
2.2.8 |
8.5 |
3.0.3 |
8.6 |
3.1.2.29 |
All teach pendant actions in this chapter are performed on KSS 8.6.
Set up the Network Connection

Set the IP Address
-
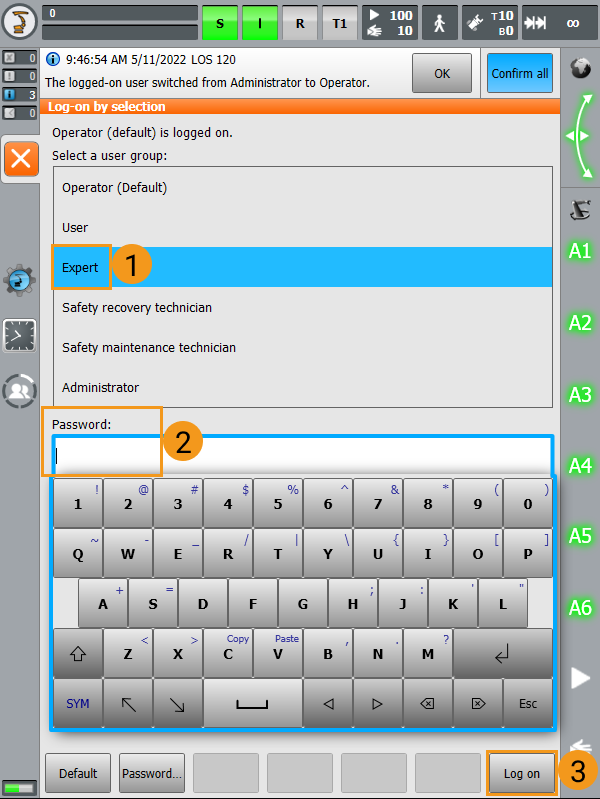
Switch to expert mode:
-
Click
 , and then select to enter the log-on interface.
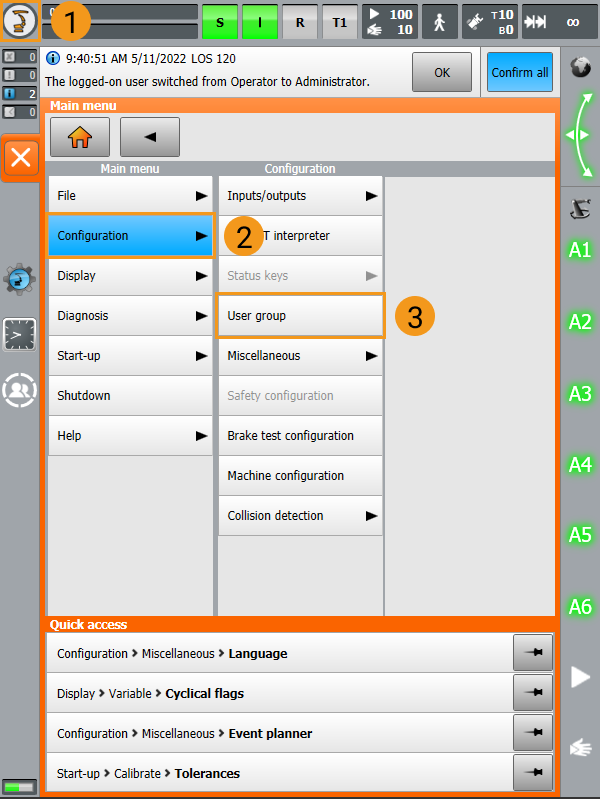
-
Select Expert, enter the password (the default password is kuka), and click Log on.
-
-
Set the IP address:
-
Click
, and then select to enter the network configuration interface.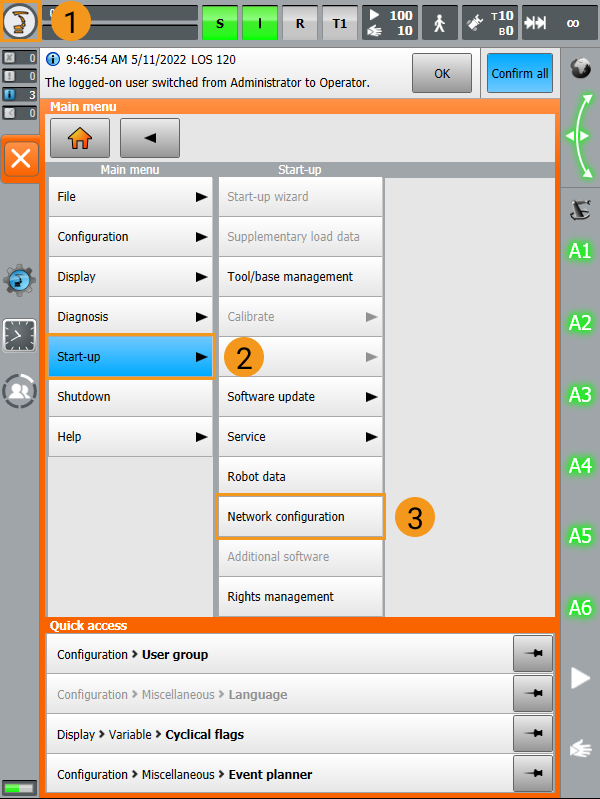
-
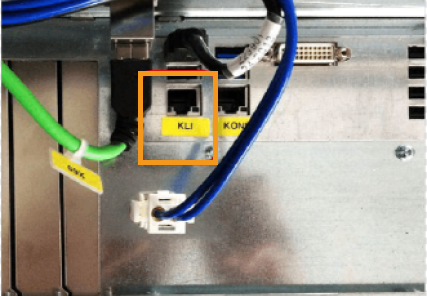
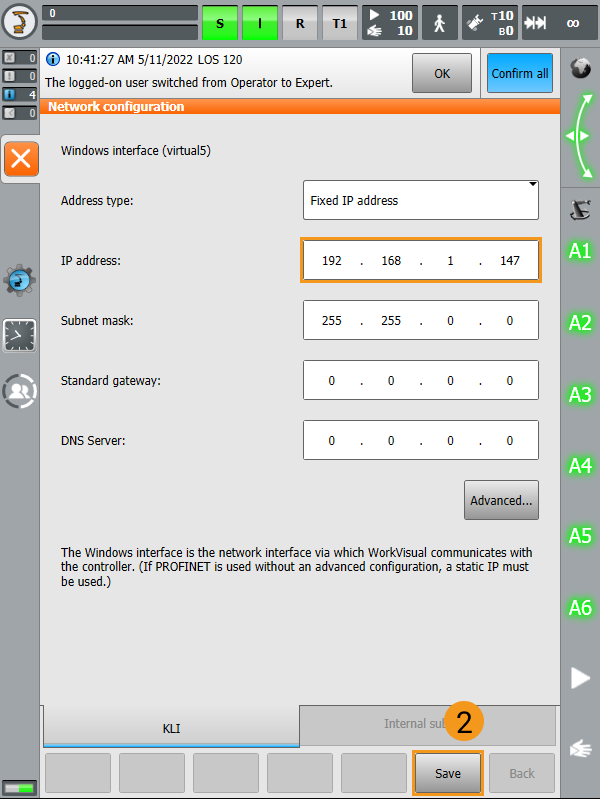
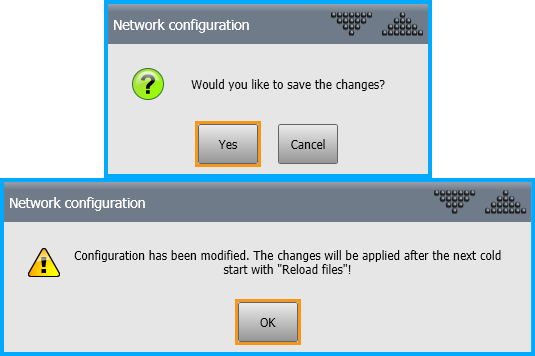
Input an IP address in the same subnet as that of the IPC, and then click Save. In the next two pop-up windows, click Yes and OK, respectively.
-
-
Restart the robot to finish setting the IP address:
-
Click
, and select Shutdown to enter the shutdown interface.
-
Click Reboot control PC in the shutdown interface.

-
Load the Program Files to the Robot
Back up the Robot Program
| Make sure you have switched to the expert mode. Otherwise, the flash drive will not show up on the teach pendant. |
-
Plug the flash drive for storing the backup file to the controller, and make sure that the flash drive shows up on the teach pendant.
-
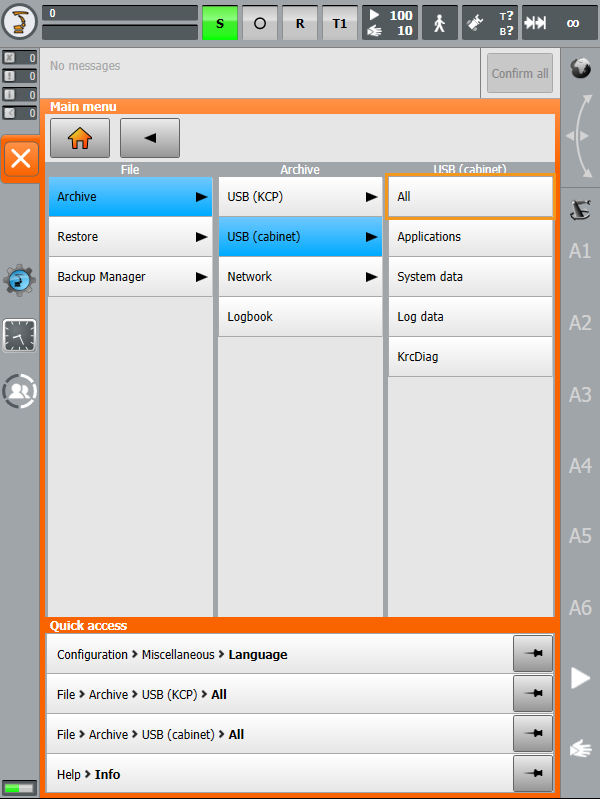
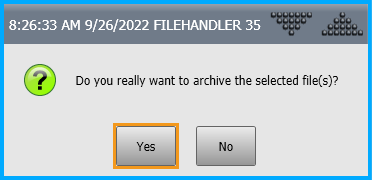
Click
, then select , and click Yes in the pop-up window.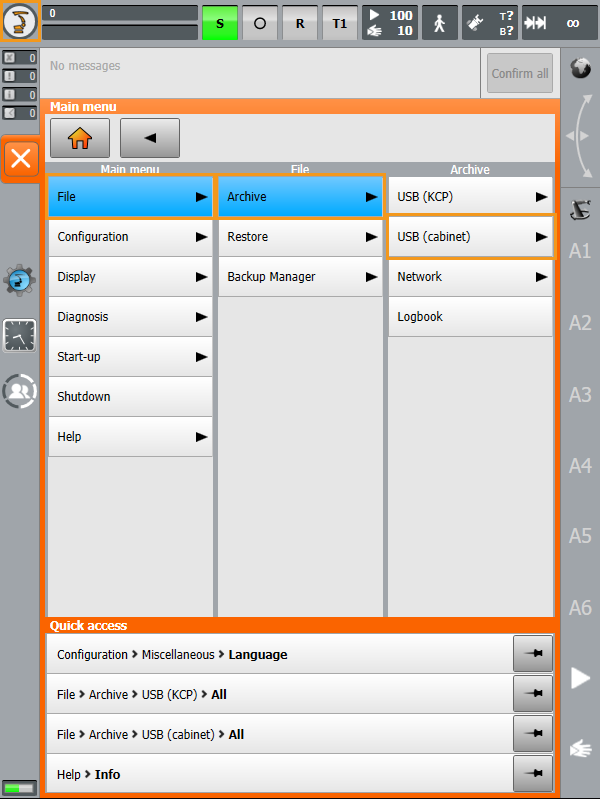
-
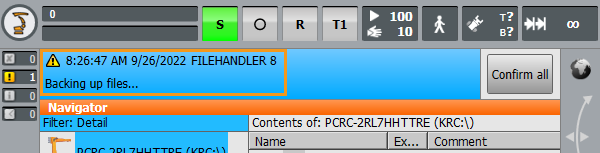
The following message is displayed when backup is in process. Once the backup is completed, this message disappears, and a ZIP file is created in the flash drive. Lastly, remove the flash drive.
Prepare the Files
| The program files are stored in the installation directory of Mech-Center. |
-
Navigate to
Mech-Center/Robot_Server/Robot_FullControl/kuka/kuka_newfrom the installation directory of Mech-Mind Software Suite, and copy and paste all the program files to your flash drive.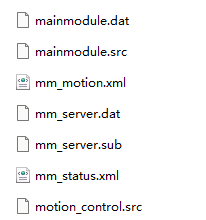
Make sure you have switched to the expert mode. Otherwise, the flash drive will not show up on the teach pendant. -
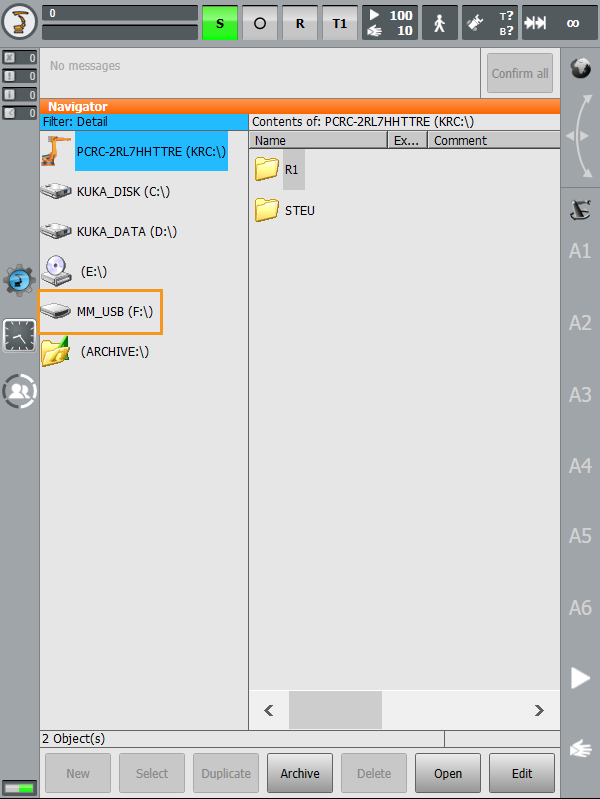
Plug the flash drive to the controller. Click the flash drive on the left side, and locate the folder which contains the program files.
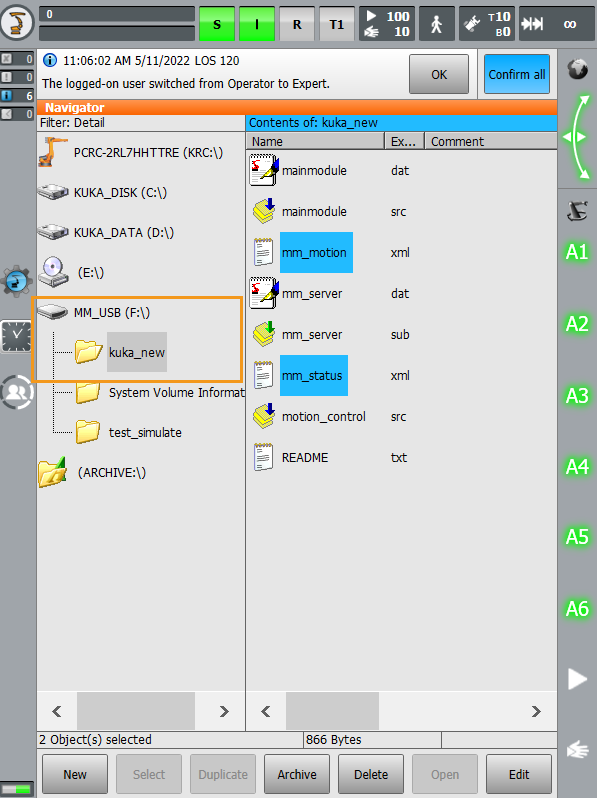
-
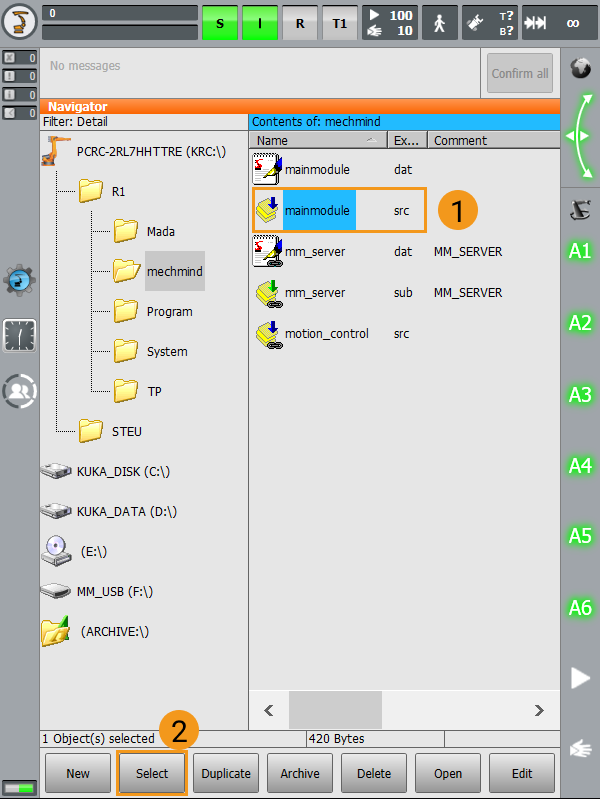
Select the mm_motion file, click Edit, and then click Copy in the pop-up menu bar.
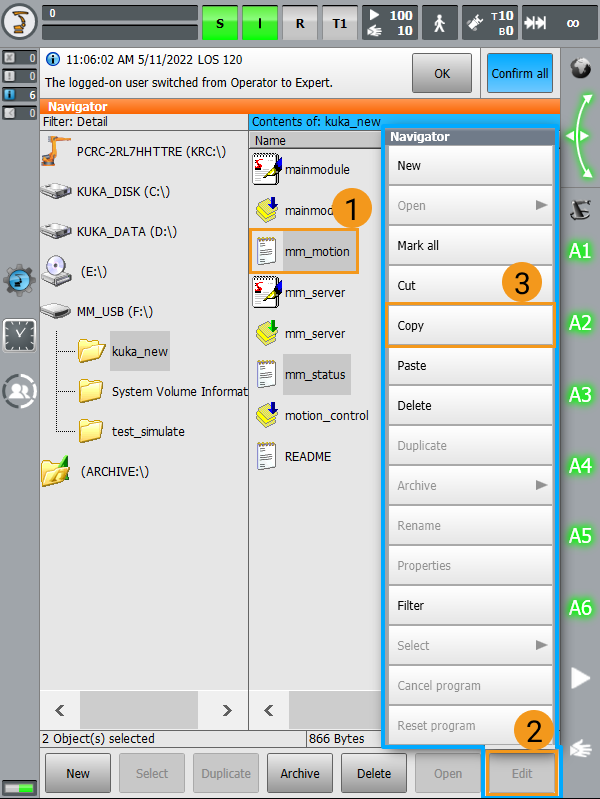
-
Navigate to
C:\\KRC\\ROBOTER\\Config\\User\\Common\\EthernetKRL,click Edit, and then select Paste in the pop-up menu bar. Repeat the above operation to copy the mm_status file to the target folder.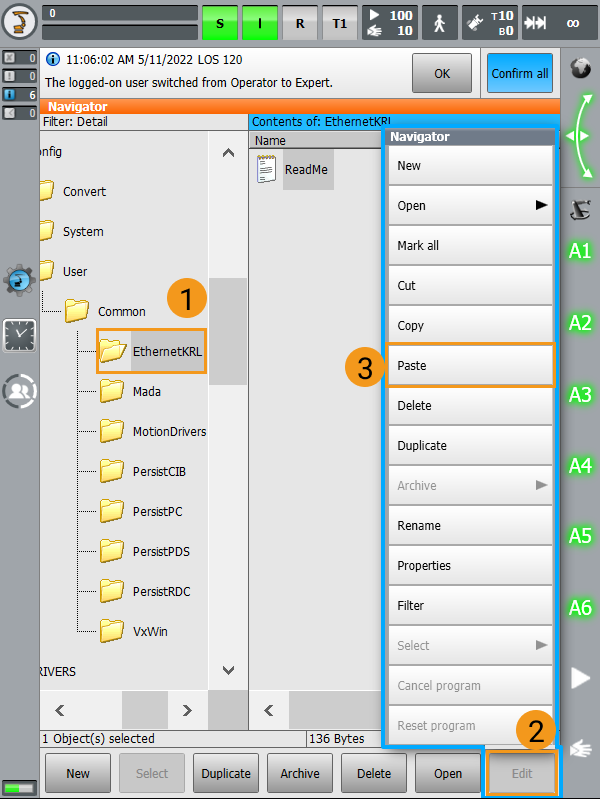
-
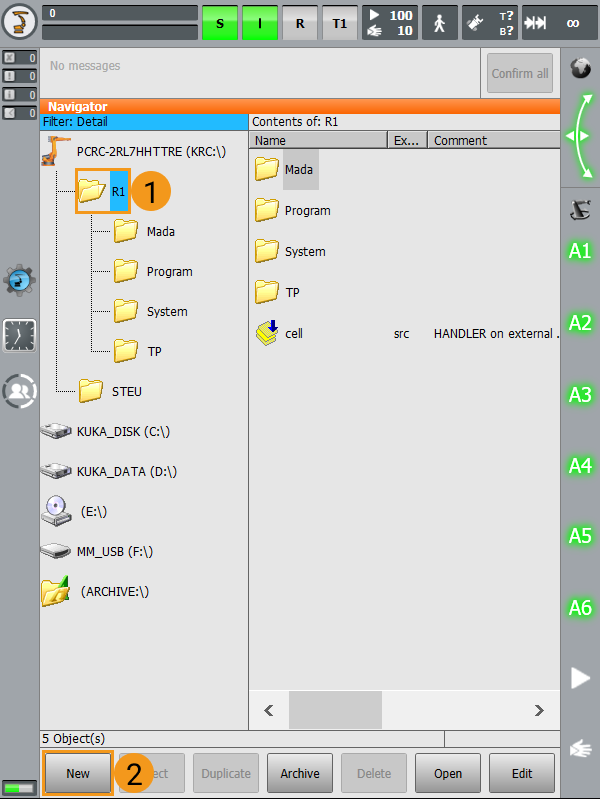
Refer to the above procedures to copy and paste the other five files to the mechmind folder in the R1 folder (Create one if there is no mechmind folder).
Long-press and drag to select multiple adjacent files. Create the mechmind folder:
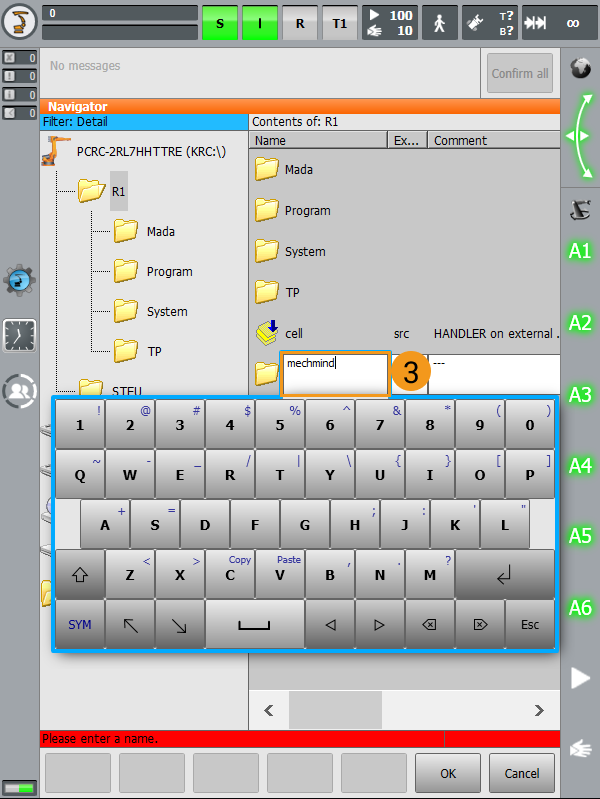
Click the R1 folder, and then click New.
Input mechmind for the folder name, and click OK.

Select Program
Set Autostart for Background Program
Switch to the expert mode referring to the above subject.
-
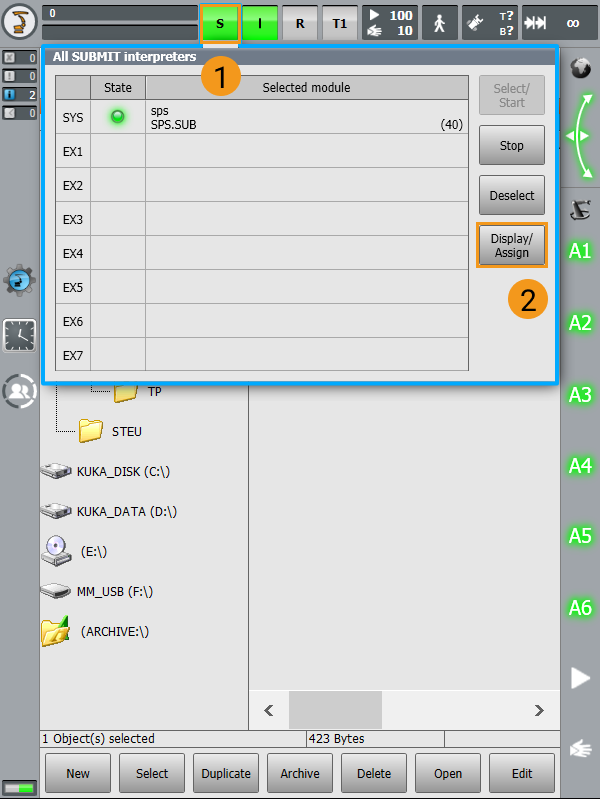
Click S on the teach pendant and then click Display/Assign.
-
Click Cold start configuration to jump to the Cold start configuration interface.
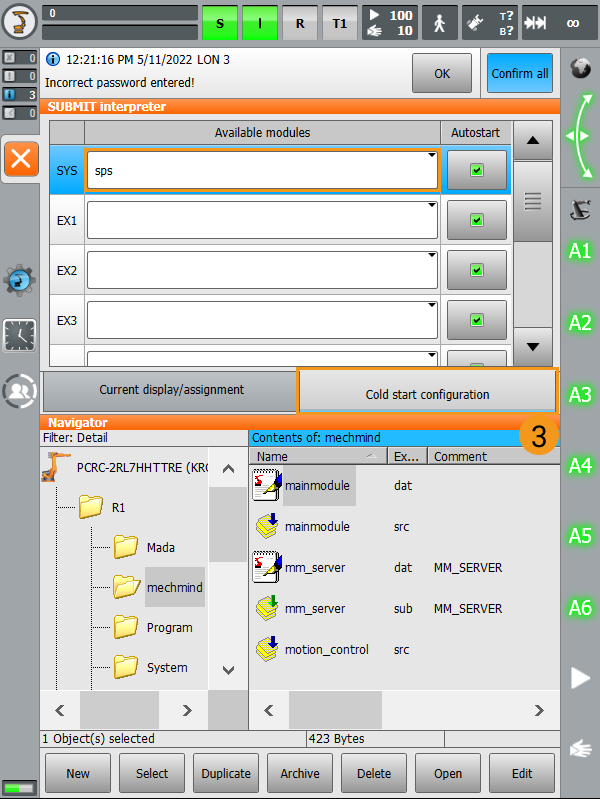
-
Click the blank in the drop-down menu on the right of SYS.
-
Then, clear the Autostart checkbox on the right of SYS.
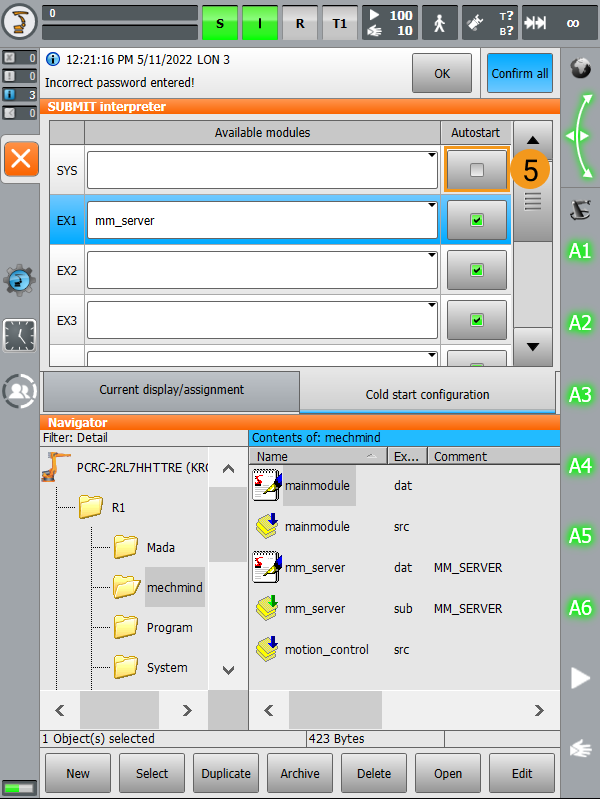
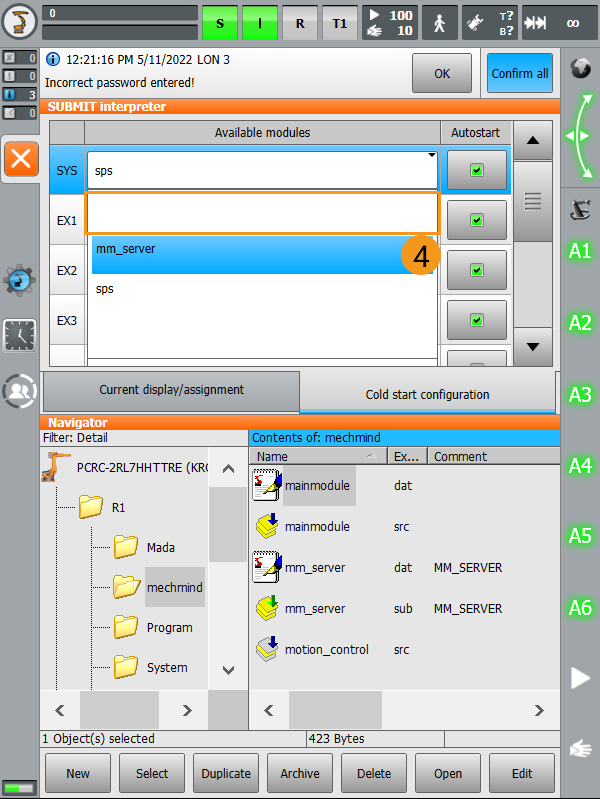
-
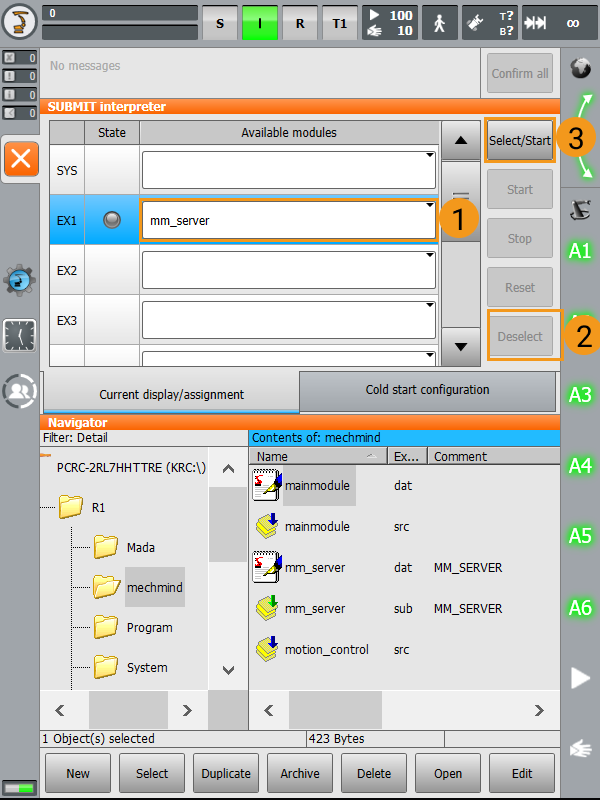
Similarly, select mm_server in the drop-down menu for EX1, and make sure Autostart is checked.
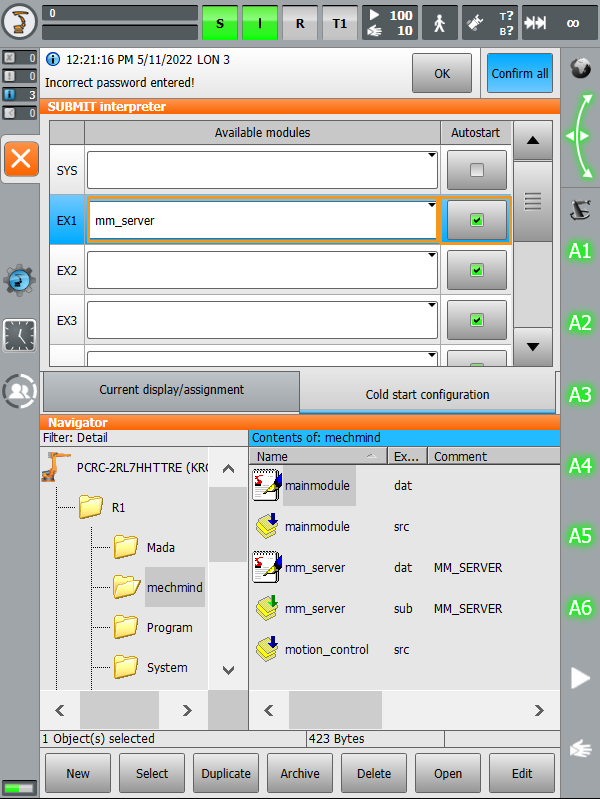
-
Click Current display/assignment to jump to the current display/assignment interface. Click the text box to the right of SYS, and then click Deselect.
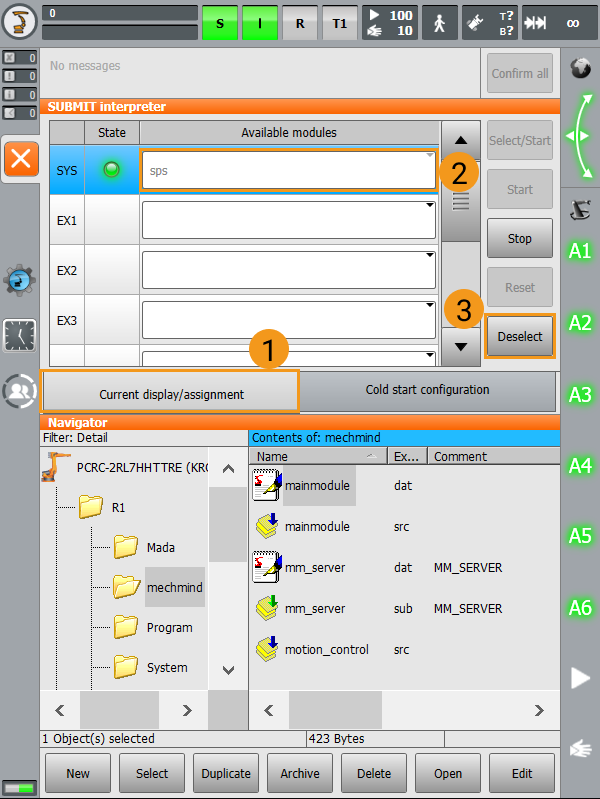
-
Click the text box to the right of SYS again, and select the blank in the drop-down menu.
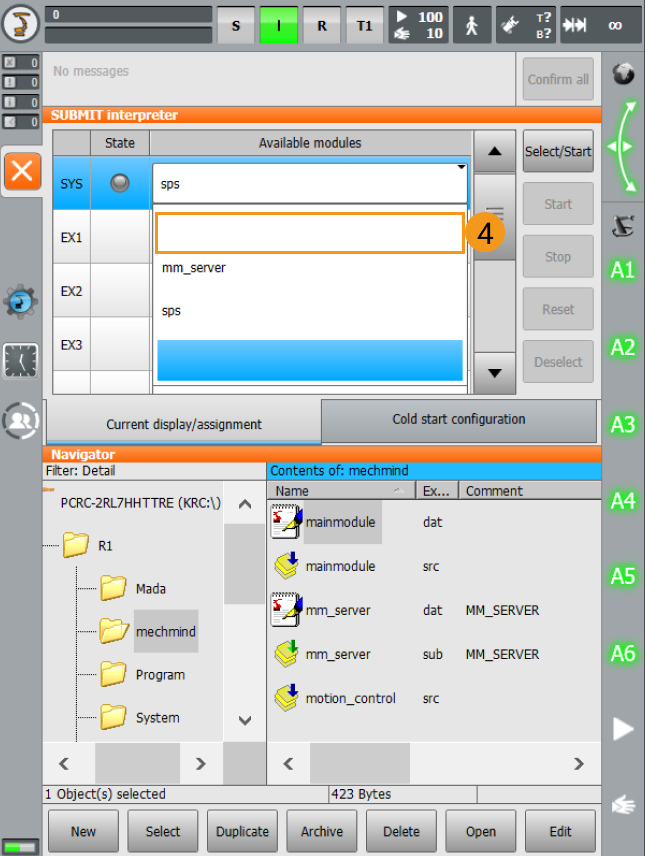
-
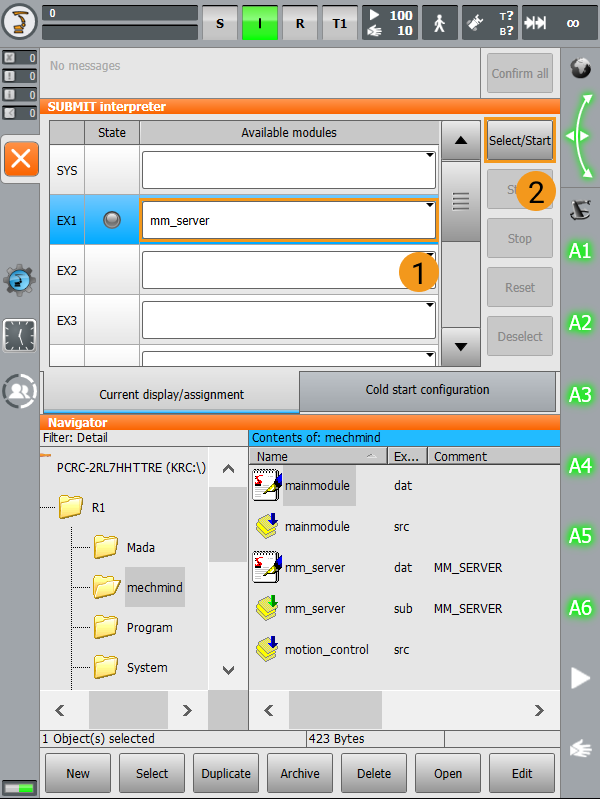
Similarly, select mm_server from the drop-down menu for EX1, and click Select/Start.
Run Program in the AUT Mode
-
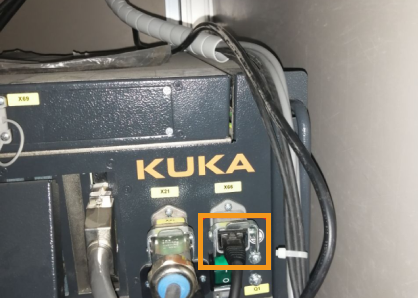
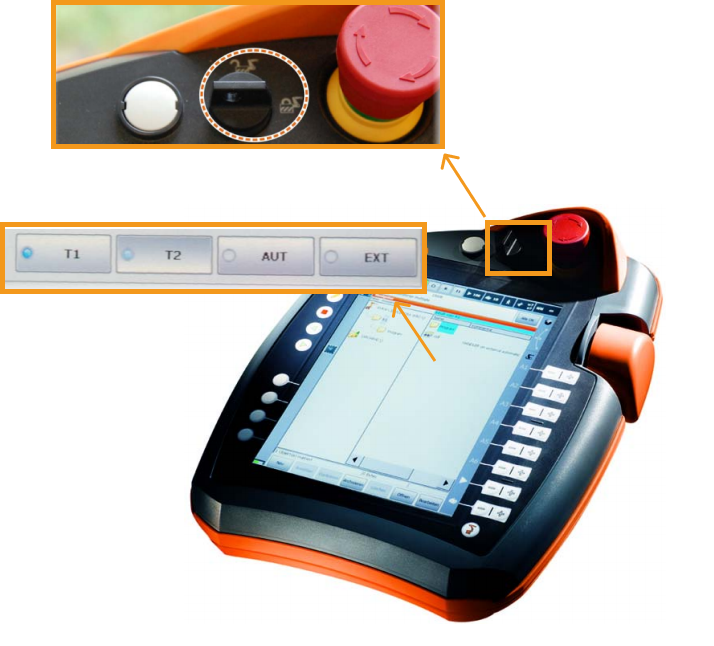
How to switch the mode: Turn the key switch to horizontal, select T1 or AUT in the pop-up dialog box on the screen, and then turn the switch back to vertical.
-
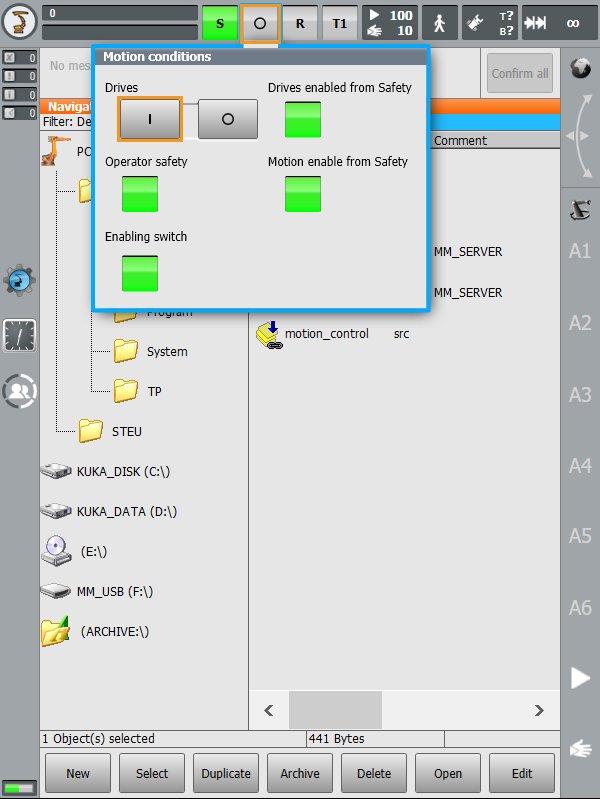
Switch to the T1 mode following the above step. Click O, and click I in the pop-up window to switch the status of Drives. If the status of Drives is I at the start, ignore this step.
-
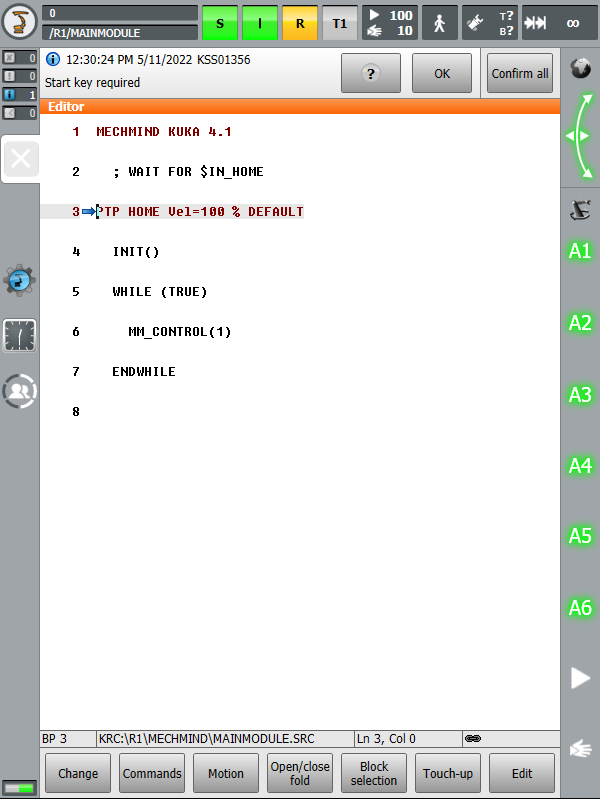
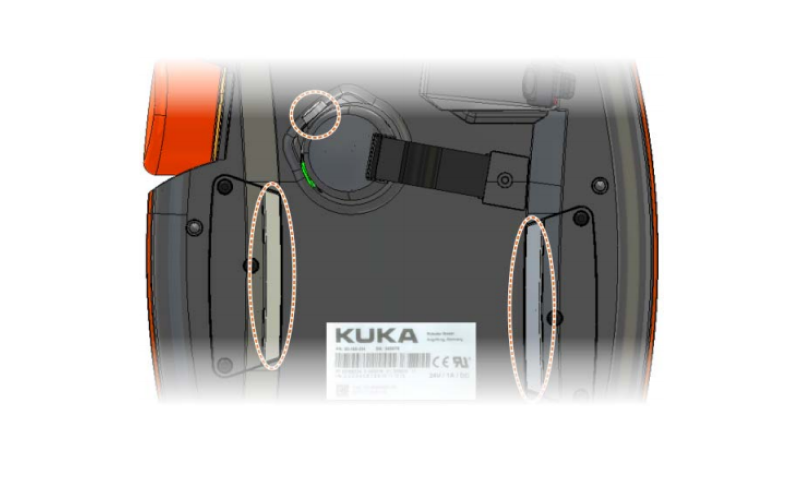
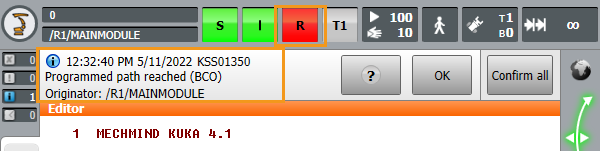
Set an appropriate velocity for the robot before moving it, and observe its motion carefully to avoid accidents. Press the enabling switch (either one of three) on the back of the pendant and the green start button on the front at the same time to move the robot back to the Home position. When the screen displays a message saying Programmed path reached (BCO), release the enabling switch and the green start button.
-
Switch to AUT mode as described in the above step, and press the start button to run the master-control program (the R icon should turn green).

If you failed to master control the robot but can successfully ping the robot IPon the IPC, please restart Mech-Center.
Test Robot Connection
Please refer to Test Robot Connection.
Fix Disconnection
The robot will automatically try to reconnect with Mech-Center if the connection is lost. If the reconnection fails, you can try the following steps to restart the program:
Click S, select mm_server from the drop-down menu, click Deselect, and click Select/Start. If an error message pops up, click Confirm all. After restarting the program, repeat the “Run Program in the AUT Mode” steps.