NACHI
This guide shows you how to set up Master-Control communication with a NACHI robot.
Check Controller and Software Version
-
There is no specific requirements on the version of robot controller
Set up the Network Connection
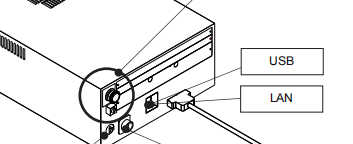
Connect the Hardware
Plug the Ethernet cable into the LAN port of the robot controller to connect it with the IPC.
Change the Protecting Level
-
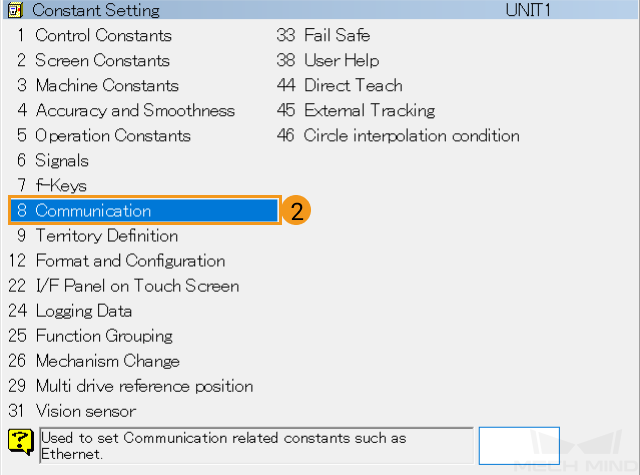
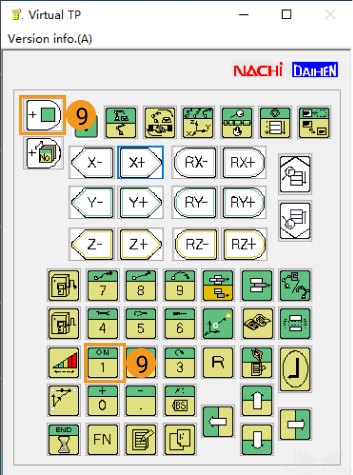
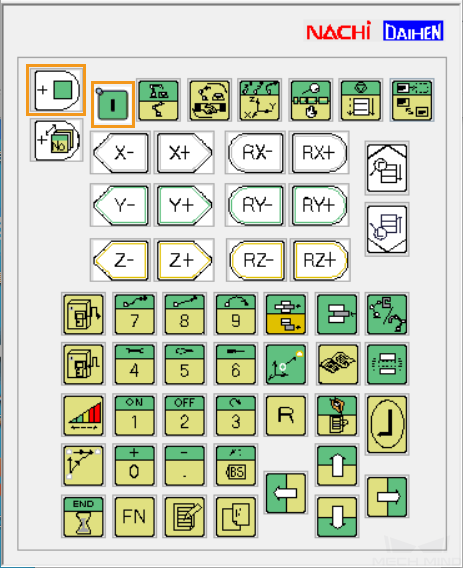
Open the teach pendant and press the **
 key, as shown below.
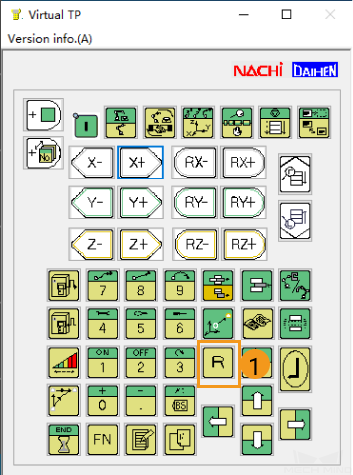
-
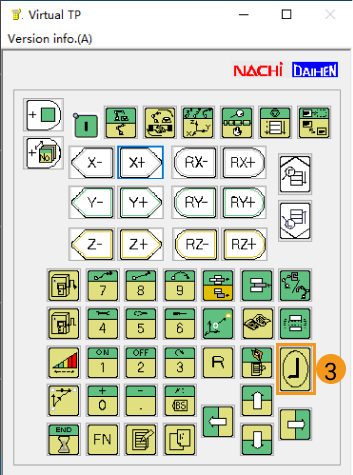
Enter 314 in the box as shown below, and then press **
 (Enter key) on the teach pendant.
-
Enter the default password 12345 in the box, and then press **
key on the teach pendant to change into SPECIALIST level.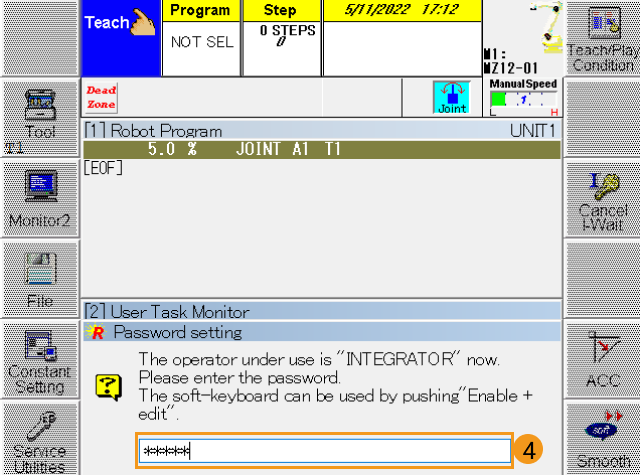
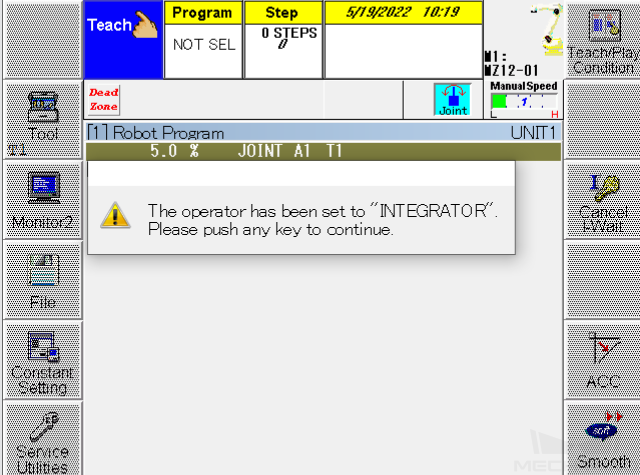
-
A pop-up window as shown below suggests that you have successfully changed the protecting level and all functions can be used from now on.


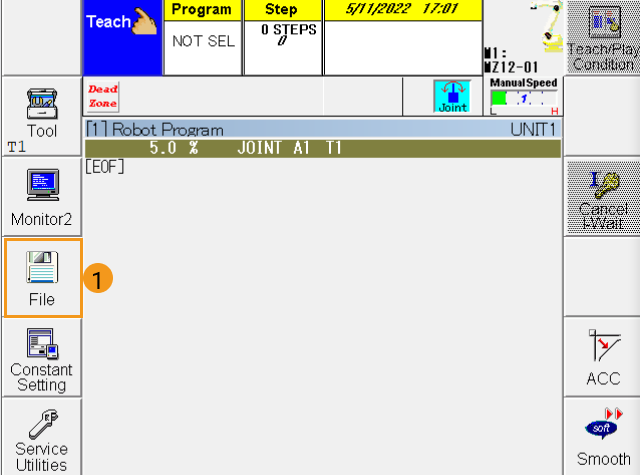
Load the Program Files to the Robot
Prepare the Files
Copy the master-control program files (The files are stored in: xxx{company} Software Suite-x.x.x{product-center}\Robot_Server\Robot_FullControl\nachi) of NACHI robot with a USB flash drive.
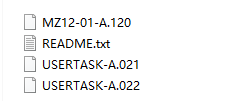
| Please rename the MZ12-01-A.120 file according to the actual robot model name. For example, when loading the file to the SRA166-1 robot, rename the file as SRA166-1-A.120, and then copy and paste it into your flash drive. |
Load the File to the Robot
-
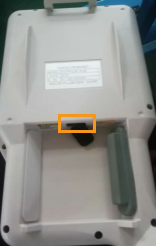
Plug the USB flash drive into the USB port on the back of the teach pendant, as shown below.
-
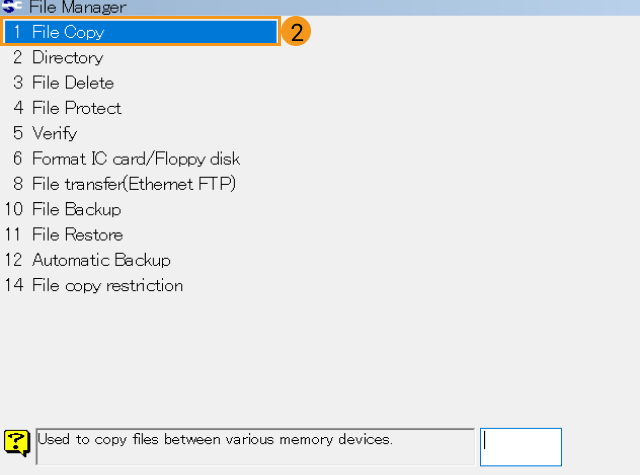
On the teach pendant, go to .
-
Device (src) is the folder of the USB flash drive. Select the folder where the program files are stored under Device (src) and the PROGRAM folder under Device (dest) In the Program column, click Select All File.
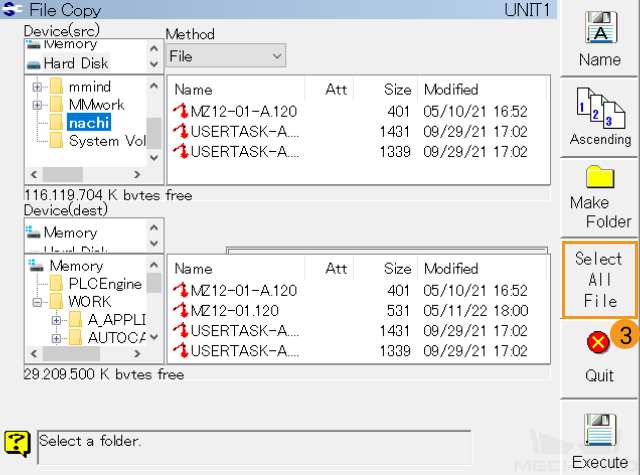
The teach pendant is a touchscreen display. You can tap the screen directly to perform operations. -
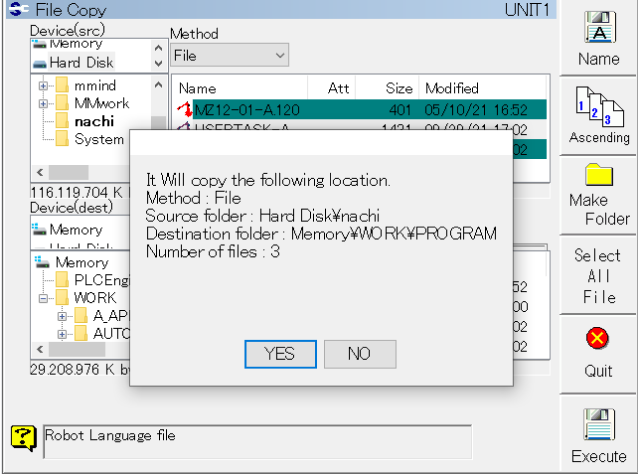
Press on Execute to import files.

-
If the following messages appear on the screen, the program files have been loaded successfully.
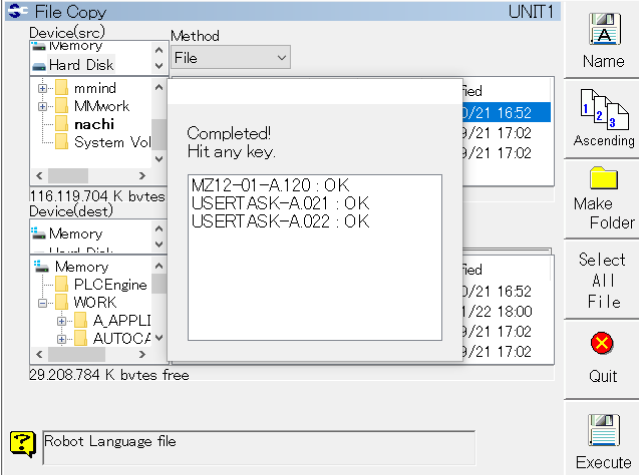
Please reboot the robot after exiting the program.
Convert the Program File
-
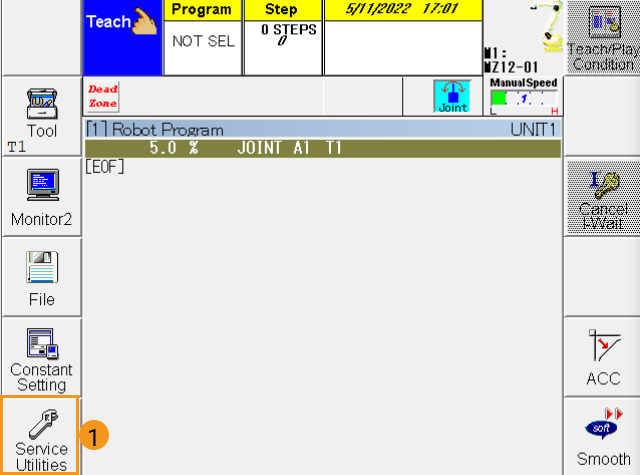
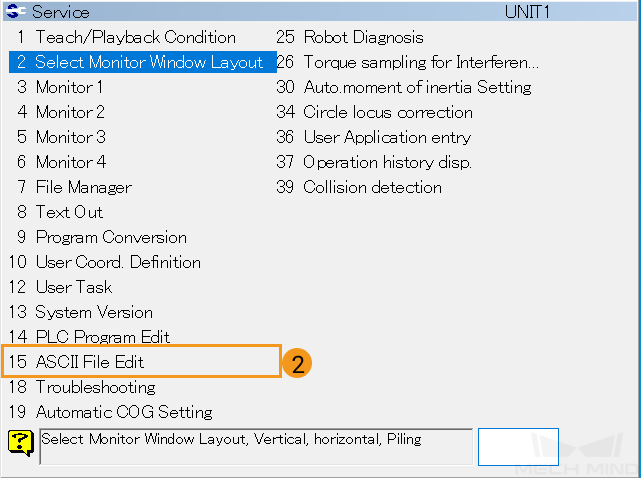
Go back to the main interface, press on to edit the ASCII files.
-
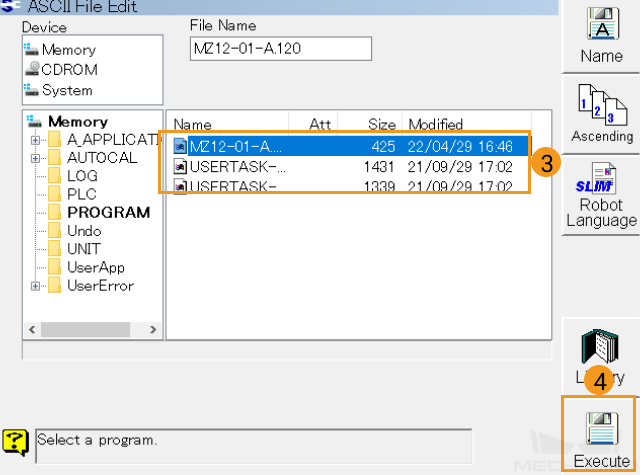
Select the file and press on Execute. Please perform the same operation on all three files in turn, and you can only start executing after the previous execution is completed.
-
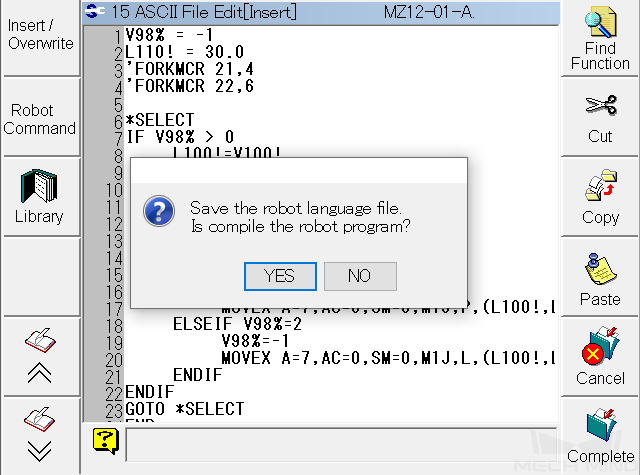
After pressing on Execute, a window as below will pop up, and then select Yes.
-
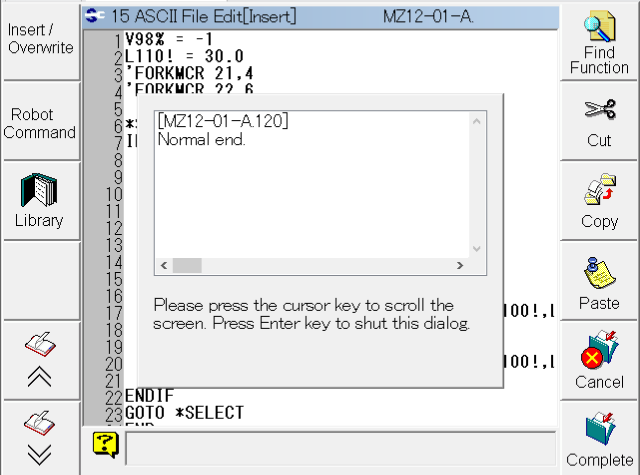
After converting the program file to the robot language, a message as shown below will appear.
Designate the Program
-
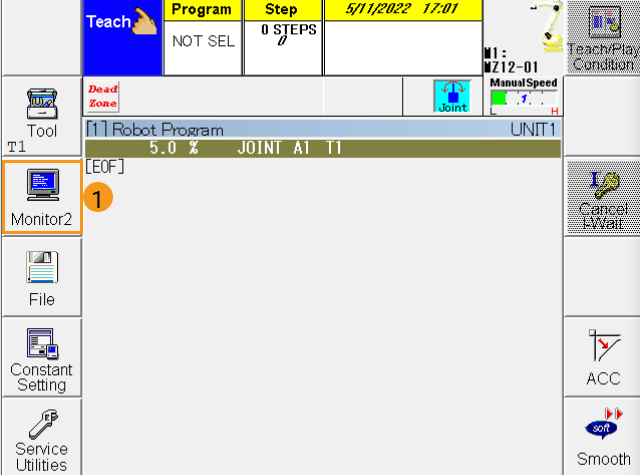
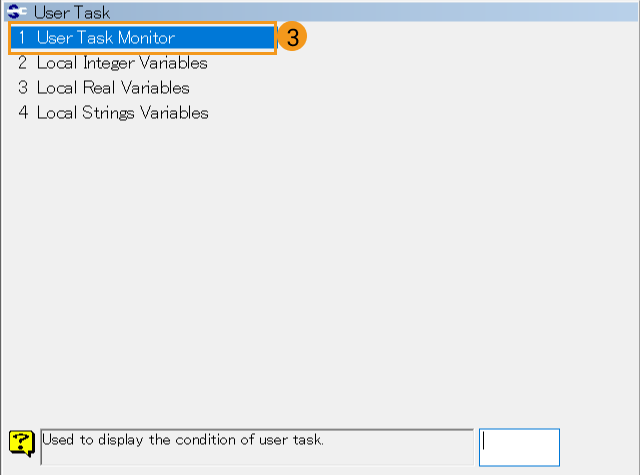
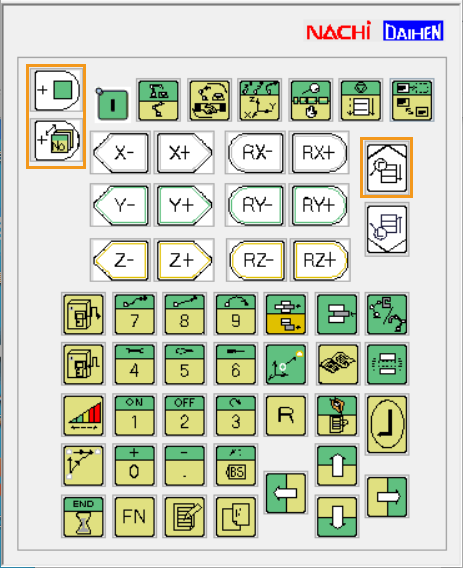
Return to the main interface, go to .
-
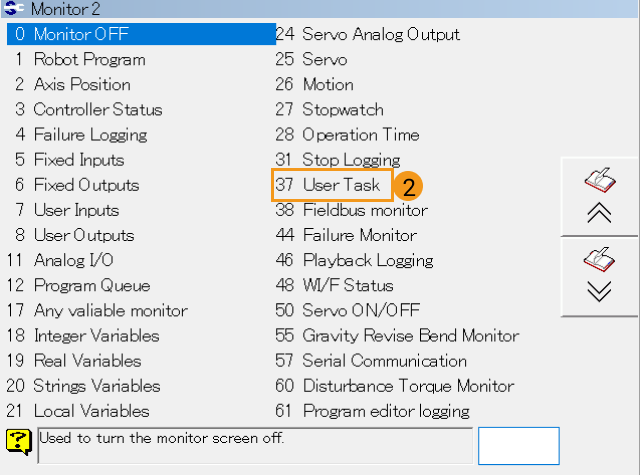
Now you can see the User Task Monitor as shown in ④ below. Press the
 key on the teach pendant, and then the User Task Monitor (⑥) line will turn orange, suggesting that it is editable now. Enter 21 in the first line in the Program column, and enter 22 in the second line. Then, press key.
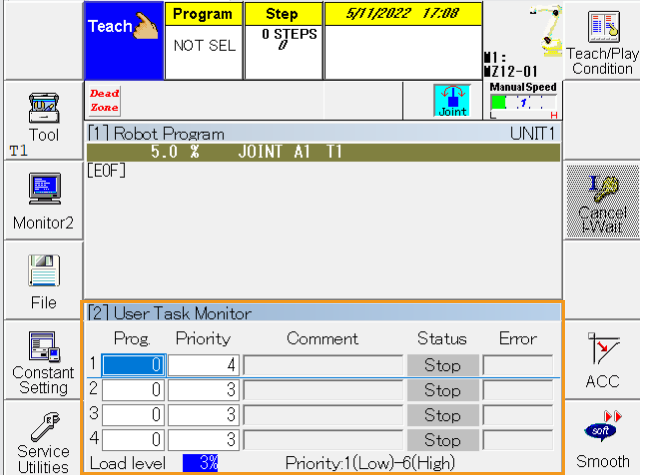


If the robot cannot move in a smooth way, please change the priority level of the program 21 from 4 to 5. -
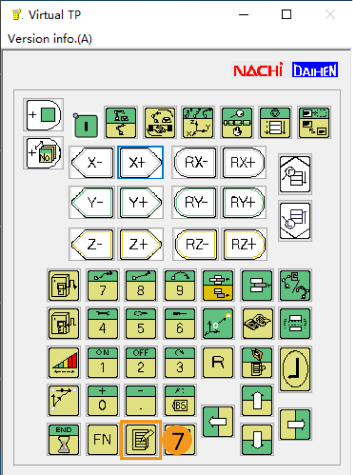
Select the Status column, and press
 and
and  keys at the same time.
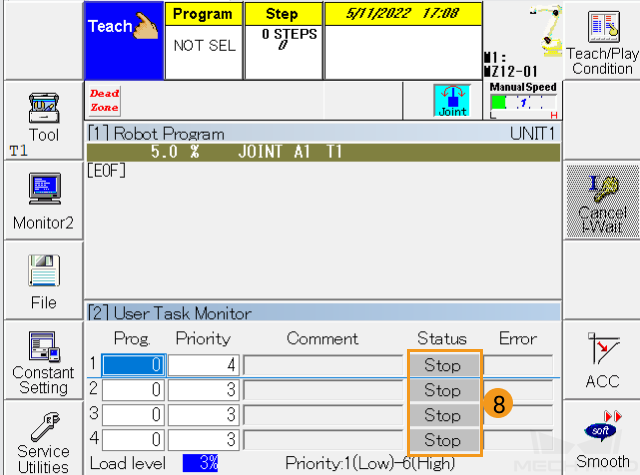
-
Go to , enter 120 in the box, and then press **
key. The designated program will appear in the Program panel and User Task Monitor.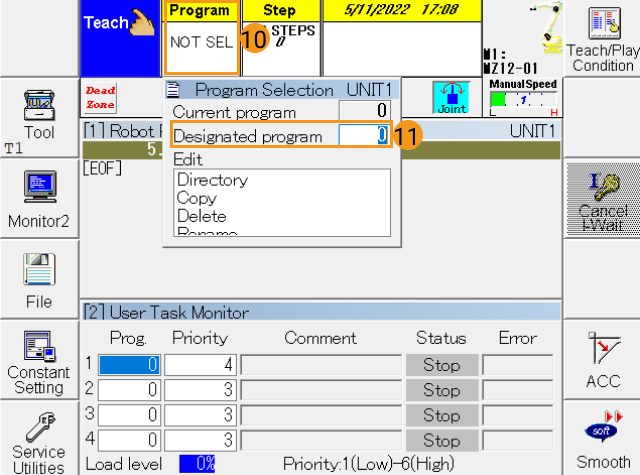
Start the robot
There are 2 types of controller for NACHI robots, which are the FD controller and the CFD controller.
-
If you are using an FD controller, follow the steps below.
-
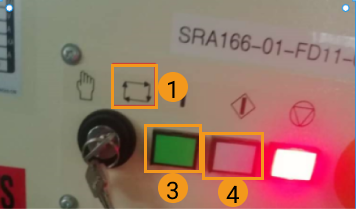
Turn the key on the controller and orientate it to the position ①.
-
Turn the selector switch to the position as shown below. Press the green button and white button in turn to start the robot.

-
-
If you are using a CFD controller, follow the steps below.
-
Turn the selector switch to the position as shown below.
-
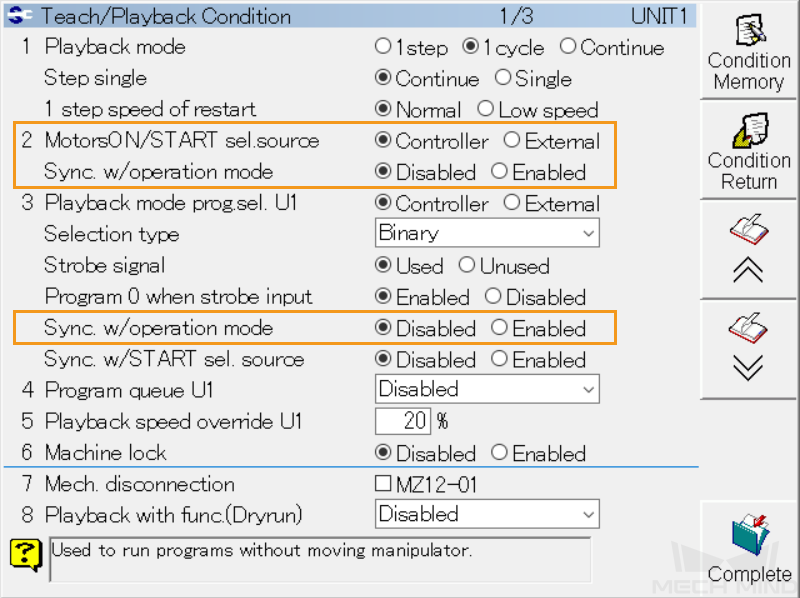
Press Teach/Play Condition in the upper right corner.

-
Set MotorsON/START sel.source to Controller and Sync. w/operation mode to Disabled.
-
Press the ENABLE and I keys together, and the indicator of the I key will be on.
-
Press the ENABLE, SHIFT, and GO keys together. If the blue line moves in the program window, the program is started and running.
-
| After all the master-control program files have been loaded, you can start Mech-Center and connect to the robot. |
Test Robot Connection
Please refer to Test Robot Connection.