Set up Standard Interface Communication with TM
This topic introduces the process of setting up the Standard Interface communication with a Techman (TM) robot.
Prerequisites
Before you perform any operation on the TM robot, please make sure that the following requirements have been met:
-
The controller software (TMflow) version is 1.84 or above.
-
The version of the Mech-Mind Software Suite you use is 1.6.1 or above.
-
You have known the IP address of the robot, e.g., 192.168.2.10.
Get Control of the Robot
There are two ways to control the robot, and you can choose either one according to the actual situation.
Control the Robot via the Controller
-
Connect the monitor, keyboard, and mouse to the controller through the controller’s USB and HDMI ports accordingly.
-
Click
 , and wait for the corresponding robot ID to appear in the window.
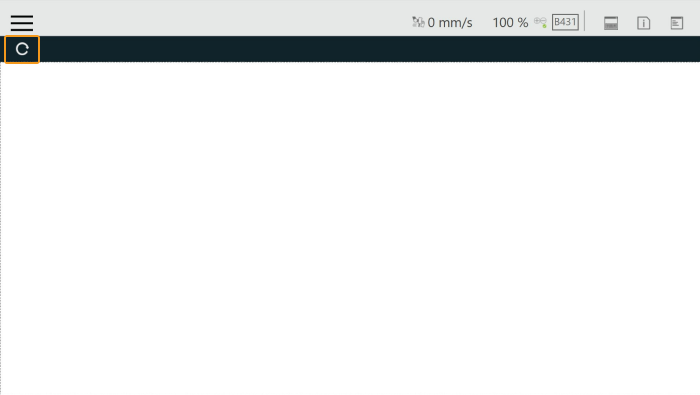
-
Connect the robot in any of the following ways:
-
Double-click the robot icon
-
Double-click the robot ID
-
Double-click the IP address of the robot
-
-
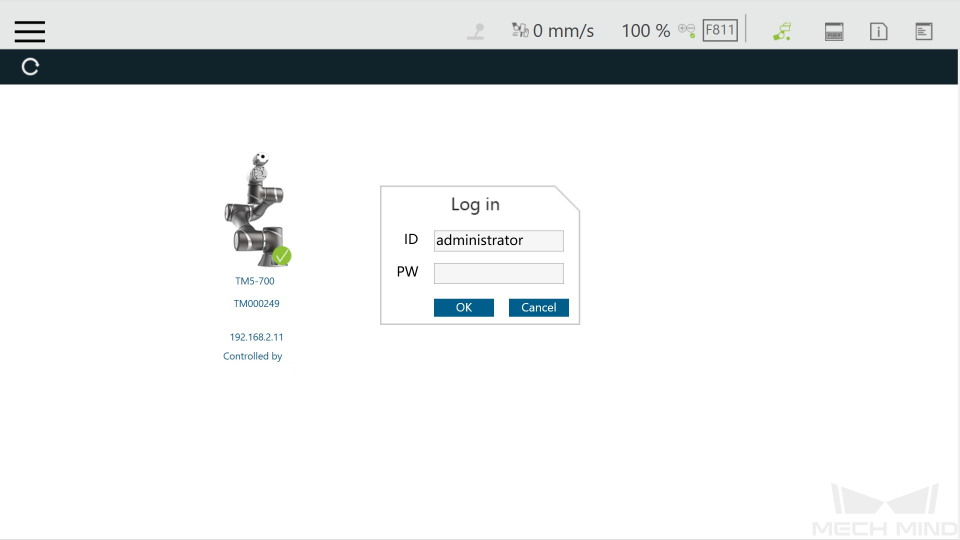
Enter your ID and password in the Log in window, and click OK. You can use the default ID administrator to log in without a password.
-
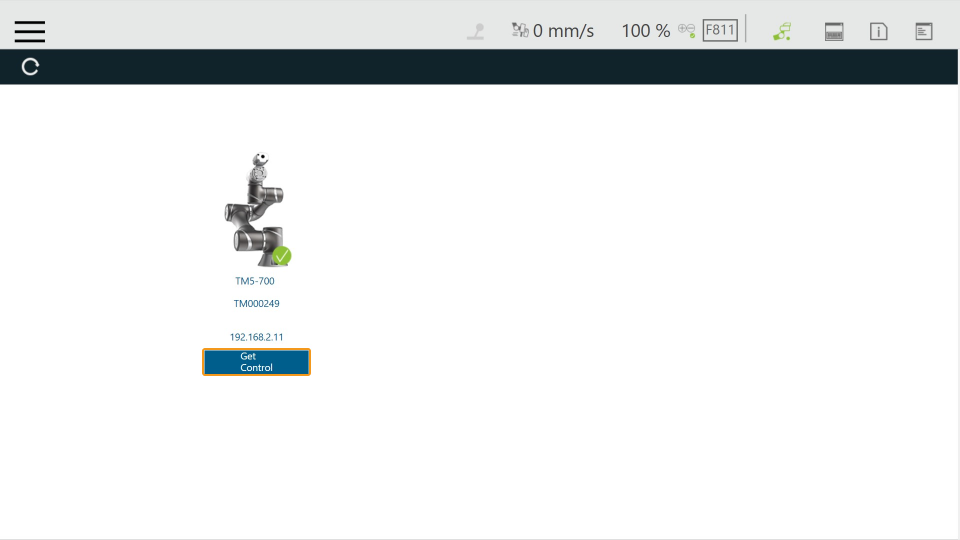
Click Get Control to control the robot.
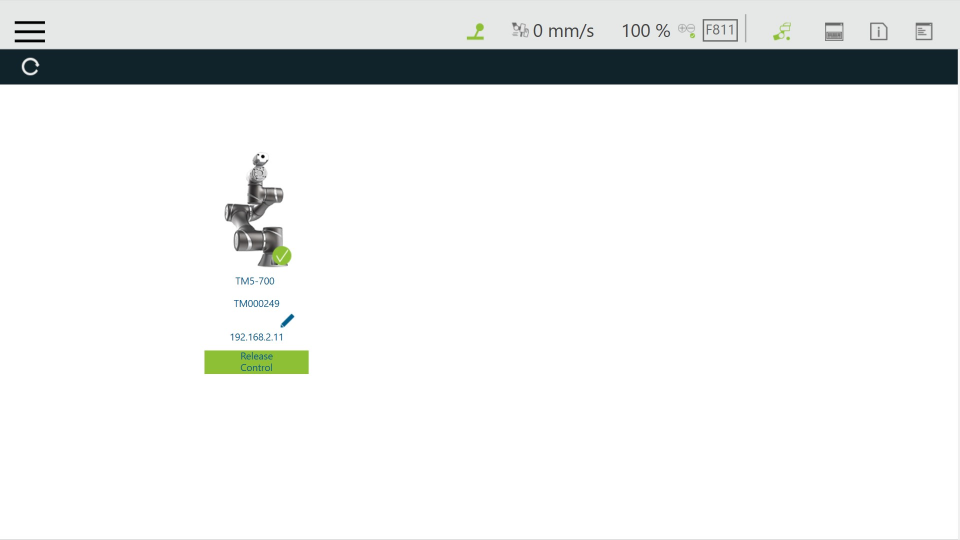
If the robot is controlled successfully, the window will be shown as below.
Control the Robot via the IPC
Connect Hardware
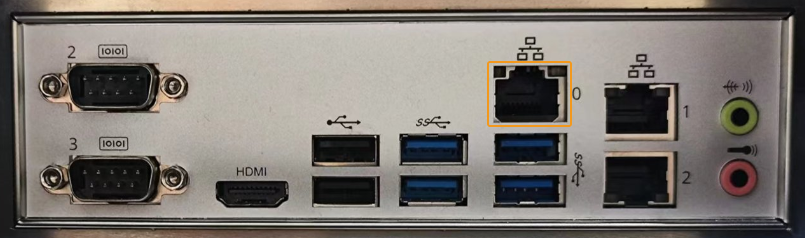
Plug the Ethernet cable into the LAN port of the robot controller to connect it with the IPC.
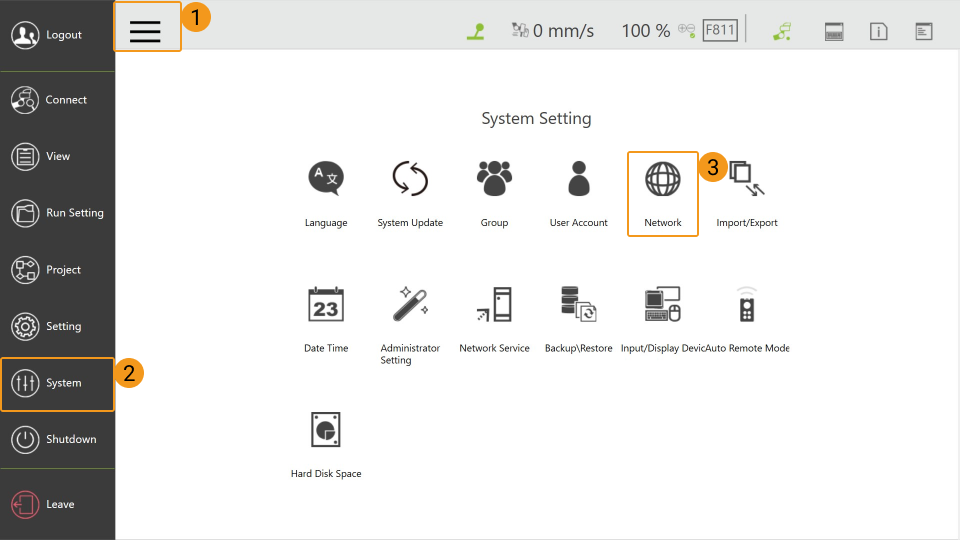
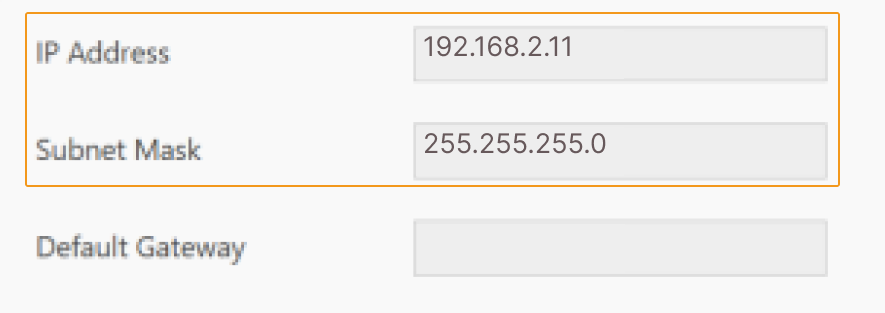
Set the IP Address of the IPC
| Set the IP addresses of the IPC and robot to be in the same subnet. Or else the robot cannot be connected successfully. |
Control the Robot with the IPC
-
Download and install the TMflow software on your IPC from Techman Robot’s website.
If the robot brand is Omron TM, please download TMFlow 1.8.4 or above from the Omron official website and complete the upgrade process. -
Open TMflow, click
, and wait for the corresponding robot ID to appear in the window.
-
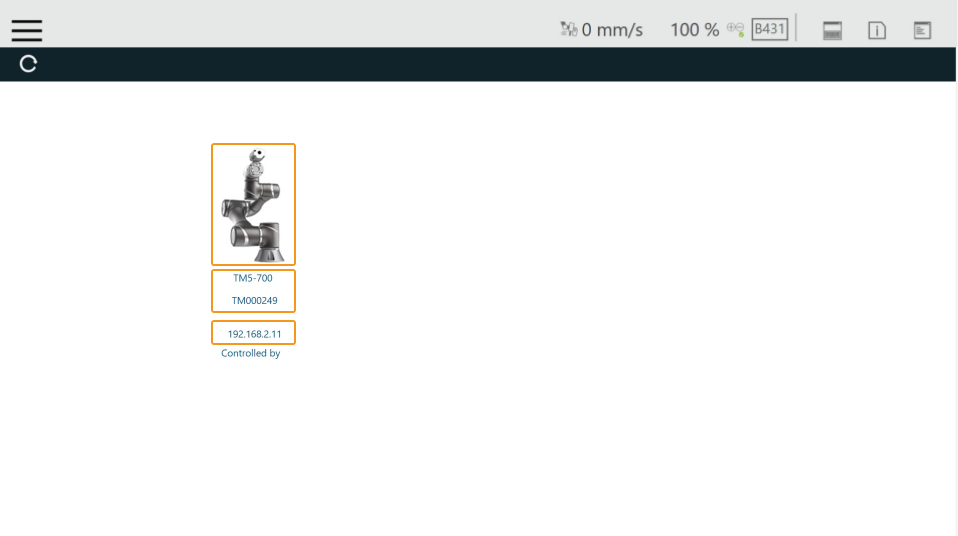
Connect the robot in any of the following ways:
-
Double-click the robot icon
-
Double-click the robot ID
-
Double-click the IP address of the robot
-
-
Enter your ID and password in the Log in window, and click OK. You can use the default ID administrator to log in without a password.
-
Click Get Control to control the robot.
If the robot is controlled successfully, the window will be shown as below.
Set up “Robot and Interface Configuration” in Mech-Vision
-
Click Robot and Interface Configuration in the toolbar of Mech-Vision.
-
Select Listed robot from the Select robot drop-down menu, and then click Select robot model. Select the robot model that you use, and then click Next.
-
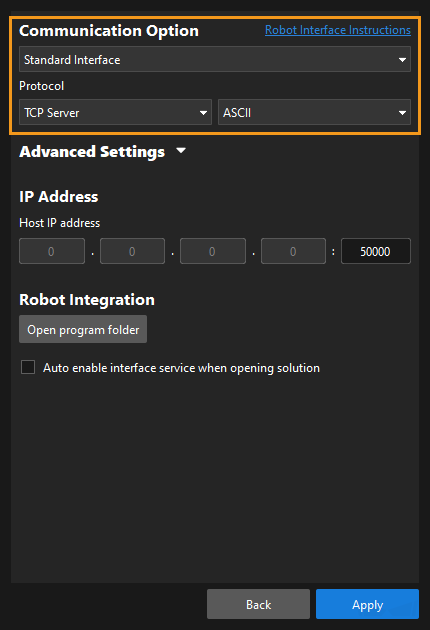
Select Standard Interface for Interface Type, and TCP Server and ASCII for Protocol, and then click Apply.
-
Make sure the Interface Service is started: in the toolbar of Mech-Vision, the Interface Service switch on the far right is flipped and turned to blue.

Load the Program Files
The example below uses an IPC to load the program files. The method to load the program files with a controller is similar.
Prepare the Files
-
Plug the USB flash drive into the USB port of the IPC.
-
Rename the USB flash drive to TMROBOT, or else the USB flash drive cannot be recognized by the robot controller.
-
Copy the program files to the USB flash drive. The files are stored in the
xxx{company} Software Suite-x.x.x{product-center}\Robot_Interface\Robot_Plugin\TM_Plugin_and_Play*TM_Export*folder. -
Plug the USB flash drive with the program files into the USB port of the robot controller.
Back up Robot System Files
It is recommended to back up robot system files before loading Standard Interface program files to avoid system corruption that may be caused by the loading operation. In case any issue occurs, you can use the backup file to restore the robot system.
-
Open the TMflow software, click the
 icon in the upper left corner of the window, and select .
-
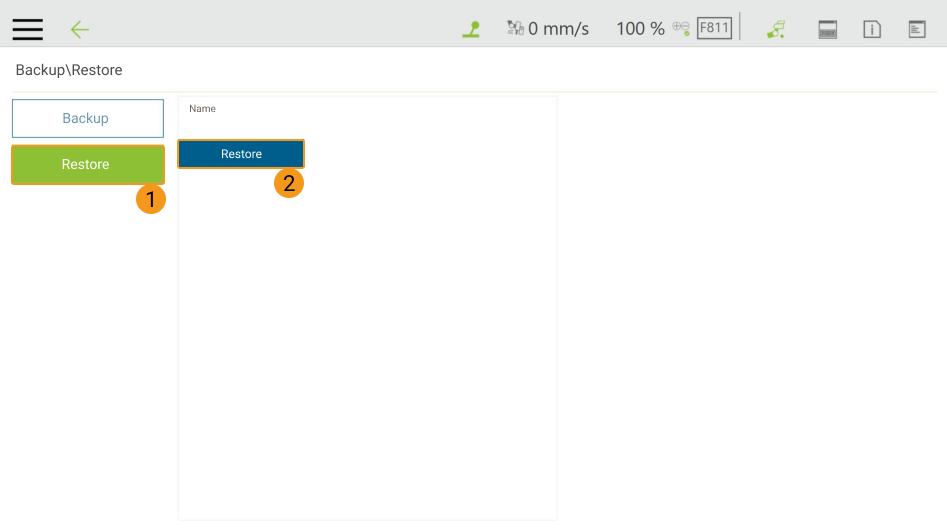
Click Backup, enter a File Name for the backup file, and then click Backup.
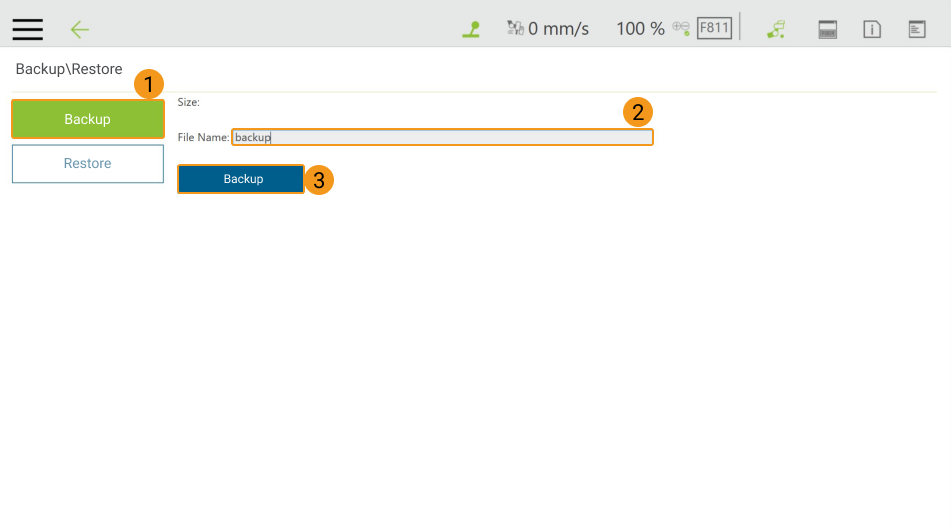
If you need to restore the robot system with the backup file, click Restore and then Restore.
Load the Files to the Robot
-
Before loading the files to the robot, please press and hold the
M/Abutton on the Robot Stick to switch the robot to the Manual mode (the green Manual light is on). Please skip this step if the robot is already in the Manual mode.
-
Open the TMflow software, click
and then select .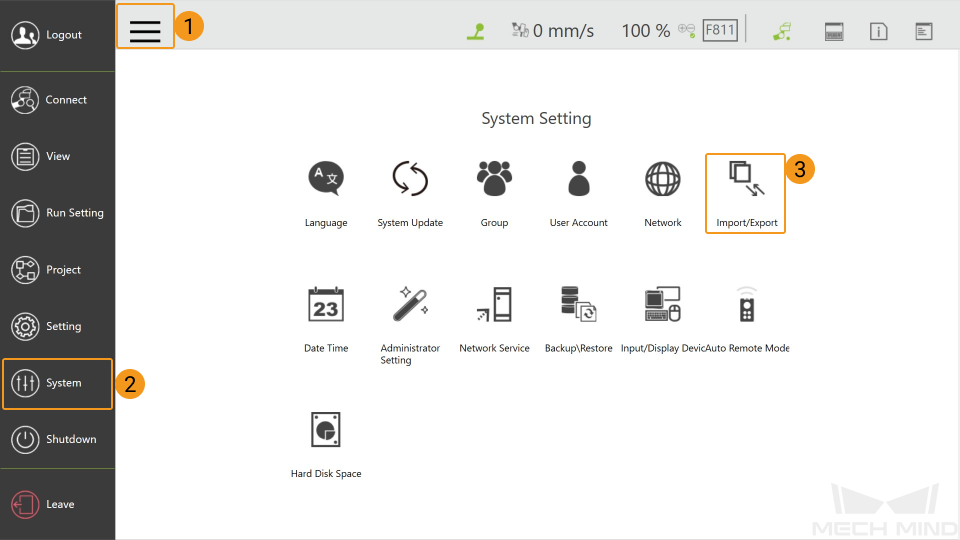
-
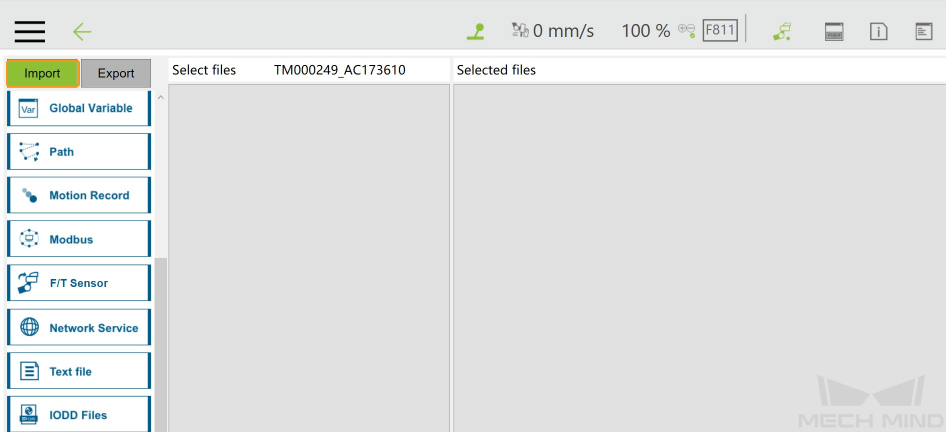
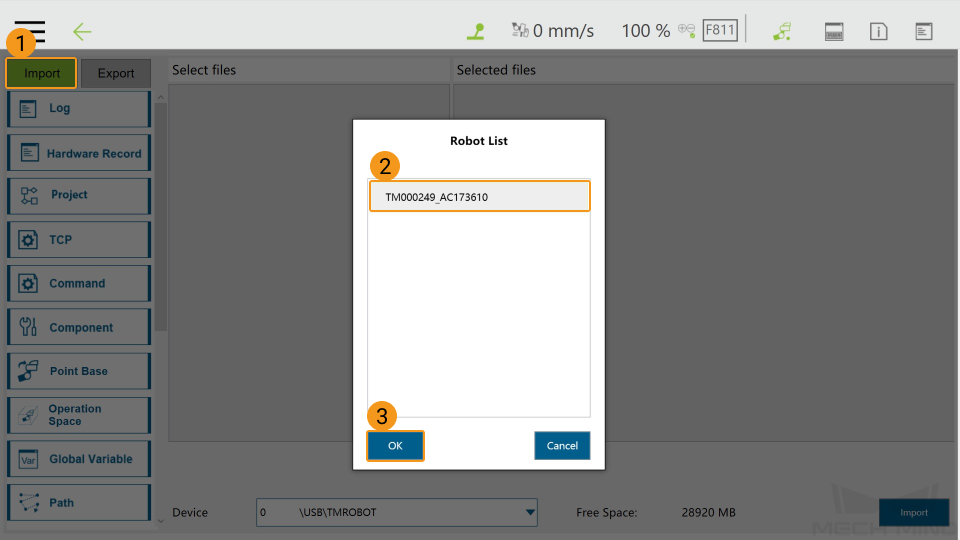
Click Import in the upper left corner.
-
Select the program file TM000249_AC173610 in the Robot List pop-up window and click OK.
-
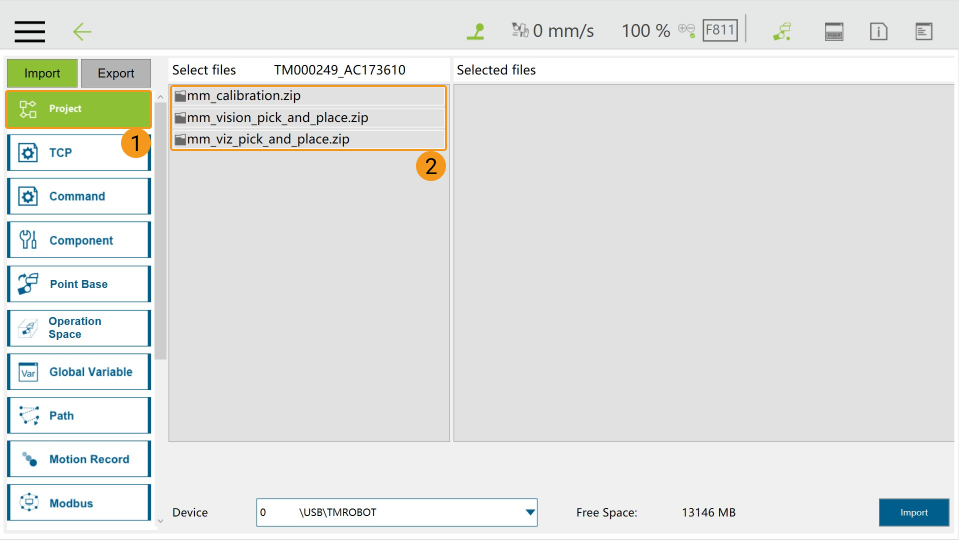
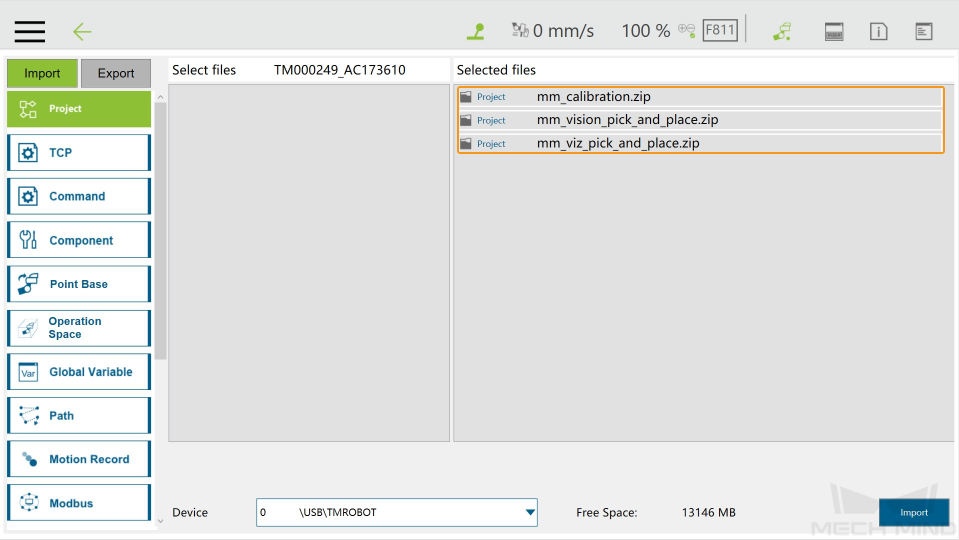
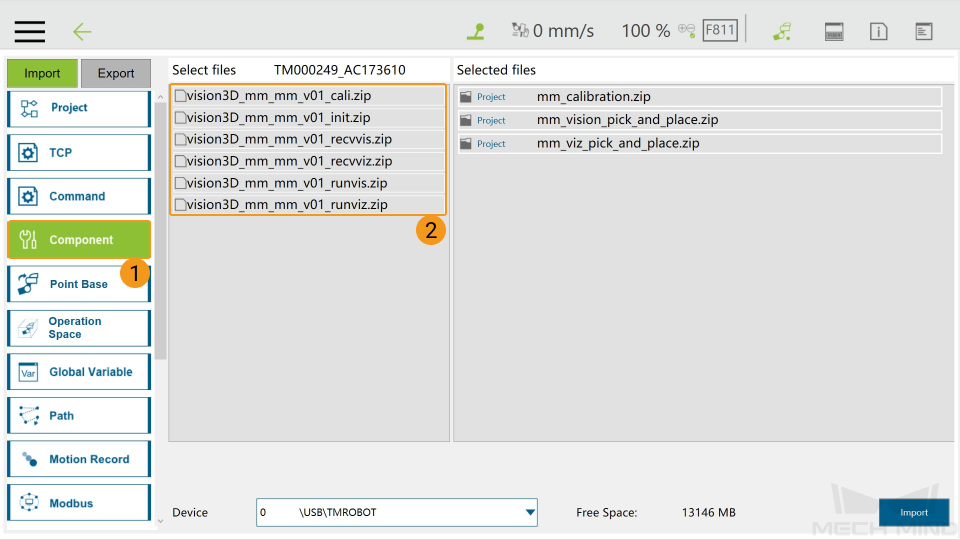
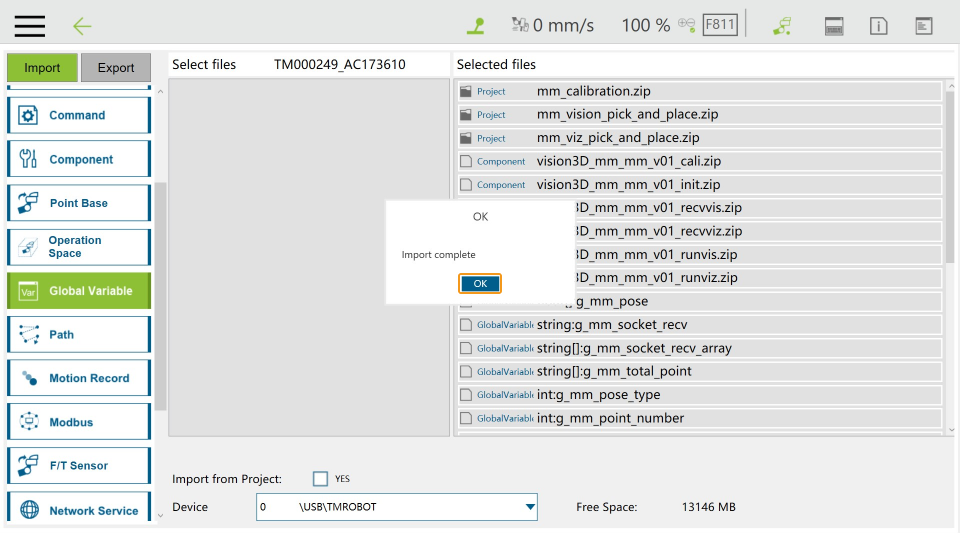
Click Project, and select all three files in sequence in the Select files panel, and then they will appear in the Selected files panel on the right.
-
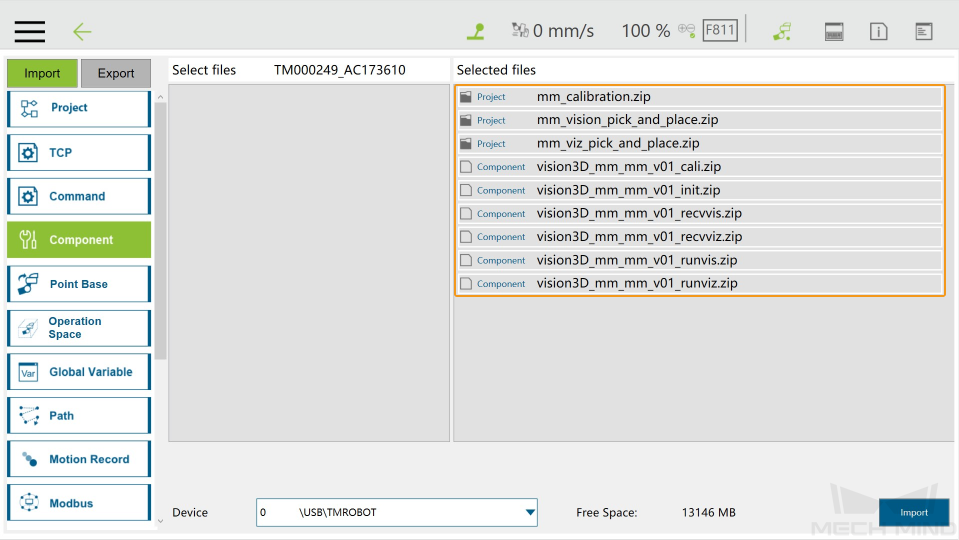
Click Component, and select all six files in sequence in the Select files panel, and then they will appear in the Selected files panel on the right.
-
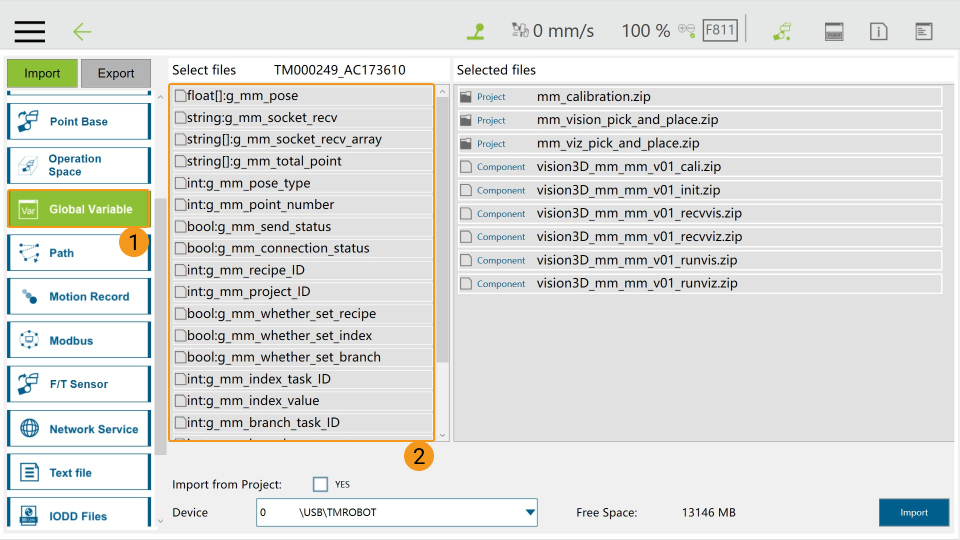
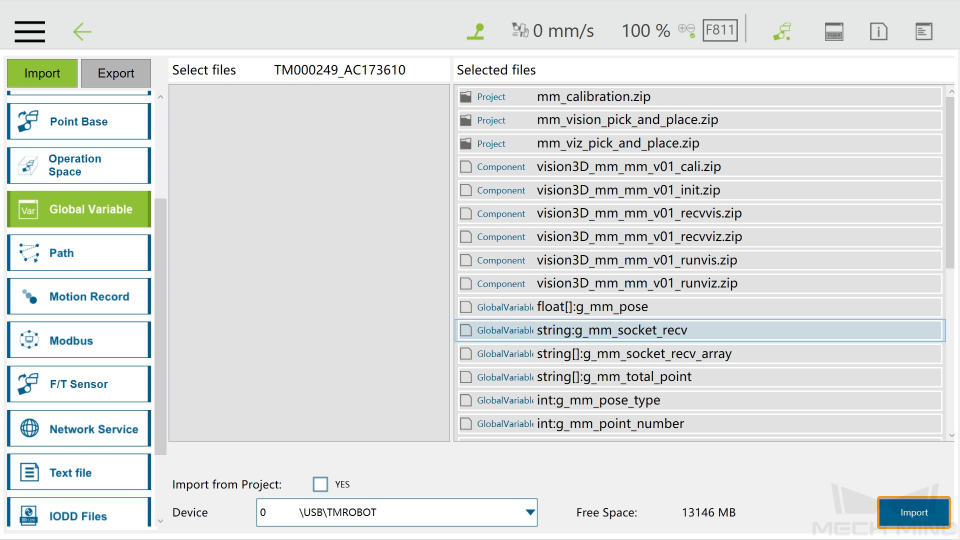
Click Global Variable, and select all files in sequence in the Select files panel, and then they will appear in the Selected files panel on the right.
-
Click Import in the lower right corner of the window, and click OK in the pop-up window after the import is completed.
-
Click
, and select .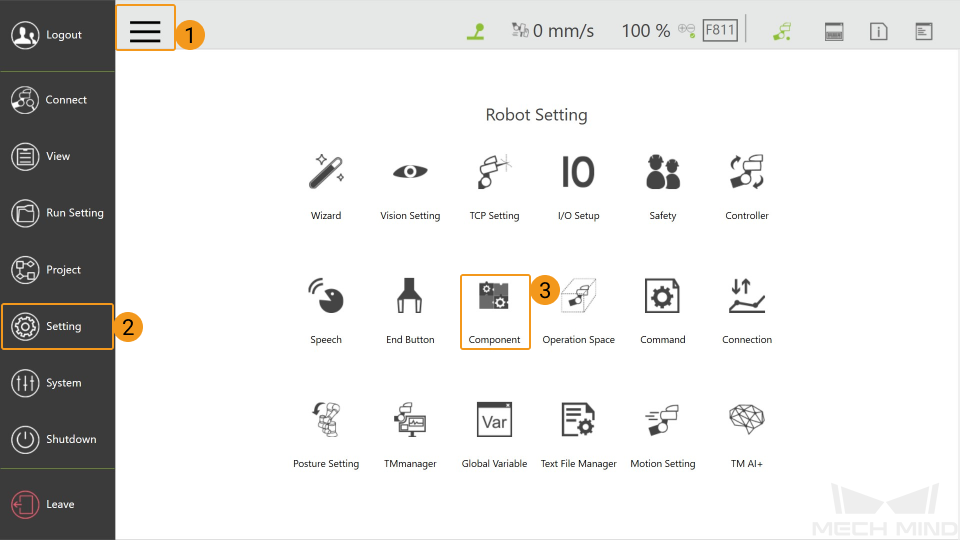
-
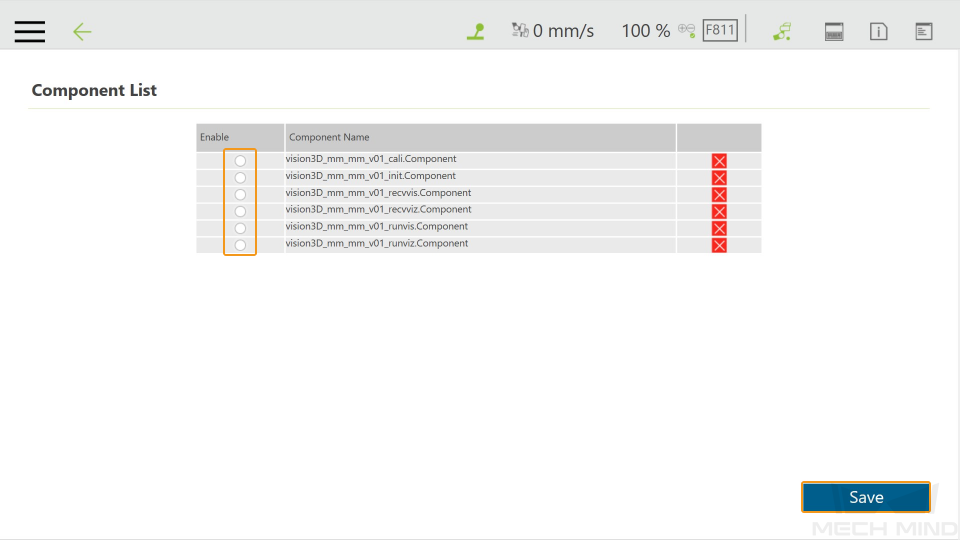
Select all the components and click Save.
-
Unplug the USB flash drive from the IPC after you have completed the above steps.
Test Robot Connection
-
Click
and select Project to open the window as shown below.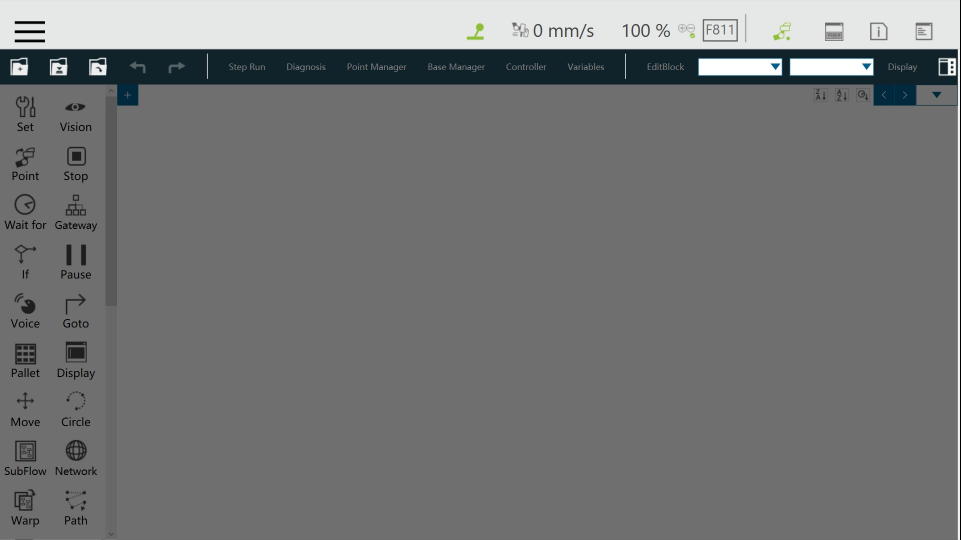
-
Click the
 icon in the upper left corner of the window, and enter a name for the project in the pop-up window, and then click OK.
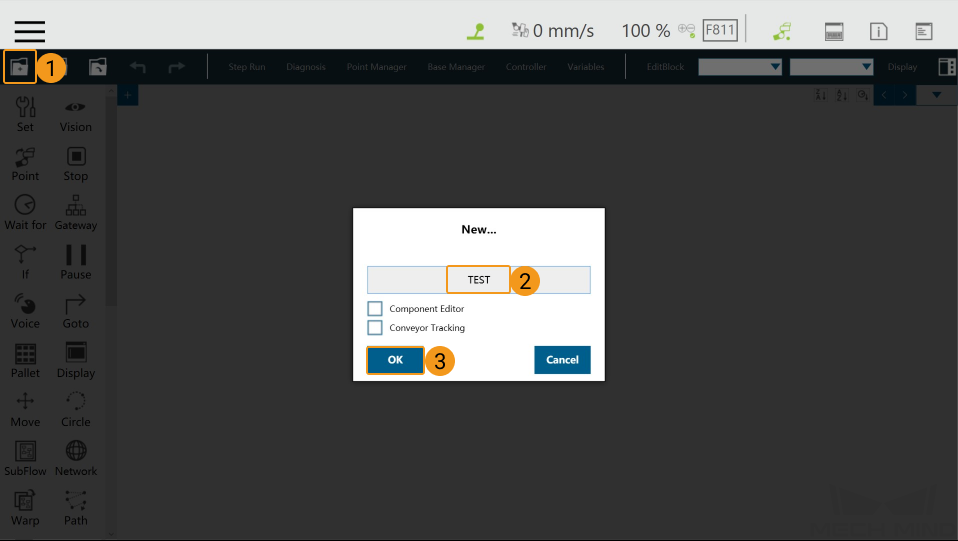
-
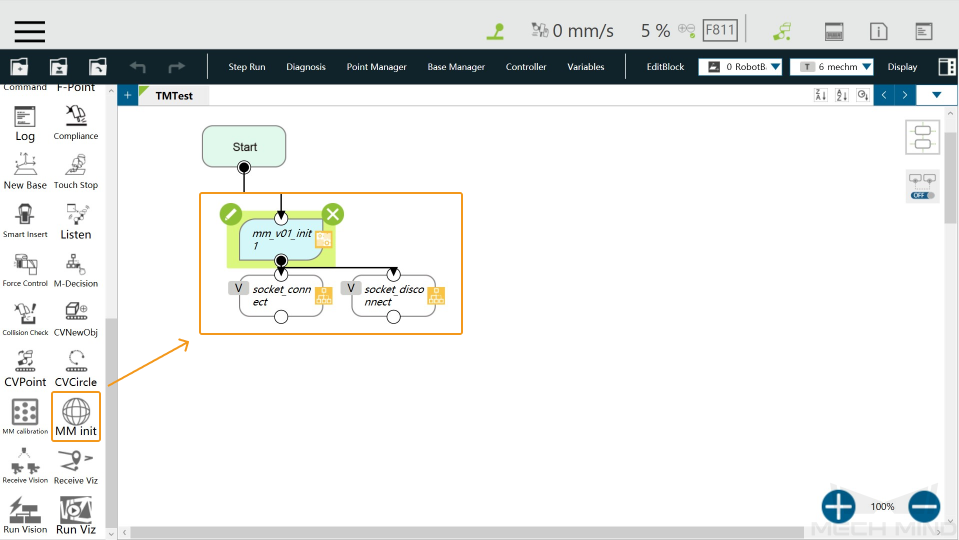
Drag the MM init node into the Flow Editing Area.
-
Click the
 icon in the upper left corner of the mm_v01_init1 node.
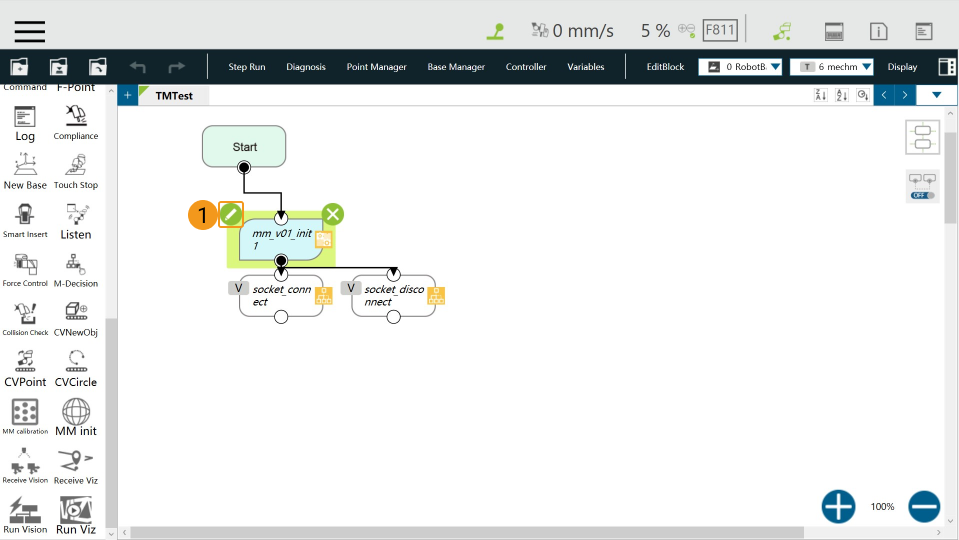
-
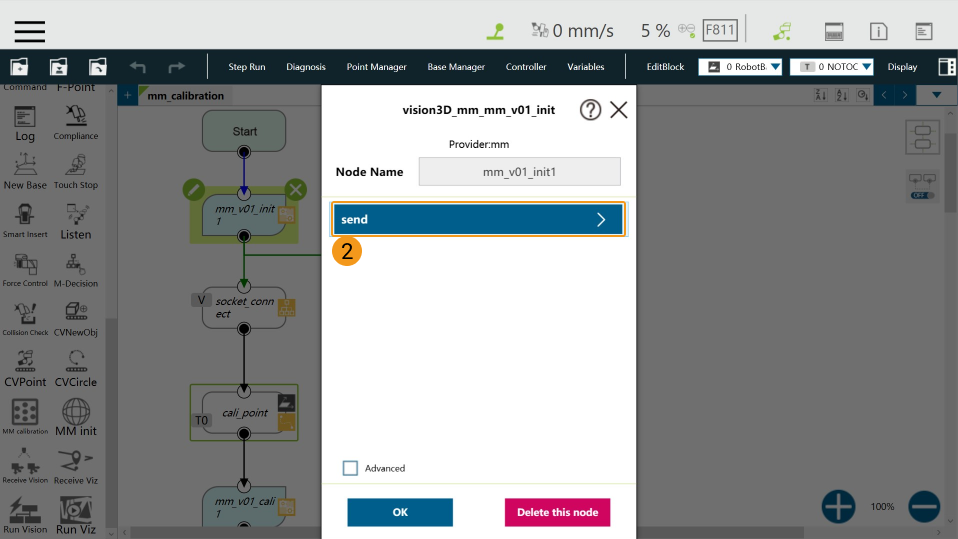
Click the icons one by one as shown in the following image.

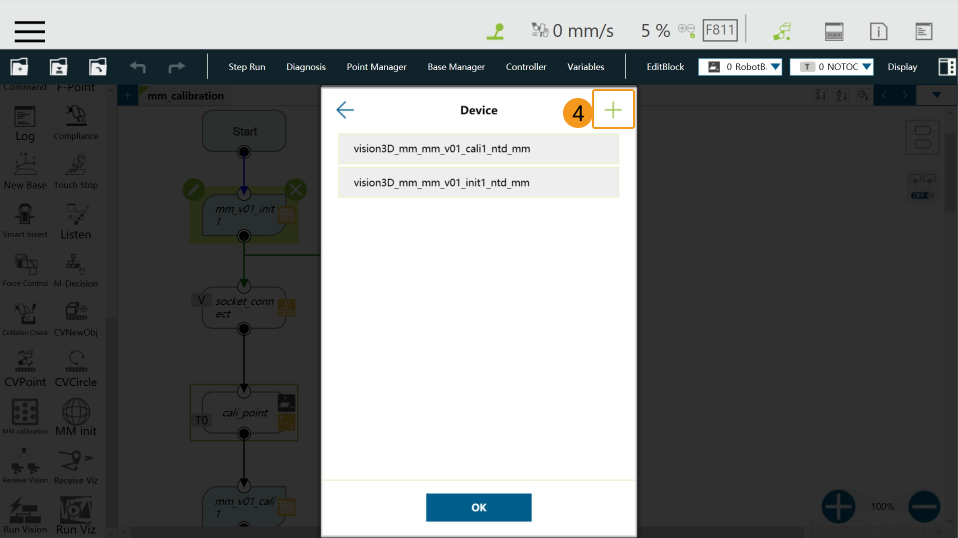
-
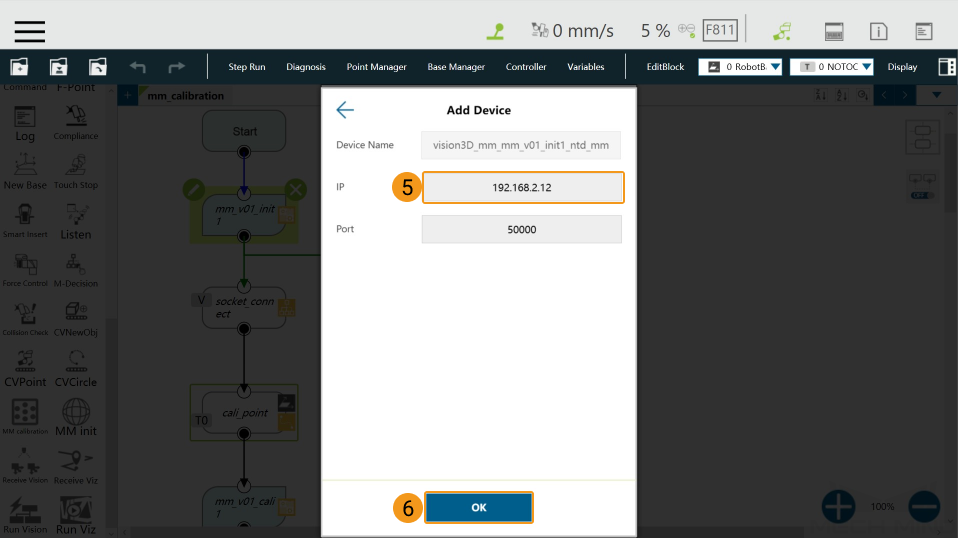
Enter the IP address of the IPC in the Add Device window and click OK.
-
Press the
M/Abutton on the Robot Stick until you hear a beep, which suggests that the Manual mode has been disabled. Press the buttons + - + + - in sequence, and the blue Auto light will be on, suggesting that the robot has been switched to the Auto mode.
-
Then press the
Runbutton on the Robot Stick, and the program will be run after three beeps. -
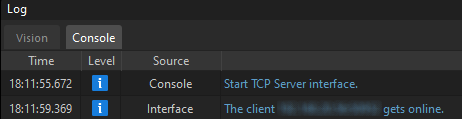
The robot can be connected successfully if the Console tab of Mech-Vision Log panel displays messages indicating that the client is connected.
-
After you complete the testing, press the
Stopbutton on the Robot Stick.