mm_vis_pick_and_place
This example program triggers the Mech-Vision project to run and moves the robot to the received vision point.
|
Please make sure that the Lua script is running in the background. Otherwise, the communication between the robot and the Software Suite cannot be established. |
Program Logic
NOP
WAIT B099 = 0
SET B105 1
//set project id
// SET B108 1
// //recipe id
// SET B099 3
// //set recipe
// WAIT B099 = 0
SET B106 0
//run vision expect num of pose
SET B107 2
//run vision pose type
SET B099 1
//start vision
WAIT B099 = 0
SET B099 2
//receive from vision
WAIT B099 = 0
SET B099 8
//set pose to v101-v120
WAIT B099 = 0
// MOVL V101 V=100MM/S CR=0.000MM
END-
Line 3: Set Mech-Vision project No. 1 as the project to be executed.
-
Line 5: Set the parameter recipe to be used in the Mech-Vision project.
-
Line 7: Send the command for switching Mech-Vision parameter recipe.
-
Line 10: Set the number of vision points to obtain (0 means to obtain all vision points or the first 20 if more than 20 are available).
-
Line 12: Set the type of pose to send to Mech-Vision (2 means to send the current TCP).
-
Line 14: Send the command for triggering the Mech-Vision project to run.
-
Line 17: Send the command for obtaining vision points.
-
Line 20: Send the command for storing the obtained vision poses from Mech-Vision in variables V101 to V120.
-
Line 23: Move the robot to the vision pose stored in V101. Modify the command and/or add more robot motion commands according to actual needs.
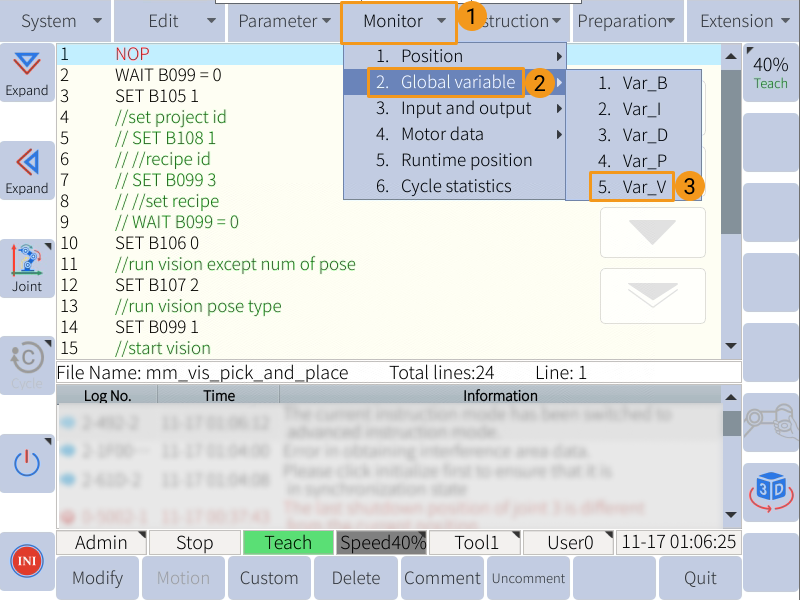
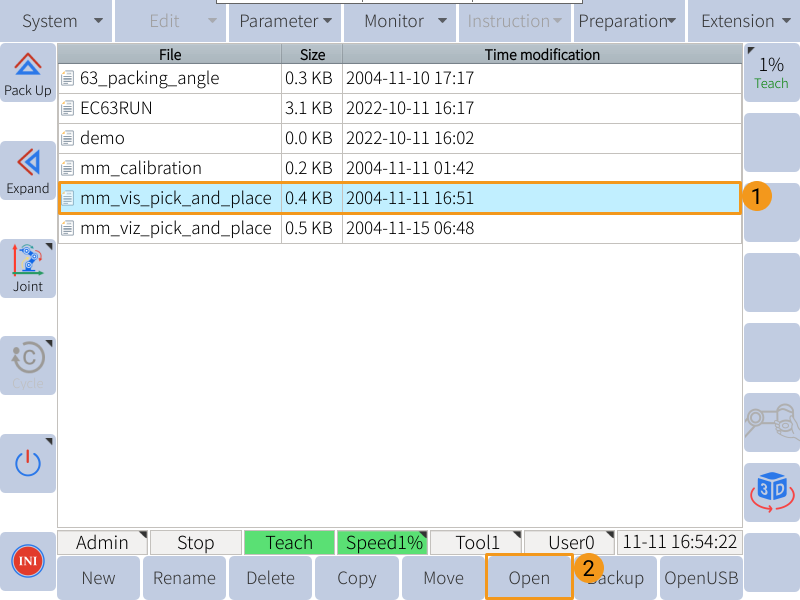
Run the mm_vis_pick_and_place program
Open Needed Variables
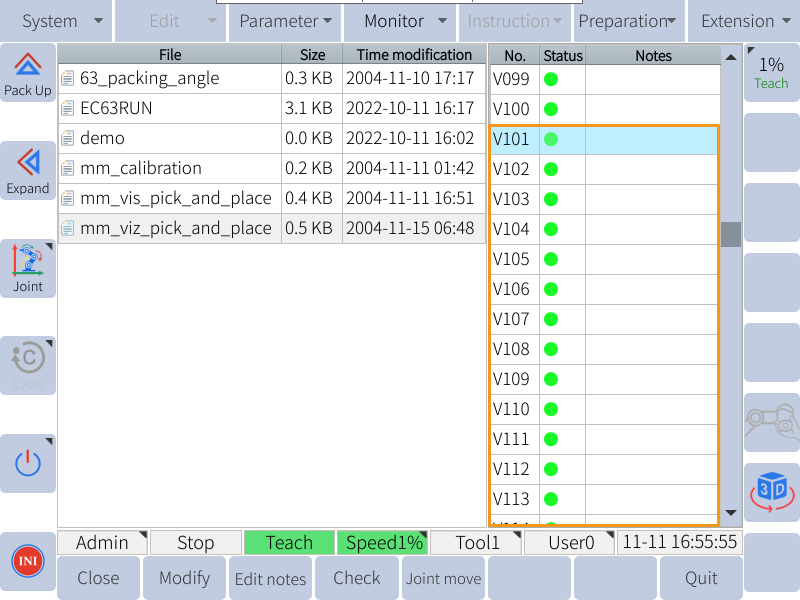
As the vision poses received from Mech-Vision will be stored in variables V101 to V120, please open these 20 variables first according to the following steps.
-
On the teach pendant, press .
-
If the dot in the Status column is red, the variable is not opened. Select a closed variable, and press Open in the lower left to open it.
-
Press Quit to return to the home page.
Run the Program
-
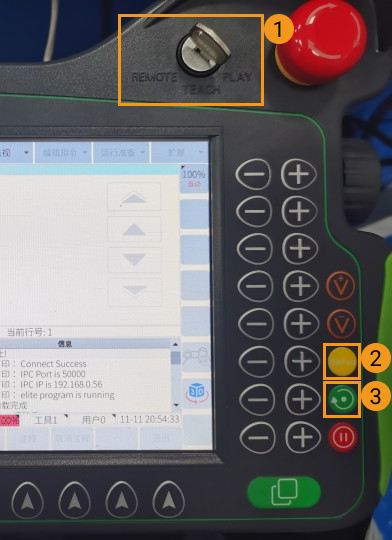
Move the cursor to the first line of the program, and turn the key to PLAY.
-
Press the yellow button in the lower right of the teach pendant to start the servo motors, and then press the green button to run the program automatically.
-
If the program is running successfully, the received vision poses will be stored in the variables starting from V101.