Set up Standard Interface Communication with ABB (RobotWare 6)
This topic introduces the process of setting up the Standard Interface communication with an ABB robot.
Check Controller and Software Compatibility
-
Robot: a 4-axis or 6-axis ABB robot
-
RobotWare Option: 616-1 PC Interface
Please follow the steps as shown in the figure below to check whether the option has been installed.
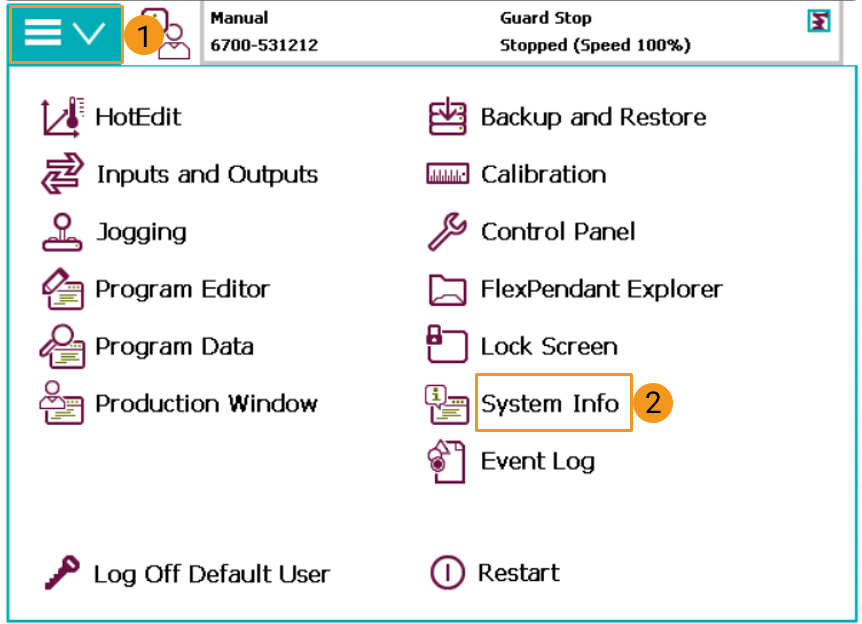
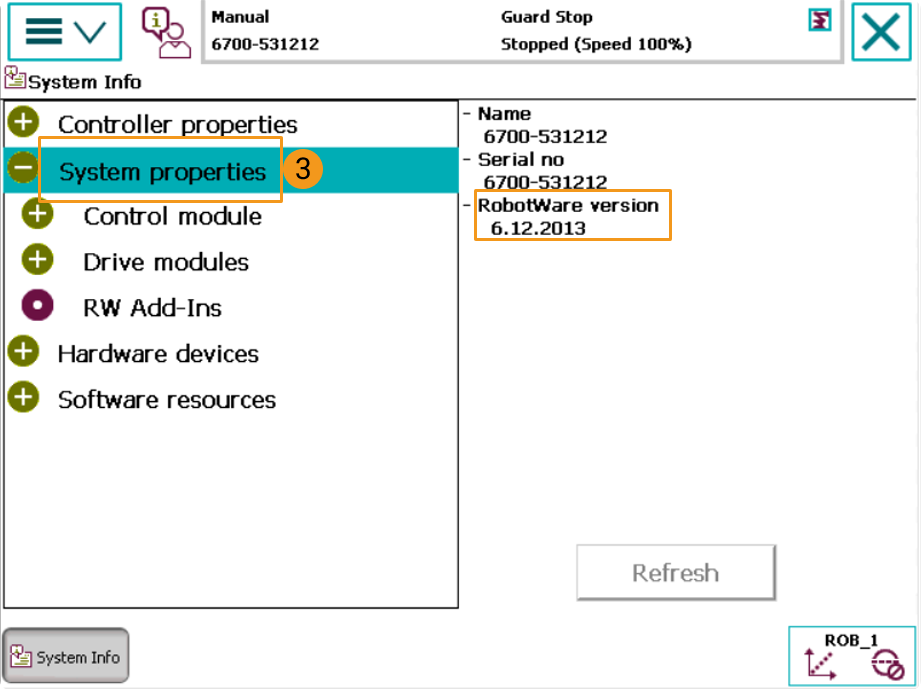

| The 616-1 PC Interface option must be installed to establish the Standard Interface communication. |
Set up the Network Connection
Hardware Connection
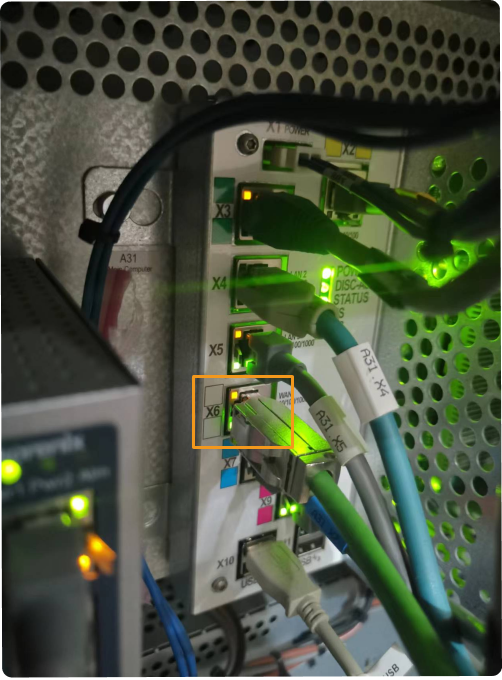
Plug the Ethernet cable of the IPC into the X6 (WAN) port of the robot controller, as shown below.
IP Address Configuration
You can set the IP on the teach pendant or via RobotStudio.
-
Set the IP on the teach pendant:
-
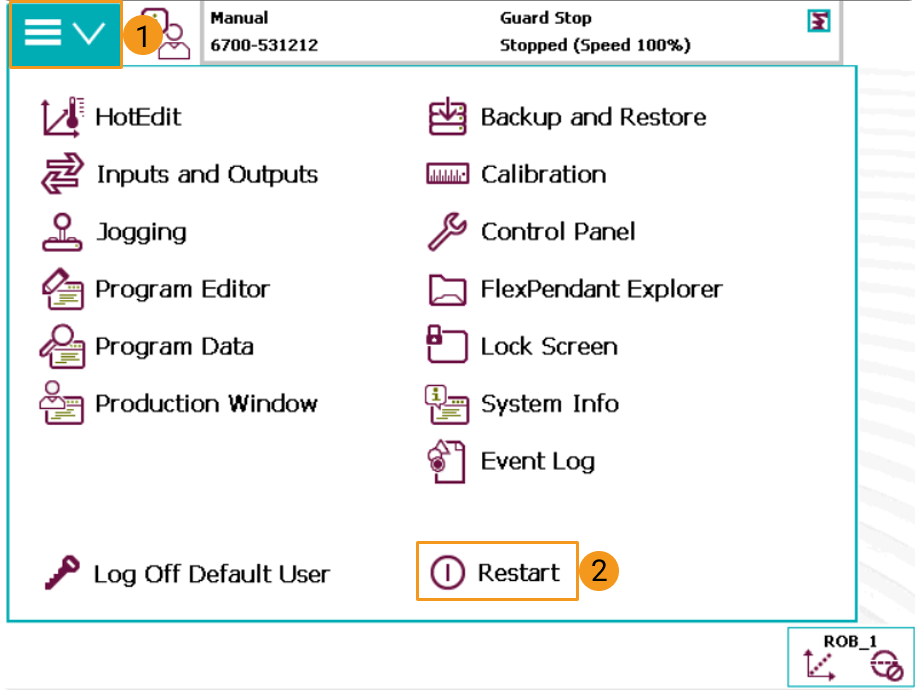
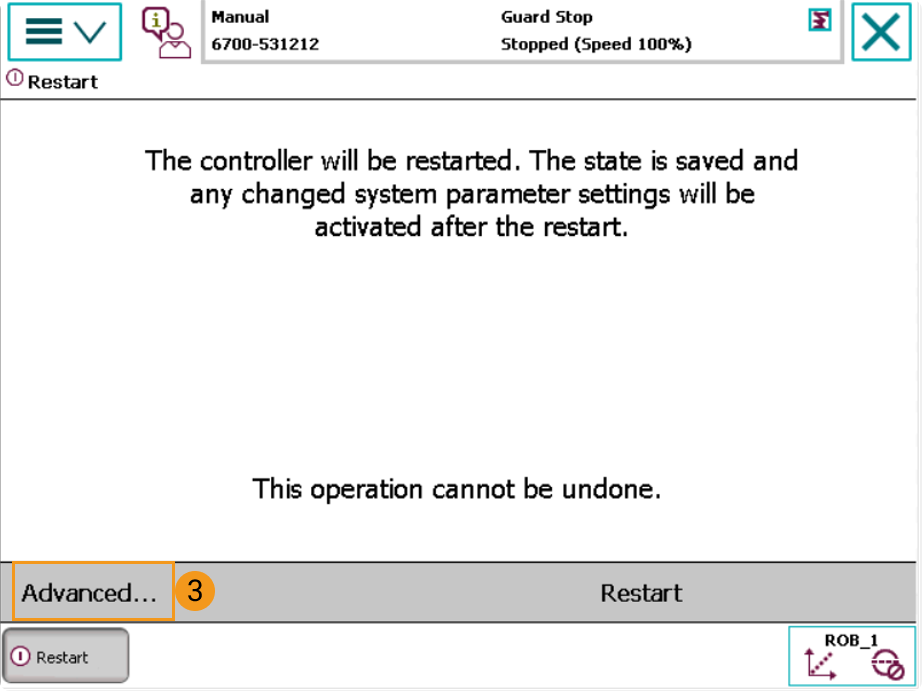
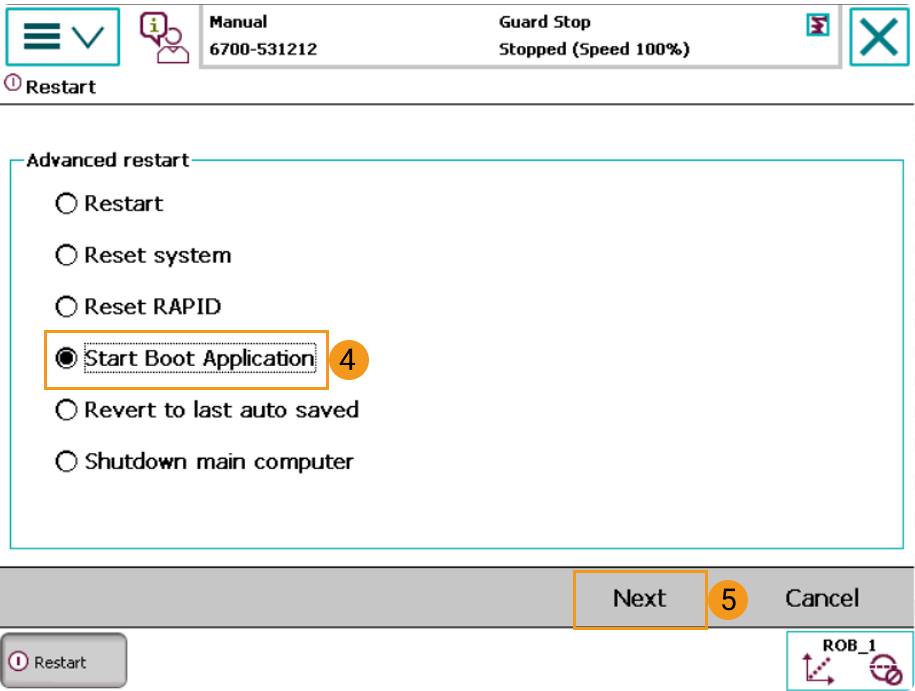
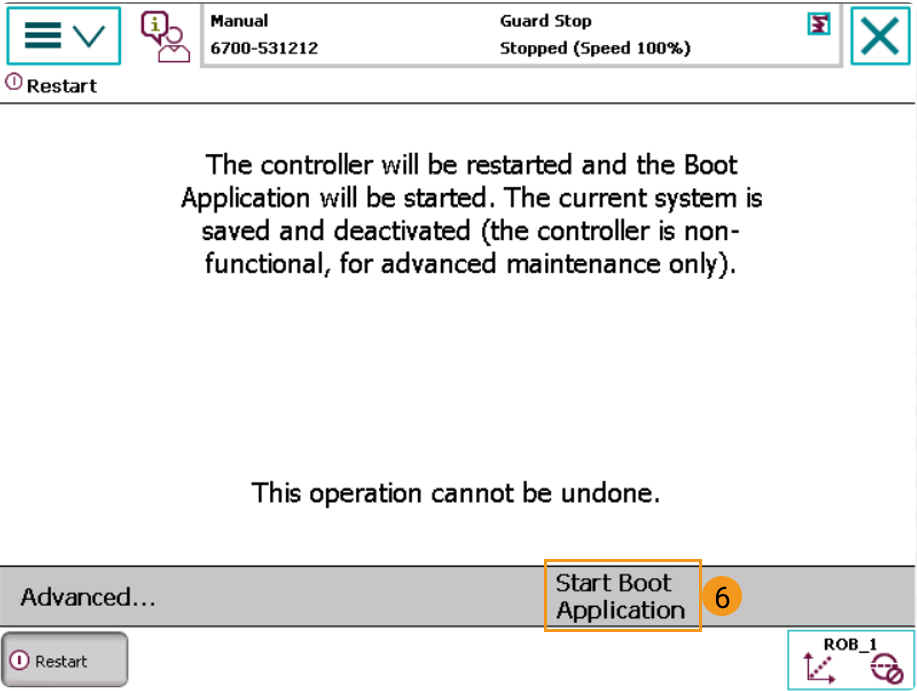
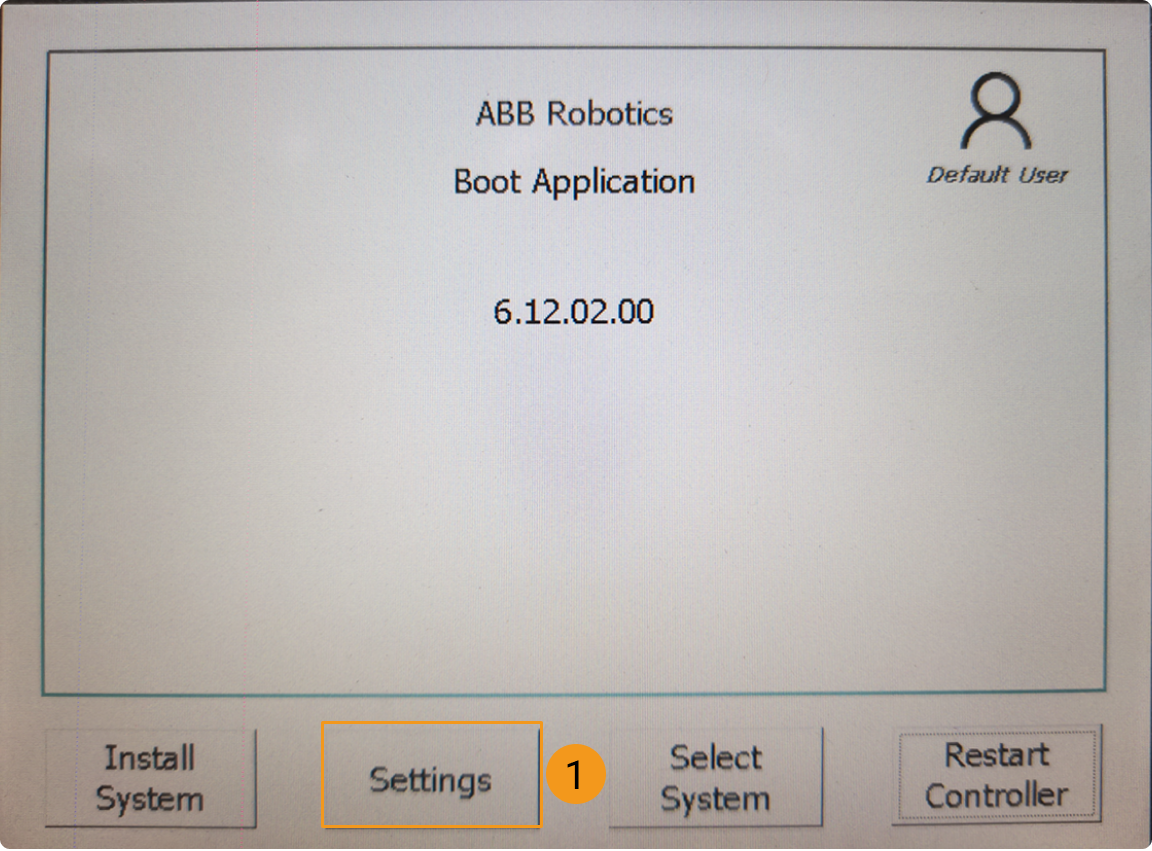
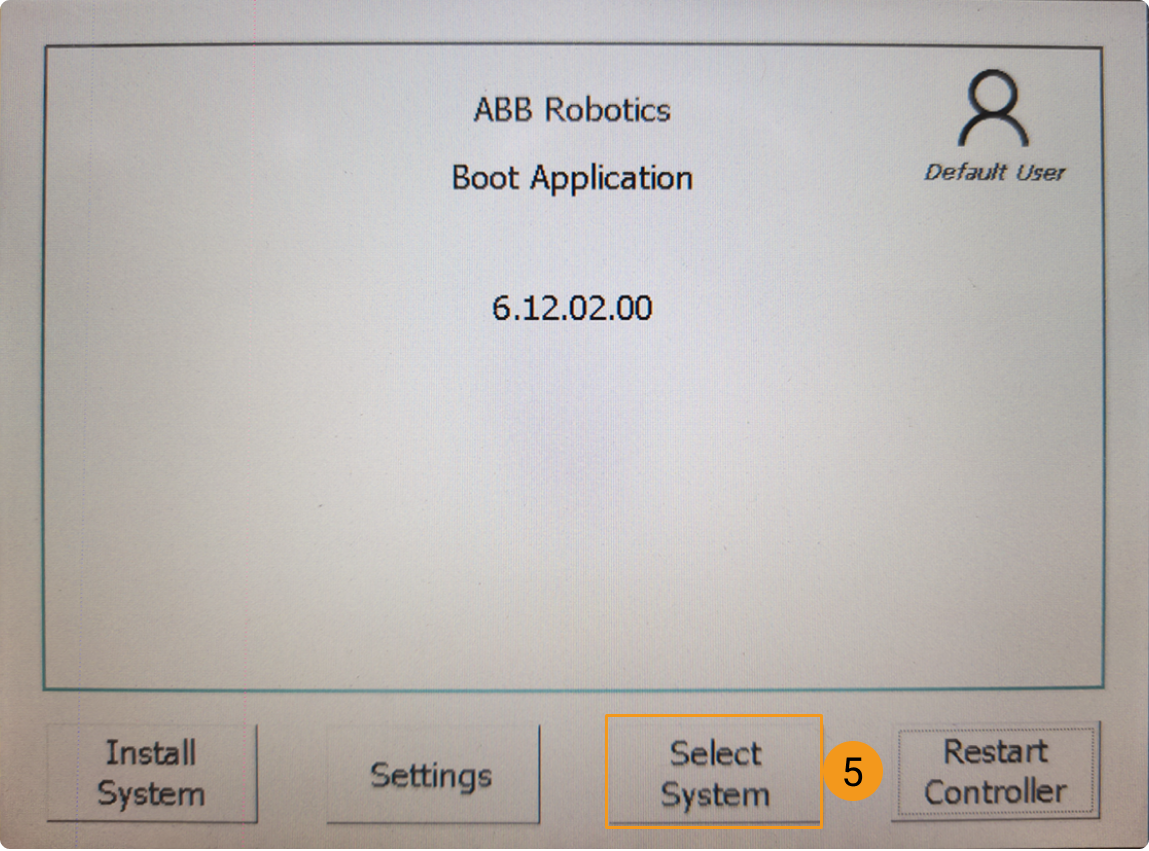
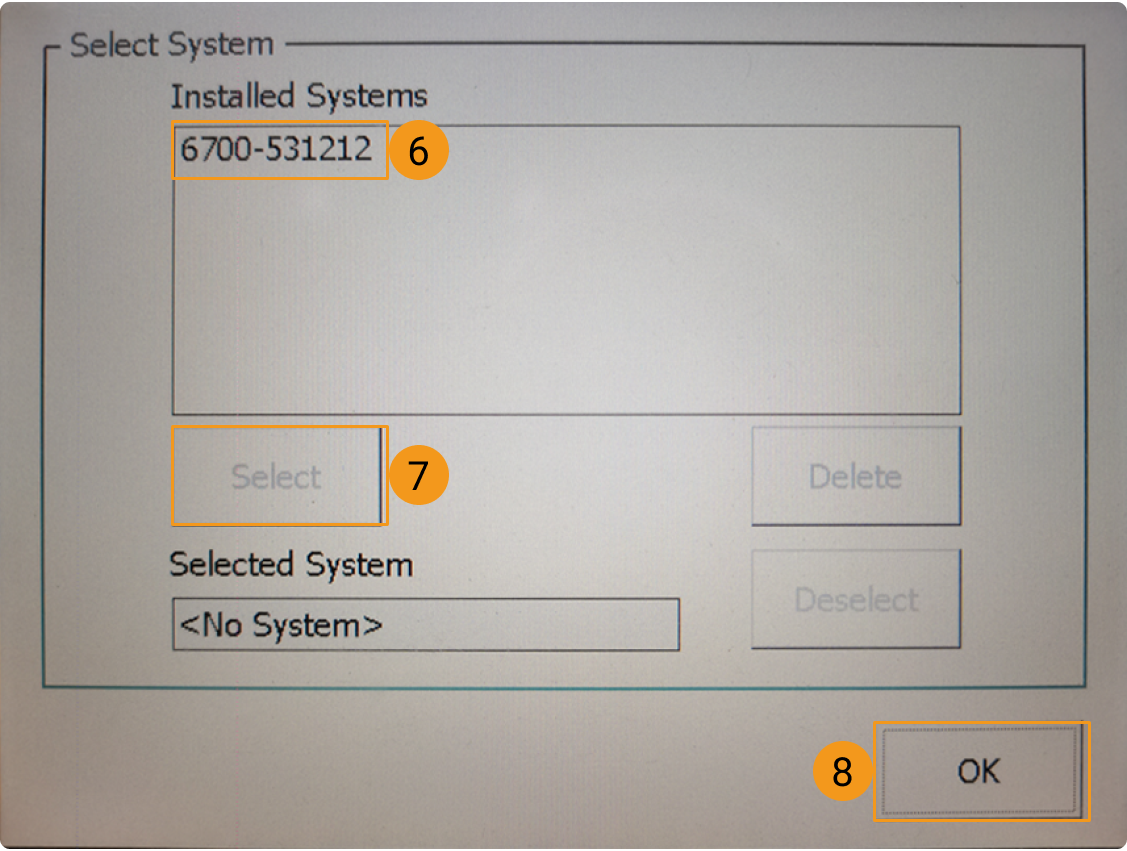
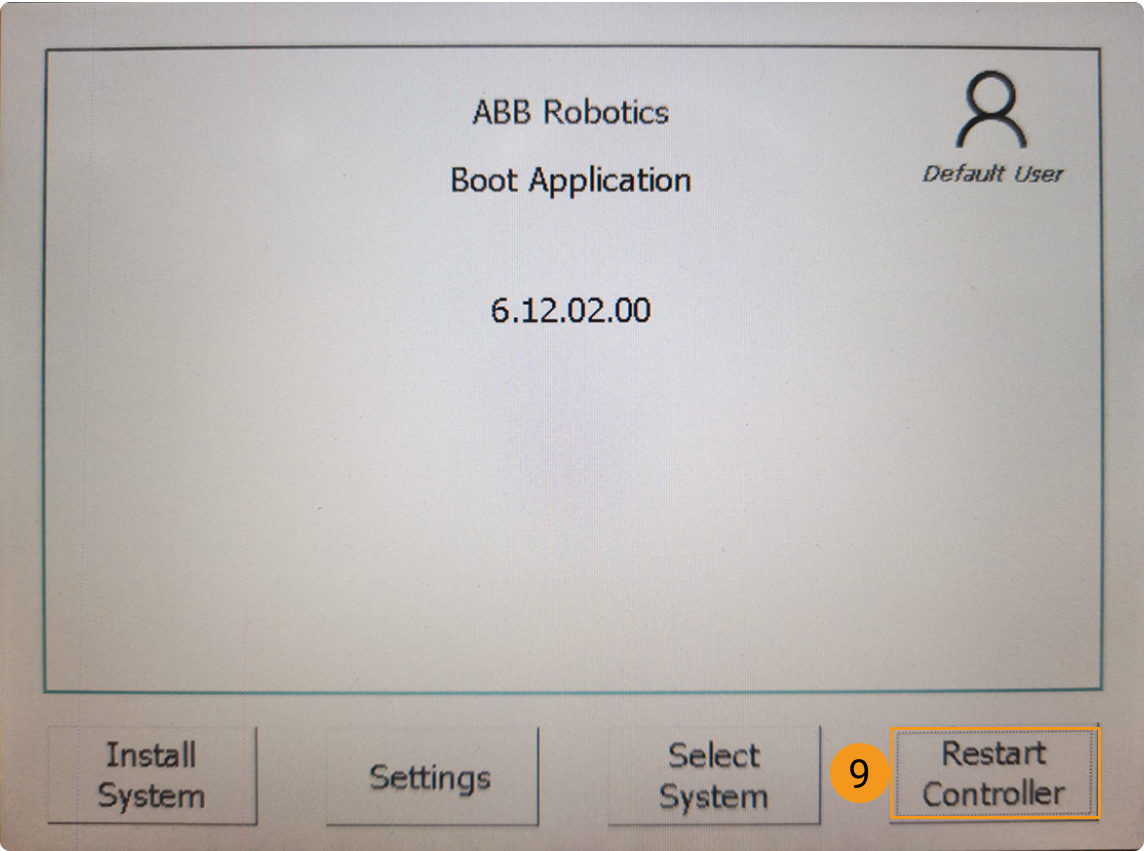
Follow the steps as shown in the figures below to start boot application.
-
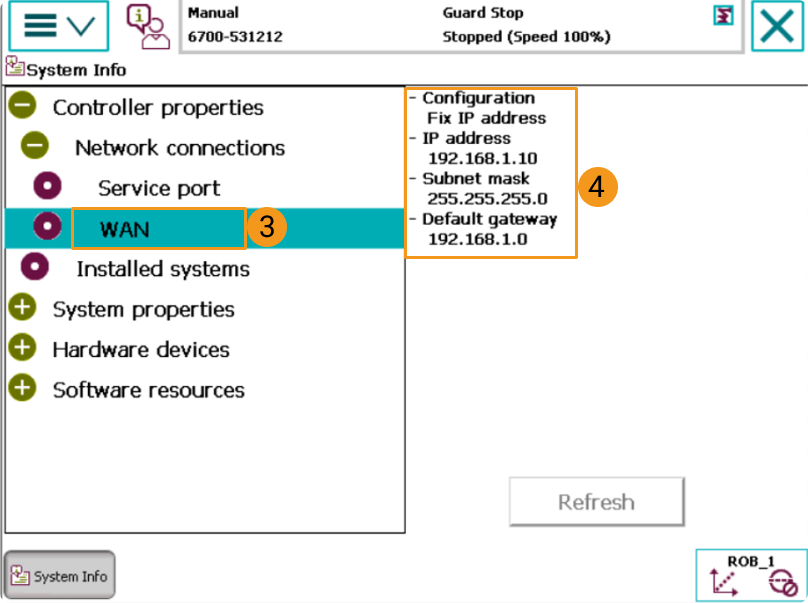
After restarting, you will see the interface as shown below. Follow the steps below to complete configuring the IP address. The IP addresses of the robot and the IPC must belong to the same subnet.
-
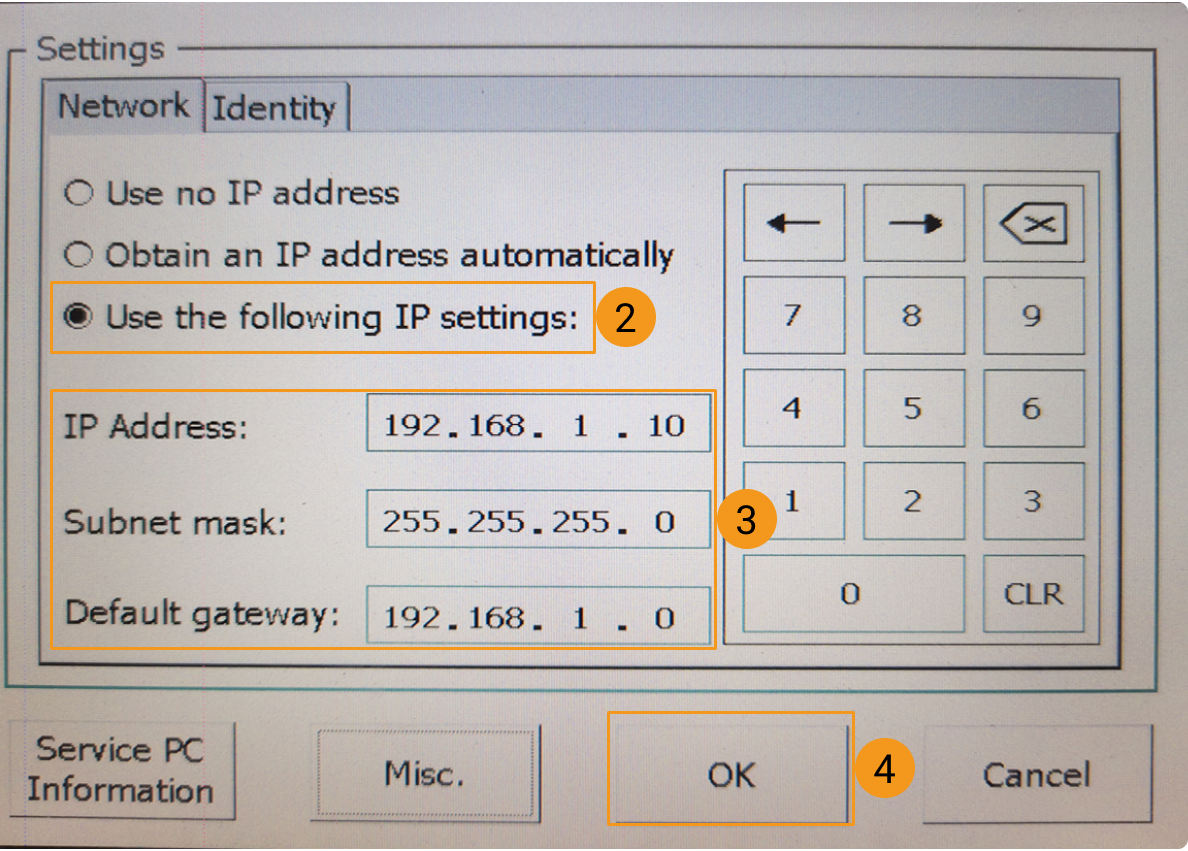
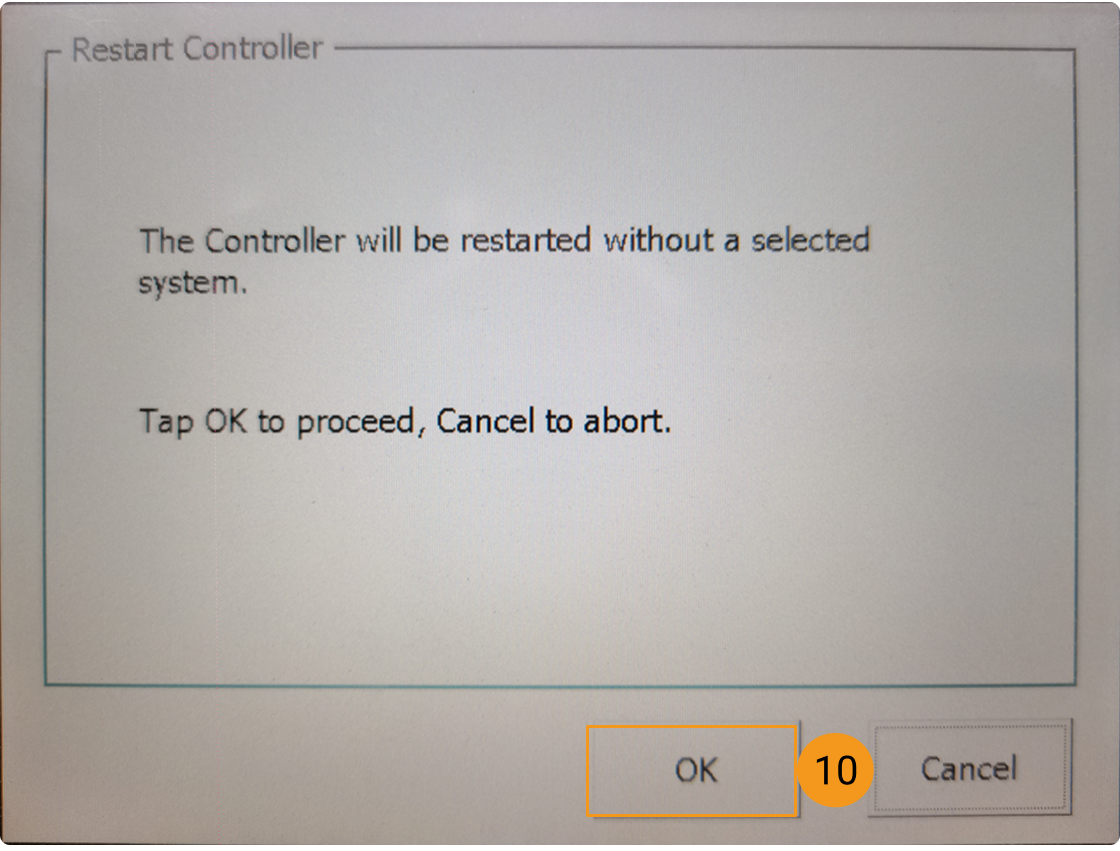
-
Set the IP via RobotStudio: Follow the steps as shown in the figure below to configure the robot IP address, and restart the robot after configuration.
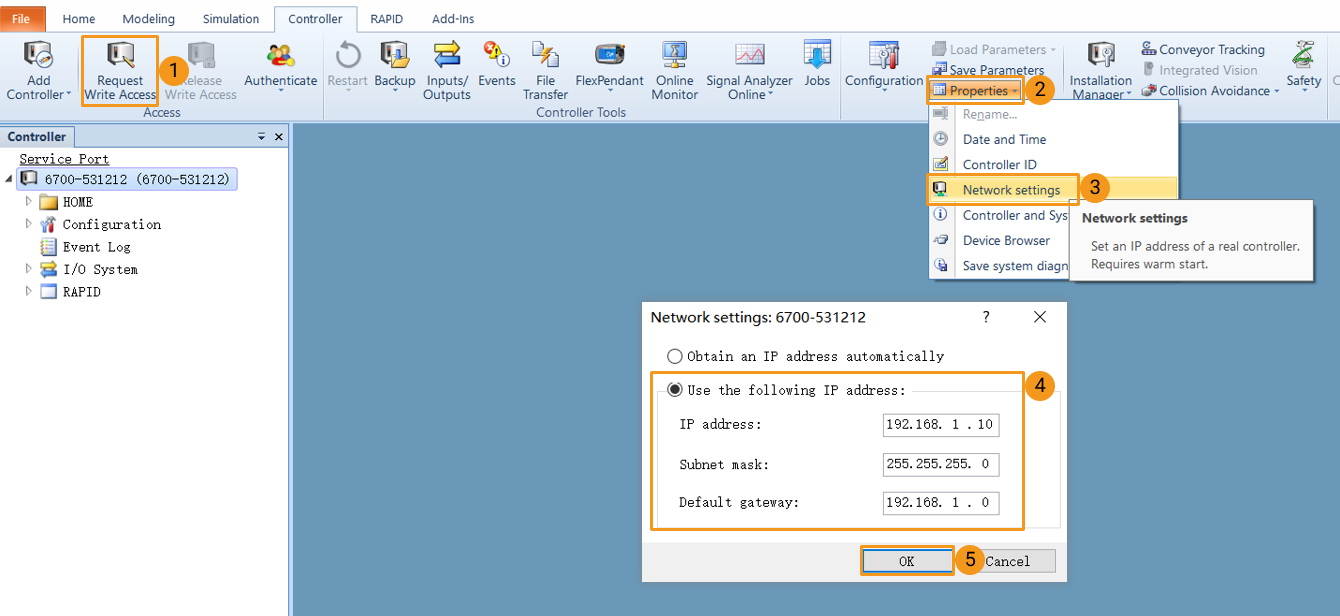
-
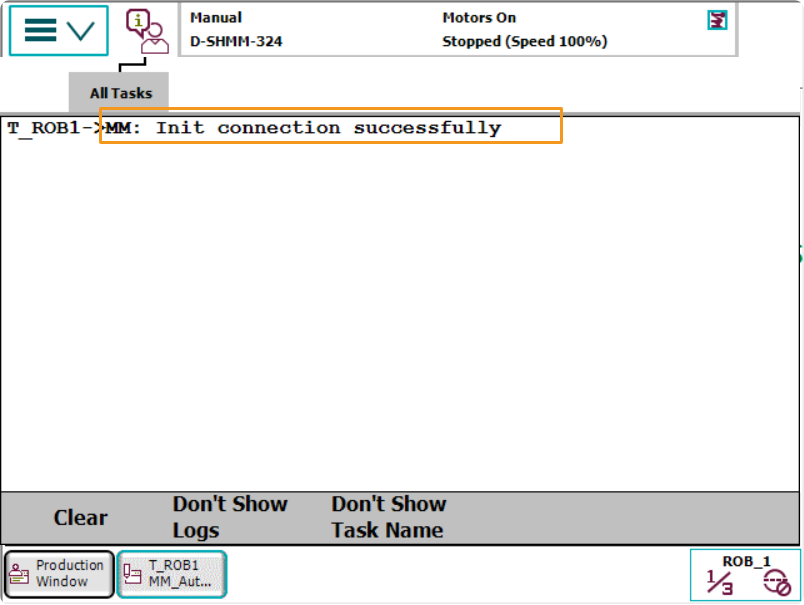
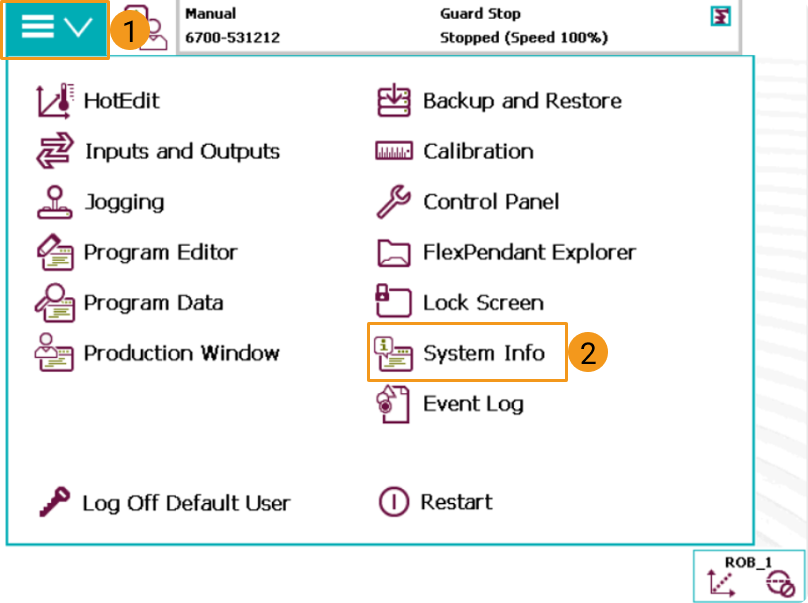
Check if the IP configuration was successful:
Set up “Robot and Interface Configuration” in Mech-Vision
-
Click Robot and Interface Configuration in the toolbar of Mech-Vision.
-
Select Listed robot from the Select robot drop-down menu, and then click Select robot model. Select the ABB robot model that you use, and then click Next.
-
In Communication Option, select Standard Interface for Interface Type, TCP Server and HEX-Little endian for Protocol, and then click Apply.

-
Make sure the Interface Service is started: in the toolbar of Mech-Vision, the Interface Service switch on the far right is flipped and turned to blue.

Load the Program Files to the Robot
Cautions
Please back up the robot system before operating the robot, so that you can restore the system if any error occurred.
-
Backup on the teach pendant
-
Go to the home page using the menu in the upper-left corner, and then select Backup and Restore.
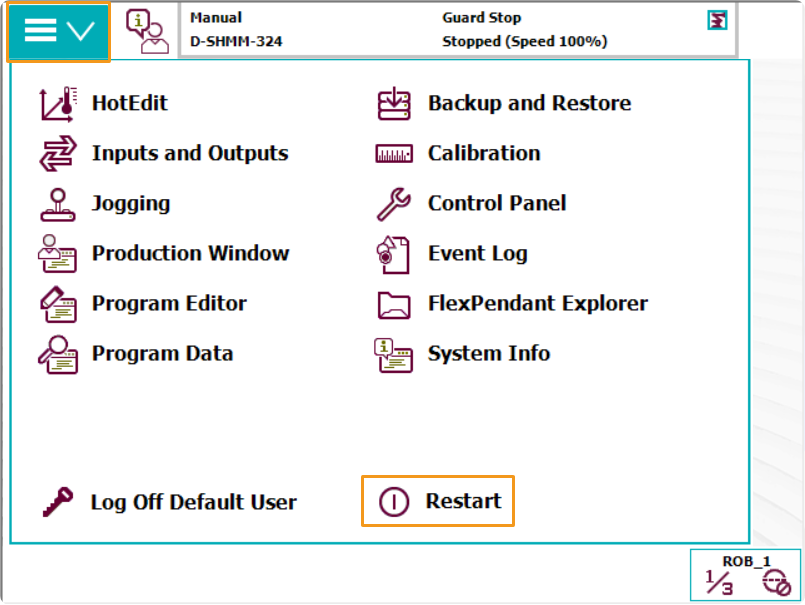
-
Select Backup Current System….
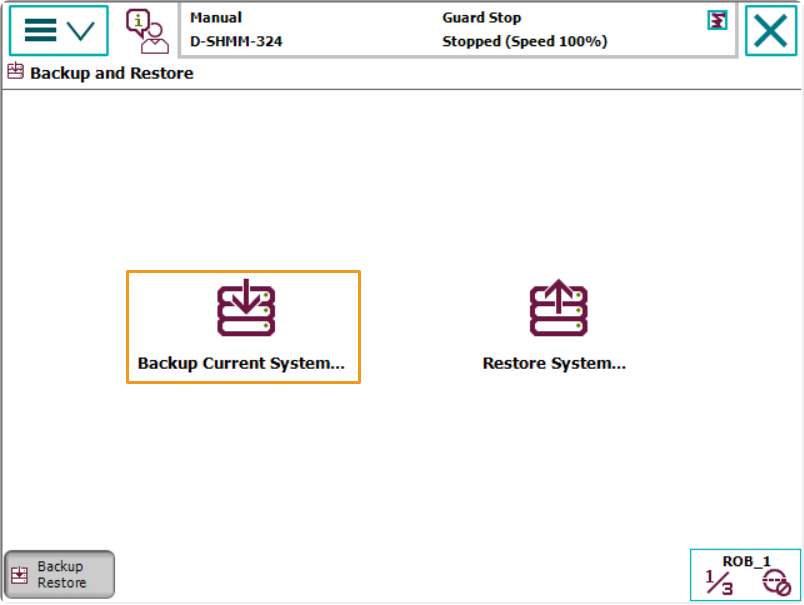
-
Specify the backup file name by pressing on ABC…, and specify the directory for saving the file by pressing the button below. Then, press Backup in the lower-right to start the backup process.
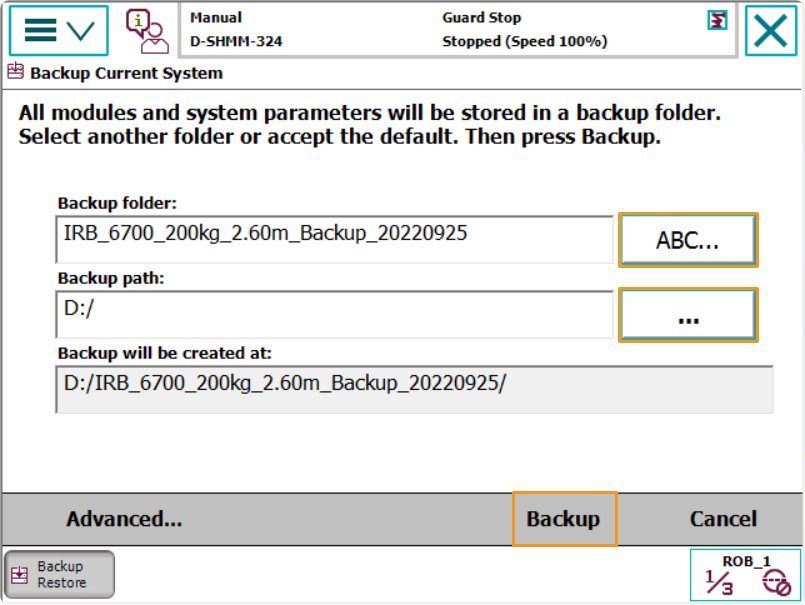
-
Prepare the Program Files
Copy the following two program modules, i.e., the program files, from Mech-Center\Robot_Interface\ABB in the installation directory of Mech-Mind Software Suite and paste them into the flash drive.
-
MM_Module.mod
-
MM_Auto_Calib.mod
Load the Files to the Robot
You can load the program modules (i.e., MM_Module.mod and MM_Auto_Calib.mod) with the teach pendant or via RobotStudio.
-
Load the modules with the teach pendant:
-
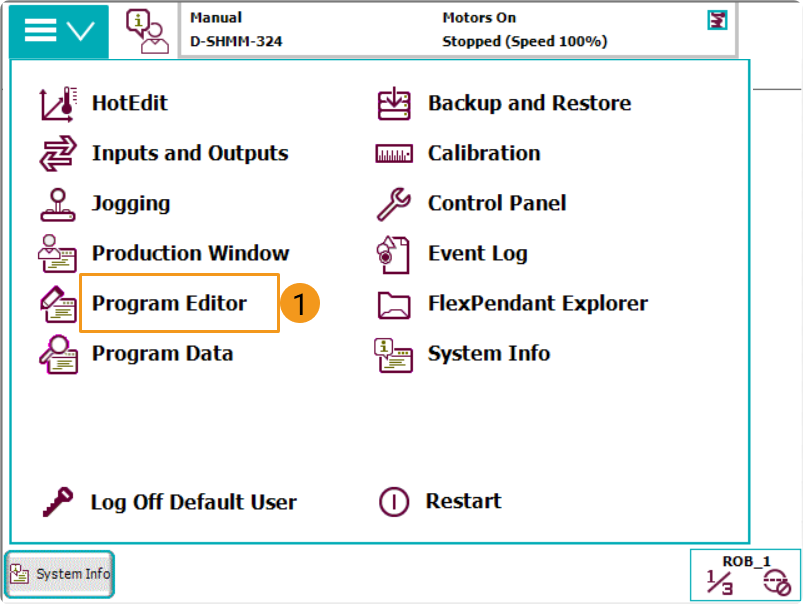
Tap Program Editor.
-
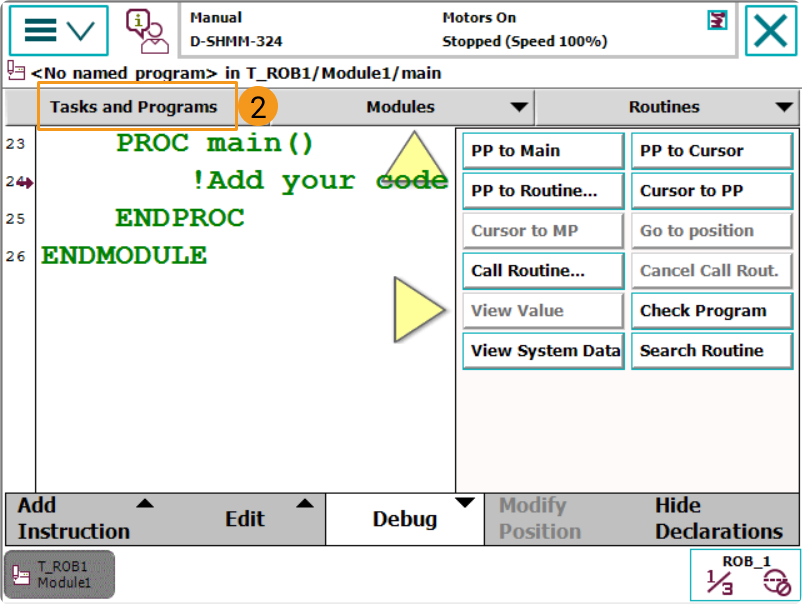
Tap Tasks and Programs.
-
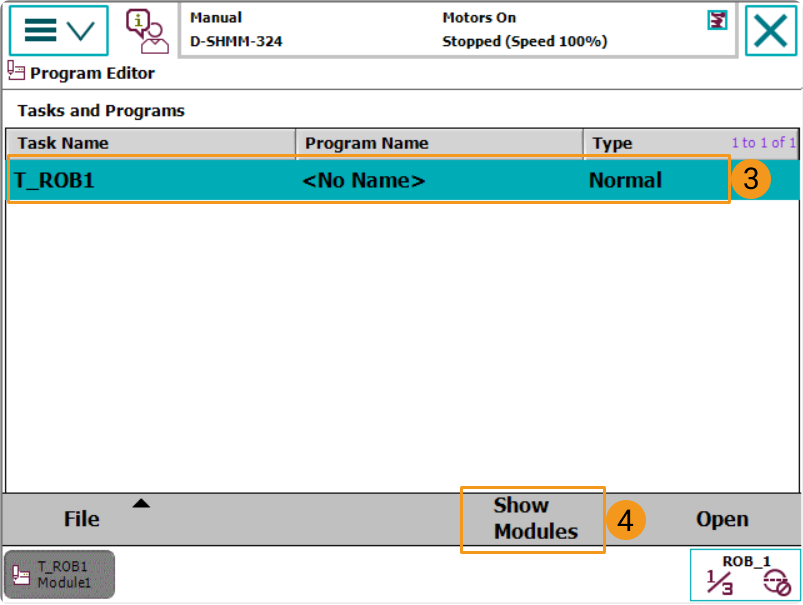
Select T_ROB1 and tap Show Modules.
-
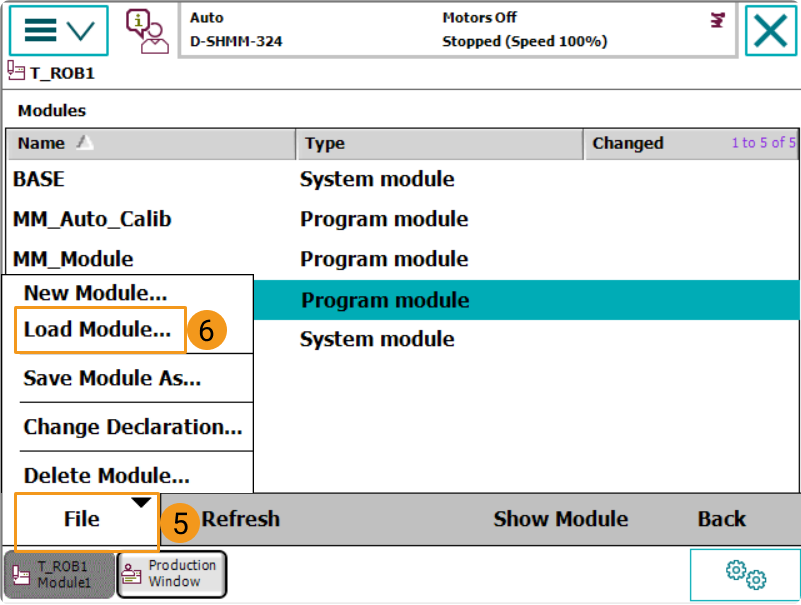
Select .
-
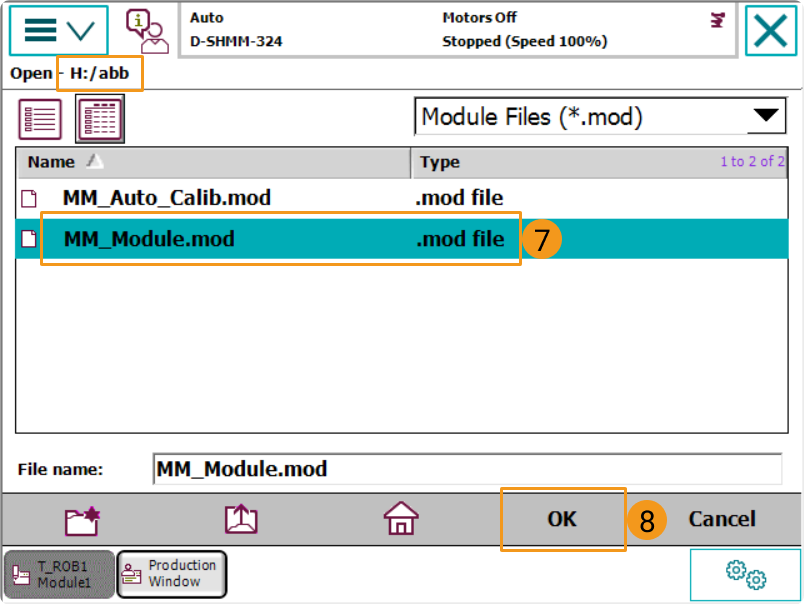
Select MM_Module.mod in the USB flash drive and tap OK to load the module.
-
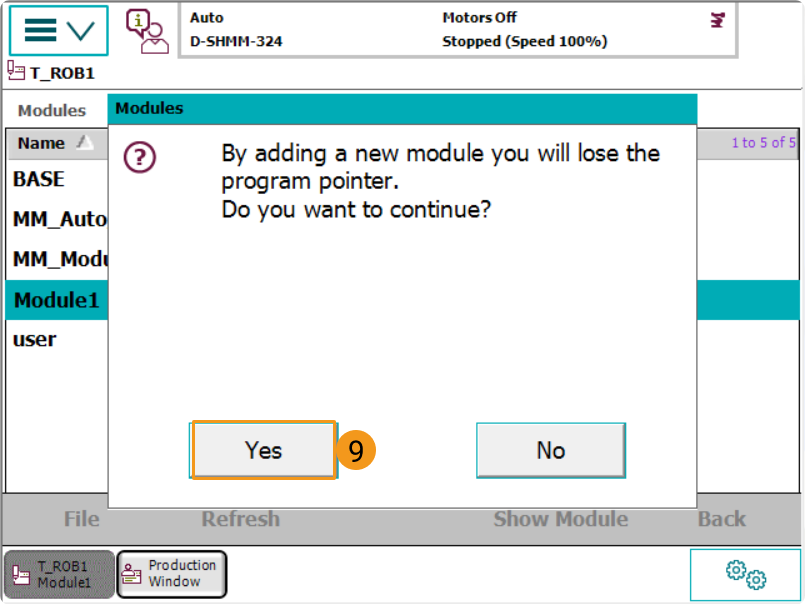
Select Yes in the pop-up window to confirm adding a new module.
-
Follow the instruction above to load MM_Auto_Calib.mod. Then you can check whether the two files have been loaded successfully under T_ROB1.
-

-
Load the modules via RobotStudio:
-
Open RobotStudio and Connect to the controller.
-
If the robot controller is connected via the LAN port, click One Click Connect….
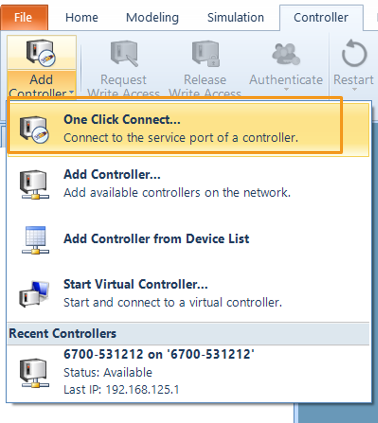
-
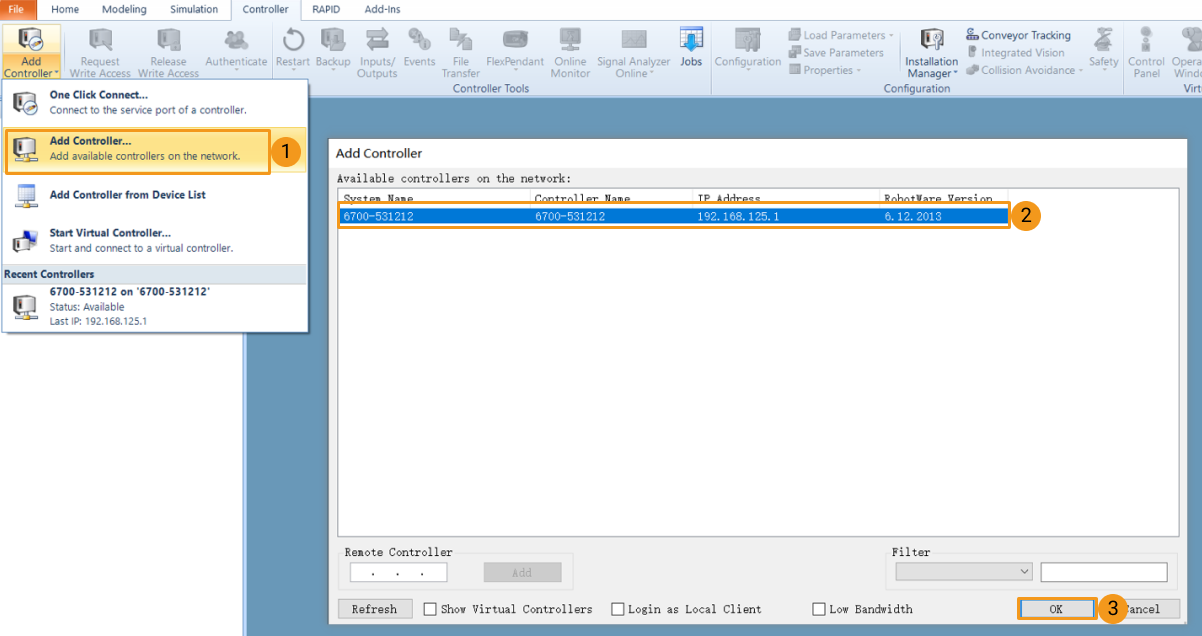
If the robot controller is connected via the WAN port or a switch, click Add Controller and then select the controller and click OK. If the controller is added successfully, RobotStudio will be connected to the service port of the controller automatically.
-
-
Request write access: Click Request Write Access to request the write access to the teach pendant.
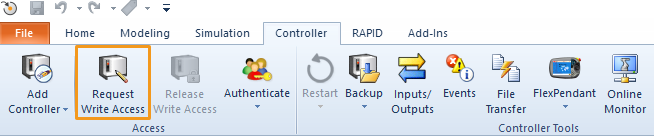
Press Grant in the Request Write Access window on the teach pendant.
-
As shown in the figure below, find and right-click T_ROB1, and select Load Module in the menu.
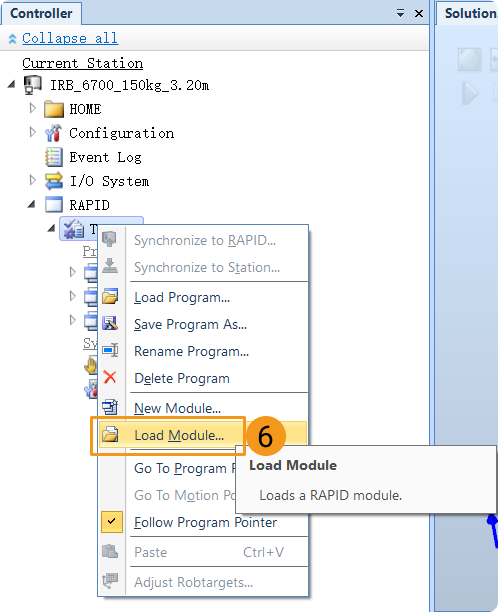
-
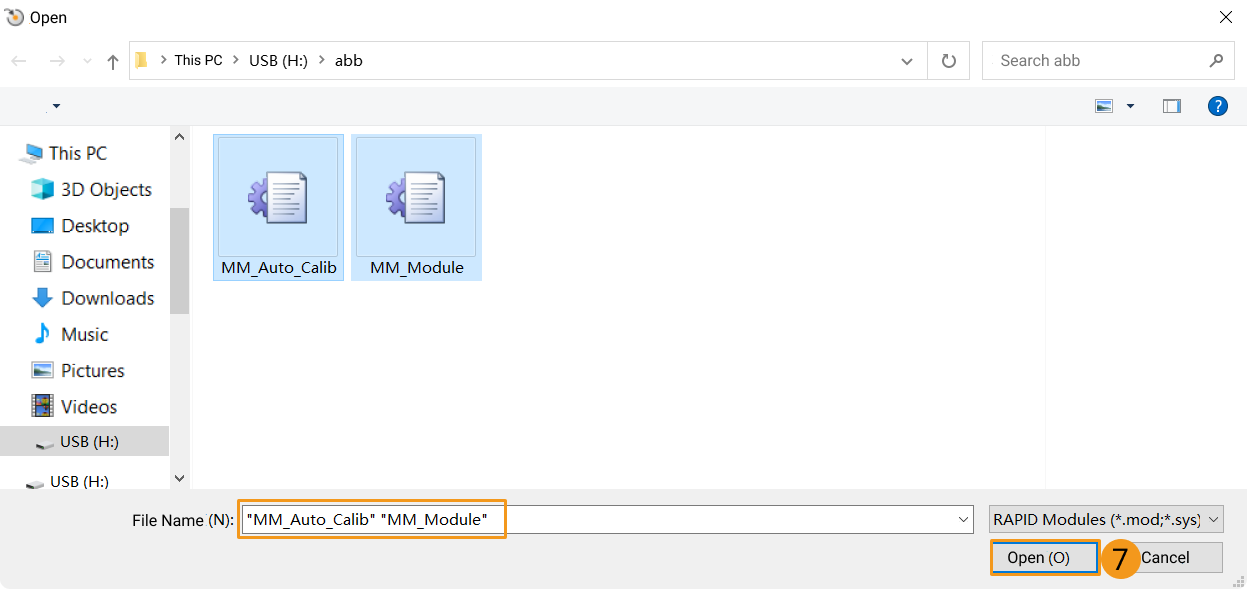
Select the program module files and click Open.
-
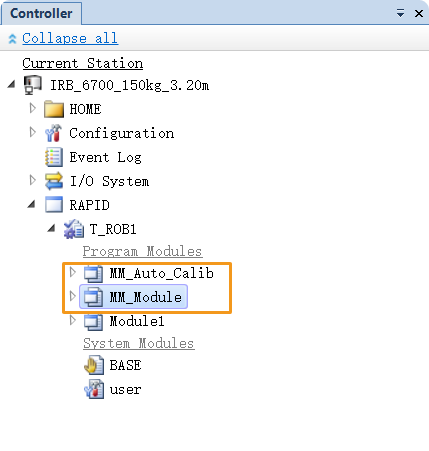
Check if the two programs appear under T_ROB1.
-
Further Configurations
-
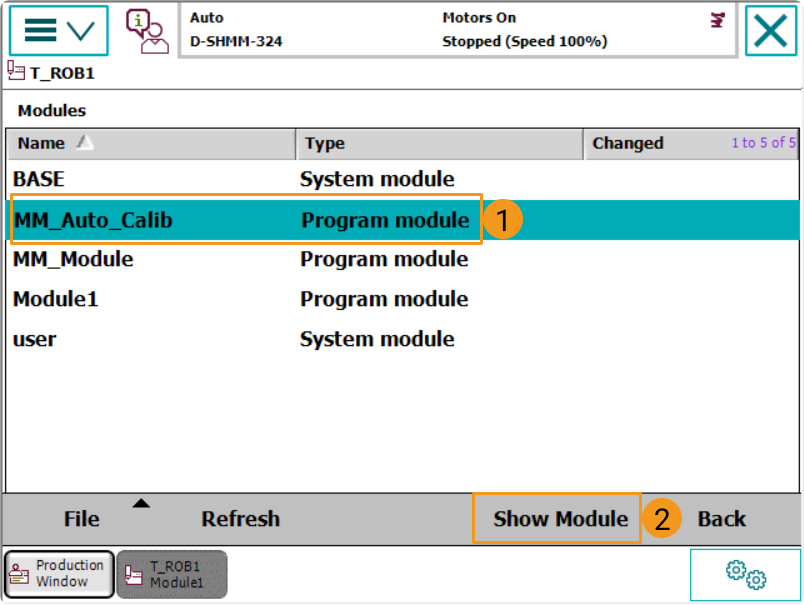
Select the MM_Auto_Calib module, and tap Show Module.
-
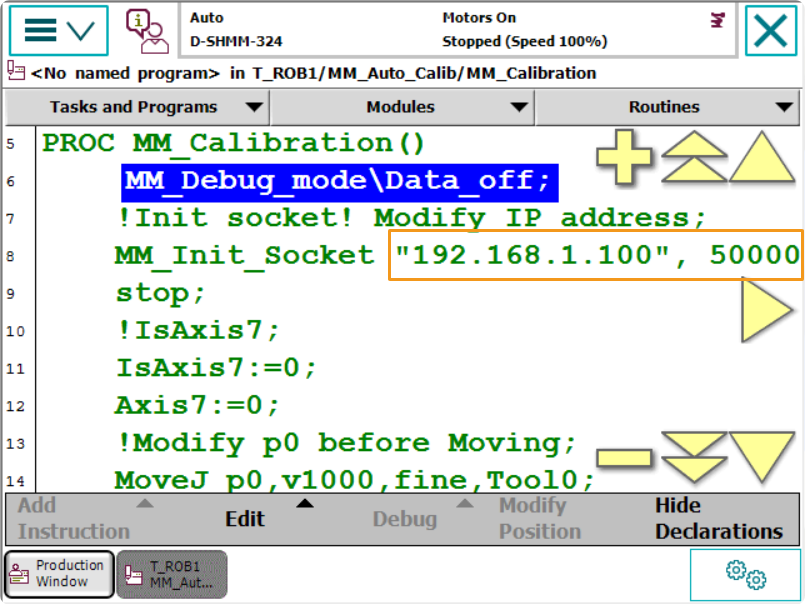
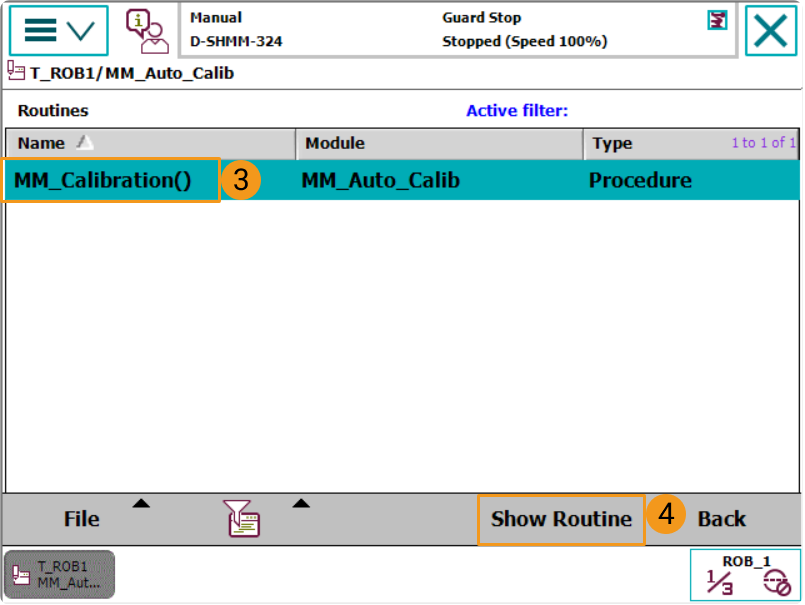
Open the MM_Calibration program.
-
Change the IP address in the program to the IP address of the IPC. If the host port number set in Mech-Vision is modified, the port number 50000 here should be modified accordingly to make it consistent with the host port number set in Mech-Vision.