FANUC Calibration Program
This topic introduces the process of automatic hand-eye calibration when a FANUC robot communicates with Mech-Mind Vision System through Standard Interface.
| Before proceeding, please make sure that you have referred to Set up Standard Interface Communication with FANUC and set up Standard Interface communication with the robot. |
Select the Calibration Program
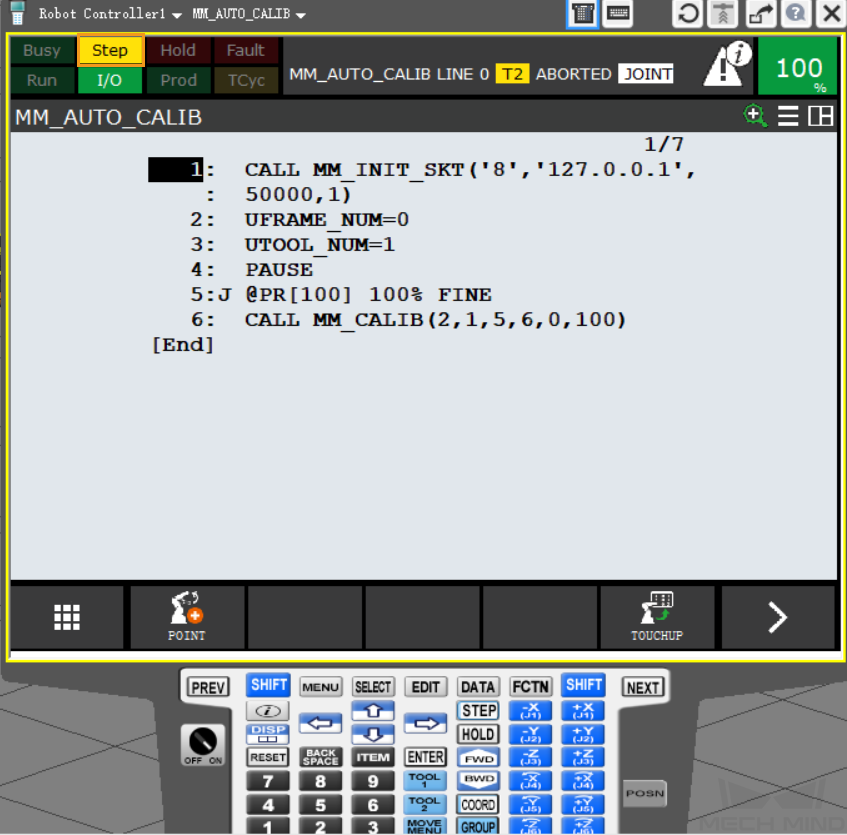
Press the SELECT on the teach pendant, and then select MM_AUTO_CALIB and press ENTER to open the program.

Teach the Calibration Start Point
-
After opening the program, press the
STEPkey on the teach pendant to switch to Step mode. Then the Step icon on the screen will turn yellow.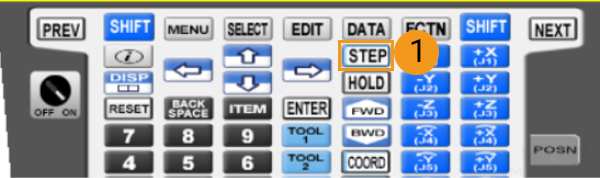
-
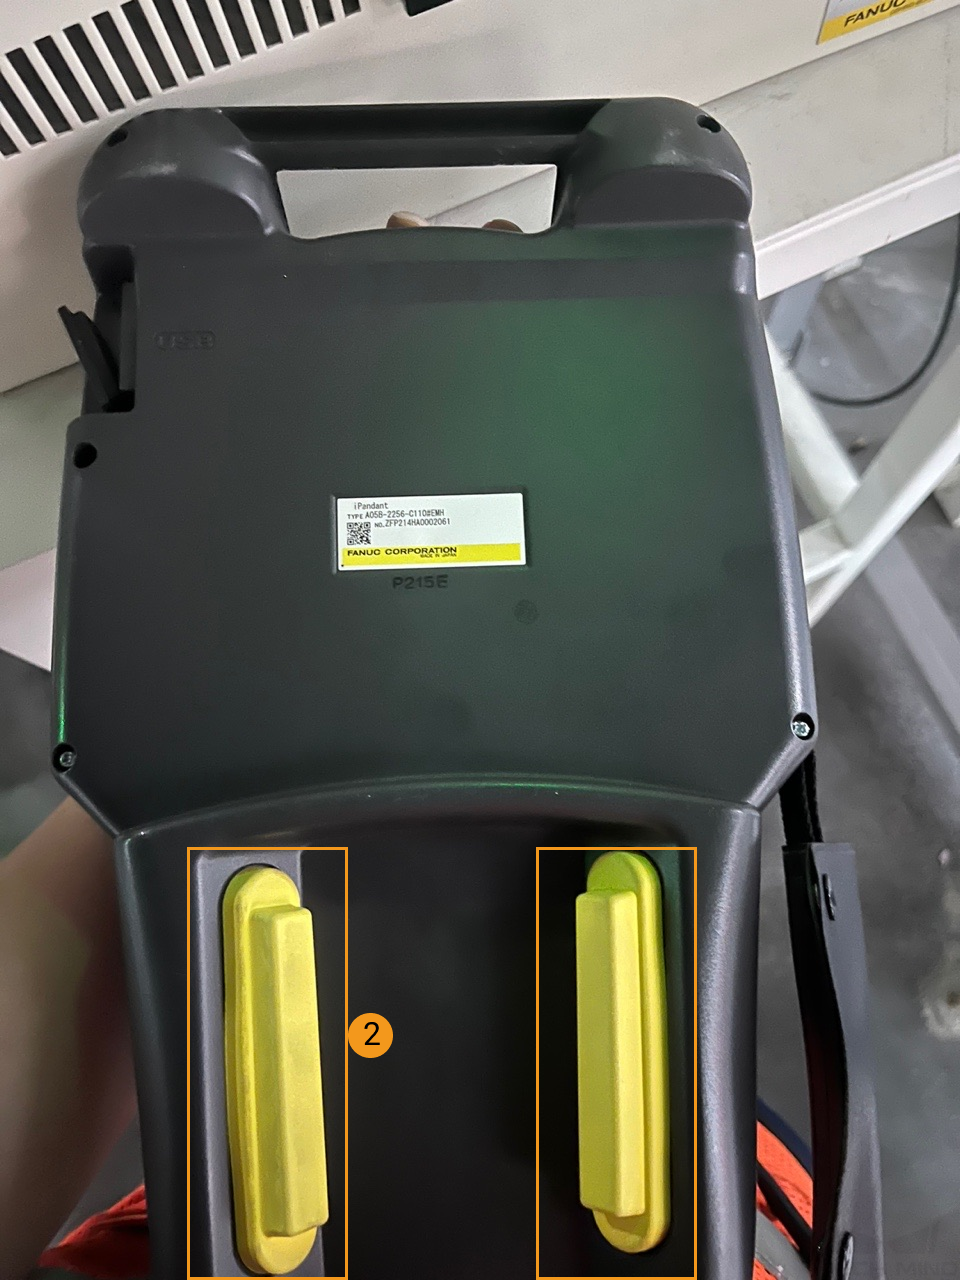
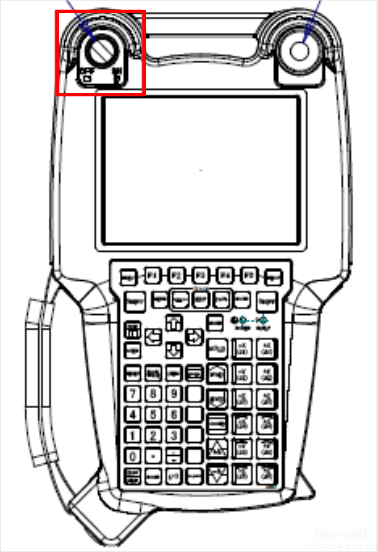
Press and hold either one of the deadman switches on the back of the teach pendant. Manually move the robot to the start point of the calibration. The start point for automatic calibration is at the center of the lowest layer in the calibration path.
-
Move the cursor to the second line, and press the
SHIFTandFWDkeys at the same time to run the command on the second line. Then the user reference frame 0 will be used. -
Move the cursor to the third line, and press the
SHIFTandFWDkeys at the same time to run the command on the third line. Then the tool reference frame 1 will be used. -
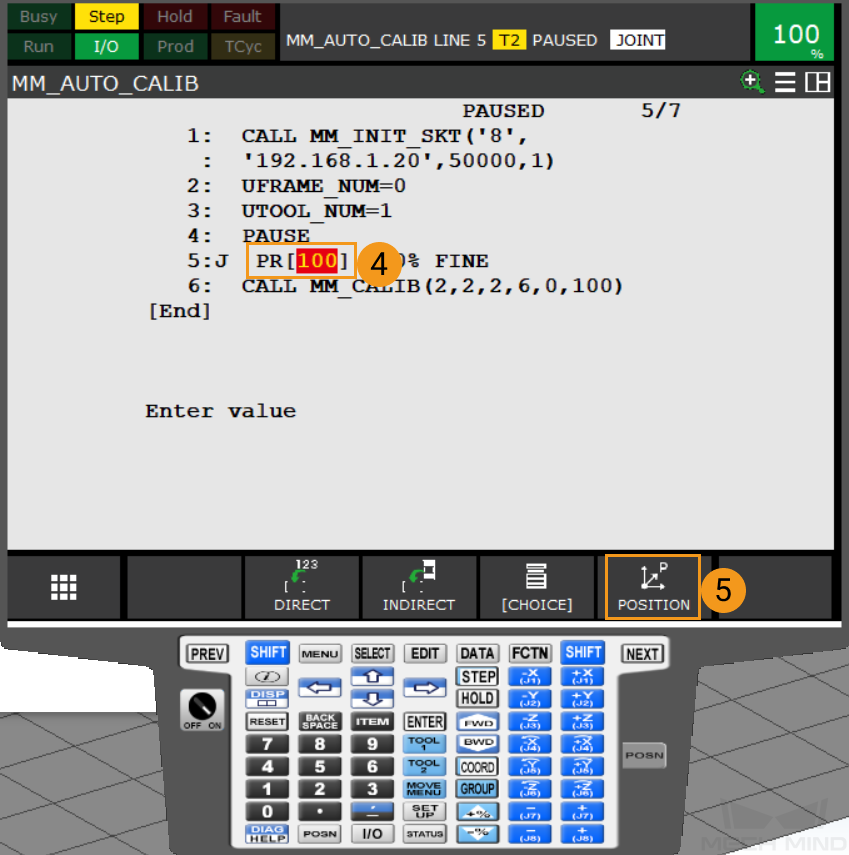
Select [100], and go to .
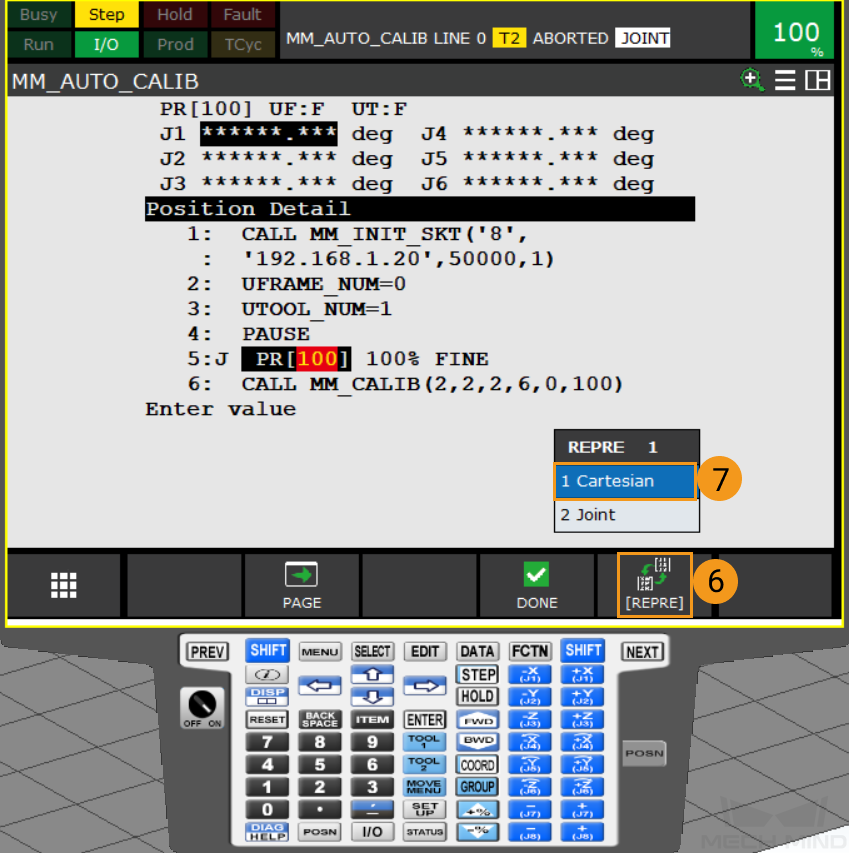
-
Press Done.
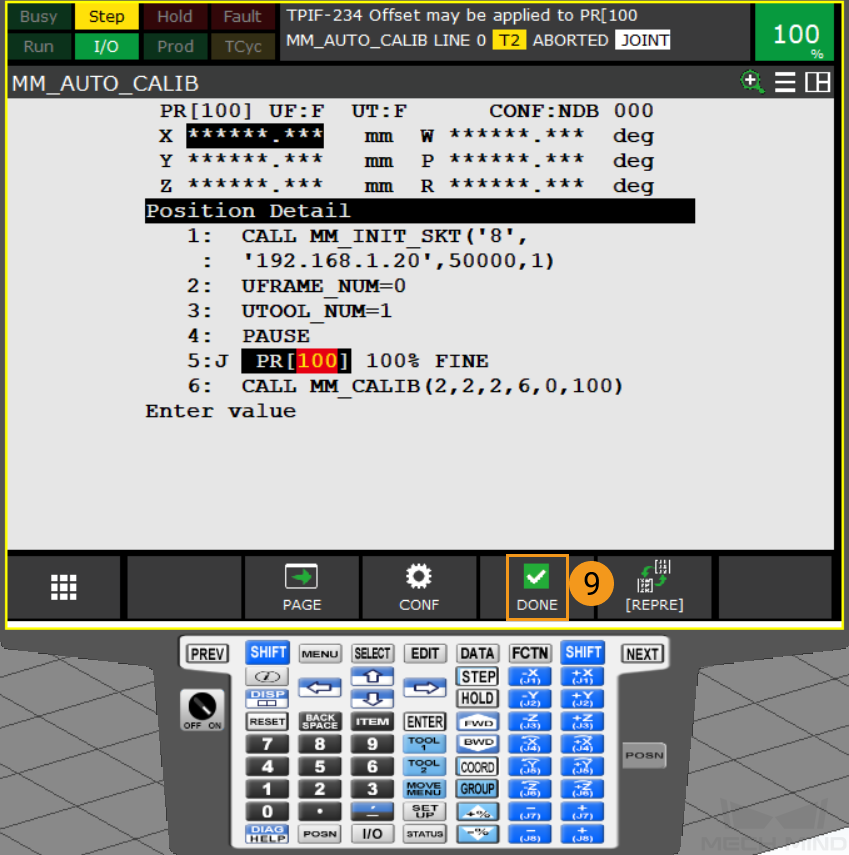
-
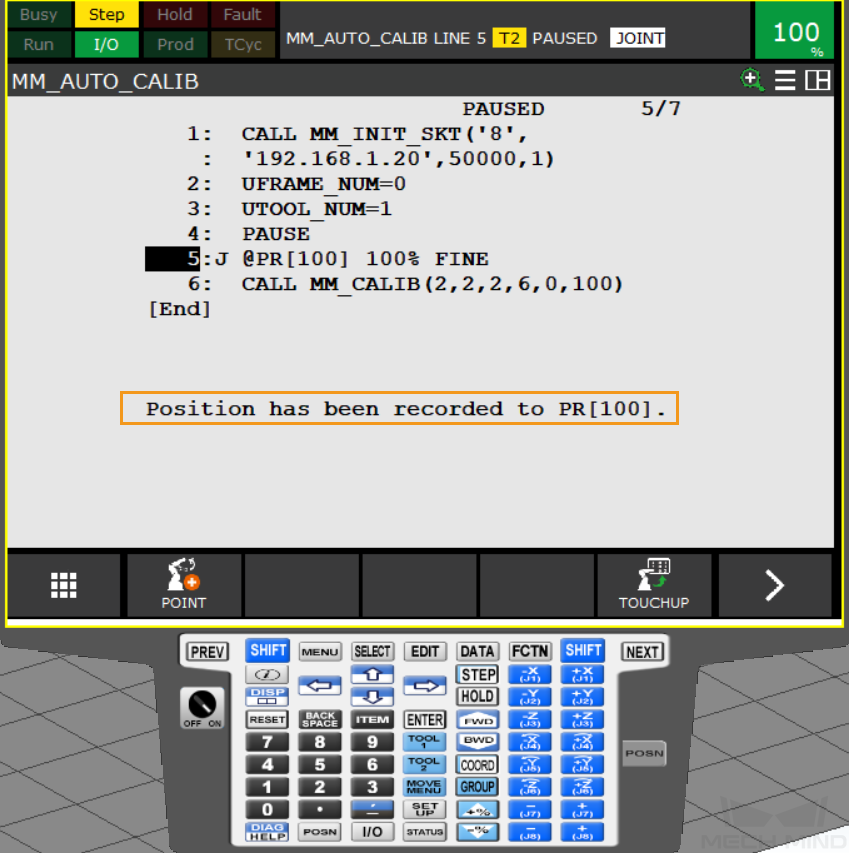
Select the number at the beginning of the 5th line, as shown below. Then press the
SHIFTkey and TOUCHUP on the screen together. A message “Position has been recorded to PR[100]” will appear, and the pose of the calibration start point has been recorded to PR[100].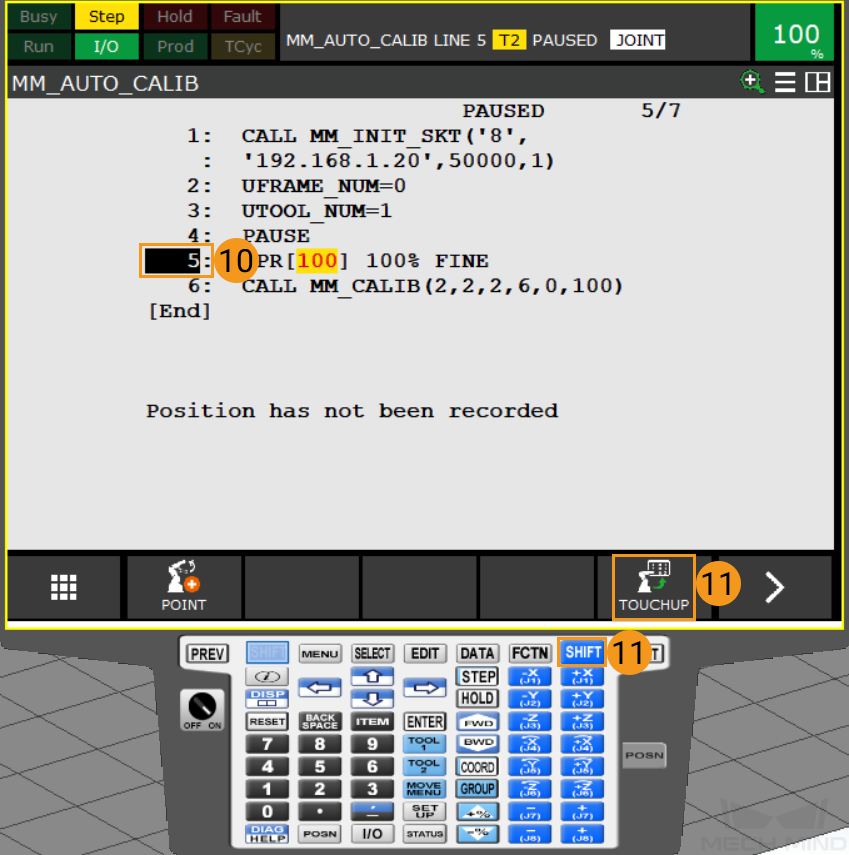
-
Press
STEPkey on the teach pendant to exit the Step mode, then the Step icon on the screen will turn grey.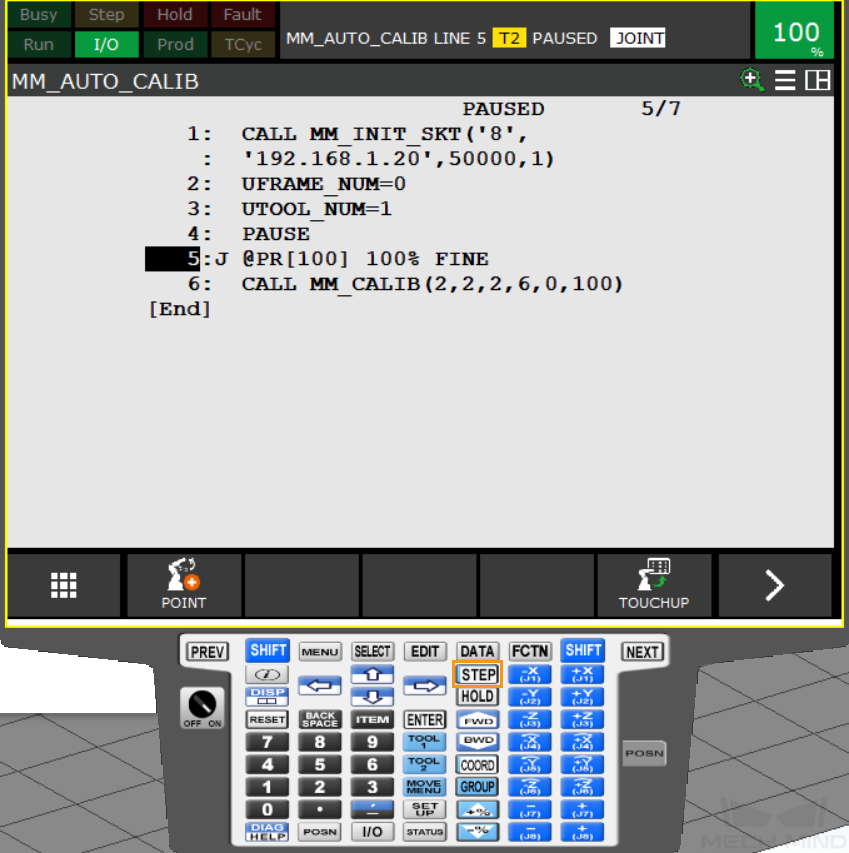
Run the Calibration Program
-
Switch to AUTO mode: turn the switch on the teach pendant to OFF and then turn the switch key on the controller to AUTO, as shown below.
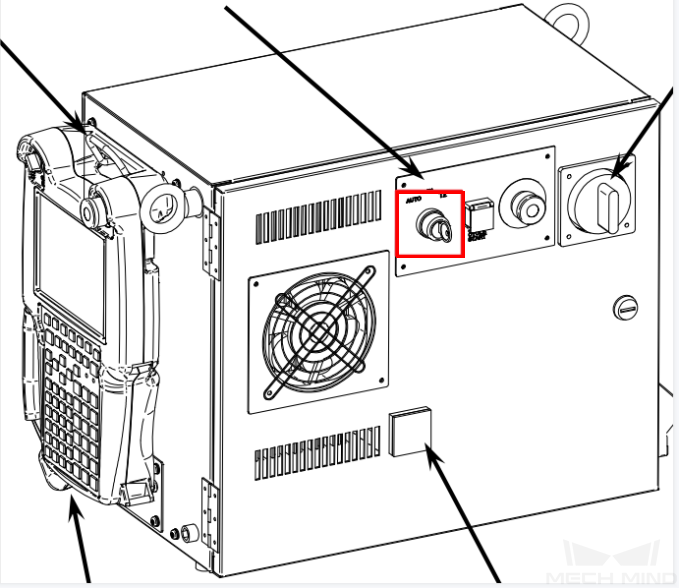
-
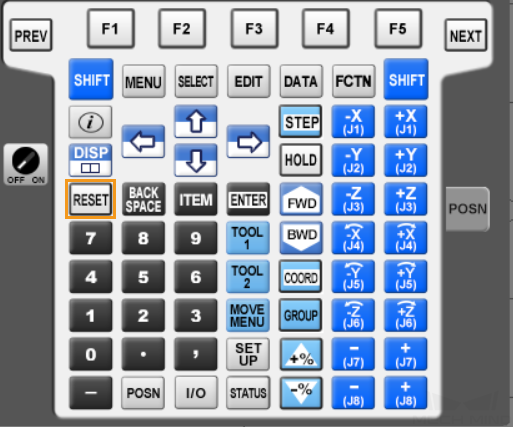
Press RESET on the teach pendant to clear all the warnings, and make sure that the speed is between 10% and 20%.
-
Press the green button on the controller to auto-run the calibration program.
-
If the calibration program runs successfully, the message “Entering the calibration process, please start the calibration in Mech-Vision” will be displayed in the Console tab of Mech-Vision Log panel.
Complete Calibration in Mech-Vision
-
In Mech-Vision, click Camera Calibration (Standard) on the toolbar, or select from the menu bar.
-
Follow the instructions based on different camera mounting methods to complete the configuration.
-
If the camera is mounted in the eye-to-hand mode, please refer to Complete Automatic Calibration in the Eye to Hand Scenario.
-
If the camera is mounted in the eye-in-hand mode, please refer to Complete Automatic Calibration in the Eye in Hand Scenario.
-
| If the robot does not reach the next calibration point within 60 seconds, Mech-Vision will report a timeout error and stop the calibration process. In such cases, please select and run the calibration program on the teach pendant again, and restart the calibration process in Mech-Vision. |