ABB Calibration Program
This topic introduces the process of automatic hand-eye calibration when an ABB robot communicates with Mech-Mind Vision System through Standard Interface.
| Before proceeding, please make sure that you have set up Standard Interface communication with the robot. |
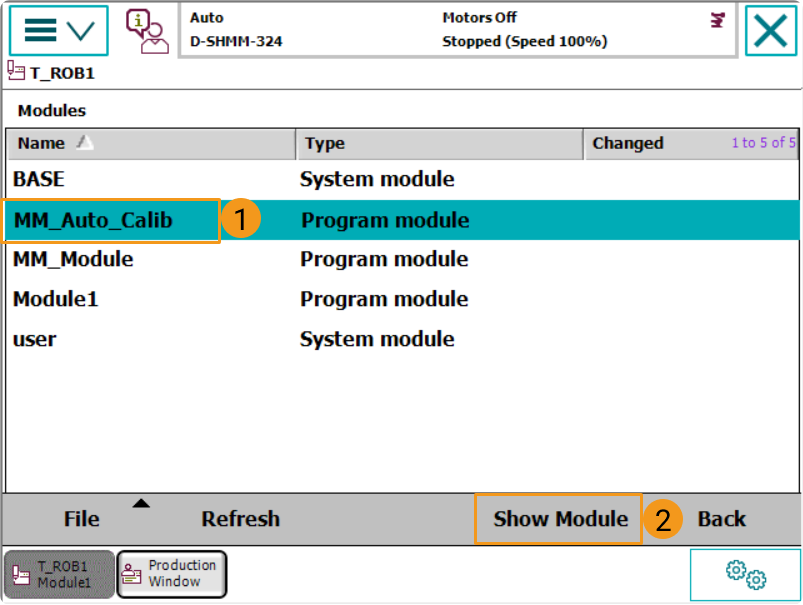
Select the Calibration Program
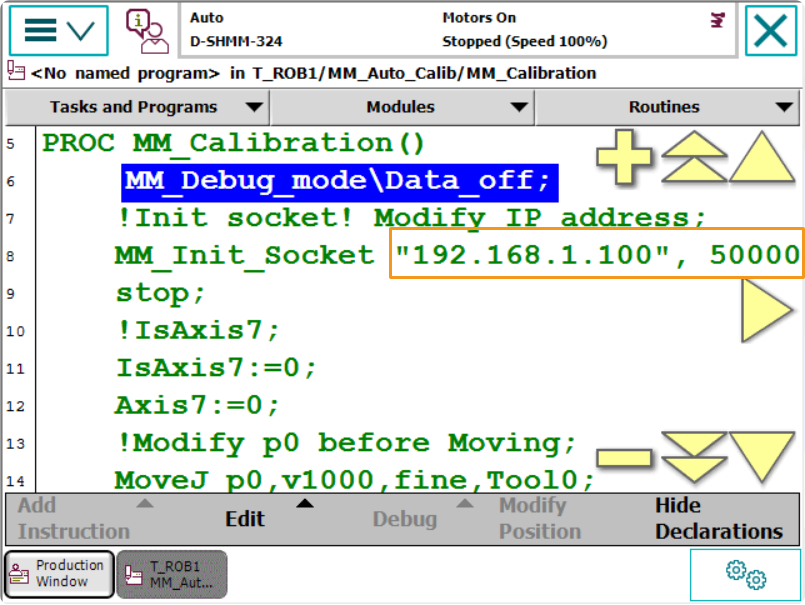
On the teach pendant, select , and locate and open the program module MM_Auto_Calib in T_ROB1. Please make sure that the IP address in the program is the same as that of the IPC, and that the port number is set correctly.

Teach the Calibration Start Point
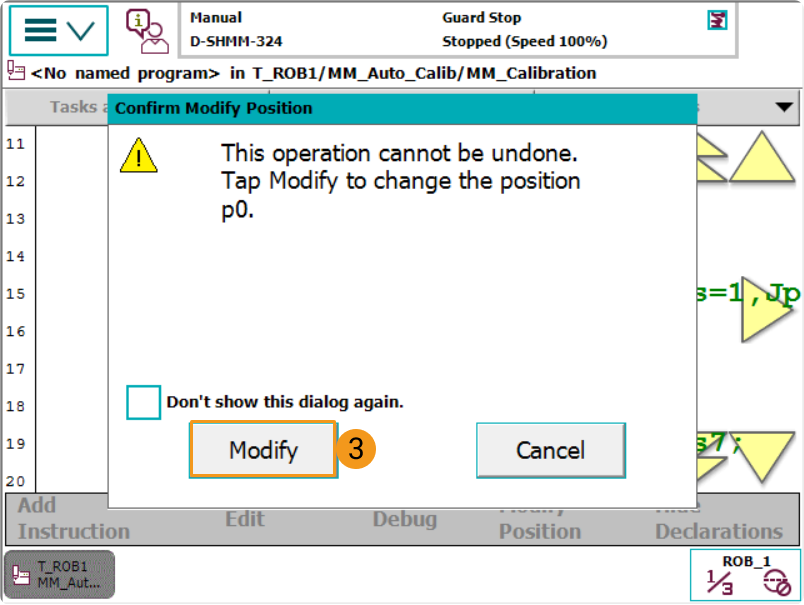
Move the robot to the start point for the calibration, and then modify this position as P0. Press on Modify in the pop-up window to confirm.
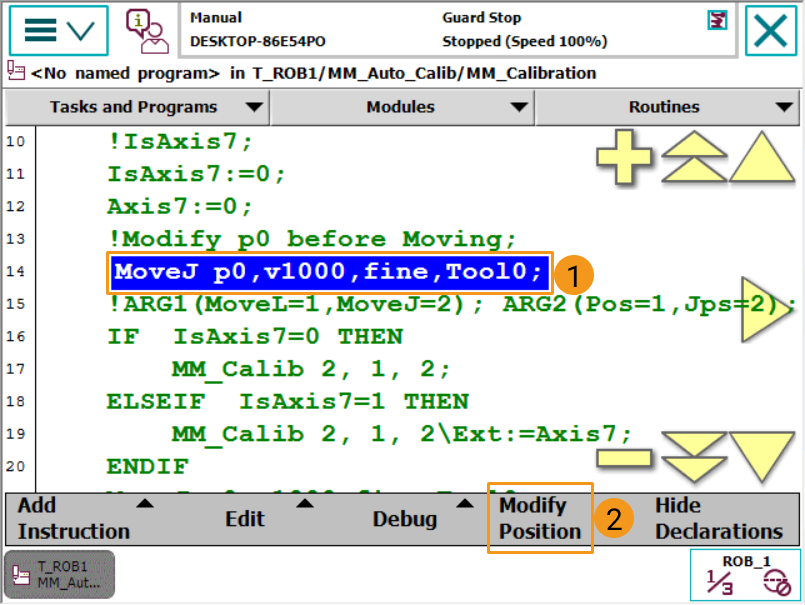
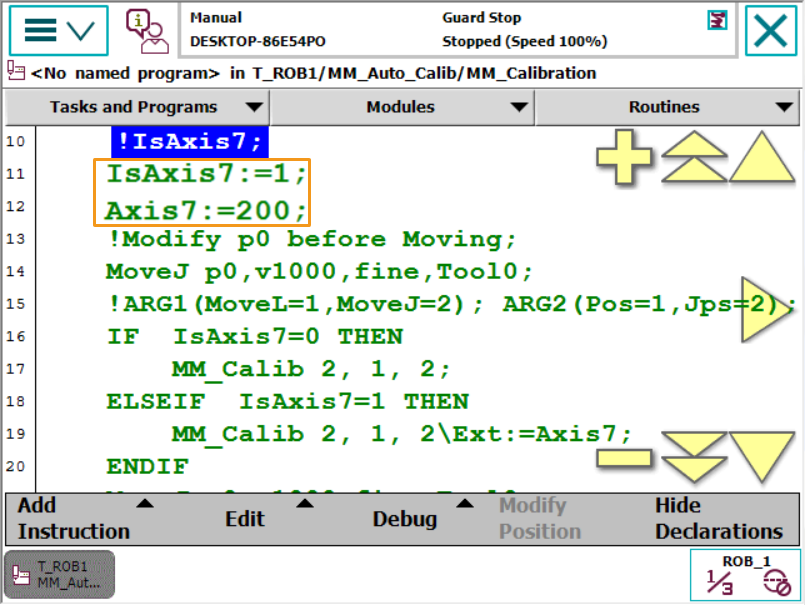
If the 6-axis robot is installed on a guide rail that is controlled by the robot, please set IsAxis7: =1, and configure the value of Axis7 according to the actual situation, as shown below. If there is no guide rail on site or the guide rail is controlled by a PLC, please skip this step.
Run the Calibration Program
-
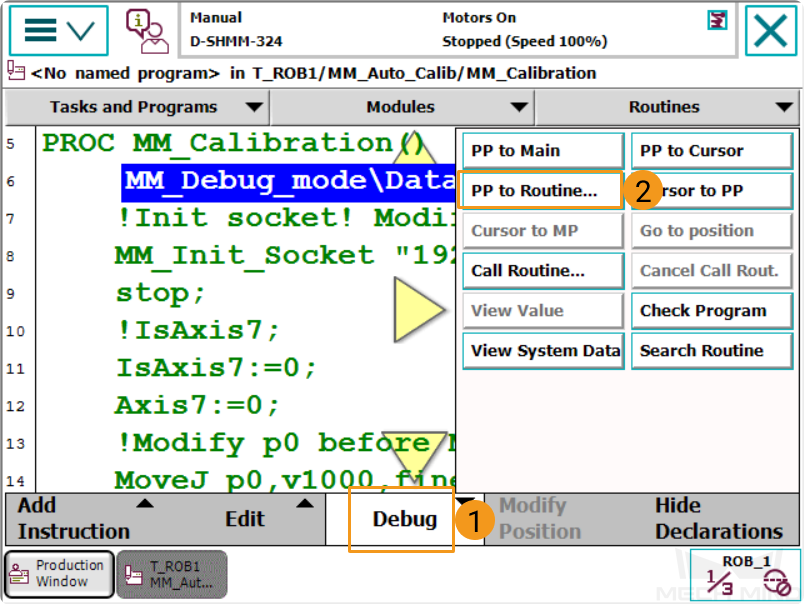
Tap .
-
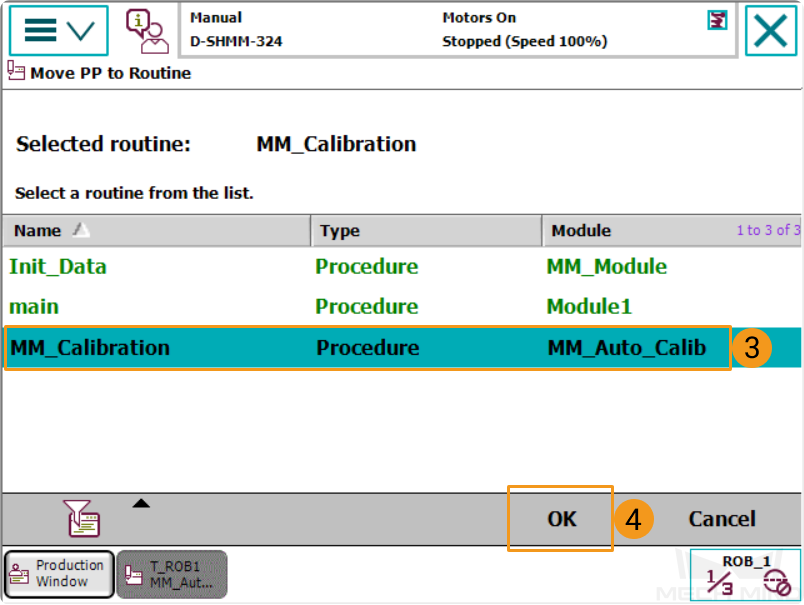
Select MM_Calibration, and then press on OK.
-
Press the
 key on the teach pendant to run the program until the PP moves to line 17.
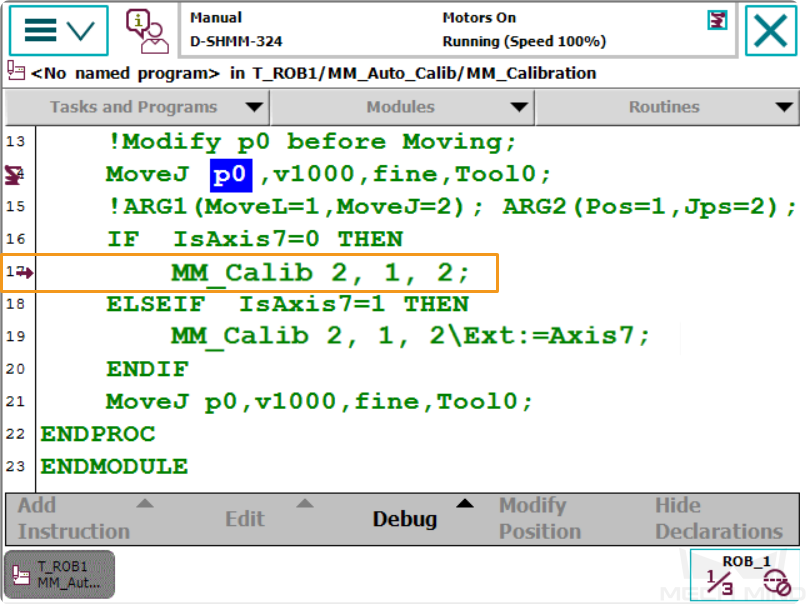
Proceed to the next section when the following are displayed:
-
On the teach pendant:
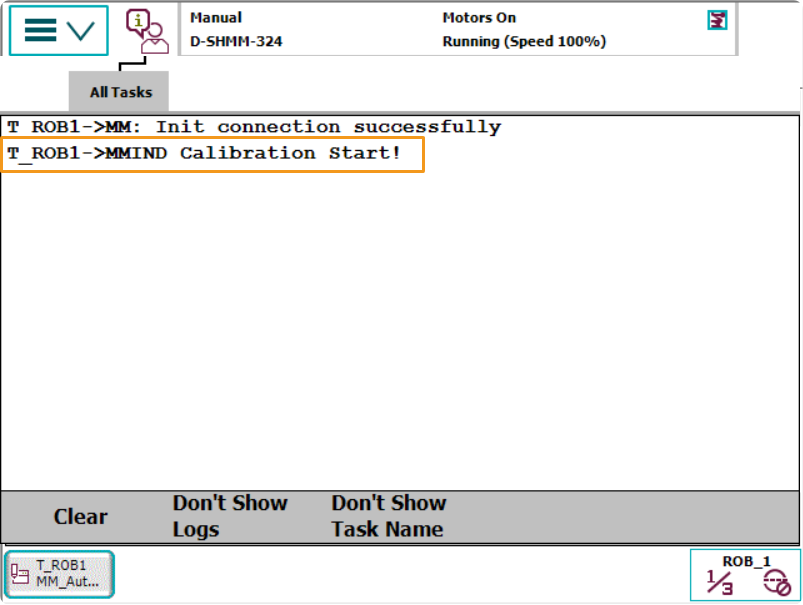
-
In the Console tab of Mech-Vision Log panel: Entering the calibration process, please start the calibration in Mech-Vision.
Complete Calibration in Mech-Vision
-
In Mech-Vision, click Camera Calibration (Standard) on the toolbar, or select from the menu bar.
-
Follow the instructions based on different camera mounting methods to complete the configuration.
-
If the camera is mounted in the eye-to-hand mode, please refer to Complete Automatic Calibration in the Eye to Hand Scenario.
-
If the camera is mounted in the eye-in-hand mode, please refer to Complete Automatic Calibration in the Eye in Hand Scenario.
-
| If the robot does not reach the next calibration point within 60 seconds, Mech-Vision will report a timeout error and stop the calibration process. In such cases, please select and run the calibration program on the teach pendant again, and restart the calibration process in Mech-Vision. |