Set up Standard Interface Communication with FANUC CRX
The CRX plugin provides TCP/IP based socket communication services to communicate with the vision system installed on the IPC. If the network environment and IP addresses on both sides remain unchanged, you only need to configure the communication settings once.
| You should configure the communication settings again if the plugin is re-installed. |
Before establishing the communication with the vision system, please ensure that the following requirements have been met.
-
The CRX plugin is installed successfully.
-
The robot controller is connected to the IPC via Ethernet (a router can be used here).
Set up “Robot and Interface Configuration” in Mech-Vision
-
Click Robot and Interface Configuration in the toolbar of Mech-Vision.
-
Select Listed robot from the Select robot drop-down menu, and then click Select robot model. Select the FANUC CRX robot model that you use, and then click Next.
-
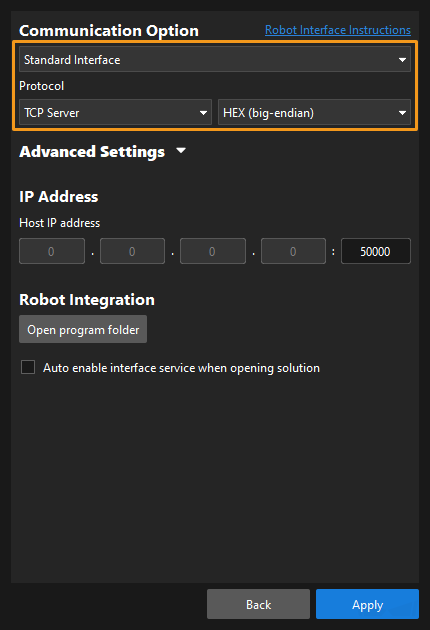
In Communication Option, select Standard Interface for Interface Type, TCP Server and HEX-Big endian for Protocol, and then click Apply.
-
Make sure the Interface Service is started: in the toolbar of Mech-Vision, the Interface Service switch on the far right is flipped and turned to blue.

Set up Communication on the Teach Pendant
-
Set the IP address of the robot.
-
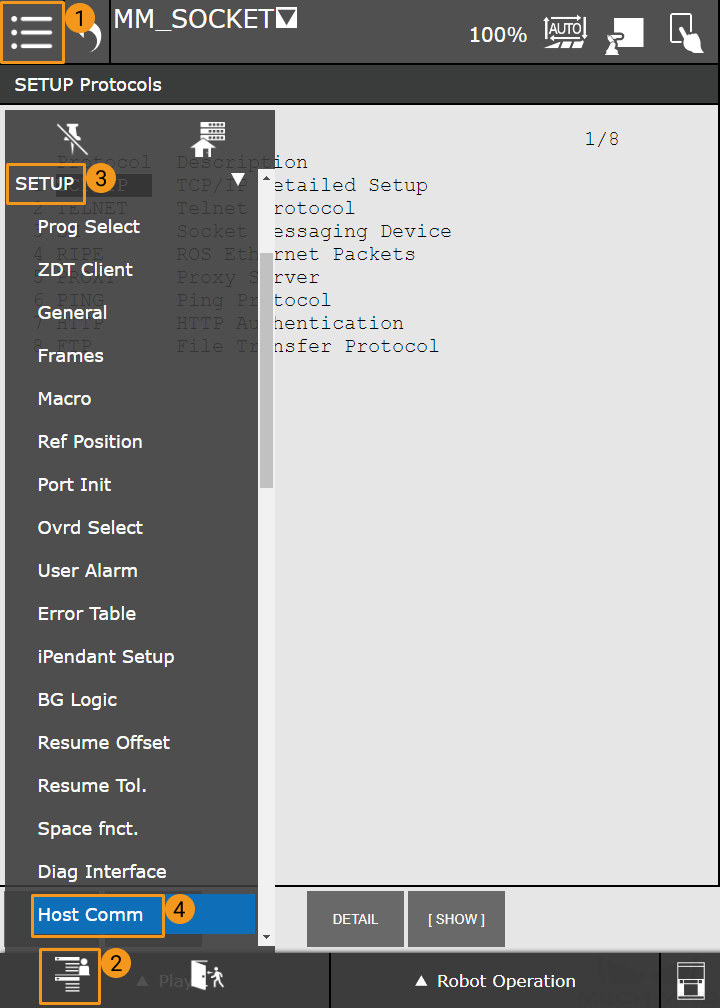
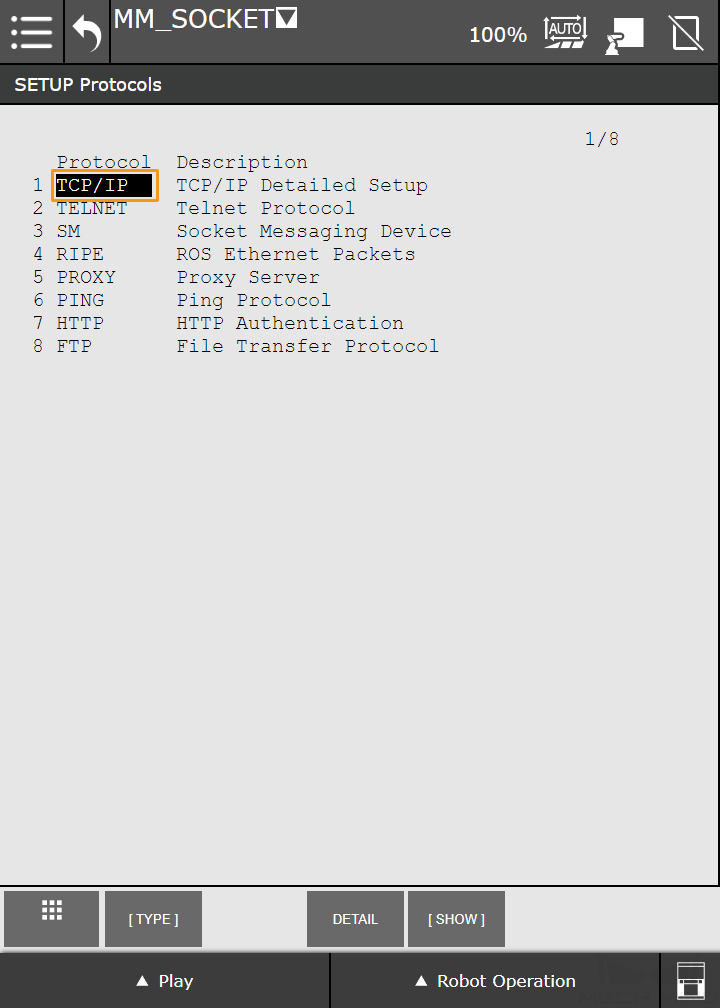
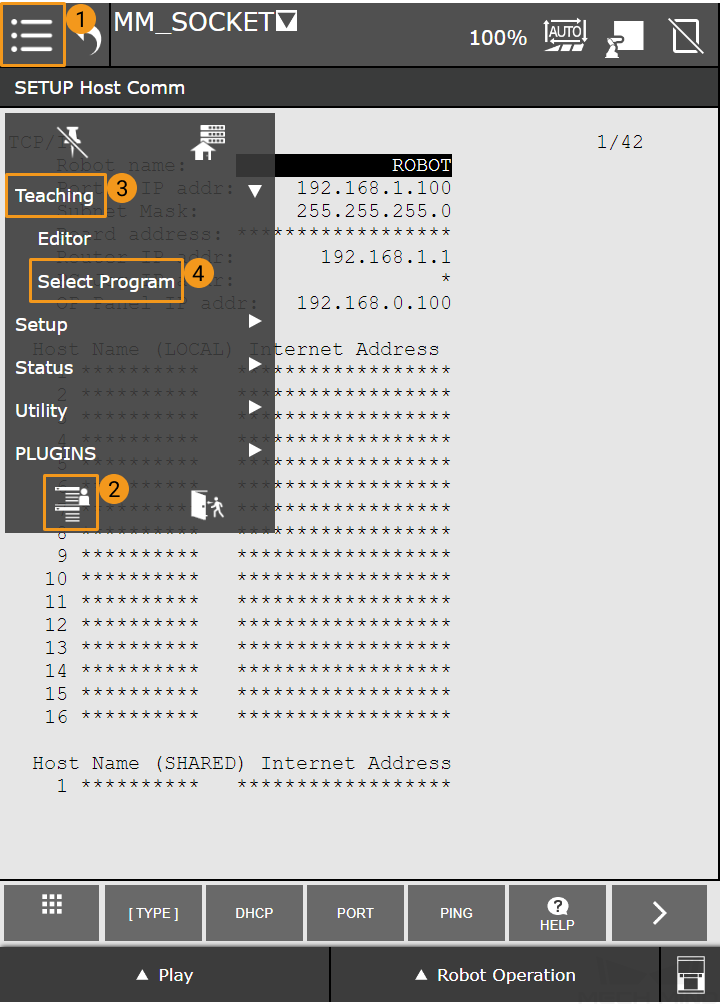
Expand the complete menu, and select SETUP > Host Comm to open the SETUP Protocols window.
-
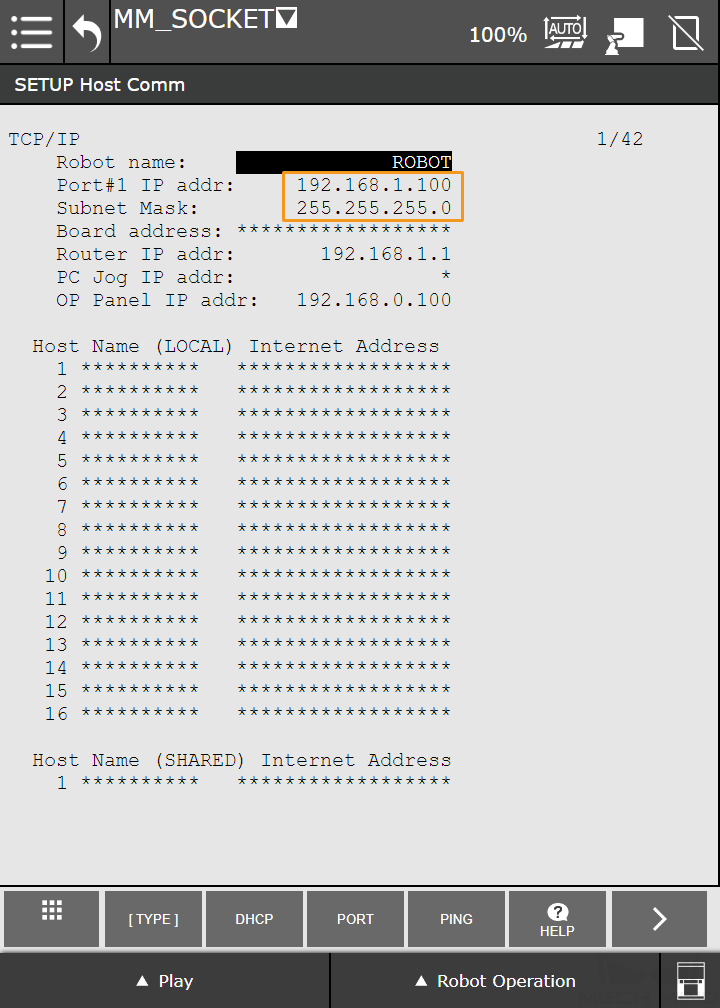
Press TCP/IP, and set the IP address and Subnet Mask.
-
-
Create a new robot program.
-
Press the Menu icon and switch to the frequently used menu, and select Teaching > Select Program.
-
Press the New icon on the right.

-
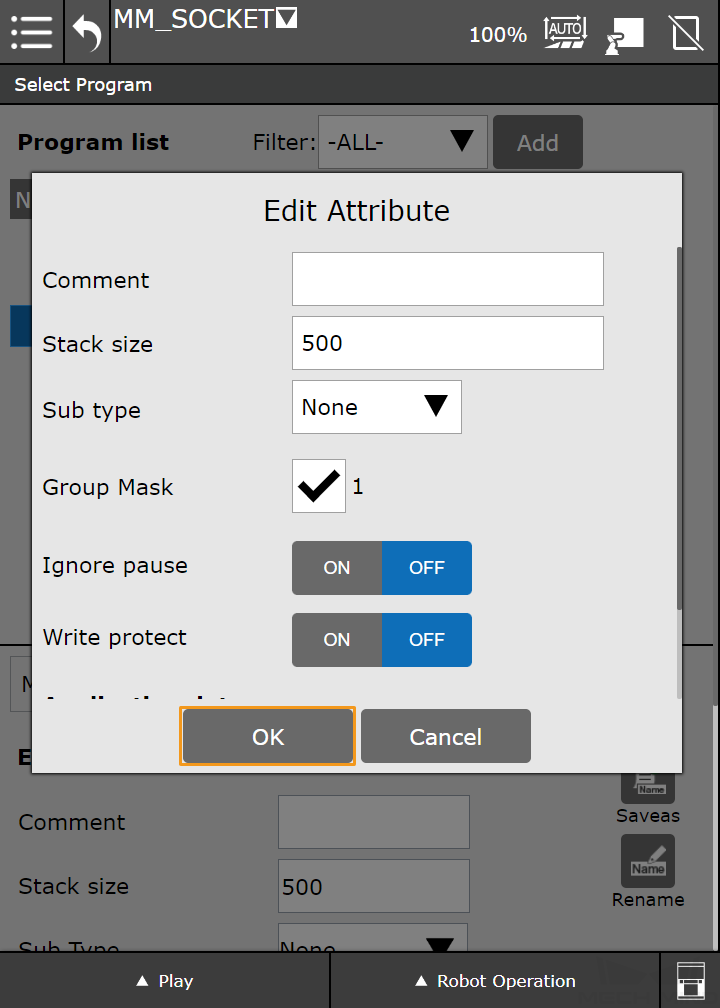
Name the program, such as MM_SOCKET, and then select OK.

-
Keep the default settings of the program and then select OK.
-
-
Execute the communication initiation command.
-
Open the newly created program.
You cannot edit the program or modify the parameters in the Automatic mode. If the icon in the upper right corner is  , which indicates the Automatic mode, you should press the icon to switch to Manual mode, and the icon will turn to
  .
.
-
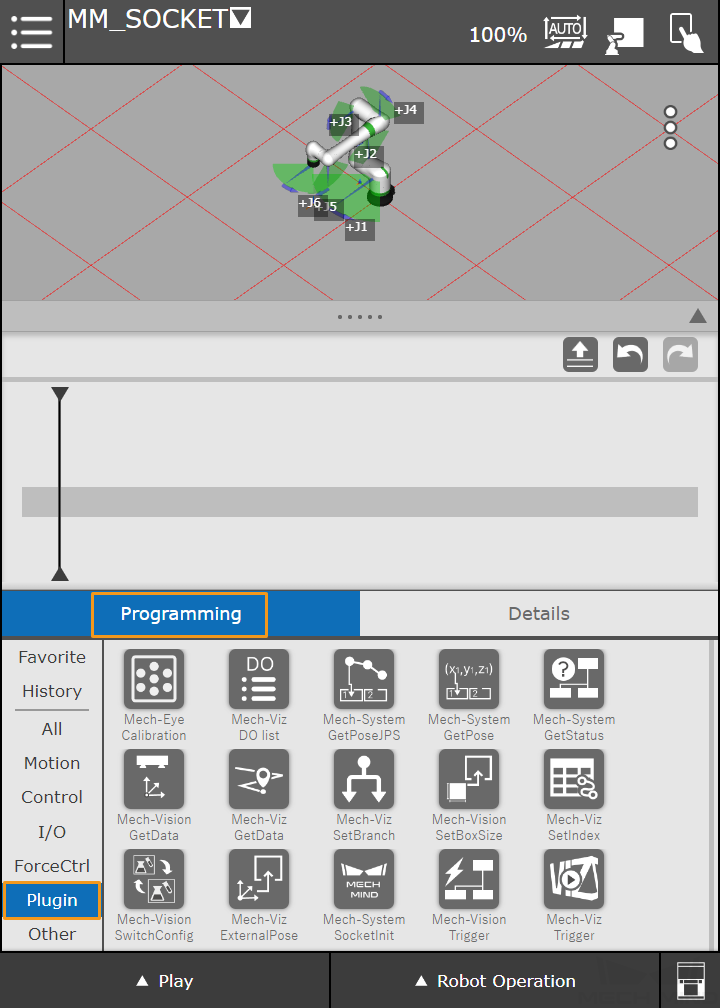
Select Programming > Plugin, and you can see the plugins in the lower right panel.
-
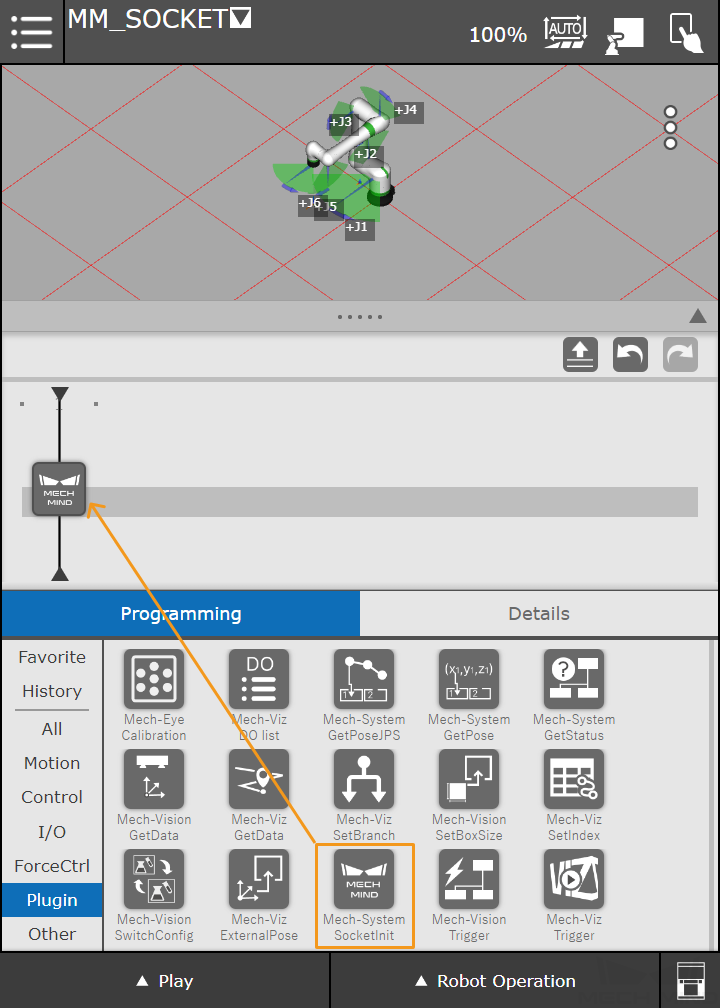
Find Mech-System SocketInit, and drag it to the program line.
-
Press the command on the program line to view its details. Set the IP Address of IPC and set the Port of IPC to the port number configured in Mech-Vision.
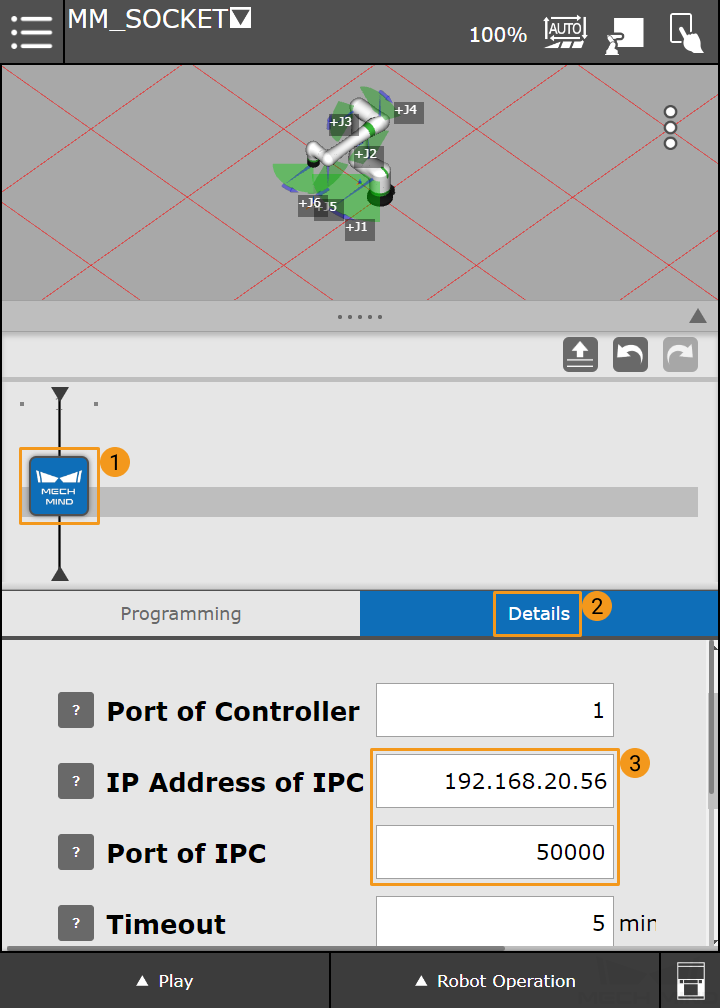
If you have any questions about the parameter to be configured, you can press and hold the question mark on the left to see the detailed description.
-
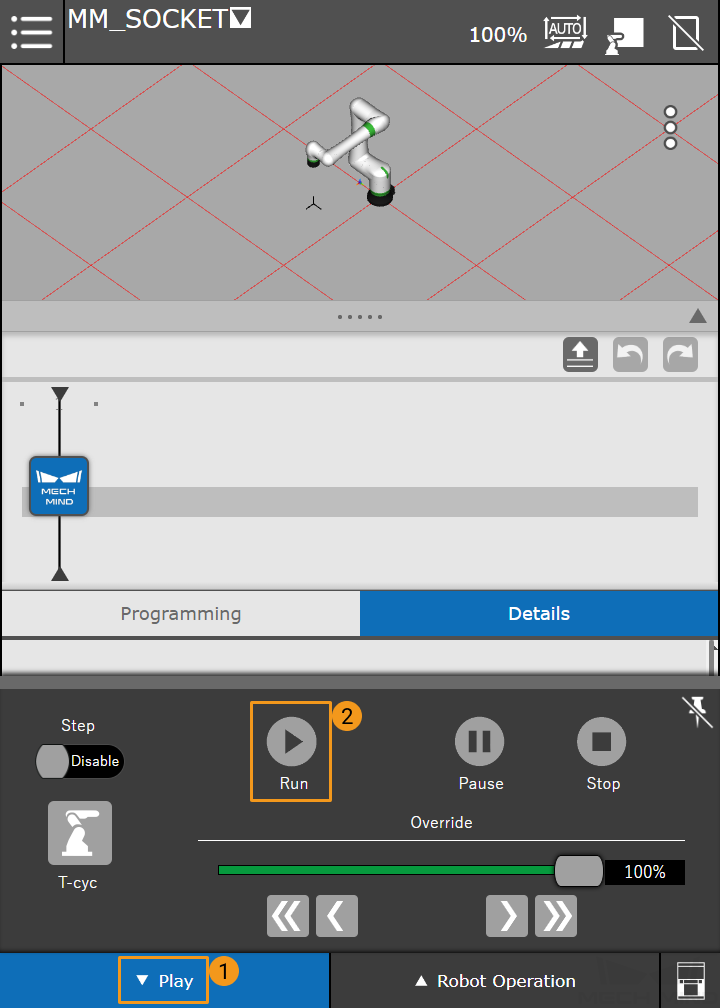
Press the Manual mode icon (
) at the upper right corner of the screen to switch to the Automatic mode (). -
Press Play in the lower left corner and then press Run.
-
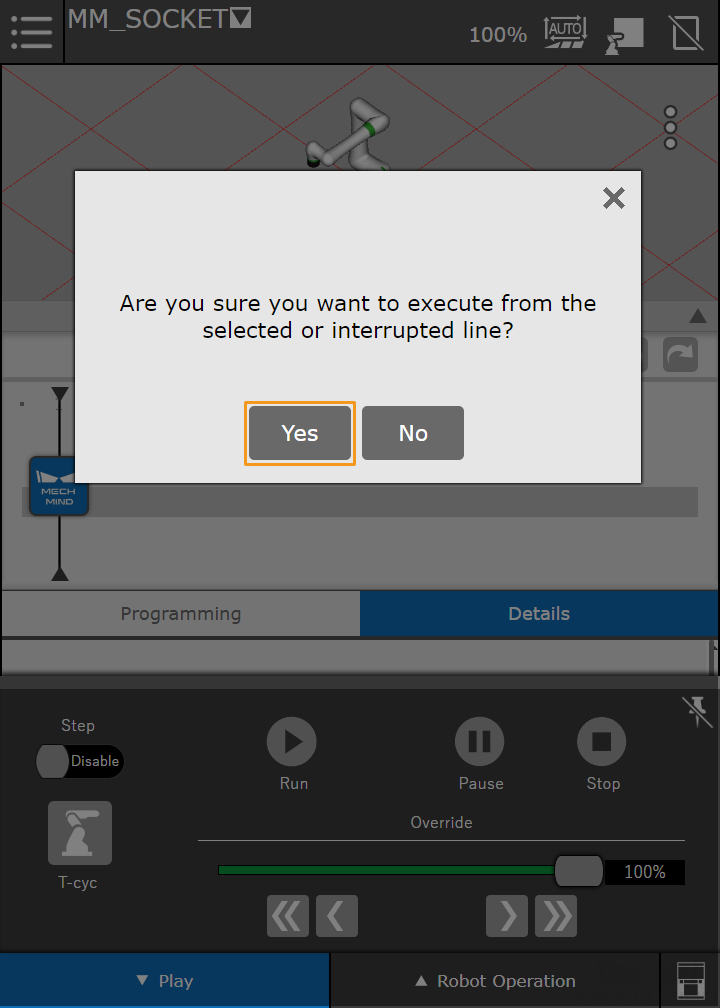
Select 是 in the pop-up dialog box.
-
The USER window will be displayed automatically. The communication is established successfully if the message “MM: Restart Robot” displays in the window, and a communication test is completed successfully if the message “MM: Init Connection Successfully” displays in the window.
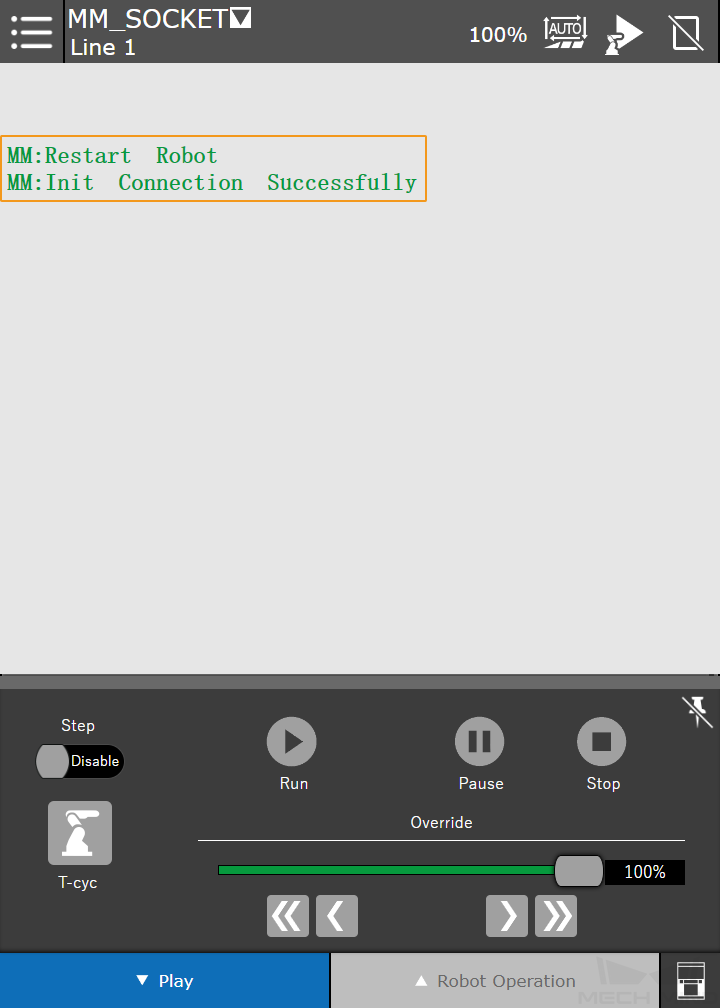
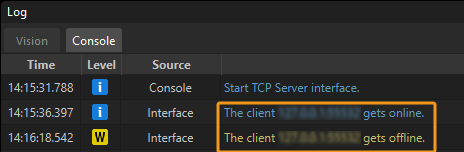
If the robot is connected successfully, the Console tab of Mech-Vision Log panel will display a log.
-
-
Power off the robot controller and then restart it.