DENSO
This guide introduces how to setup master-control communication for a DENSO robot.
Preparation
Check Controller and Software Versions
-
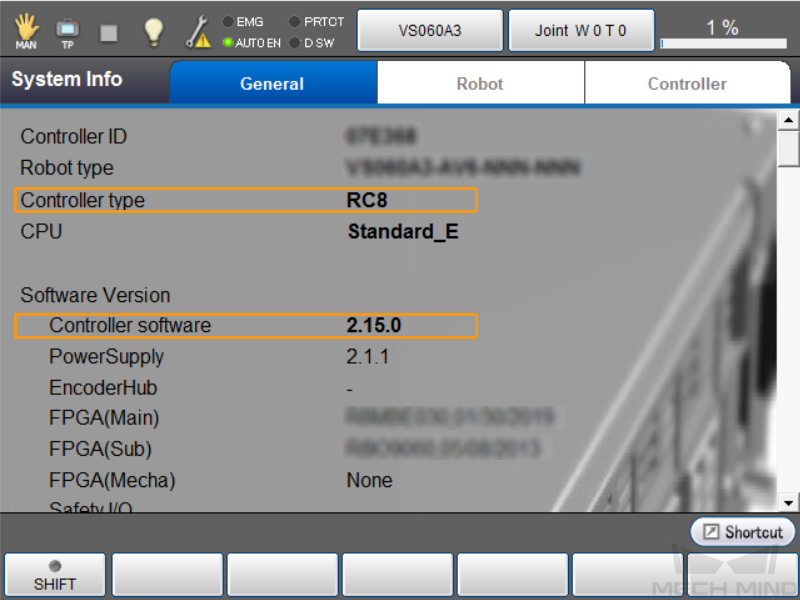
Controller model: RC8, RC8A, or RC9
-
Controller software: 2.15.0 (other versions unknown)
Click here for instructions
-
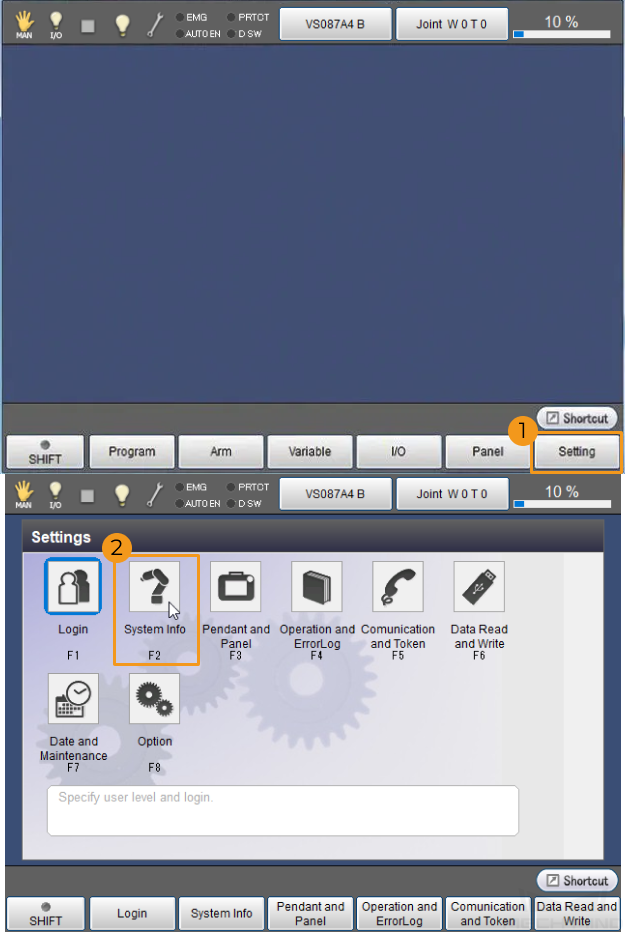
Press on the teach pendant.

-
Check Controller type and Controller software.

-
Download Robot Software
Visit the official website of DENSO robotics on the IPC, and download and install the robot software WINCAPSⅢ as prompted. After you install WINCAPSⅢ, double-click WINCAPSⅢ to open the software.
Set up the Network Connection
-
Plug the Ethernet cable into the controller’s Ethernet interface to connect the IPC and the robot controller.
-
Check the robot’s IP address and make sure it is on the same subnet as the IPC.
Click here for instructions
-
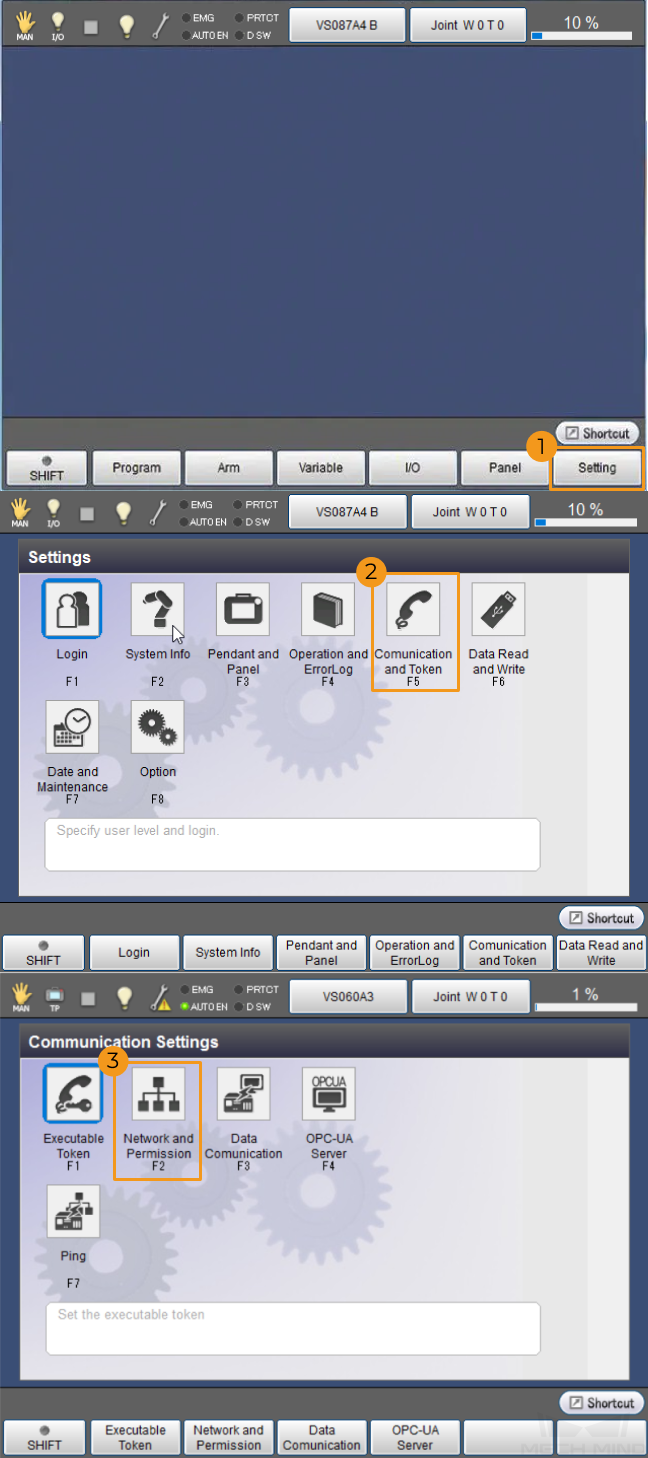
On the teach pendant, tap .

-
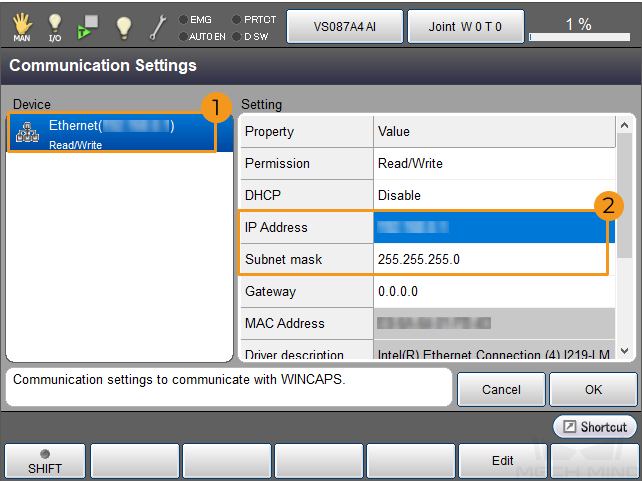
In the Communicate Settings window, select Ethernet in the Device area, and view the IP Address and Subnet mask in the Setting area.

-
-
If the IP addresses of the robot and the IPC are in different subnets, modify the IPC’s IP address.
Obtain Control of the Robot
After completing configurations of this section, Mech-Mind Vision System will gain control of the robot and will be able to master-control the robot.
Modify Robot Program (Only required by RC9 controller)
By default, the programs provided by Mech-Vision and Mech-Viz only support the RC8 controller. If you are using an RC9 controller, please modify the program files according to the instructions below.
-
On the IPC, go to
Mech-Center\Robot_Server\src\robot\densofrom the installation directory of Mech-Vision & Mech-Viz, and you will see the following files:-
__init__
-
cao_controller
-
denso_robot
-
denso_robot_adapter
-
-
Open the denso_robot_adapter file, change RC8 to RC9, and save the modification.

-
Open the cao_controller file, change RC8 to RC9, and save the modification.

Transfer Robot Control
Please transfer the robot control to Mech-Viz according to the instructions below.
-
Tap on the teach pendant.
-
In the Start Control Settings window, change the IP address of Ethernet1 to the IPC’s IP address.
-
Turn the mode key of the teach pendant to the automatic mode to later test the master-control communication between the robot and IPC.
Test the Master-Control Communication
For more information, see Test Robot Connection.
|