Master-Control Communication Setup
This guide shows you how to set up Master-Control communication with an ESTUN robot.
Set up the Network Connection
Set the Controller IP Address
Ensure that the IP addresses of the IPC and robot are on the same subnet. For example, if the IP address and subnet mask of the IPC are 192.168.100.1 and 255.255.255.0, the controller’s IP address should be 192.168.100.x (within the subnet 255.255.255.0). If the IP address and subnet mask of the IPC are 192.168.100.1 and 255.255.0.0, the controller’s IP address should be 192.168.x.x (within the subnet 255.255.0.0).
-
Enter the main interface of the teach pendant, and press Login.
-
Select Administrator on the current user list, and the password window will pop up.
| The default password of the administrator is 000000. |
+ . Return to the main interface after logging in as an administrator. Press Advanced settings → Network settings.
-
Set an IP address for ETH2 (lan4) and save the settings.
|
ETH2 (lan4) is the Ethernet port used to communicate with VNC. |
Load the Program File
The master-control program should be loaded to the robot controller so that Mech-Mind Vision System can master-control the robot side. You should first connect the robot’s low-level control system with VNC before loading the master-control program.
Connect Robot’s Low-level Control System with TightVNC
As remote connectivity software, TightVNC enables easy remote access to your computer. When using TightVNC to remotely connect the robot system, you may conveniently modify files in the robot system.
-
Download TightVNC software to the robot and unzip it.
-
Double-click the tvnviewer.exe file, enter the host IP address, i.e., that of ETH2(lan4), and click Connect.
| The system might warn you of malware the first time you run the tvnviewer.exe file. You may ignore the warning. |
+ . Enter the password in the authentication window and click OK.
+ NOTE: The default password of the low-level control system of the Estun robot is ERC654321.
+ . After entering the low-level control system, click Management.
-
Enter the password (estun) in the pop-up window, and then click Minimize on the right panel. The Windows desktop will show.
Prepare and Load the Program
| Before loading the program, you need to install Python 2.7 and configure the environment variables. For details, refer to Set up Python. |
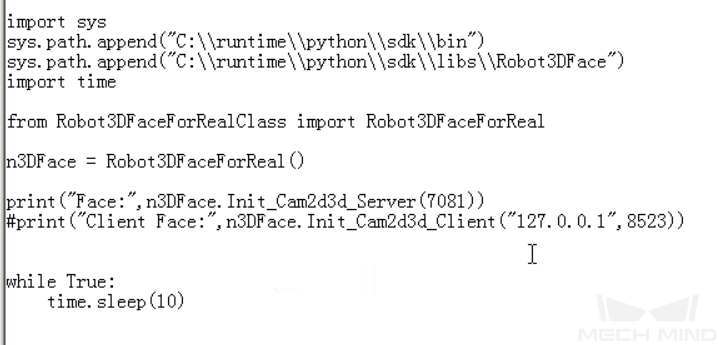
Prepare the master-control program “Robot3DFaceTestSrv1.py” and configure it before starting the program.
-
Double-click the computer icon on the desktop, and go to C:/runtime/python/sdk/libs/Robot3DFace.
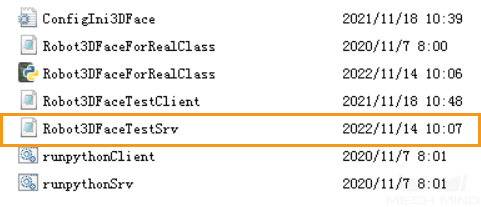
-
Copy and paste the files Robot3DFaceTestSrv.py and runpythonSrv.bat, and rename the copy, and rename the respective copies to Robot3DFaceTestSrv1.py and runpythonSrv1.bat.
-
Open the file Robot3DFaceTestSrv1.py with the Notepad, modify the 7080 port to 7081, save the file, and close the Notepad.
-
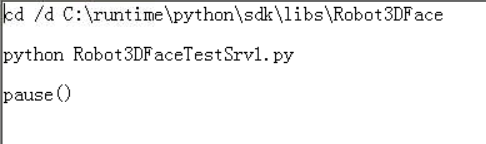
Open the file runpythonSrv1.bat with the Notepad, modify Robot3DFaceTestSrv.py to Robot3DFaceTestSrv1.py, save the file, and close the Notepad.
-
Go to C:/runtime and open the startSys file. Add the three lines below to the end of the file, save the file, and close the Notepad.
cd /d c:\runtime\python\sdk\libs\Robot3DFace
start runpythonSrv.bat
start runpythonSrv1.bat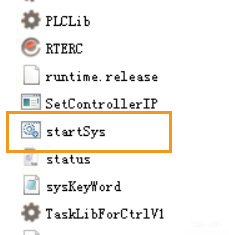

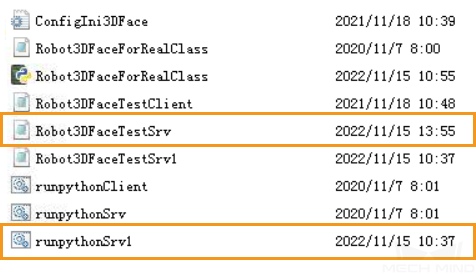
You may double-check if the files are modified correctly. -
Restart the robot after the above configuration.
Test Master-Control Communication
Run the Program
-
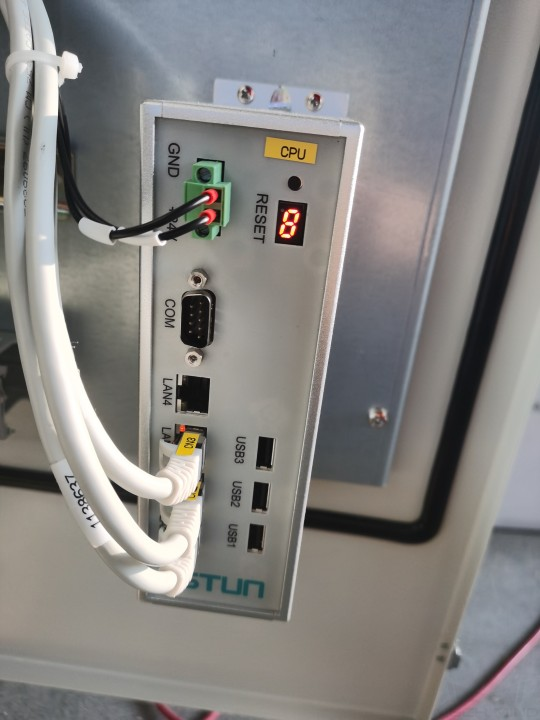
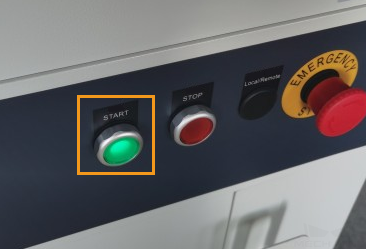
Press the green button on the controller.
-
Turn the key on the teach pendant to the Run mode.

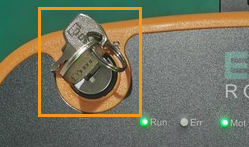
Then, the master-control program will automatically start to run.
Create a Mech-Viz Project
-
Open Mech-Viz, press Ctrl + N on the keyboard to create a new project. Select the robot model corresponding to your real robot brand and model on the interface as shown below.

-
Press Ctrl + S and create or select a folder to save the project.
-
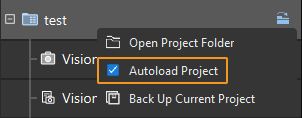
Right-click the project name in the left panel in Mech-Viz and select Autoload Project.
Connect to the Robot
-
Click Master-Control Robot on the toolbar of Mech-Viz.
-
Input the IP address of the real robot in Robot IP address (the IP address in the picture is only an example). Click Connect the robot.

If Mech-Viz successfully connects the real robot, the current status will change to Connected. Meanwhile, the icon in the toolbar will turn from blue to green.
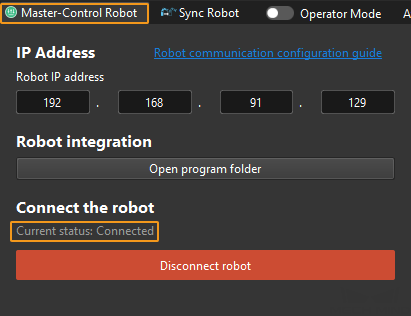
If the connection fails, please double-check the robot IP address.
Move the Robot
-
In the toolbar of Mech-Viz, change the “Vel.” (velocity) and “Acc.” (acceleration) parameters to 5%.

-
Click Sync Robot in the toolbar, and you can synchronize the poses of the simulated robot in the 3D simulation space with the poses of the real robot. Then click Sync Robot again to unselect it.

-
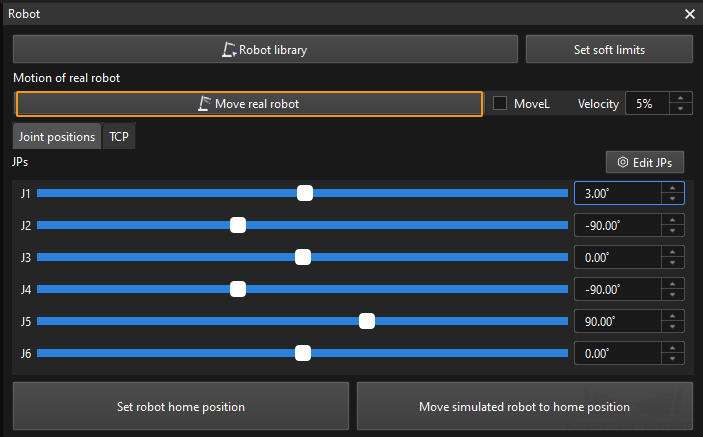
In the Robot tab, slightly adjust the value of “J1”, for example, from 0˚ to 3˚. This operation will move the simulated robot.
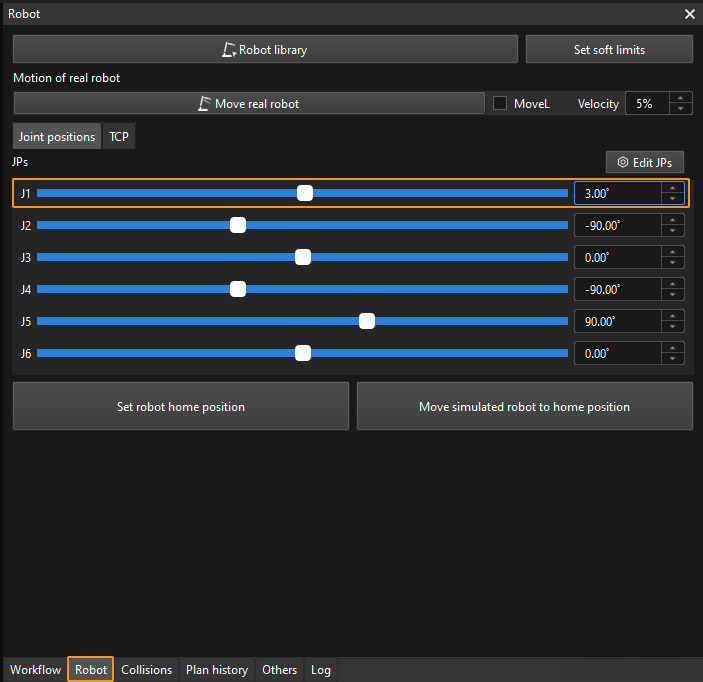
-
Click Move real robot and check if the real robot has moved. If the real robot has reached the JPs set for the simulated robot, the master-control communication is working.
When moving the robot, please ensure the safety of personnel. In the case of an emergency, press the emergency stop button on the teach pendant!