Edit Point Cloud Model
Once you have generated a point cloud model or imported a point cloud model, you may want to edit it so that it can meet the actual requirement.
In Matching Model and Pick Point Editor, you can perform the following editing.
|
Point cloud models must be visible (i.e., the icon after the file name is If there are multiple point cloud models in the Resource list, you can hide other models and keep only the point cloud model you want to edit visible. |
Select Desired Points
-
Select the point cloud model for editing in the Model files list, adjust your view in the visualizing space so that you can see most or all the points you want to select, and then click
 on the toolbar.
Once you’ve clicked on
, the view in the visualizing space will be locked. Therefore, please adjust your view first. -
Select the points in the visualizing space. To select multiple areas, hold the Ctrl key while you select. The selected points are shown in orange.

-
Click
again, or press the Esc key to unlock the view in the visualizing space.
Delete Unwanted Points
Select the point cloud model you want to edit in the Model files list first, and click ![]() on the toolbar or press the Delete key to delete the selected points.
on the toolbar or press the Delete key to delete the selected points.
|
If you deleted wanted points by accident, you can undo the deleting by clicking in the menu bar or using the shortcut Ctrl+Z. You can also redo the deleting by clicking in the menu bar or using the shortcut Ctrl+Y. |
|
The size of the bounding box can indicate if you have deleted all the unwanted points. Check the box in front of Show bounding box below the CAD files list to show the bounding box. |
Invert Point Selection on the Current Model
Select the point cloud model you want to edit in the Model files list first, select unwanted points and click ![]() in the toolbar, the points that you didn’t select now become selected.
in the toolbar, the points that you didn’t select now become selected.
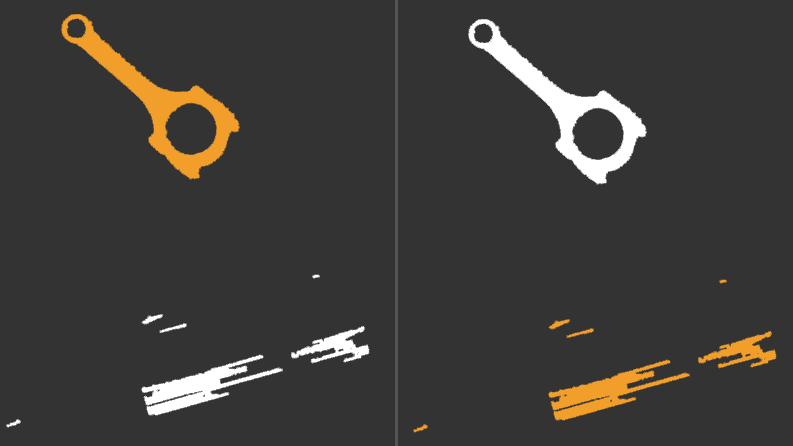
The figure below shows the point cloud model before (left) and after (right) the invert point selection.
Estimate Point Cloud Edges by 3D Method
For general matching, the point cloud of the object surface facing the camera will be used to make the point cloud model. However, the point cloud surface matching may not apply to some special application scenarios.
-
When there are multiple objects or an inevitable interference in the scene, objects with the larger surface tend to be mistakenly recognized as objects with the smaller surface. Also, the matching confidence differs slightly with the matching score for a successful matching, and therefore invalid matching results cannot be filtered by setting a matching confidence threshold.
-
When the front and back side or other characteristics of the object to be recognized need to be distinguished, if there is not an obvious difference such as the shape and height between the front and back side, a wrong match may occur, and it is unable to distinguish the front and back side of the object.
The cause of the above problems is that the shape difference between the objects is not well represented in the point cloud model and then utilized in the matching.
Extracting the edge of the object’s point cloud for matching will increase the weight of the shape difference in matching and therefore increase the matching success rate.
-
Select the point cloud model for editing in the Model files list, and then click
 in the toolbar. The following window will pop up.
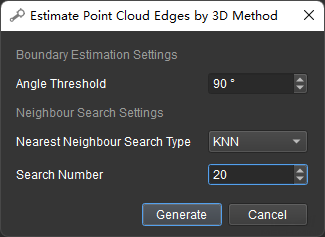
-
Angle Threshold: if the angle between the normal of a point and the normals of its neighboring points exceeds this threshold, this point will be recognized as on the object edge.
-
Nearest Neighbour Search Type: set the method for searching nearest neighbors, including KNN and Radius.
-
Search Number (when KNN is selected): set the number of neighbors to search. Neighboring points are used to estimate a point’s normal.
-
Search Radius (when Radius is selected): set the search radius of neighbors. Neighboring points within this radius are used to estimate a point’s normal.
-
-
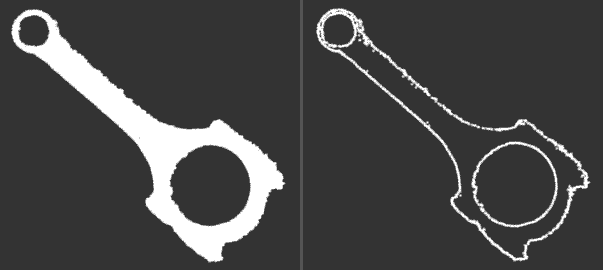
After setting the parameters, click Generate. A point cloud containing only the points on the object’s edge (right) is generated from the original point cloud (left).
Merge Point Cloud: Merge Multiple Point Clouds into One
Select the point cloud models for merging in the Model files list, and then click ![]() on the toolbar to generate a new point cloud from merging. Meanwhile, the point clouds selected for merging will become invisible automatically.
on the toolbar to generate a new point cloud from merging. Meanwhile, the point clouds selected for merging will become invisible automatically.
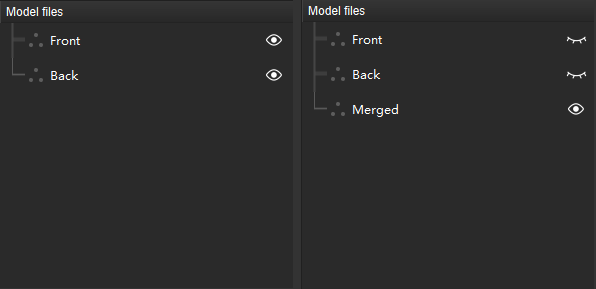
In the figure below, the left image is the Model files list before point cloud merging, and the right is the Model files list after merging the point clouds Front and Back.
Downsample: Reduce the Size of the Point Cloud Model to Speed Up Subsequent Processing
There is not a necessary connection between the number of points in the point cloud and the quality of the point cloud model. An ideal point cloud model should have an appropriate number of points that can well represent the actual target object.
-
Select the point cloud model for downsampling in the Model files list, click
 , and adjust the sampling interval in the pop-up window.
The larger the sampling interval, the sparser the points in the point cloud model, and therefore the smaller the file size will be.
-
Once you finish adjusting the sampling interval, click OK to generate a new, downsampled point cloud. Meanwhile, the point cloud selected for downsampling will become invisible automatically.
In the figure below, the left image is the Model files list before downsampling Merged, and the right after.
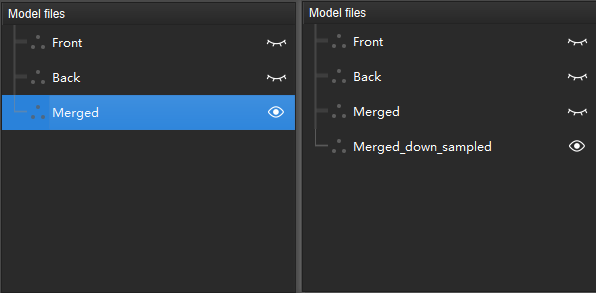
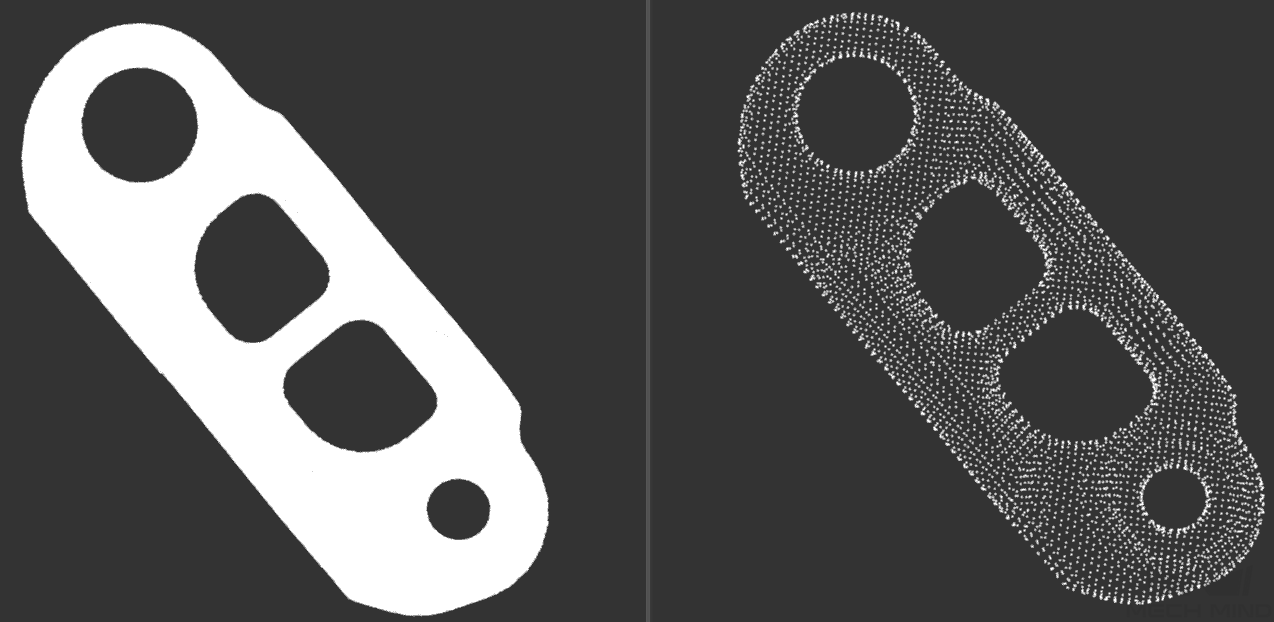
In the figure below, the left image is a point cloud model before downsampling, and the right one is after downsampling with a sampling interval of 3 mm.
After you finish editing the point cloud model, you can add a pick point for it.