Set the Scene Point Cloud
The scene point cloud consists of all point clouds in the camera’s field of view, and can be used as a reference for setting the ROI in relevant Steps. Therefore, a scene point cloud should be selected before setting the ROI.
This section describes how to use the tool to select a scene point cloud.
-
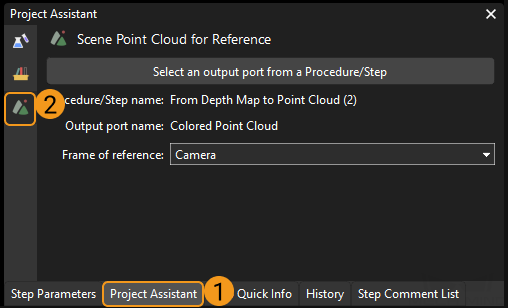
Open Project Assistant and click
 icon to open the window for configuration.
-
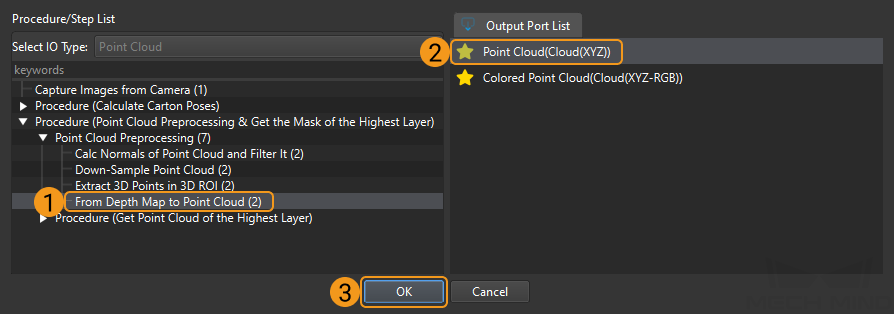
Click Select an output port from a Procedure/Step, and select the Step which outputs the scene point cloud on the left side, and select the output port on the right side. Then click OK.

It is recommended to select the point cloud output by From Depth Map to Point Cloud as the scene point cloud to ensure the processing speed in the subsequent Steps. Usually, the Step Capture Images from Camera is not recommended to be selected here.
-
Icon
 represents that the output port is connected with an input port of a succeeding Step.
 -
Icon
 represents that the output port is not connected with a succeeding Step.
-
-
After selecting the scene point cloud, you can also choose the Frame of reference according to actual requirements.
|
After setting up the scene point cloud, you can refer to Setting ROI to learn more details about setting up ROI. |