Adjust the Reference Frame of the Model
| Click here to download the STL model used as an example in this section. |
It is better to define the reference frame in the model editing software in advance. You don’t need to adjust the imported model’s reference frame if it appears correct. If not, please follow the instructions below to adjust the reference frame.
The origin of the model reference frame is usually located at the center of the flange mounted at the robot end. The Z-axis direction is typically perpendicular to the plane of the mounting flange and points outward.
As shown in the left figure below, the tool reference frame is located at the center of the gripper fingers, not the center of the mounting flange. In this case, the reference frame needs to be reset. The correct reference frame after being adjusted is shown in the right figure.
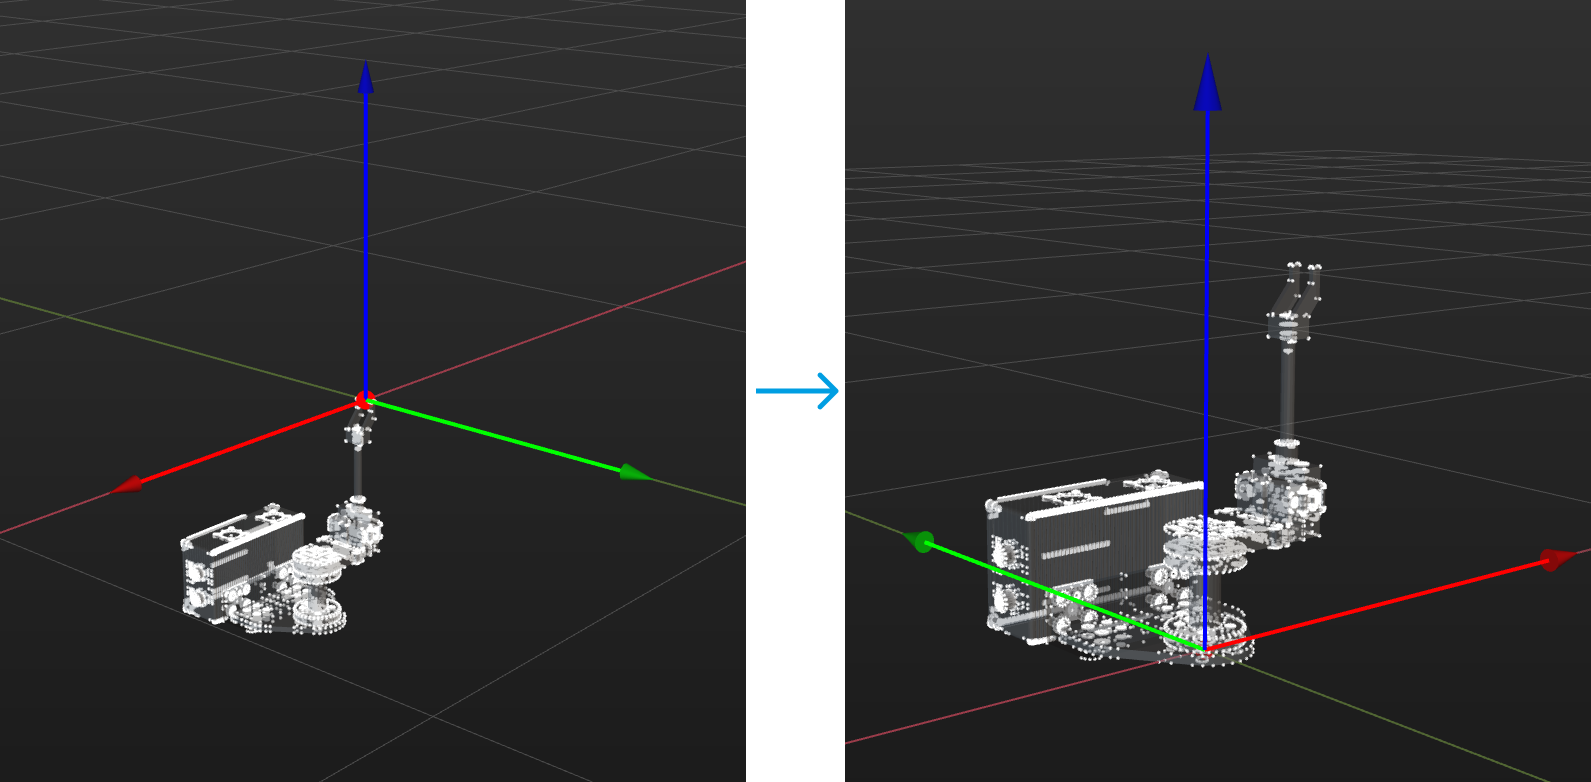
The basic steps for adjusting the model reference frame are shown in the diagram below.

| Before continuing, please ensure you are familiar with how to use the selection tool. If you’re not familiar, please refer to Selection Tool Usage Guide for more information. |
Instructions
Determine the Origin of the Reference Frame
-
Select the model name in the Reference Model panel.
-
In this example, two pixel points on the upper surface of the flange connector can be used to locate the origin of the tool reference frame. Click Cuboid Selection in the toolbar and adjust the selection frame to enclose the two pixel points only.
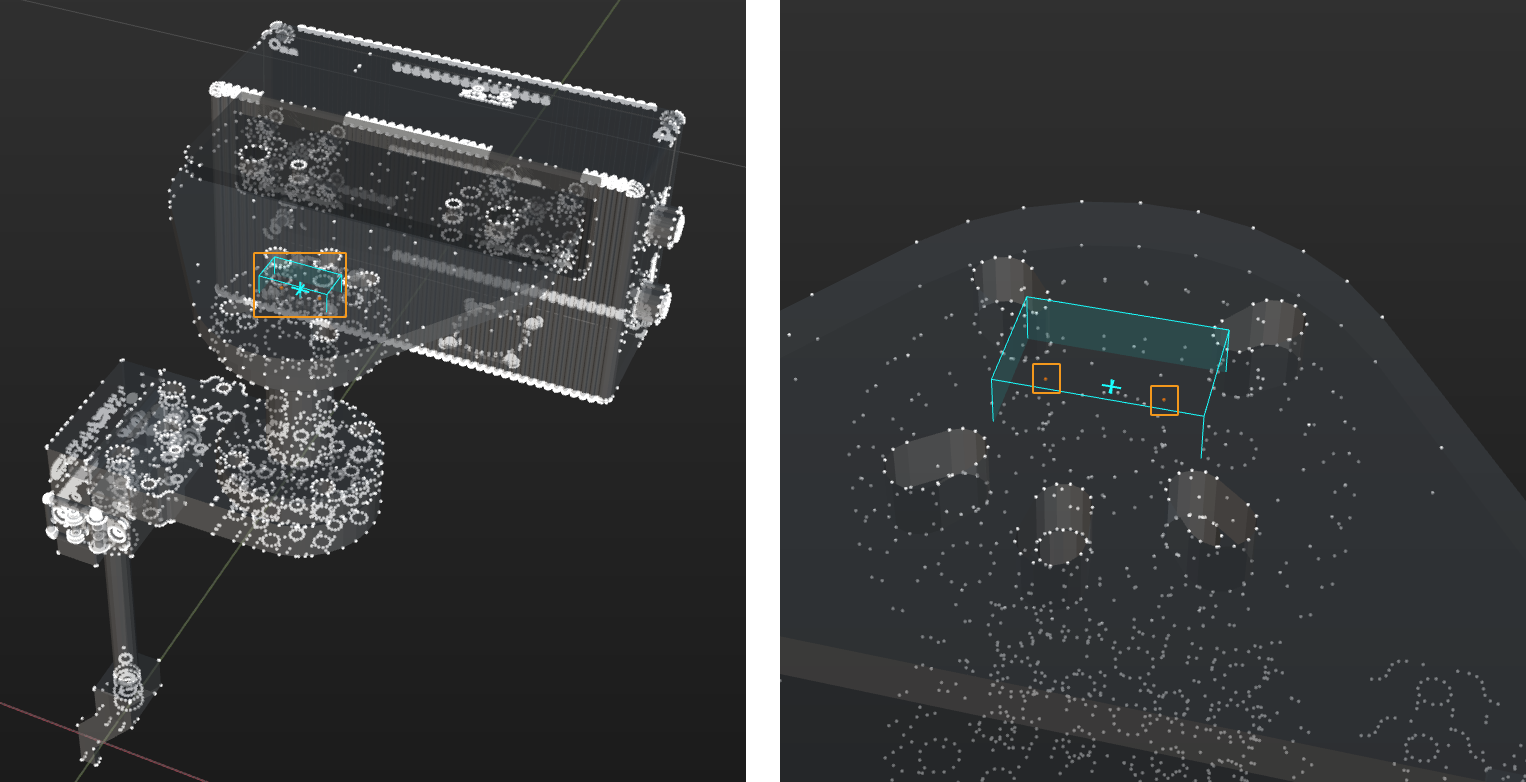
The software will generate the center point based on the chosen pixel points. Please select the pixel points of the area to be processed as accurately as possible. -
After clicking Create Center Point in the toolbar, a yellow center point will appear between the two points.
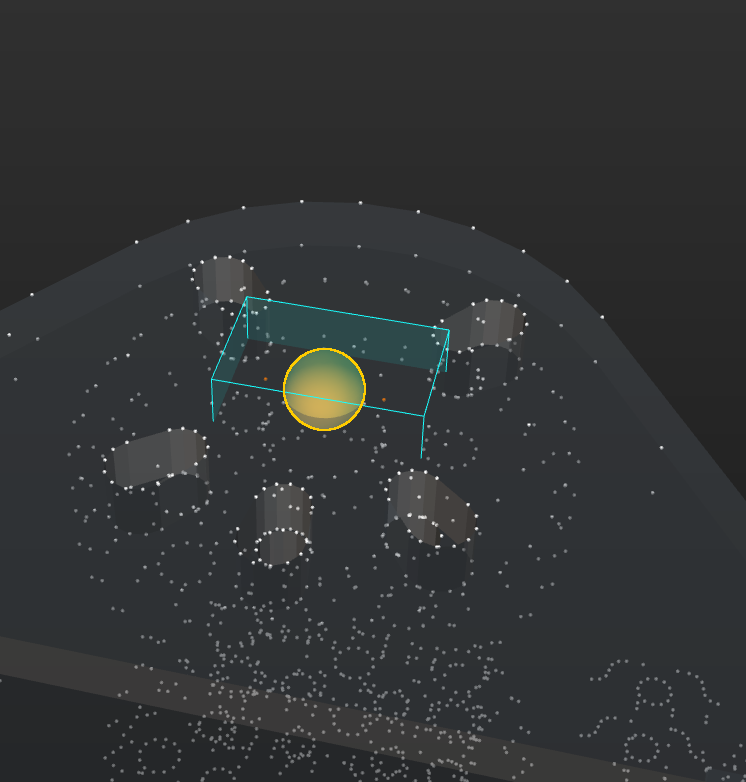
-
Right-click the point under Center Points and rename it as “Origin.”
-
Unselect Cuboid Selection in the toolbar.
Select Reference Point for Z-Axis
-
In this example, the Z-axis should be vertical and point downward. A center point can be set at the center of the round hole below the flange connector to determine the direction of the Z-axis. Click Cylinder Selection in the toolbar and adjust the cylinder to enclose the circle beneath the round hole.
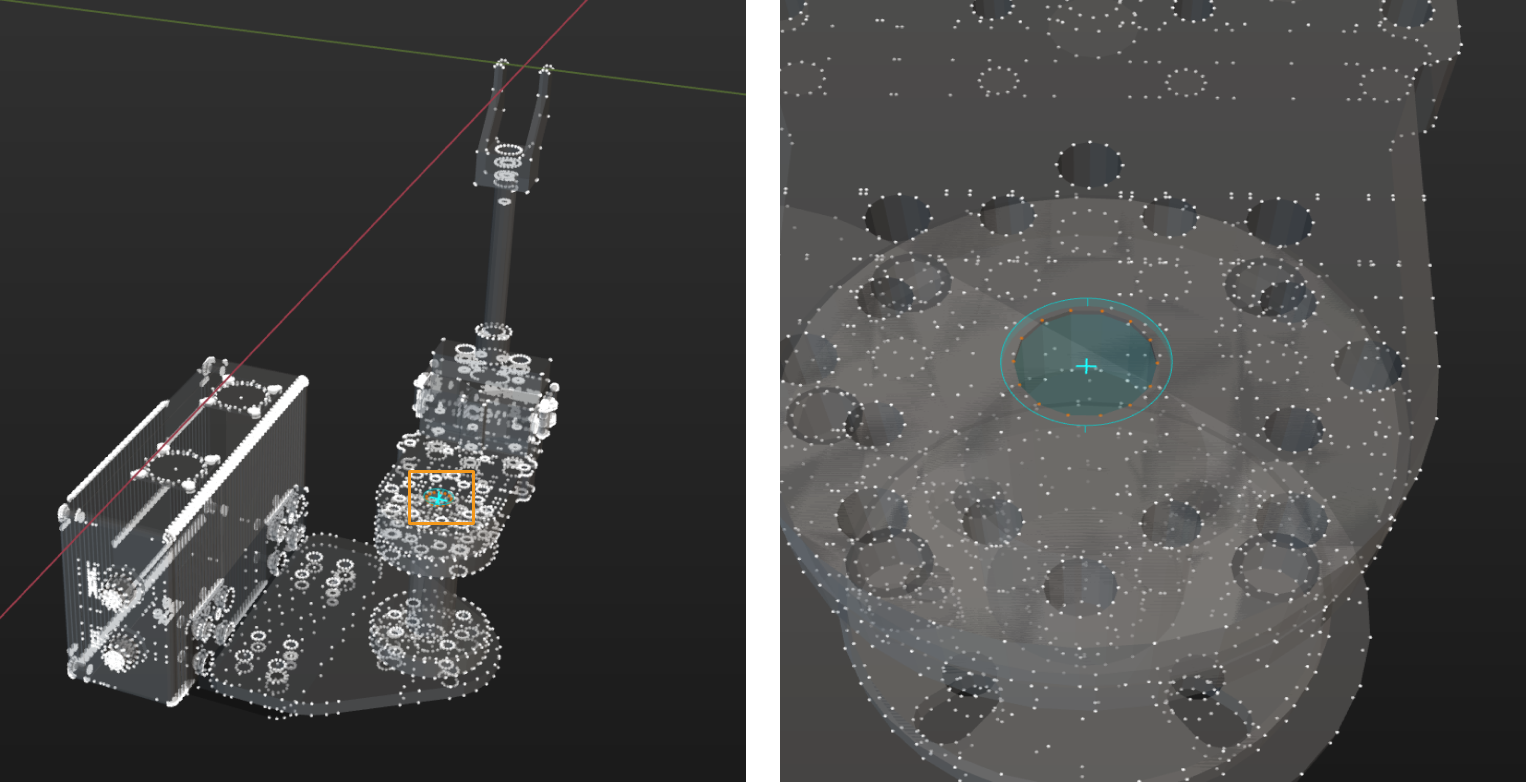
-
After clicking Create Center Point in the toolbar, a center point will be generated at the center of the round hole.
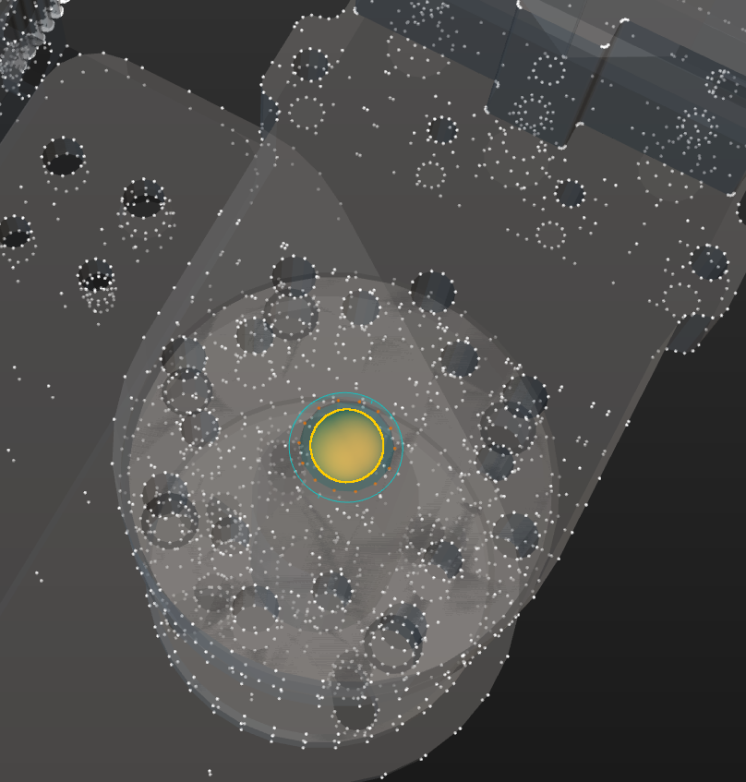
-
Right-click the point under Center Points and rename it as “Z-axis reference point.”
-
Unselect Cylinder Selection in the toolbar.
Create Reference Frame
-
Click Set Frame in the toolbar.
-
Select Select center point in the Coordinate Parameters panel. Then click Unselected next to Coordinate Origin, and the text on the button becomes Activated.
-
After clicking “Origin” under Center Points, you can see the reference frame generated based on the selected origin. The button next to Coordinate Origin shows Selected.
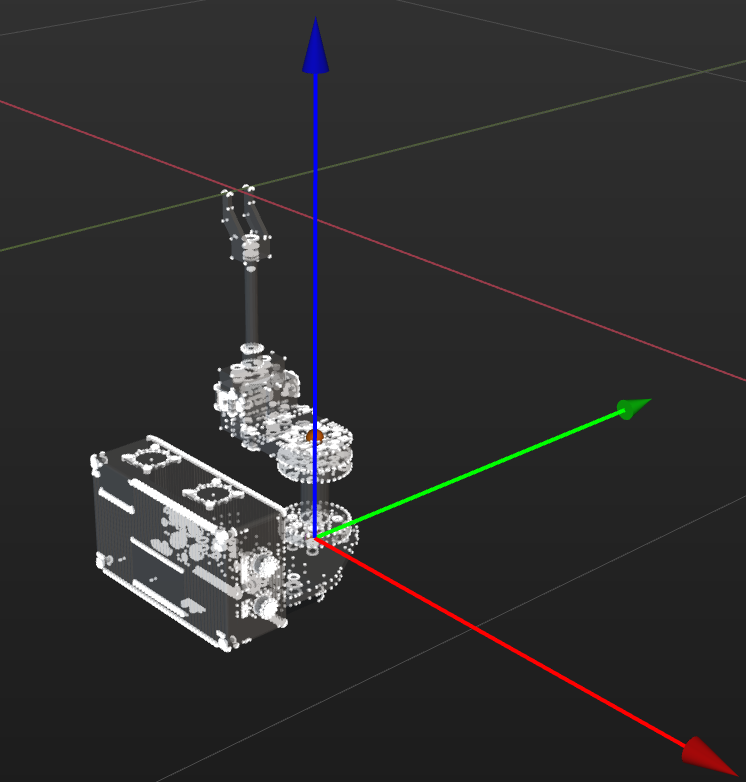
Determine the Direction of Z-Axis
-
In the Coordinate Parameters panel, click the button next to Axis Z, and the text on the button will change from Unselected to Activated.
-
Click the “Z-axis reference point” under Center Points to complete the Z-axis setup.
Determine the Direction of X/Y-Axis
-
In this example, the X-axis of the reference frame needs to be parallel to the long side of the camera and point toward the outside of the gripper. You can directly use pixel points on the outer surface of the flange connector to determine the direction of the X-axis.
-
In the Coordinate Parameters panel, click the button next to Axis X, and the text on the button will change from Unselected to Activated.
-
Unselect Select center point.
-
In the 3D editing workspace, hover the mouse over the pixel points on the flange connector, and the target point will turn red. Click the pixel point to complete the X-axis setup.
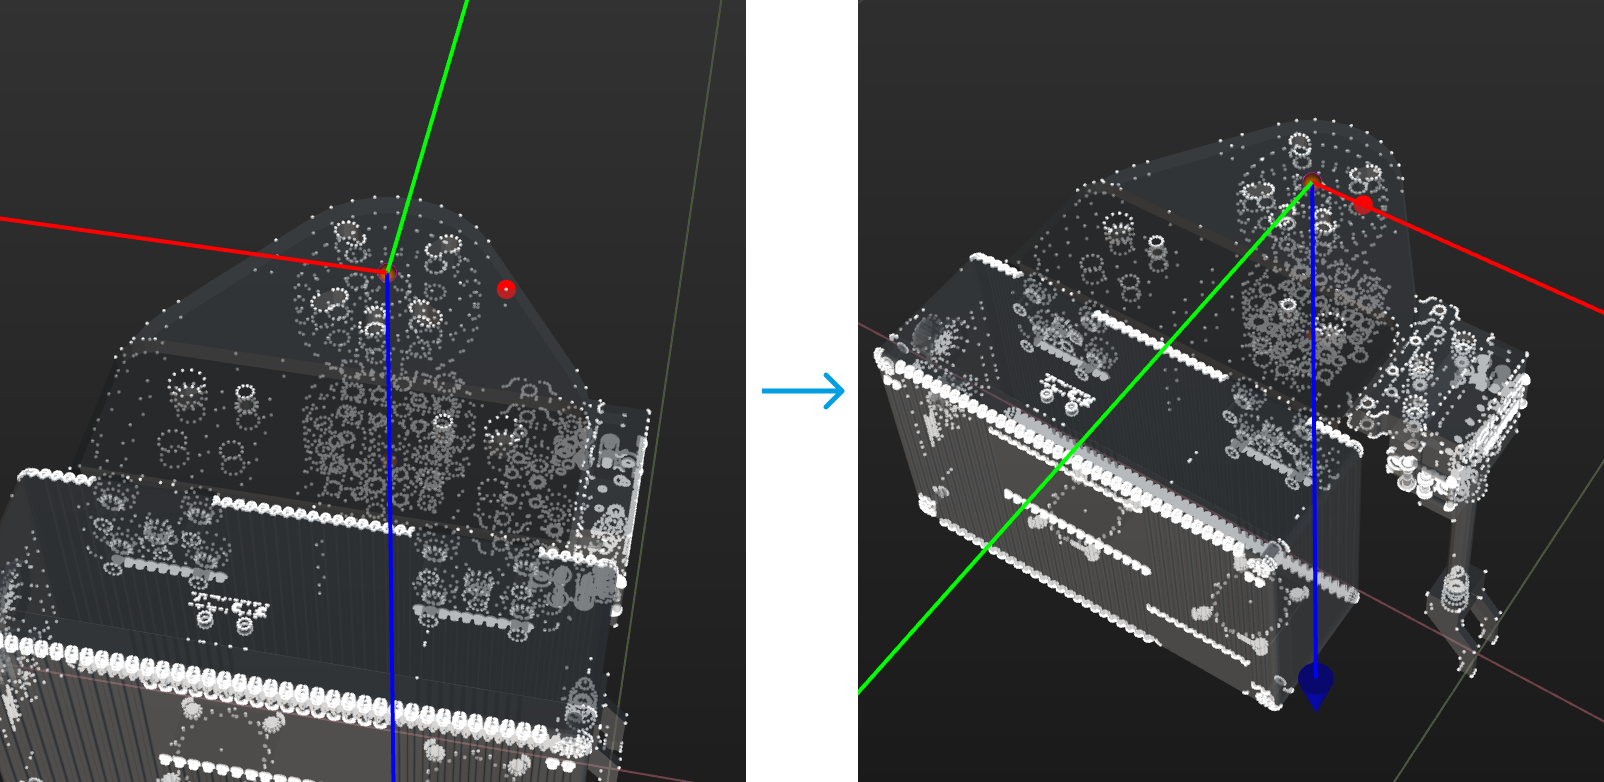
-
Once the origin position and the directions of the two axes are determined, click Confirm in the Coordinate Parameters panel to complete the reference frame adjustment.
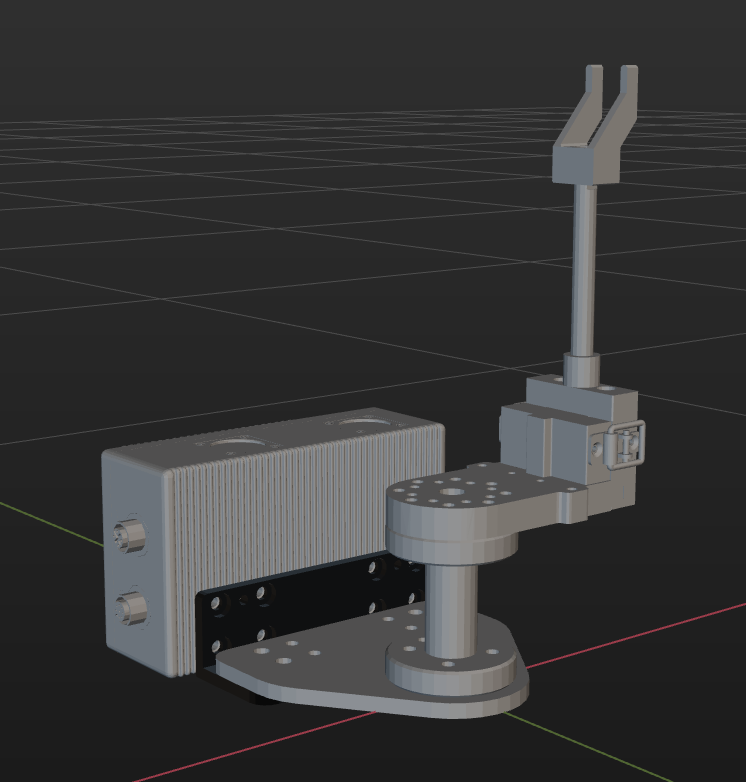
|