Smart Path in Bin
Function
Based on information such as bin and target object models, this Step can automatically generate paths for robots to enter the bin, pick the target object, and exit the bin.
Prerequisites
-
This Step can only be used in conjunction with the Vision Move Step. In addition, the Picking Method set in the Vision Move Step must be “Regular picking”.
-
The Step cannot be placed at the end of the workflow. It must be followed by a move-type Step with a fixed waypoint.
-
When using this Step, it is necessary to enable Point cloud collision detection and Detect collisions on target objects in the Collisions panel.
-
The Smart Path in Bin Step should be added for both the paths of entering and exiting the bin.
|
Each Smart Path in Bin Step corresponds to two waypoints. When the Picking Stage is set to Before picking, the corresponding waypoints are Approach point and Enter-bin point. When thePicking Stage is set to After picking, the corresponding waypoints are Retreat point and Exit-bin point. Different strategies will affect the waypoint closer to the pick point, i.e., the Approach point will be affected while entering the bin, and the Retreat point will be affected while exiting the bin. When writing the robot communication program, it is important to receive the two waypoints. Please refer to Example Program for detailed description. |
Application Scenario
This Step is designed for bin-picking applications. It can attempt multiple paths of entering and exiting the bin, and avoid collisions with the bin and surrounding target objects during picking, thus improving the bin clearance rate.
Parameter Description
Allow Tool Rotation in Bin
When unselected, the orientation of the waypoints within the bin is the same as the pick point. When selected, the software automatically adjusts the orientation of the waypoints within the bin to smooth the robot’s path of motion. However, the robot tool rotates while holding the target object, which leads to an increased risk of collision in the bin and an increased probability of path planning failure.
Motion Type for Segment 1/2
For the path of entering the bin, i.e., with the picking stage set to Before picking, it is recommended to select Joint move for segment 1, and Linear move for segment 2.
For the path of exiting the bin, i.e., with the picking stage set to After picking, it is recommended to select Linear move for segment 1, and Joint move for segment 2.
Singularity Avoidance
When the motion type is Linear move, enabling this function can simulate linear move by joint move with multiple segments, thus reducing singularity problems to a certain extent.
Parameters Setting
| Limit to Motion Segments | Specific Number | No Limit |
|---|---|---|
Feature |
Simulate linear move using joint move with a user-specified number of segments. |
The software calculates the number of segments needed to simulate linear move. |
Advantages |
|
|
Disadvantages |
|
|
| Parameter | Description |
|---|---|
Number of Segments |
The number of joint move segments specified by the user when the Limit to Motion Segments is set to Specific Number. |
Max Position Deviation |
The maximum allowable deviation of the new multi-segment joint motion path from the original linear motion path. The greater the max position deviation, the higher the success rate of singularity avoidance, and the lower the similarity between the actual trajectory and the straight line. |
Max Angle Deviation |
The maximum allowable angular deviation of the new multi-segment joint motion path from the original linear motion path. The greater the max angle deviation, the higher the success rate of singularity avoidance, and the lower the similarity between the actual trajectory and the straight line. |
Velocity & Acceleration
Velocity and acceleration determine how fast the robot can move. Usually, the set acceleration should be lower than the velocity. When the set acceleration is higher than the velocity, the robot will move in a choppy way.
| The velocities of Vision Move and its prior and subsequent Steps should be relatively low to ensure that the objects can be picked steadily. |
Blend radius
Usually, the default setting can be used.
-
The blend radius refers to the distance between the target point and the point where the robot starts to turn. The larger the blend radius, the more smoother the robot motion transitions are. If the robot moves in a relatively small space, please set the blend radius to a smaller value.
-
If the robot moves in a relatively large space without obstacles and the distance between two consecutive path segments is long, please set the blend radius to a larger value.
Picking Stage
If in the stage of entering the bin to prepare for picking, select Before picking. At this time, the “Smart Path in Bin” Step should be before the Vision Move Step. If in the stage of holding the target object and leaving the bin, select After picking. At this time, the “Smart Path in Bin” Step should be after the Vision Move Step.
Bin Selection
Please select the bin added in Scene objects in the project resource tree. Please refer to Add a Scene Object for detailed instructions.
Strategy Mode
-
When Auto is selected, the software will calculate the picking path automatically.
The picking strategies in the Auto mode are shown in the table below. In the Auto mode, the software will automatically attempt different strategies for exiting the bin.
Strategy for entering the bin Strategy for exiting the bin 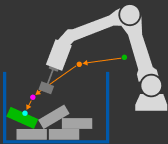
Enter along Z-direction of pick point: Attempt to find collision-free positions above the target object along the Z-direction of its pick point.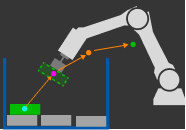
Lift away from bin walls: To avoid collision with the bin walls, attempt to lift the target object towards the center of the top surface of the bin.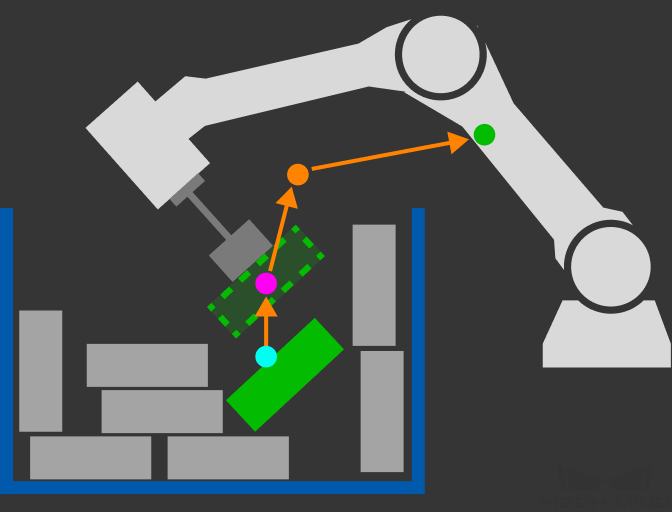
Lift along Z-direction of world frame: Attempt to lift the target object along the Z-direction of the world reference frame. -
When Manual is selected, you need to select at least one picking strategy. You can customize the attempt strategy and adjust the robot’s movement distance based on the selected strategy. Compared to the Auto mode, Lift along Z-direction of pick point and Drag horizontally are added to the Manual mode.
In the following scenarios, Manual mode is recommended.
-
If the robot needs to leave the bin along the Z-axis direction of the pick point, the Lift along Z-direction of pick point strategy can be used.
-
If the robot needs to horizontally extract the overlapped target object, the Drag horizontally strategy can be used.
-
When the target object is tall, and the automatically calculated Attempted lifting distance is insufficient, an Attempted lifting distance should be set manually.
-
To improve the cycle time, only one strategy for exiting the bin is expected to be used.
The picking strategies in the Manual mode are shown in the table below.
Strategy for entering the bin Strategy for exiting the bin 
Enter along Z-direction of pick point: Attempt to find collision-free positions above the target object along the Z-direction of its pick point. Up to 5 distances above object can be set, and the software will attempt according to the set distances in turn.
Lift away from bin walls: To avoid collision with the bin walls, attempt to lift the target object towards the center of the top surface of the bin. Up to 5 attempted lifting distances can be set, and the software will attempt according to the set distances in turn.
Lift along Z-direction of world frame: Attempt to lift the target object along the Z-direction of the world reference frame. Up to 5 attempted lifting distances can be set, and the software will attempt according to the set distances in turn.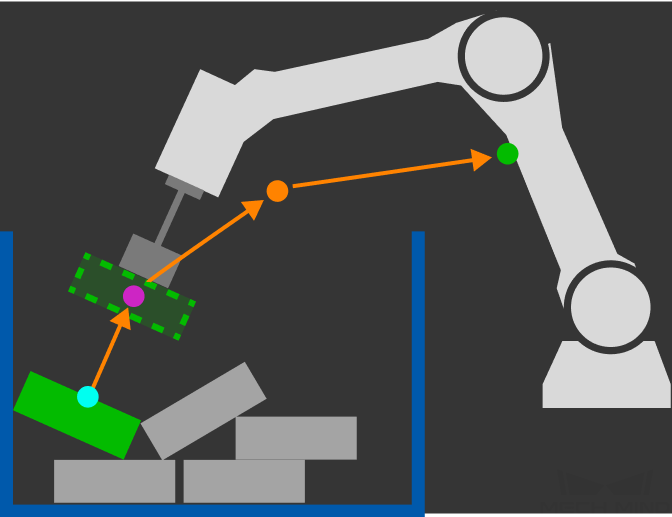
Lift along Z-direction of pick point: Attempt to lift the target object along the Z-direction of its pick point. Up to 5 attempted lifting distances can be set, and the software will attempt according to the set distances in turn.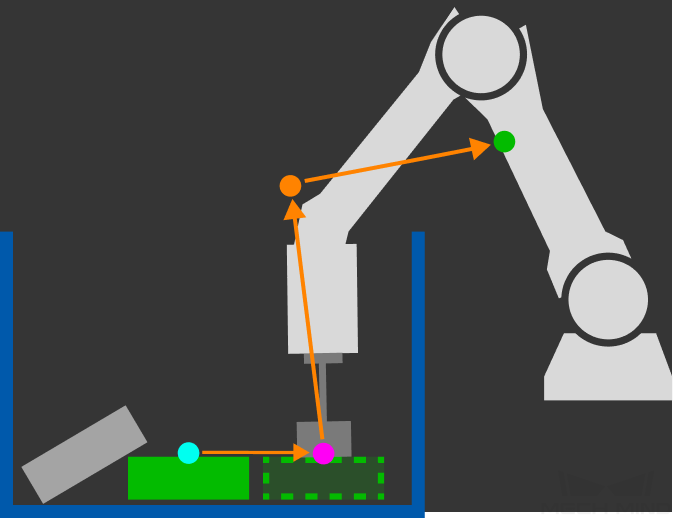
Drag horizontally: On the horizontal plane where the pick point of the target object is located, attempt to drag the target object towards the center of the bin. Up to 5 attempted dragging distances can be set, and the software will attempt according to the set distances in turn.
-
Application Examples
Please refer to the example project Smart Path in Bin.