Add New Target Object
For example, when the infeed target object changes from target object A to target object B and there is not an available production recipe for the new target object, you can make a point cloud model of the new target object in the production interface and add a new production recipe for the recognition of target object B.
Workflow
The process of adding new target objects is shown in the figure below.

-
Determine whether new target objects will be added in the current associated project, and confirm that the Associated project selected in Production Interface Configurator is the correct one.
-
Open the Production Interface Configurator and click New Target Object. Then make a new target object model and set the production recipe.
-
Make the point cloud model for the new target object.
-
Set the production recipe for the new target object.
-
Apply the new production recipe to the project for production.
Determine Whether the Associated Project Requires New Target Objects
Please check whether the current associated project requires new target objects first. If no new target objects will be added to the current associated project, please contact the engineer to modify the associated project in the Production Interface Configurator.
Launch New Target Object Wizard
The New Target Object wizard can be opened in the Task window. The detailed steps are as follow.
-
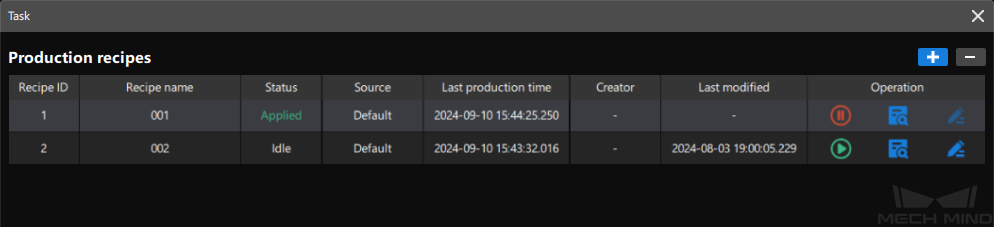
Open the window for editing production recipes.
Click the
 button in the operation area.
The window for editing production recipes is shown below.
-
Launch the New Target Object wizard.
Click the + button in the upper right corner to launch the New Target Object wizard. The interface of the New Target Object wizard is shown below.
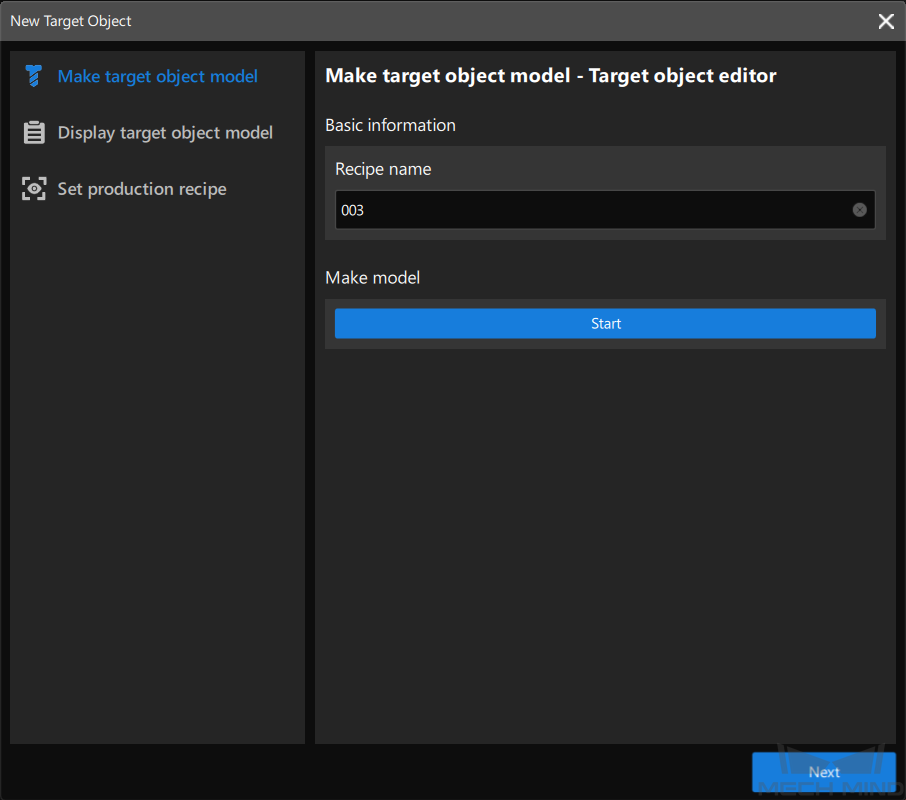
As shown in the figure above, the configuration for adding a new target object can mainly be divided into two processes: making the target object model and setting the production recipe.
Make Target Object Model
When new target objects are added, models for the new target object should be made. The method to make the target object models should be consistent with the one specified in the Production Interface Configurator. All three methods are described as follows.
|
The target object model contains the point cloud model and pick points. |
Use Target Object Editor to Make Target Object Model
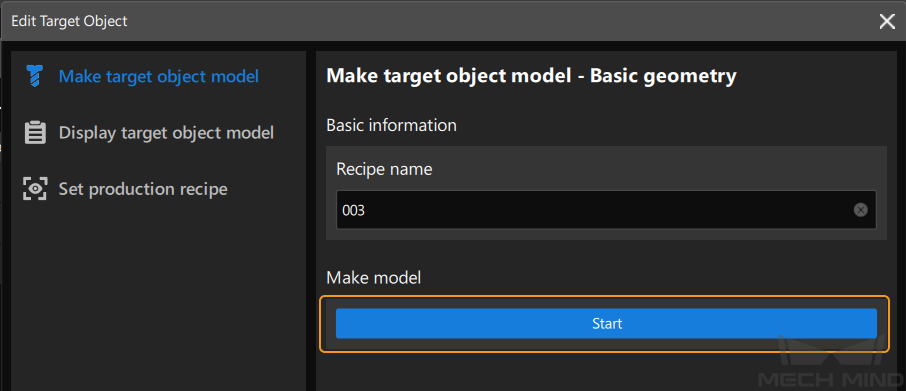
When the method for making target object model is set to Target object editor in the Production Interface Configurator, you should use the target object editor to make the point cloud model for the new target object. Please follow the steps below to operate.
-
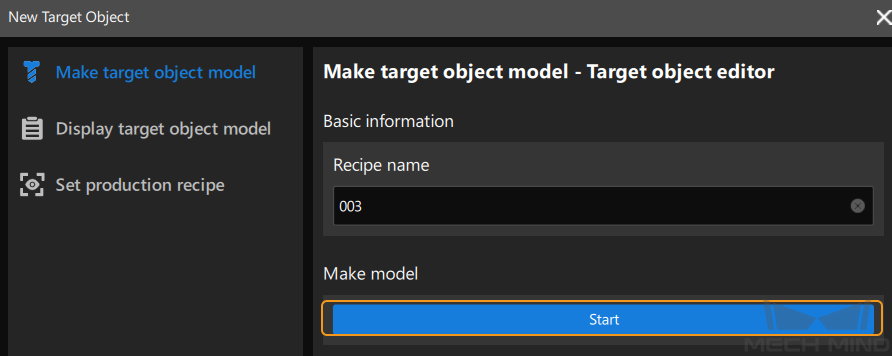
Open the target object editor.
Click Start in the New Target Object wizard to open the target object editor.
-
Make the point cloud model.
To use the target object editor to make the point cloud model for the target object, please refer to Target Object Editor.
Use Model-Making Project to Make Target Object Model
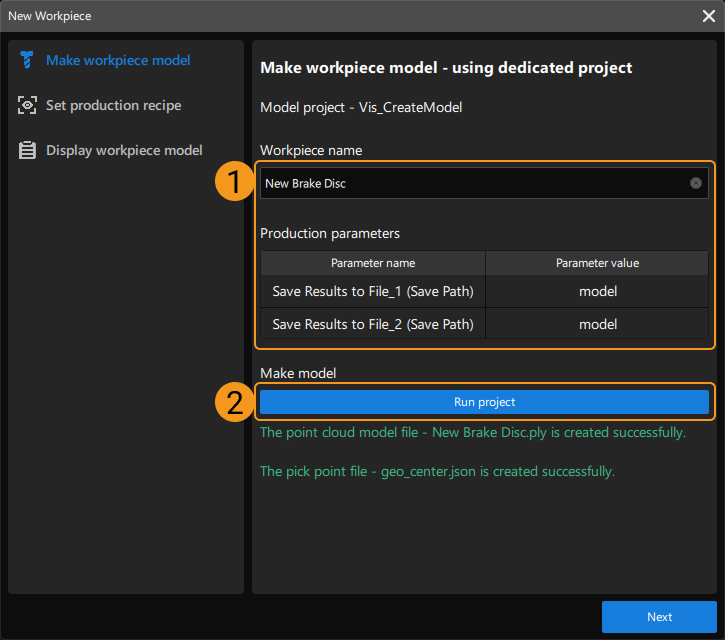
When the method for making target object model is set to Model-making project in the Production Interface Configurator, you should name the new target object and set the production parameters in the New Target Object wizard, and then click the Run project button. A message “The point cloud model file - XXX.ply is created successfully” will appear if the model is created successfully.
Use Common 3D Shape to Make Target Object Model
When the method for making target object model is set to Common 3D shape in the Production Interface Configurator, you should select Create common 3D shape in the target object editor to make the point cloud model for the new target object. Please follow the steps below to operate.
-
Open the target object editor.
Click Start in the New Target Object wizard and select Create common 3D shape in the target object editor as the configuration process.
-
Use a common 3D shape to make point cloud model.
For detailed instructions on how to use the common 3D shape to make the point cloud model for the target object, please refer to Create Common 3D Shape as Point Cloud Model.
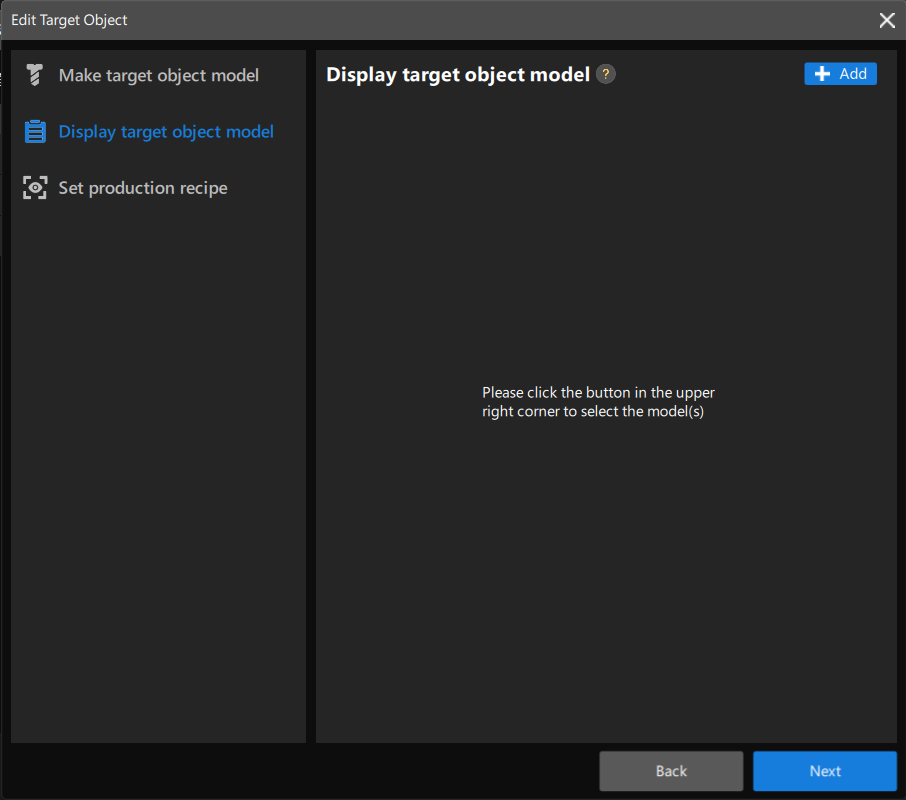
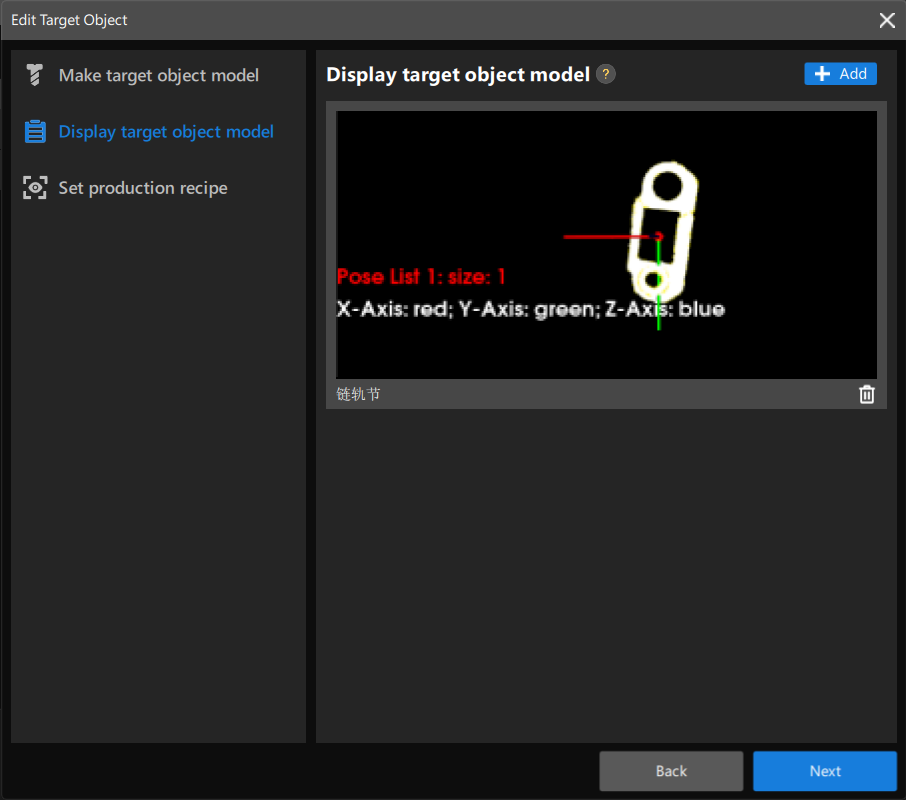
Display Target Object Model
After setting the production parameter, if you want to display the target object model on the Target object info area in the production interface, click the + button in the upper right corner in the “Display target object model” section.
|
Up to two target object models can be added for display. |
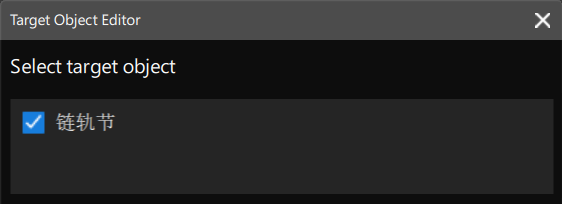
Select the target object model in the pop-up window, and click OK.
After making the point cloud model for the new target object, click Next to set the production recipe.
Set Production Recipe
As shown in the figure below, set the Recipe parameters, and then click Finish.

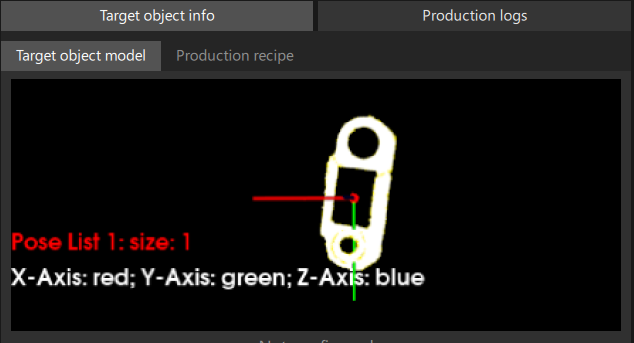
Now, the point cloud model for the target object you made will be displayed in the Target object info area in the production interface.
|
If the point cloud model you made is not stored in the 3d_matching folder under |
Apply the New Recipe
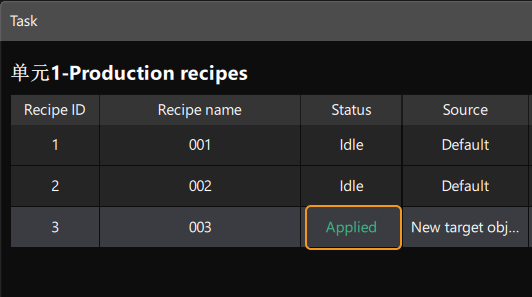
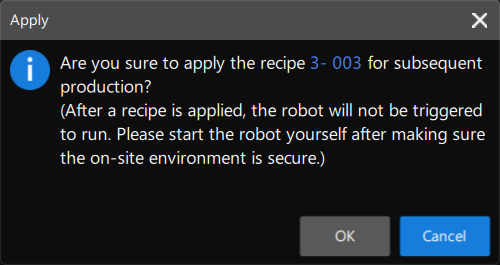
The production recipe configured in the New Target Object wizard will be added to the Production recipe list, as shown below.

Click the ![]() button next to the new recipe to apply it to the project. If the on-site safety can be guaranteed, click OK in the pop-up window.
button next to the new recipe to apply it to the project. If the on-site safety can be guaranteed, click OK in the pop-up window.
If Applied appears in the Status column, the production recipe for the new target object is applied successfully.