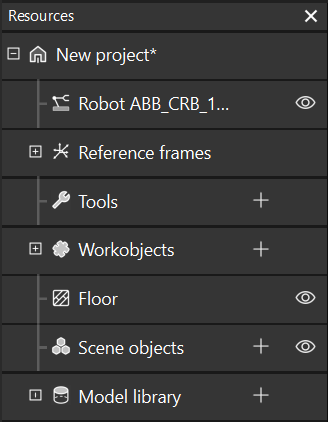
Resources
The interface of the Resources panel is shown as below.
This section summarizes the functions of options in the context menu and the buttons in the Resources panel.
Please refer to Resources to learn about how to configure various resources in the project.
Project
This entry provides the interfaces for the project name, project modification status, and the project autoload status.
Right-click the project name, and the following options will appear.
| Open Project Folder |
Open the folder where the project is stored |
| Autoload Project |
Select to automatically open the current project when you open the software next time |
| Back Up Current Project |
Back up the current project |
If a change of the workflow is not saved in the current project, the project name will be marked with an asterisk. If the project is set to autoload, the icon will be displayed next to the project name.

Robot
This entry provides the interfaces for displaying the robot used in the current project.
Right-click the robot name and the following option will appear.
| Open Robot File Directory |
Open the folder where the robot model file is stored |
Click ![]() to make the displayed robot semitransparent, and click
to make the displayed robot semitransparent, and click ![]() to restore to the original display setting.
to restore to the original display setting.
Reference Frames
This entry provides the interface for displaying all reference frames in the 3D simulation area.
Click ![]() to display the corresponding reference frame, and click
to display the corresponding reference frame, and click ![]() to hide the reference frame.
Click
to hide the reference frame.
Click ![]() to enable or disable the “translation” or “rotation” of the dragger.
to enable or disable the “translation” or “rotation” of the dragger.
Tools
This entry provides the interface for configuring the tools in the project. Please refer to Tools for how to configure the tools.
Click + to open the Tool Configuration window, where you can add tools.
Right-click the name of a configured tool, and the following options will appear.
| Option | Description | Shortcut |
|---|---|---|
Copy |
Copy the current tool |
Ctrl + C |
Paste |
Paste the current tool |
Ctrl + V |
Delete |
Delete the current tool |
Delete |
Rename |
Rename the current tool |
|
Tool Configuration |
Open the Tool Configuration window of the current tool |
|
Set As Active Tool |
Set the current tool as the active tool |
Click ![]() to make the tool semitransparent, and click
to make the tool semitransparent, and click ![]() to restore to the original display setting.
to restore to the original display setting.
Workobjects
This entry provides the interface for configuring the workobjects in the project. Please refer to Workobjects for how to configure the workobjects.
Click + to open a Workobject Configuration window, where you can add workobjects.
Right-click the name of a configured workobject, and the following options will appear.
| Option | Description | Shortcut |
|---|---|---|
Delete |
Delete the current workobject |
Delete |
Rename |
Rename the current workobject |
|
Workobject Configuration |
Open the Workobject Configuration window of the current workobject |
| “Default” is the workobject configuration used for vision results without labels. |
Floor
This entry provides the interface for modifying the height of the floor and floor display setting.
Right-click the Floor and you can modify the height of it in the pop-up window.
Click ![]() to hide the floor and click
to hide the floor and click ![]() to restore.
to restore.
Scene Objects
This entry provides the interface for configuring the scene objects in the project. Please refer to Scene Objects for how to configure the scene objects.
Click + to open a Scene Object Configuration window, where you can add scene objects.
Right-click the name of a configured scene object, and the following options will appear.
| Option | Description | Shortcut |
|---|---|---|
Copy |
Copy the current scene object |
Ctrl + C |
Paste |
Paste the scene object |
Ctrl + V |
Cut |
Cut the current scene object |
Ctrl + X |
Delete |
Delete the current scene object |
Delete |
Rename |
Rename the current scene object |
|
Scene Object Configuration |
Open the Scene Object Configuration window of the current workobject |
Click ![]() to make the scene object semitransparent; click
to make the scene object semitransparent; click ![]() to make the scene object transparent; and
to make the scene object transparent; and ![]() to restore to the original display setting.
to restore to the original display setting.
You can also drag and drop the scene object name in the Resources panel to make the scene object model a child model or an individual model.
Model Library
This entry provides the interface for importing external models to the project. All the external models imported will be displayed in the Model Library, and the models will be categorized according to their formats.
Click + to open the file selection window to import an external model.
Right-click the imported external model, and the following options will appear.
| Option | Description | Shortcut |
|---|---|---|
Copy |
Copy the current model |
Ctrl + C |
Paste |
Paste the copied model |
Ctrl + V |
Delete |
Delete the current model |
Delete |
Model Configuration |
Open the Model Configuration window of the current model |
|
Model Editor |
Open the model editor and the current model will be used as the reference model |
|
Open Folder |
Open the folder where the model file is stored |