Analyze the Correlation and Perform Correlation Compensation
This section introduces how to use the Correlation Compensation tool to analyze the correlations and perform correlation compensation.
When deploying the Mech-Metrics project, you need to analyze the correlation between the measurement data from the Mech-Mind inline measurement system and the CMM. Based on this analysis, compensation values are calculated to correct deviations in the Mech-Mind inline measurement system, aligning its measurements more closely with the CMM to improve its accuracy.
|
|
In addition to automatic compensation with the correlation compensation tool, Mech-Metrics allows you to manually compensate using the Administrator account in the Configuration interface. The steps for manual compensation are as follows:
|
Open Correlation Compensation Tool
-
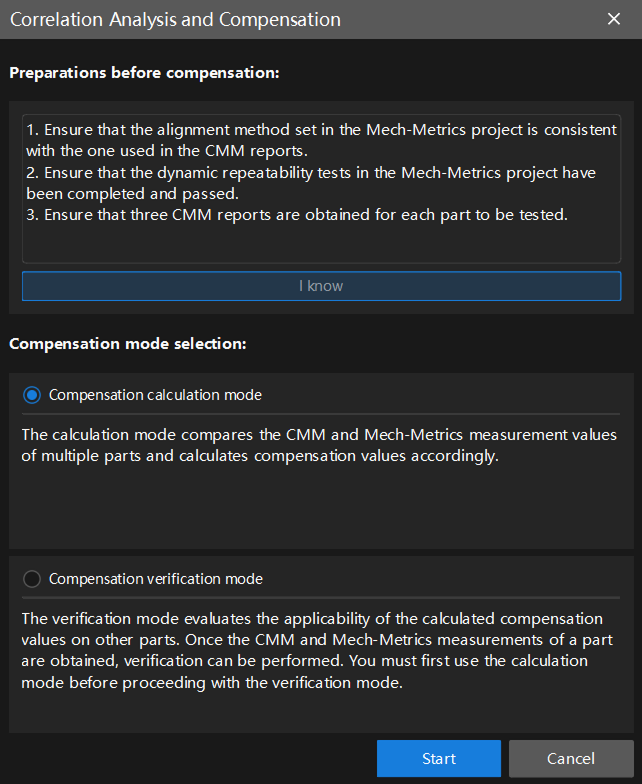
In the top ribbon of the software Configuration interface, select . The Correlation Analysis and Compensation dialog box will appear.
-
In the Preparations before compensation area, check if all preparations have been completed. If so, click I know.
-
In the Compensation mode selection area, select the compensation mode, and then click Start.
-
Compensation calculation mode: compare the measured CMM values and Mech-Metrics values of multiple parts and calculate compensation values accordingly. If you are using the correlation compensation tool for the first time, select this mode.
-
Compensation verification mode: used to evaluate the applicability of the compensation values calculated by the calculation mode to other parts. You need to use the calculation mode first, and then use the verification mode.
After clicking Start, the Correlation Wizard interface will appear.
-
Compensation Value Calculation Mode
After selecting the Compensation calculation mode, this section introduces how to use the Correlation Wizard to complete the correlation analysis and calculate the compensation value. Please follow the steps below.
Select Measurement Records
At this step, you can select the required measurement records from historical data for subsequent data correlation.
-
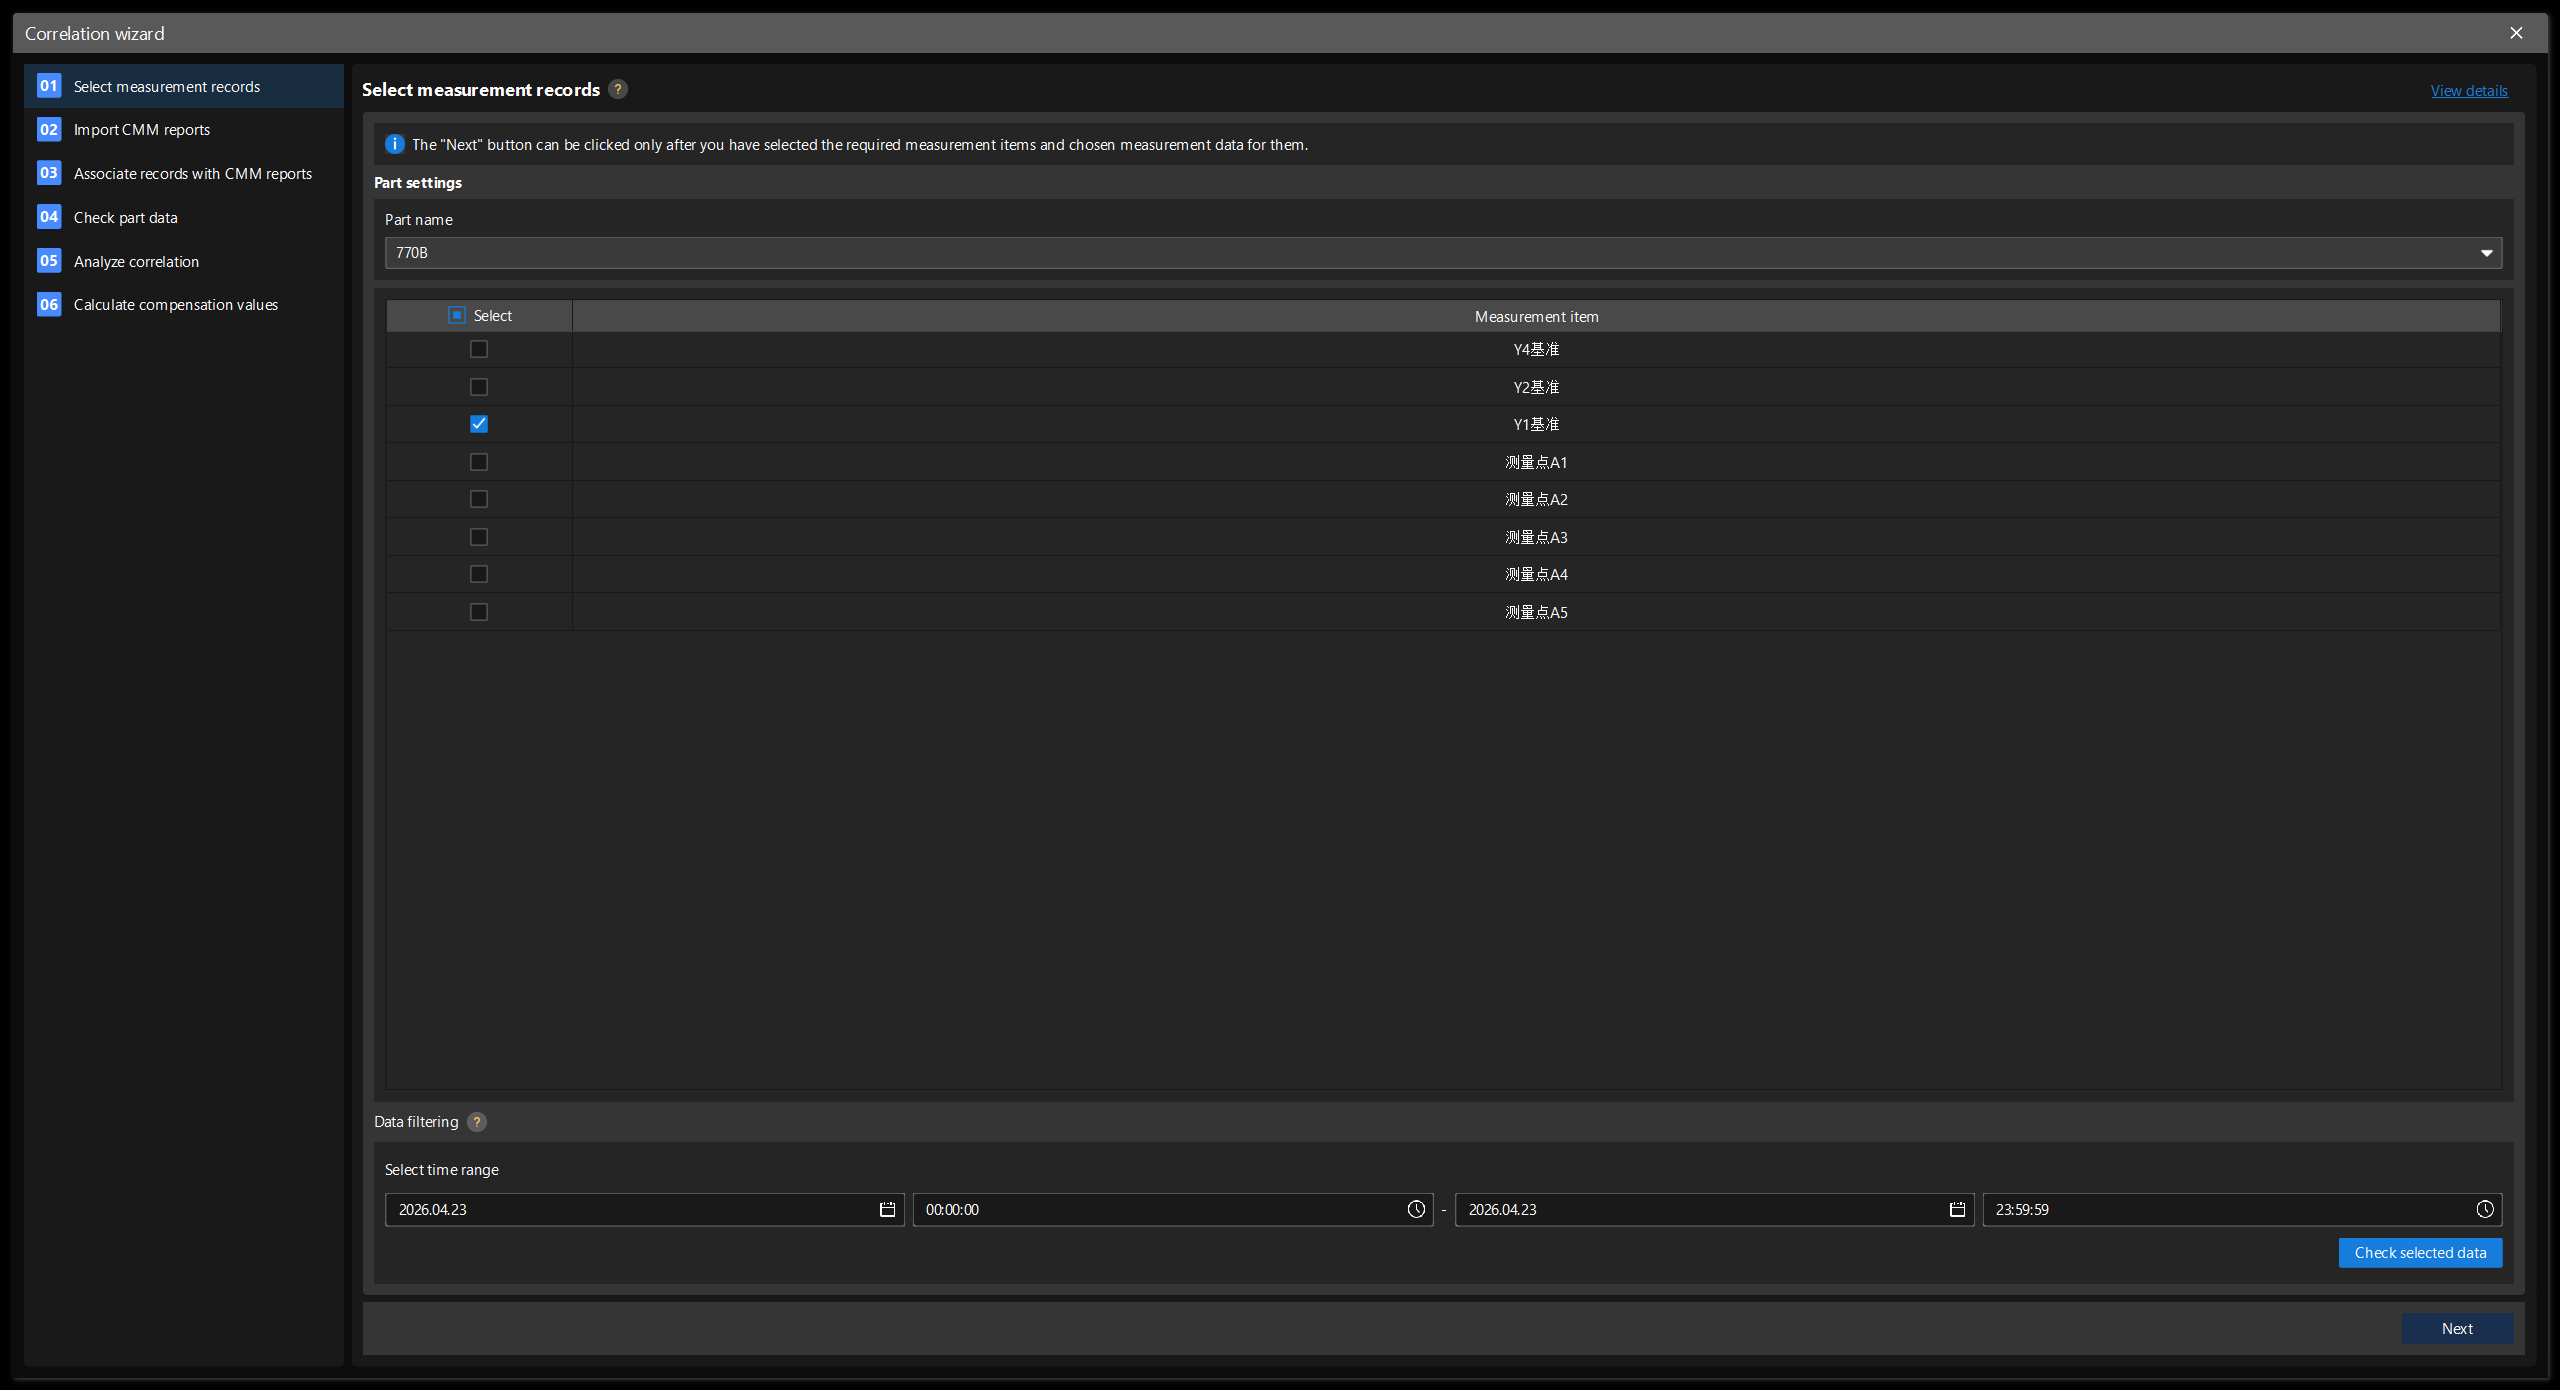
In the Select measurement records tab of the Correlation Wizard dialog box, set the Part name in the Part settings area, and select the measurement items that need to be involved in analysis and compensation in the measurement item list.
-
In the Data filtering area, set the Select time range according to your needs, and then click Check selected data.
-
In the Tables tab of the pop-up Historical Data dialog box, select the measurement records that need to be involved in the analysis. You can click the checkbox on the left of Quick selection to select all.
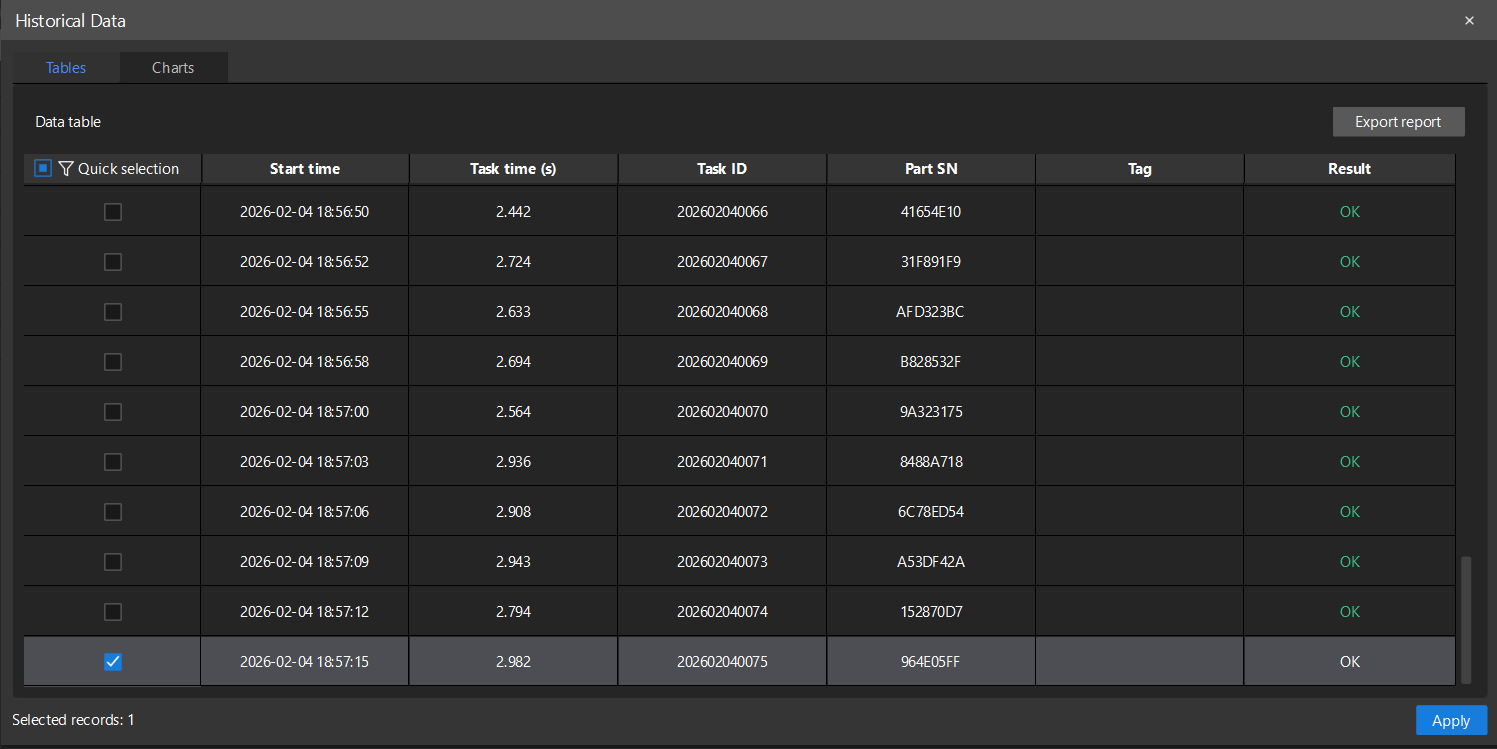
The Result column in the table displays the qualified status of each measurement record (for example, NG stands for Not Compliant). You can select the records involved in the analysis according to your needs. -
Click Apply and then click Next.
Import CMM Reports
This step is used to import third-party CMM measurement reports. The imported data will be associated with the measurement data in the Mech-Metrics to calculate compensation values.

-
In the Correlation Wizard dialog box, under the Import CMM reports tab, click Obtain CMM report template to download the report template, and adjust the CMM report format according to the template.
-
Select the CMM report format (such as PC_DMIS-Excel or Polyworks-Excel) in the drop-down list on the left of Import. Then, click Import, select one or more files in this format, and click Open to import the report file.
Only files of the same format can be imported at a time. If you need to import reports in different formats, please do so in multiple batches. -
The imported files will appear in the Imported files section. In the number shown to the right of each imported file name, the first part indicates the number of successfully matched measurement items, and the second part indicates the total number of measurement items detected in the file.
-
In the Imported files section, click a file to view its unmatched items in the View file content section. Set aliases for all unmatched measurement items (modify the alias to match the corresponding CMM measurement item name), and then click Re-match on the right side of the Imported files section.
-
Perform the re-match operation until all files have no unmatched measurement items, and then click Next.
Associate Records with CMM Reports
This step associates measurement records with CMM reports through part aliases.
-
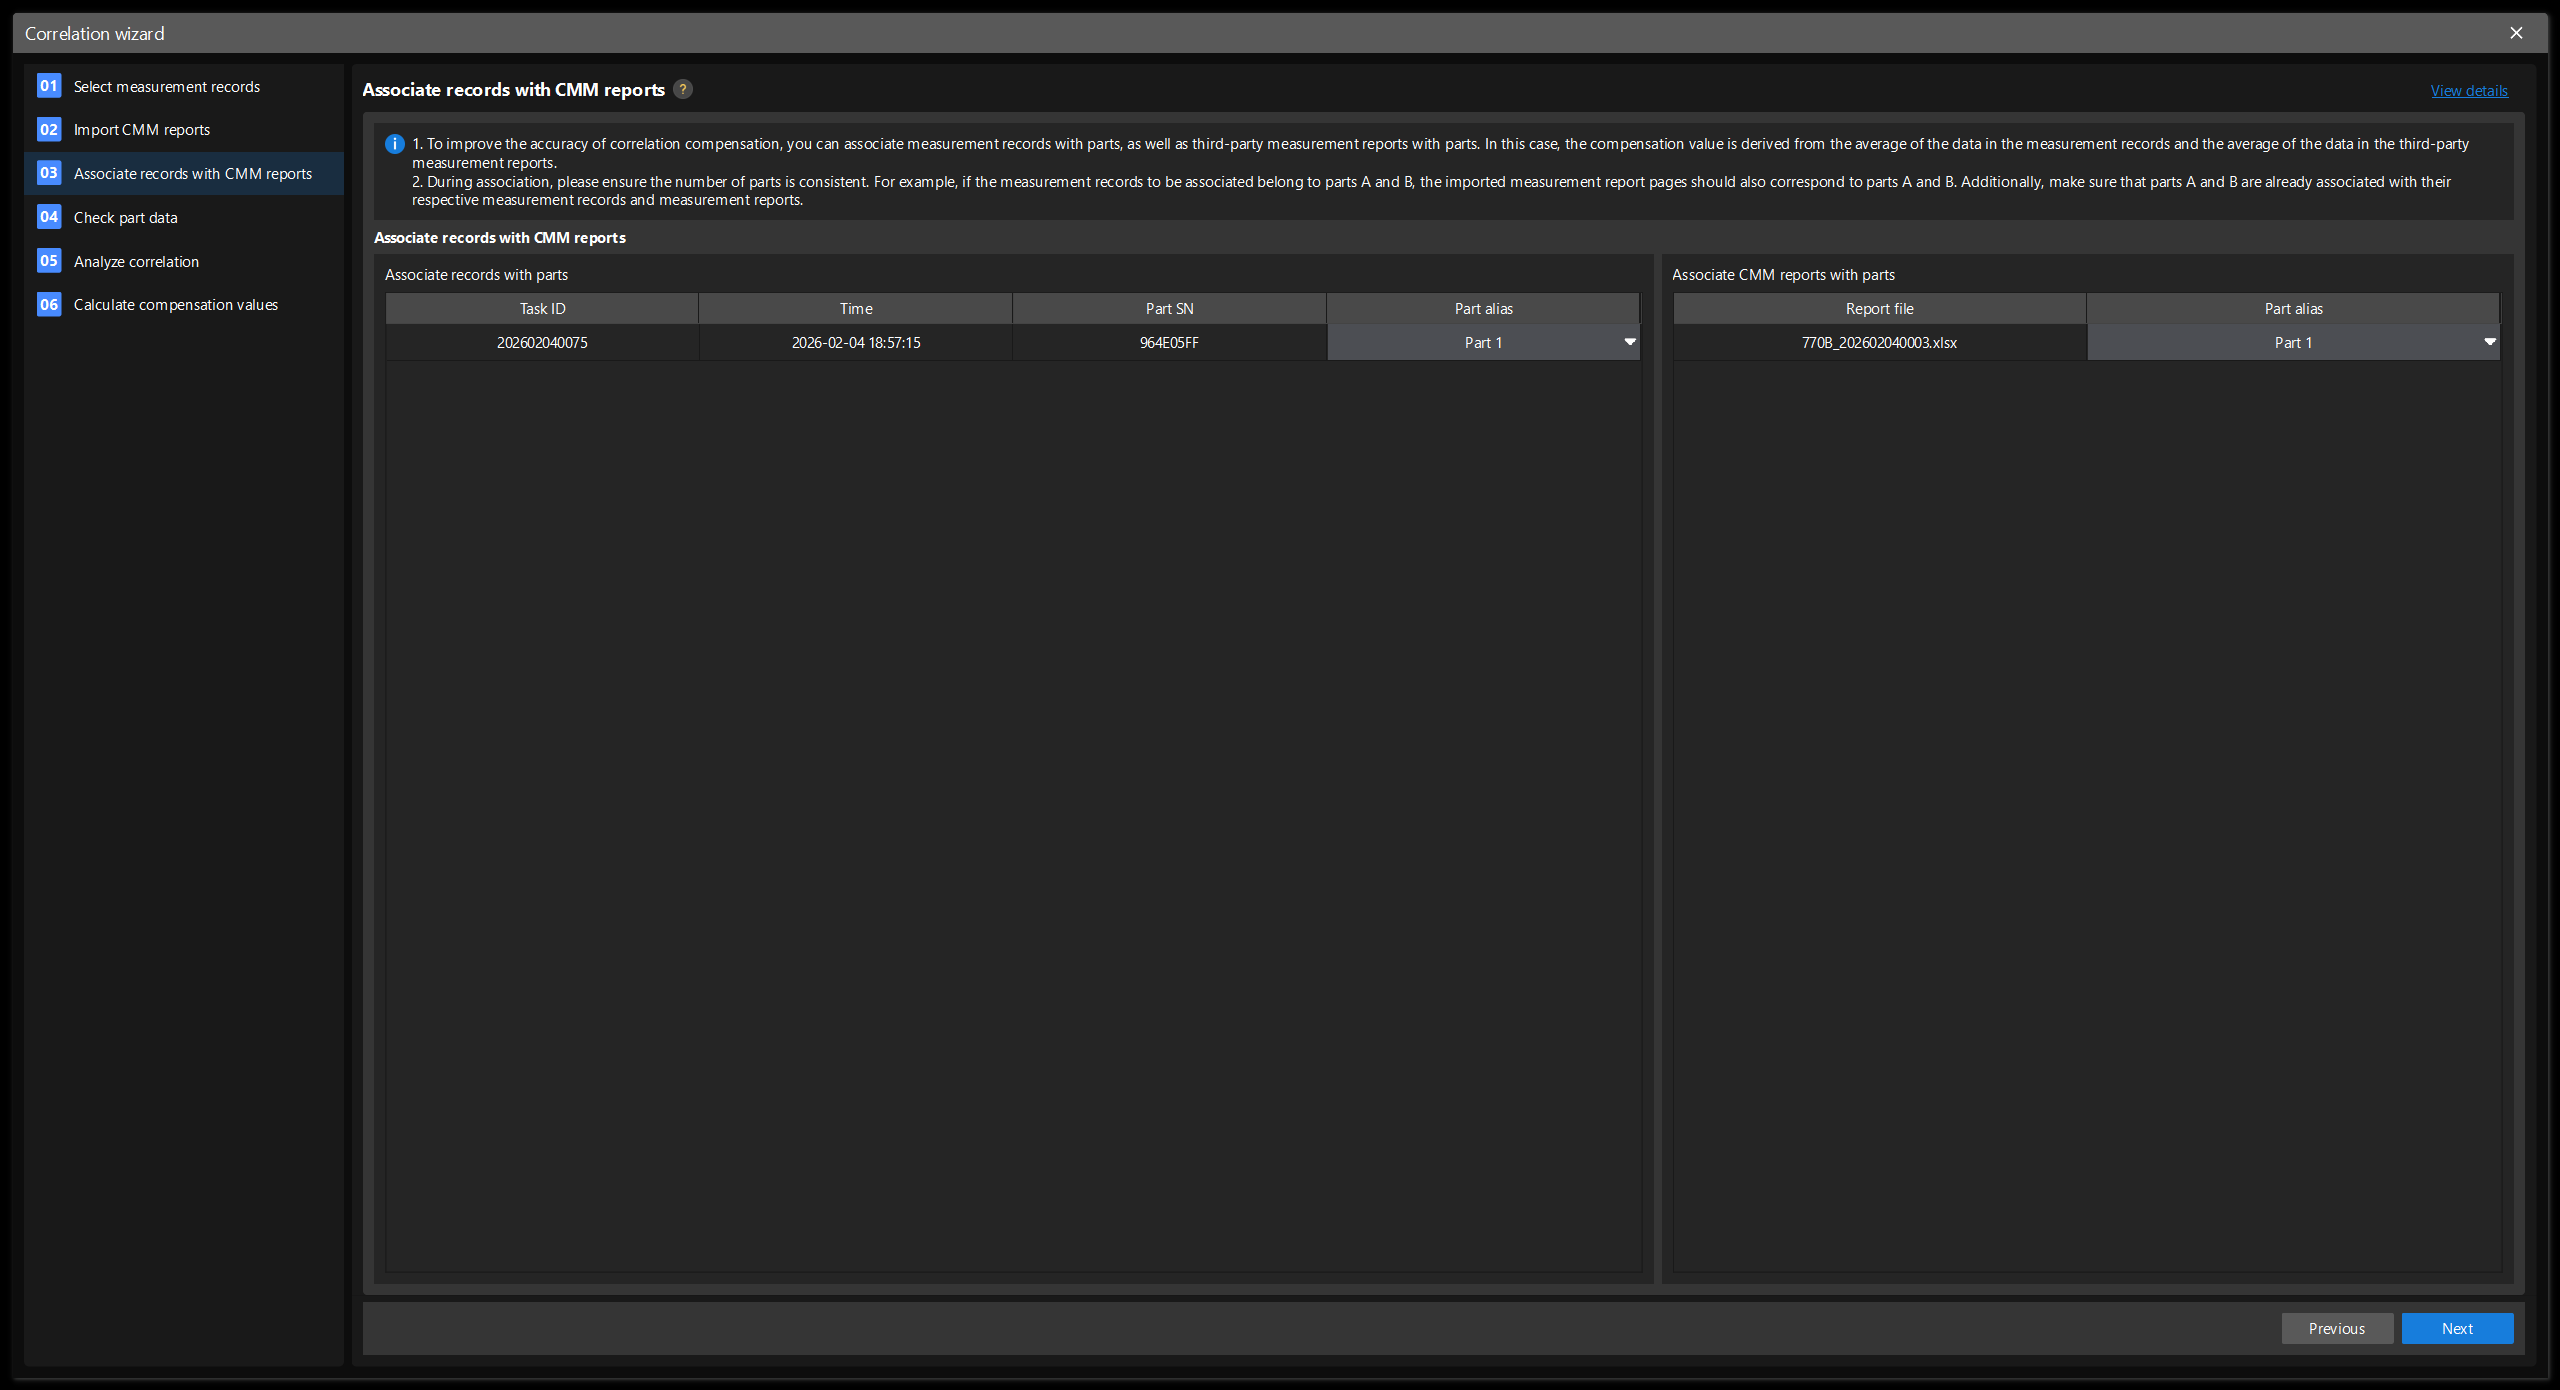
In the Associate records with parts section, select a part alias for each measurement record.
-
In the Associate CMM reports with parts section, select a part alias for each report file.
-
Click Next.
When associating, please ensure that the number of parts is consistent. For example, if the measurement records to be associated belong to parts 1 and 2, the imported measurement reports should also correspond to parts 1 and 2. Make sure that parts 1 and 2 are associated with their respective measurement records and reports.
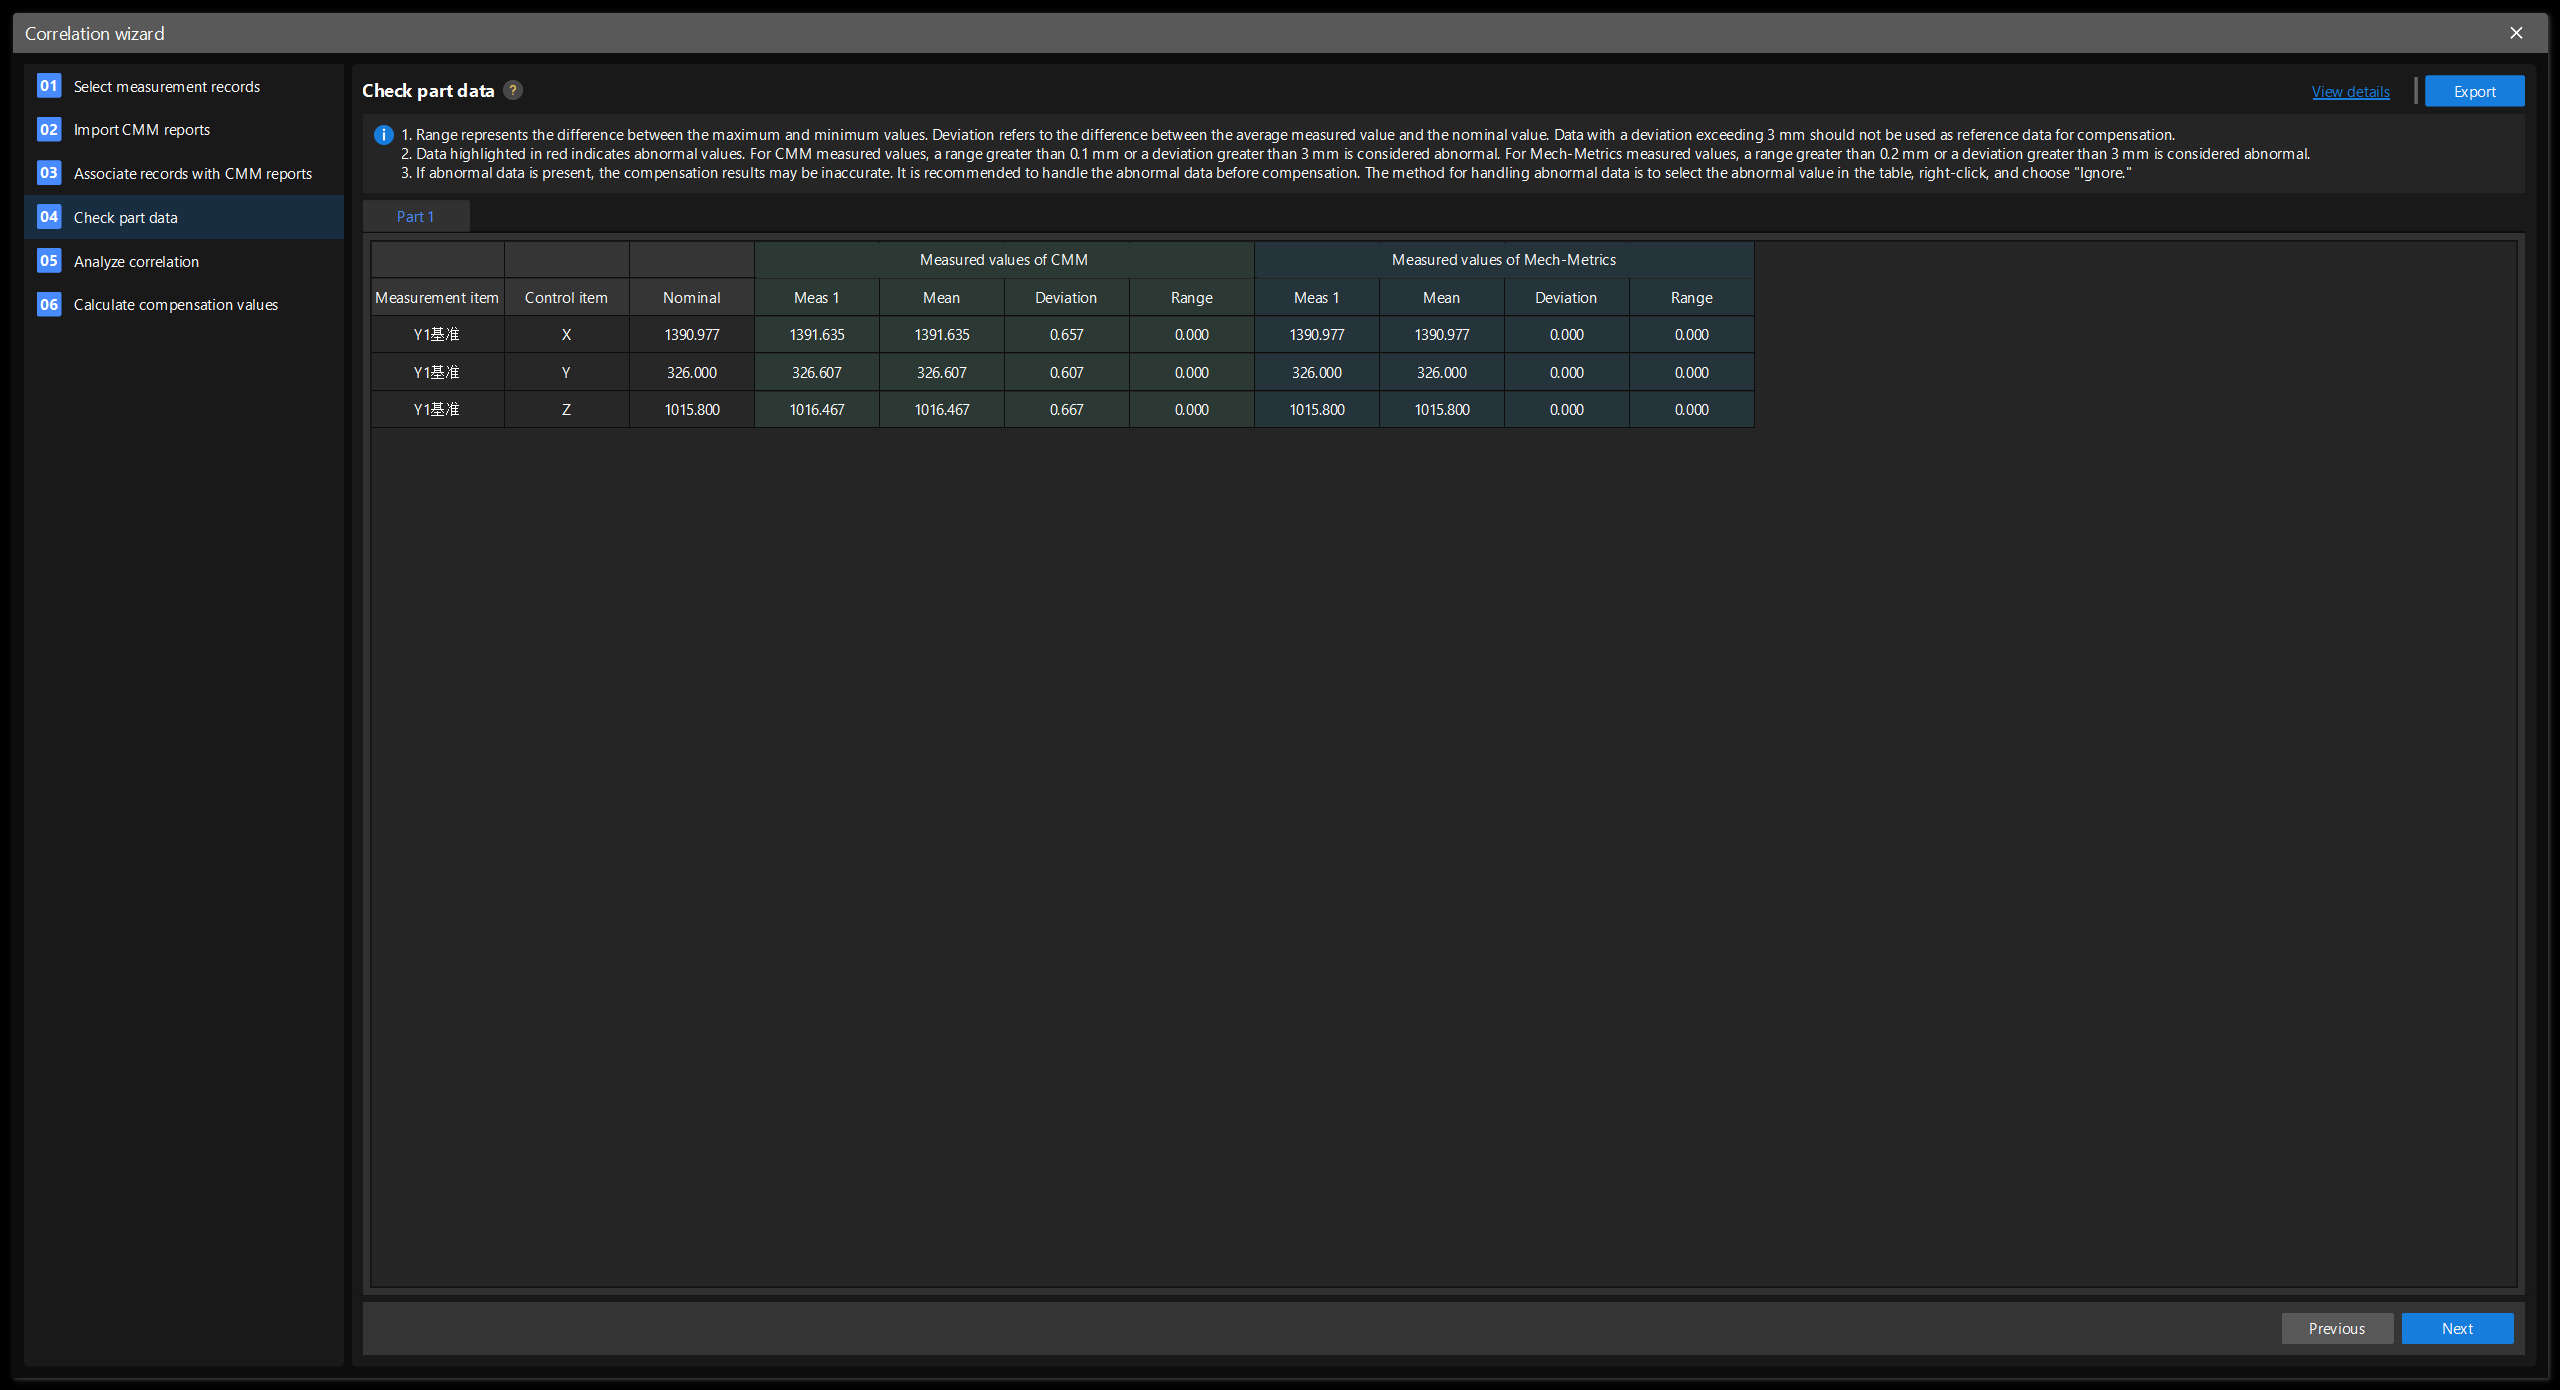
Check Part Data
This step is used to check the part data and process abnormal measured values. If the deviation between the vision measured values and the CMM measured values exceeds 3 mm, compensation cannot be performed. In this step, you can ignore clearly abnormal measured values to improve the accuracy of correlation compensation.
-
Check the Range column in the Measured values of CMM. A range greater than 0.1 mm indicates abnormal data. Please review the data set, identify the abnormal measured value (such as an unusually high or low value), and then right-click the measured value and select Ignore. After ignoring the value, check whether the deviation is less than or equal to 3 mm. If the condition is met, it means the abnormal value in this set of CMM measured data has been handled. Repeat this operation until all outliers in the CMM measured values have been handled.
-
Check the Range column in the Measured values of Mech-Metrics. A range greater than 0.2 mm indicates abnormal data. Please review the data set, identify the abnormal measured value (such as an unusually high or low value), and then right-click the measured value and select Ignore. After ignoring the value, check whether the deviation is less than or equal to 3 mm. If the condition is met, it means the abnormal value in this set of vision measured data has been handled. Repeat this operation until all outliers in the vision measured values have been handled.
-
If you need to save the current data, click Export in the upper right corner to save the current data.
-
Click Next.
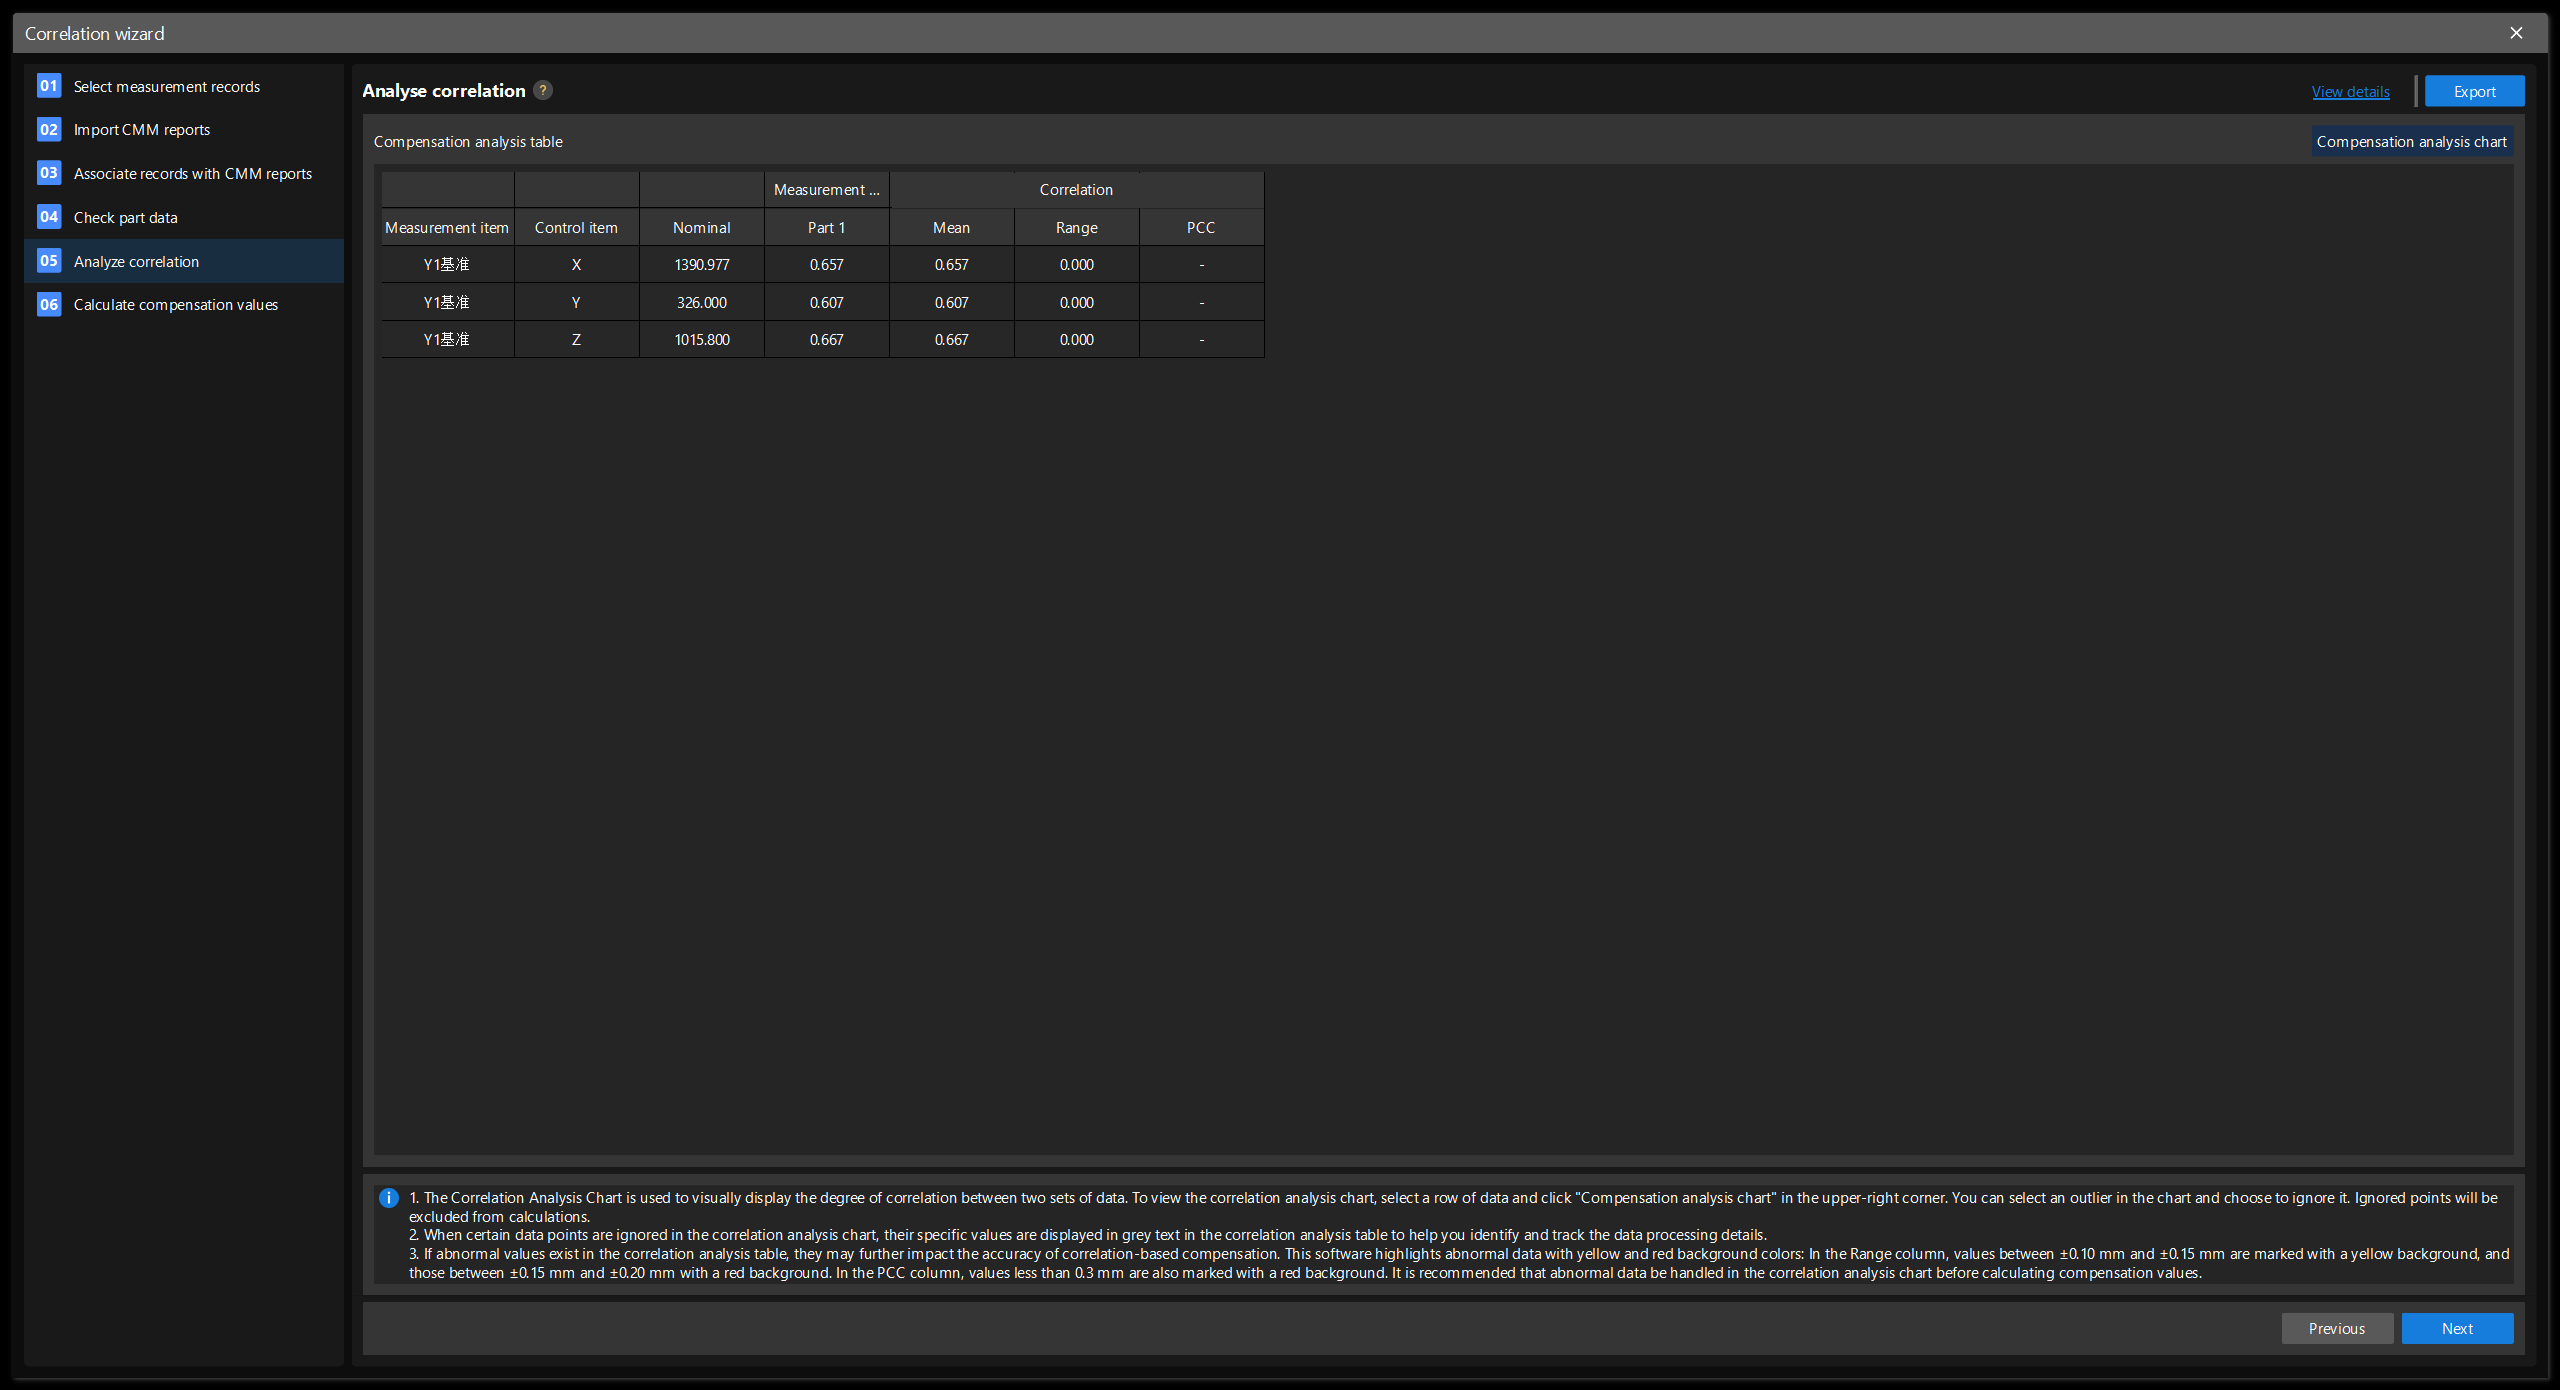
Analyze Correlation
This step is used to evaluate the correlation between CMM measurement data and vision measurement data, and to handle data with low correlation.
-
Check the Correlation column in the Correlation analysis table, find the row with the Pearson coefficient below 0.3, and then click Correlation analysis chart.
-
Find one or more outliers in the correlation analysis chart, right-click them, and select Ignore.
-
If you need to save the current data, click Export in the upper right corner to save the current data.
-
Repeat the above operations until no rows with Pearson coefficients lower than 0.3 exist and then click Next.
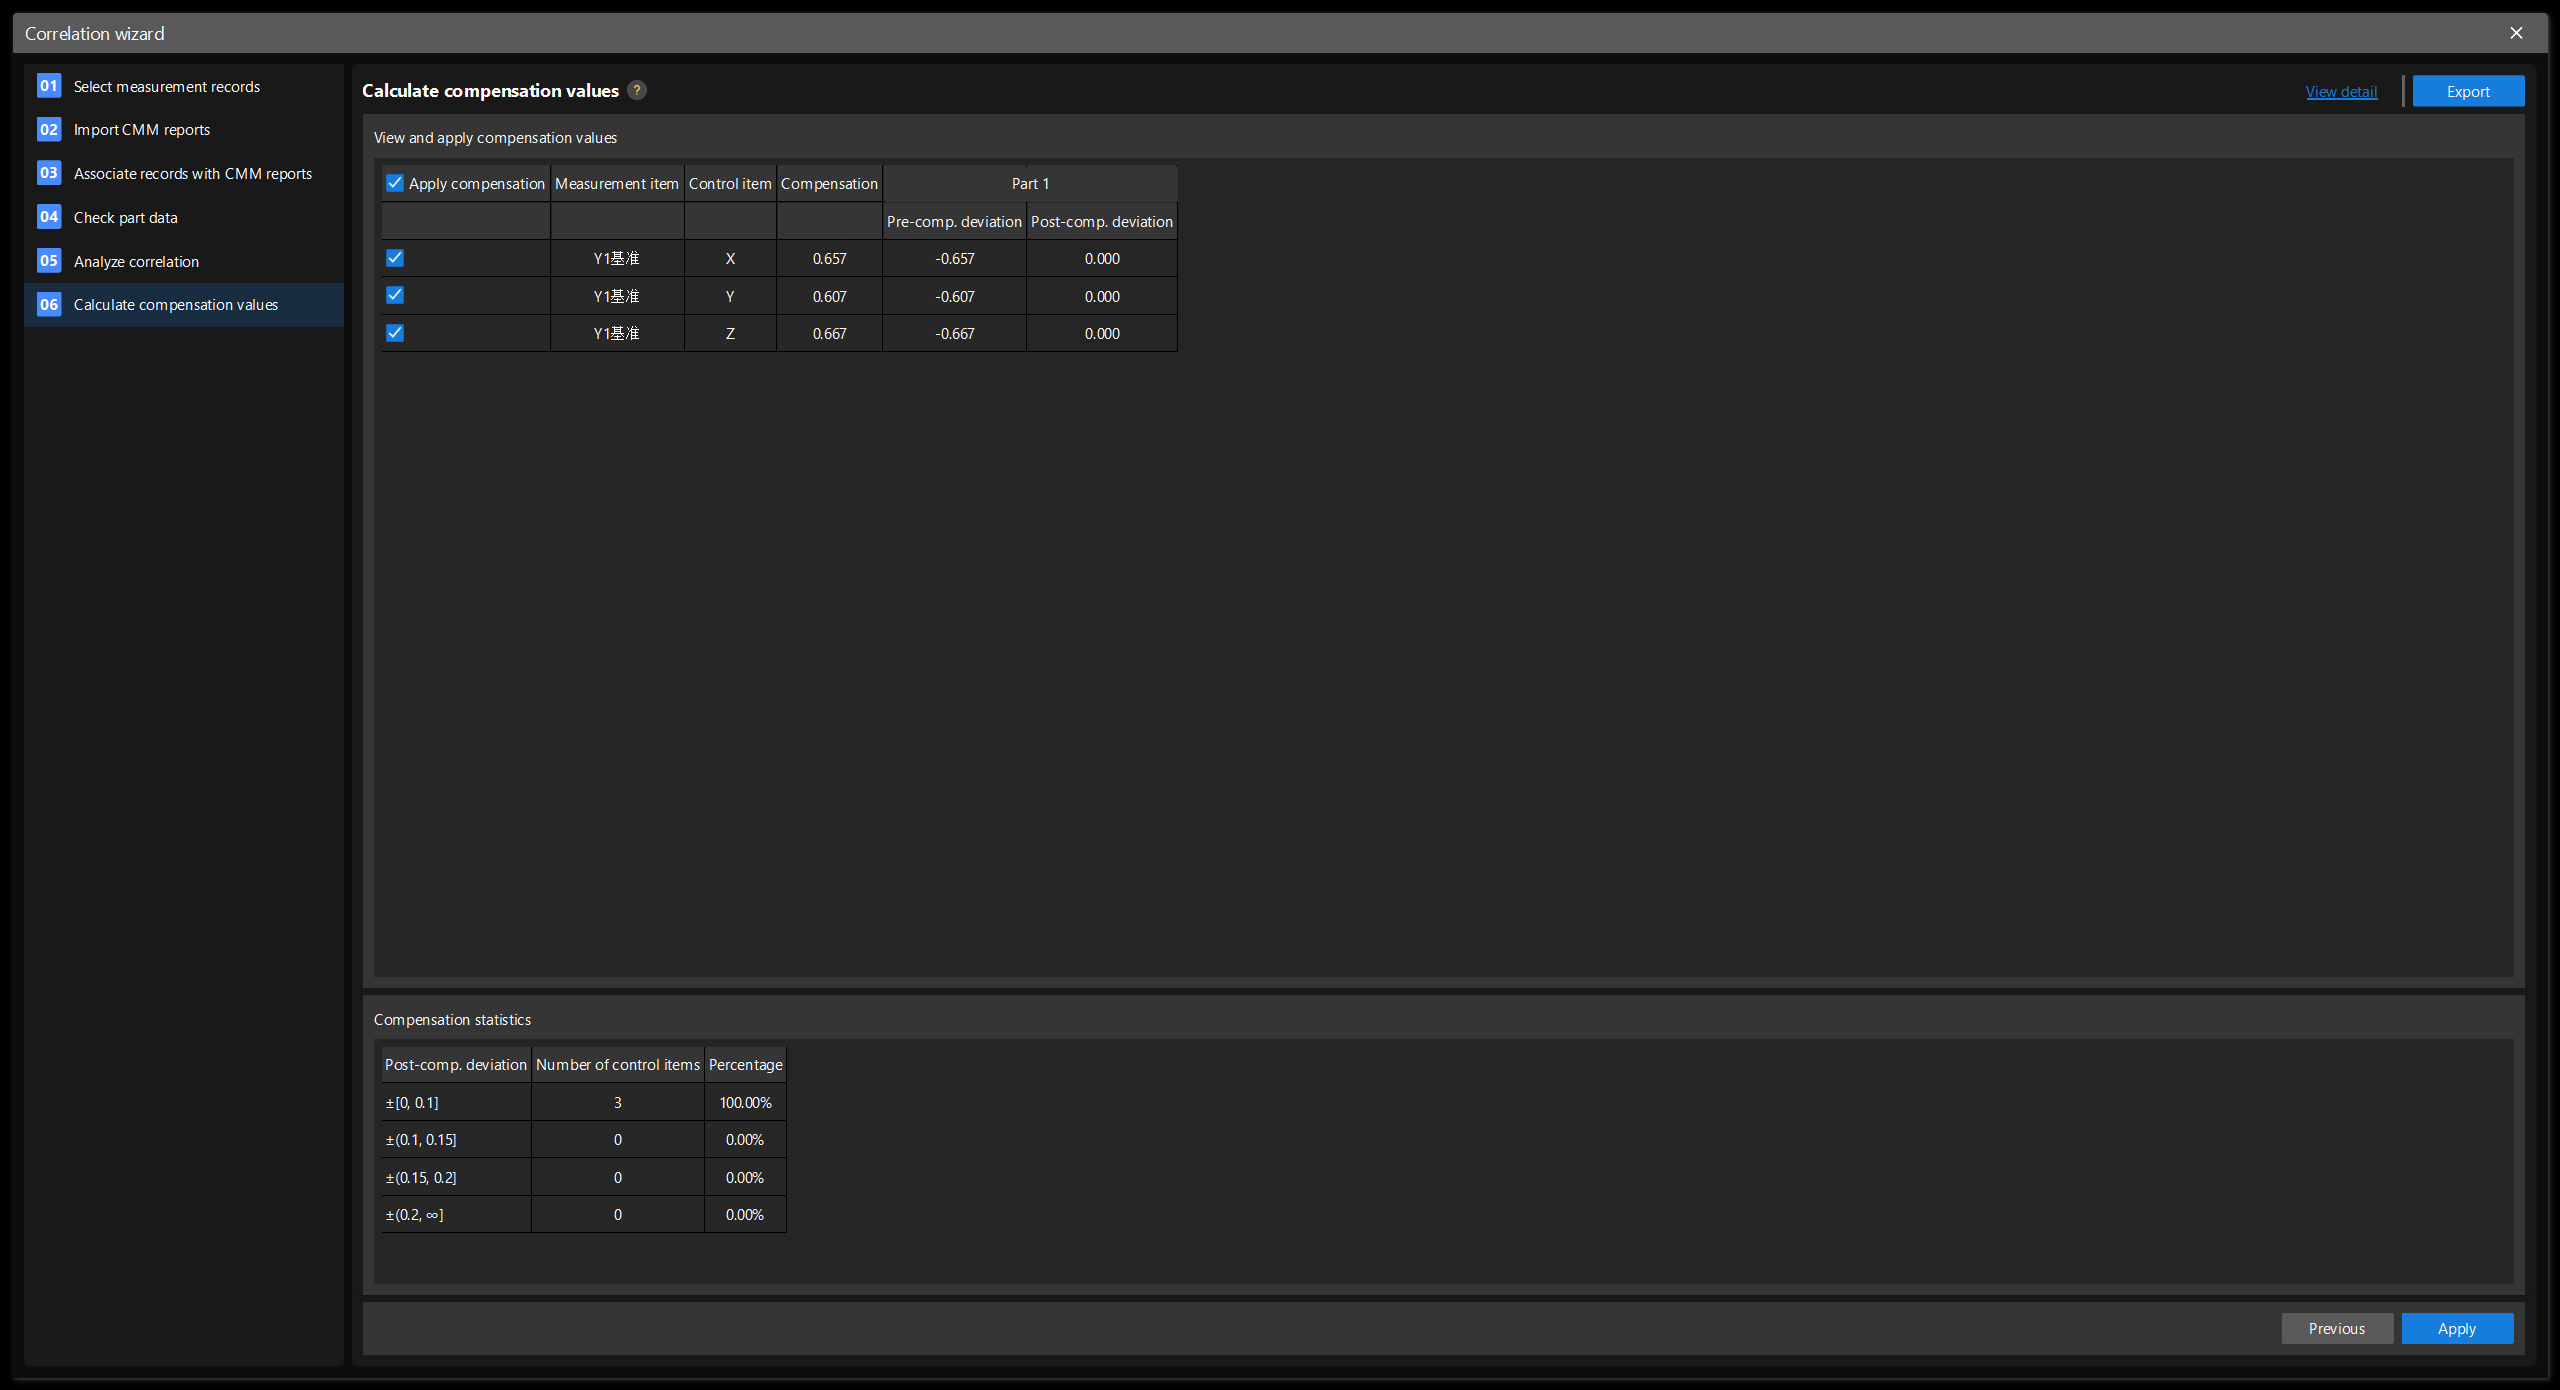
Calculate Compensation Values
This step is used to view the calculated compensation values and check whether the compensation result statistics meet the requirements.
-
In the View and apply compensation values area, check if the deviation before and after compensation meets the requirements of each line.
-
In the Compensation statistics area, check whether the number and proportion of control items in each statistical range meet the requirements.
-
If you need to save the current data, click Export in the upper right corner to save the current data.
-
If all requirements are met, click Apply. If the requirements are not met, return to the Check Part Data and Analyze Correlation steps to handle the abnormal data again. If the requirements are still not met, exit the Correlation Wizard, re-prepare the data, and enter the Correlation Wizard again for analysis and compensation.
Compensation Value Verification Mode
After selecting the Compensation verification mode, the first five steps of the Correlation Wizard follow the instructions of the Compensation calculation mode. Please refer to:
After completing the above steps, proceed to the last step:
Verify Compensation Values
This step is used to evaluate the applicability of the compensation values calculated by the calculation mode to other parts.

-
In the View and apply compensation values area, check whether each deviation before and after compensation meets the requirements.
-
In the Compensation statistics area, check whether the number and proportion of control items in each statistical range meet the requirements.
-
If you need to save the current data, click Export in the upper right corner to save the current data.
-
If all requirements are met, click Apply. If the requirements are not met, return to the Check Part Data and Analyze Correlation steps to handle the abnormal data again. If the requirements are still not met, exit the Correlation Wizard, re-prepare the data, and enter the Correlation Wizard again for analysis and compensation.