Configure the Communication Command
This section introduces how to configure communication commands to customize the part information.
|
Communication During the communication between the robot and Mech-Metrics, the robot establishes a connection with Mech-MSR, and Mech-MSR establishes a connection with Mech-Metrics. Once these connections are established, the specific communication steps are as follows: 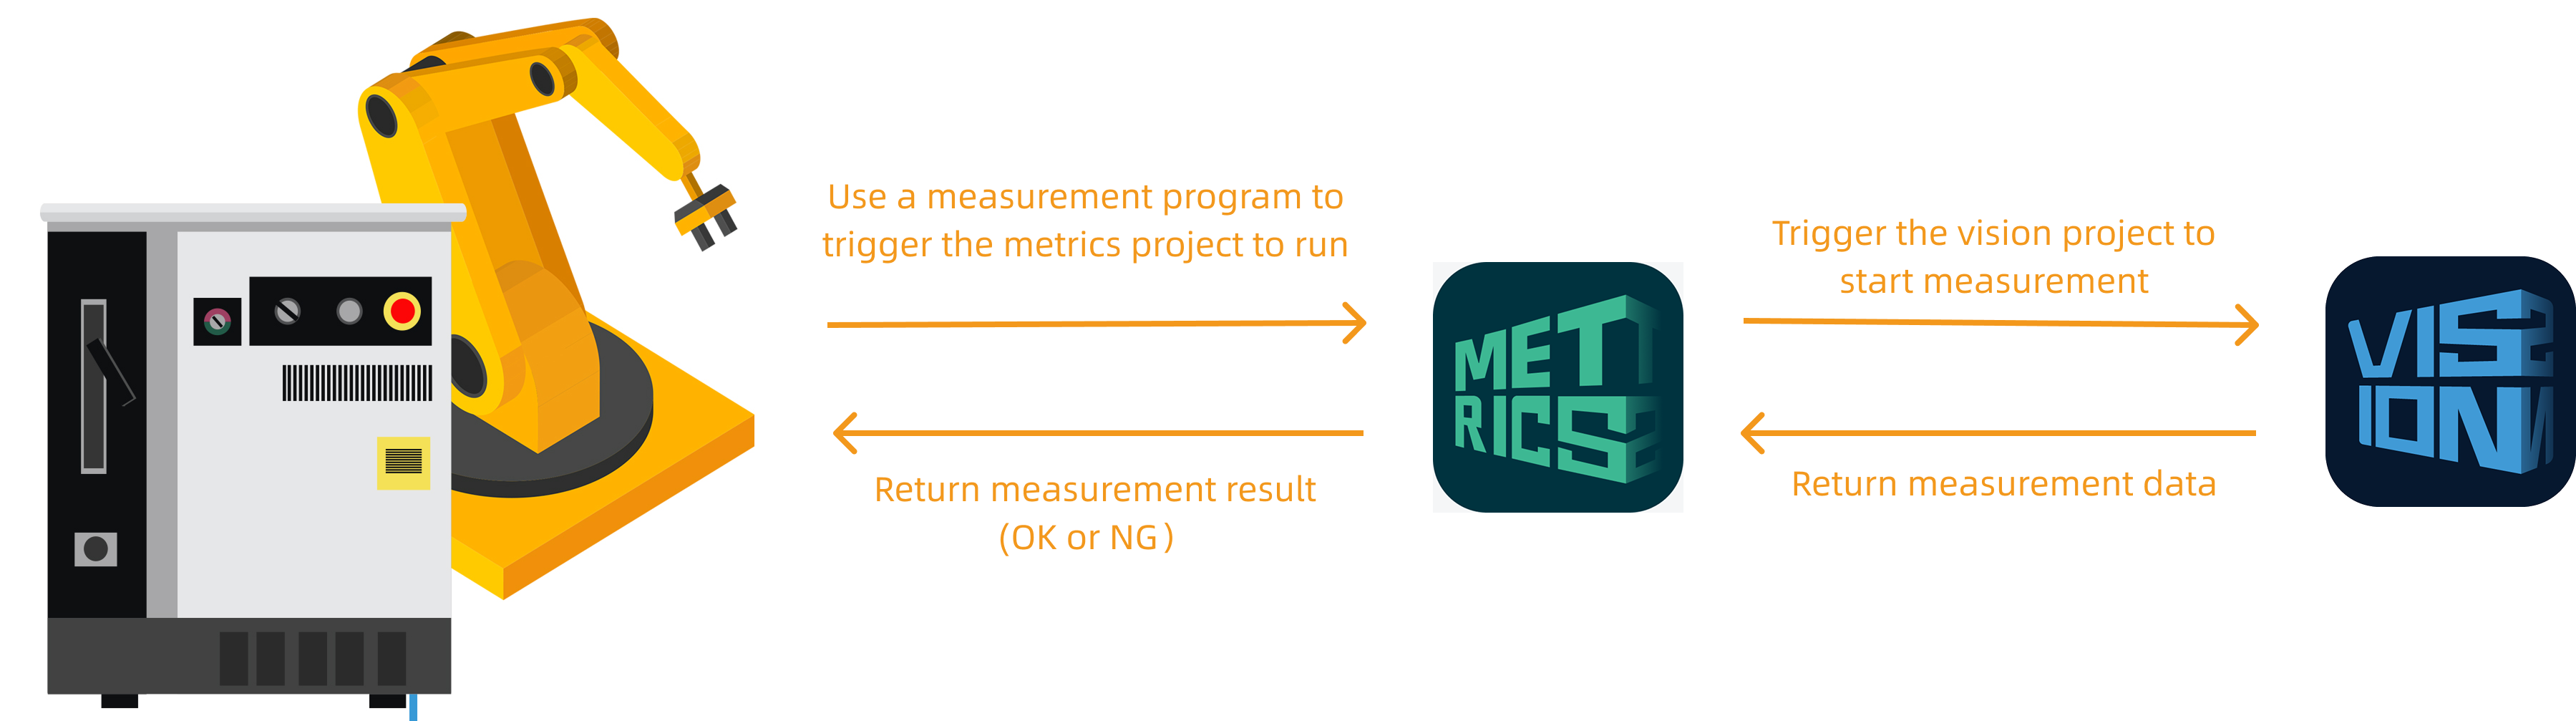
|
Configure the Communication Command
Follow these steps:
-
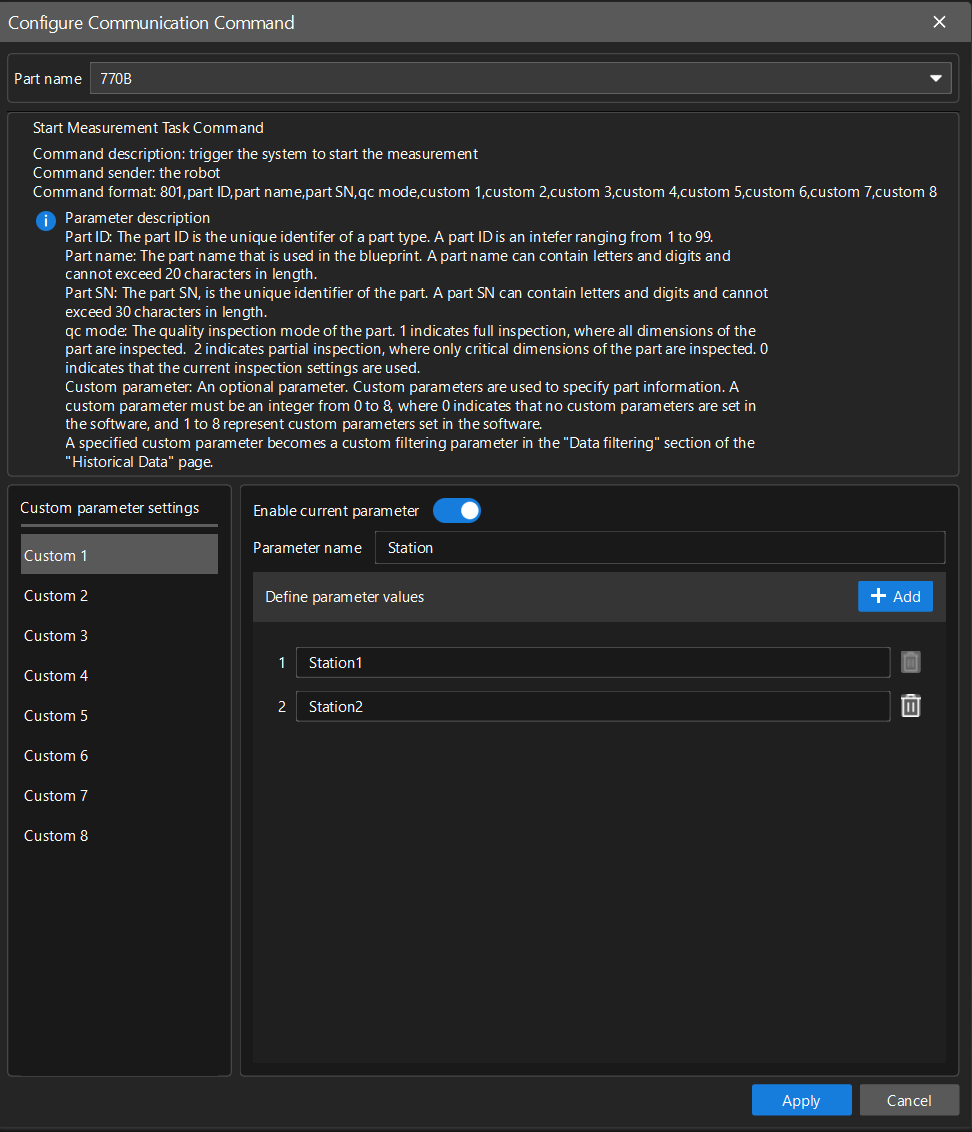
In the Configuration interface, select . The Configure Communication Command dialog box will pop up.
-
In the dialog box, select the Part name to be measured (e.g., the current part), and configure custom parameters for the part as follows:
-
In the Custom parameter settings area, the Custom 1 tab will be displayed by default. On the Custom 1 tab, enter the parameter name (e.g., Station), and click +Add to add a parameter value 1 for custom parameter 1.
-
In the text field next to 1, enter the meaning of parameter value 1 (e.g., Station 1).
-
Click +Add again to add parameter value 2 for custom parameter 1.
-
In the text field next to 2, enter the meaning of parameter value 2 (e.g., Station 2).
-
On the Custom 1 tab, the Enable current parameter button is turned off by default, indicating that custom parameter 1 is not enabled. Click the Enable current parameter button, and then click Apply.
-
-
The above are just examples. Please configure them according to the actual situation.
This software supports the configuration of up to 8 custom parameters. Each custom parameter supports 8 custom parameter values.
Use Configured Information for Data Filtering
The configured custom part information can be used as a filter option on the Historical Data page. After obtaining the relevant measurement data, you can follow these steps to filter the data.
-
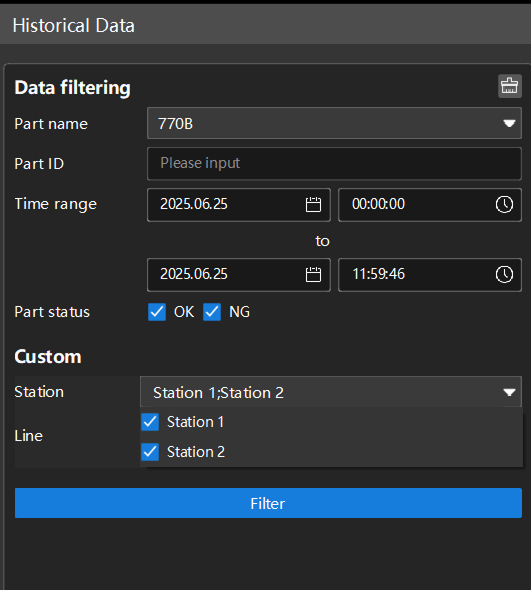
In the Configuration interface, select . The Historical Data page will be displayed.
-
On the Historical Data page, in the Custom section, you can view the custom parameter Station and the parameter value Station 1;Station 2. Now Station 1 and Station 2 are selected by default. The checked custom parameter values can be used for data filtering.
If, after configuring the custom parameters, you cannot see the configured custom parameters in the Custom section of the Historical Data page, please follow these steps to check:
-
Check if the configured custom parameters are enabled in the Configure Communication Command dialog box.
-
Troubleshoot based on any error messages.
-
Contact technical support.
-
-
Click the Station 1;Station 2 drop-down menu. You can check or uncheck the relevant parameter values according to actual needs, and then filter the data.