Master-Control Communication Setup (Collaborative Robot)

You are currently viewing the documentation for the latest version (2.1.0). To access a different version, click the "Switch version" button located in the upper-right corner of the page.

■ If you are not sure which version of the product you are currently using, please feel free to contact Mech-Mind Technical Support.

This guide shows you how to set up Master-Control communication with a ROKAE Xmate7 collaborative robot.

Preparation

Connect to the Robot

  • Open the ROKAE Xmate7 control system software and connect the robot as shown below. If an alert window pops up, showing that the current control system is not compatible with the robot model, please upgrade the system according to the instruction.

    update

Set up the Network Connection

Connect the Hardware

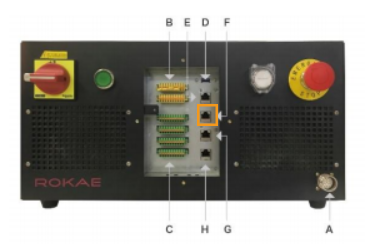
Plug the Ethernet cable of the IPC into the F port as shown below.

hardware connect

Set the IP Addresses

The default robot IP address is 192.168.0.160, please set the IP address of the IPC to 192.168.0.222. After configuration, you can check the connection by entering the command ping 192.168.0.160 in the Command Prompt window.

Load the Program Files to the Robot

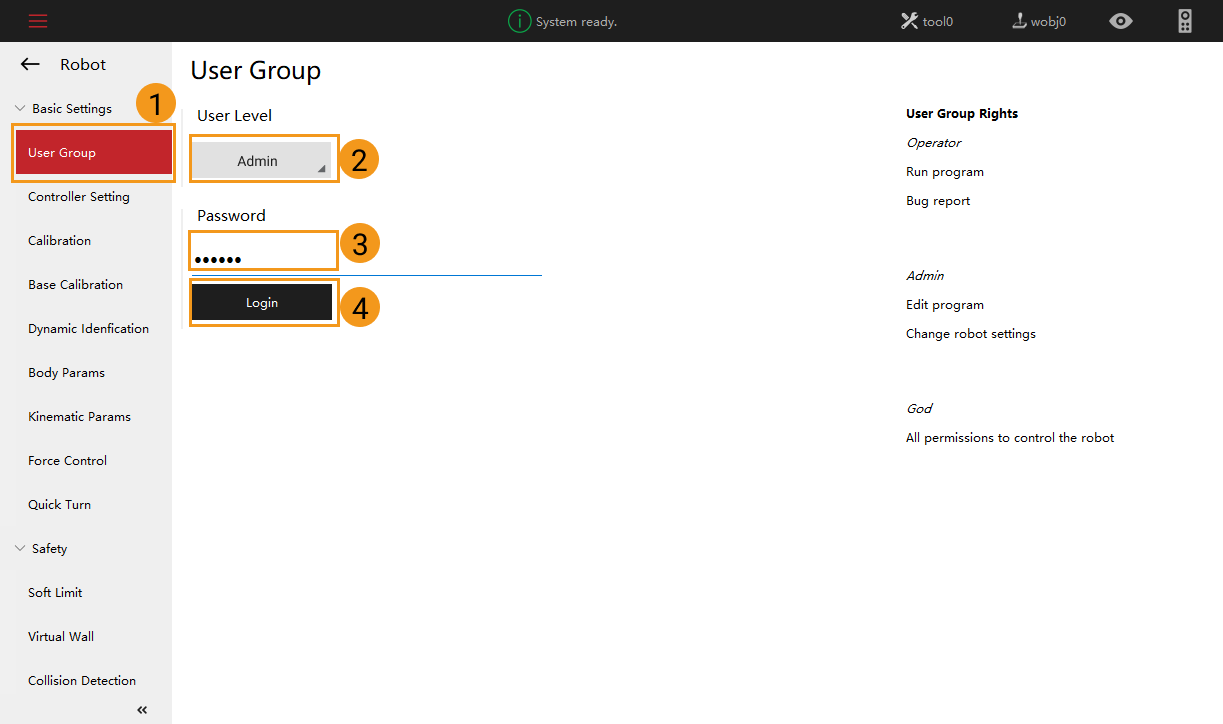
Switch the Level

Go to Basic Settings  User Group from the left-side toolbar, select Admin as the user level, enter the default password 123456, and then select Login.
change mode2

Load the Files to the Robot

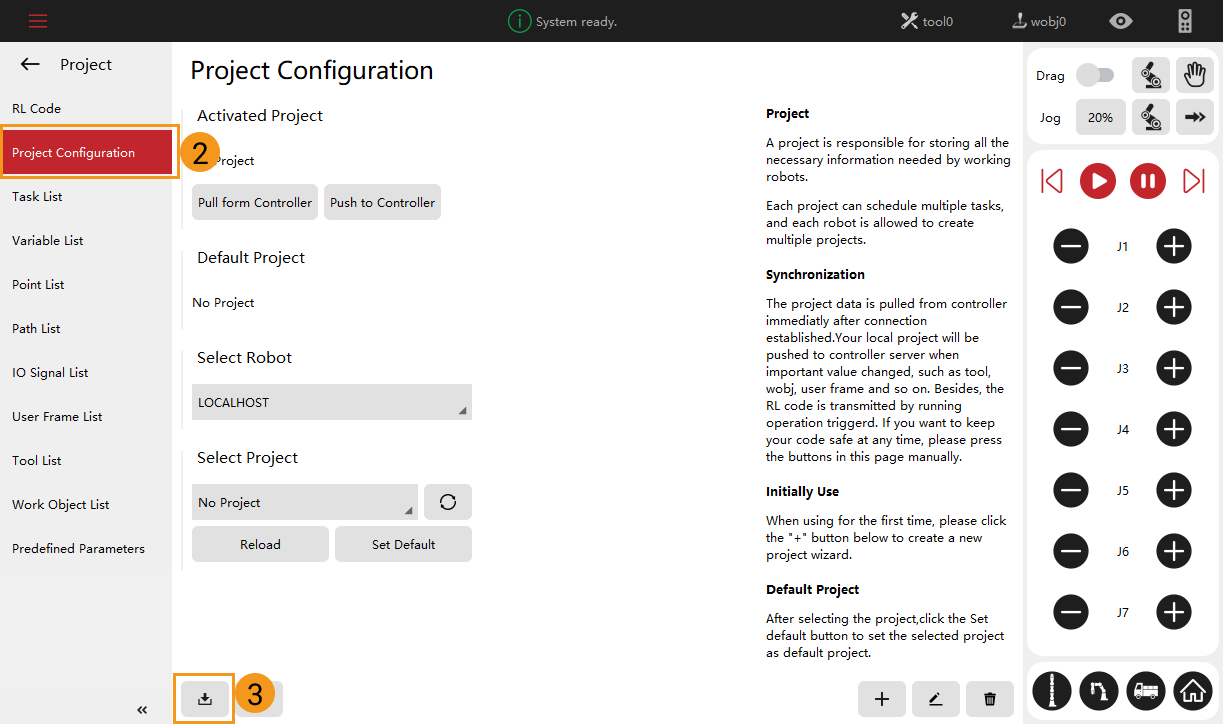
Please follow the steps below to load the Master-Control program to the robot.

  1. Go to Project ‣ Project Configuration.

    load program1
    load program2
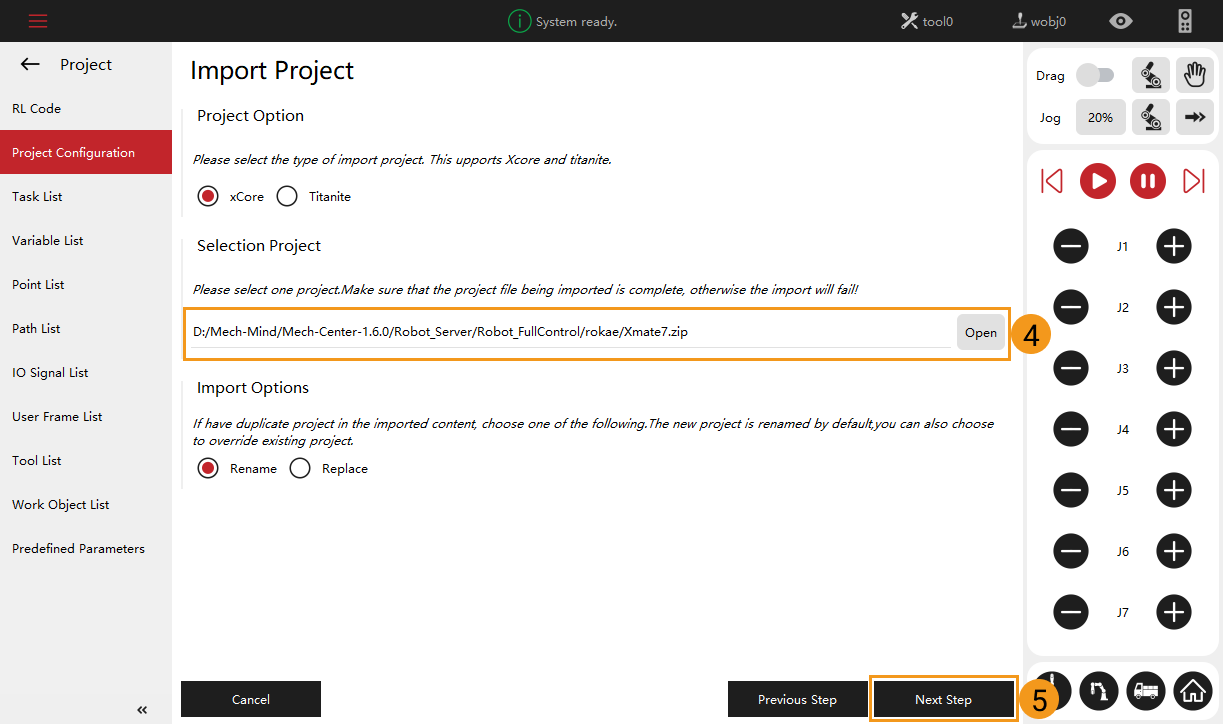
  2. Select the Xmate7.zip program file that you want to import and then select Next.

    The program file is stored in Communication Component/Robot_Server/Robot_FullControl/rokae in the installation directory where Mech-Vision and Mech-Viz are installed.
    load program3
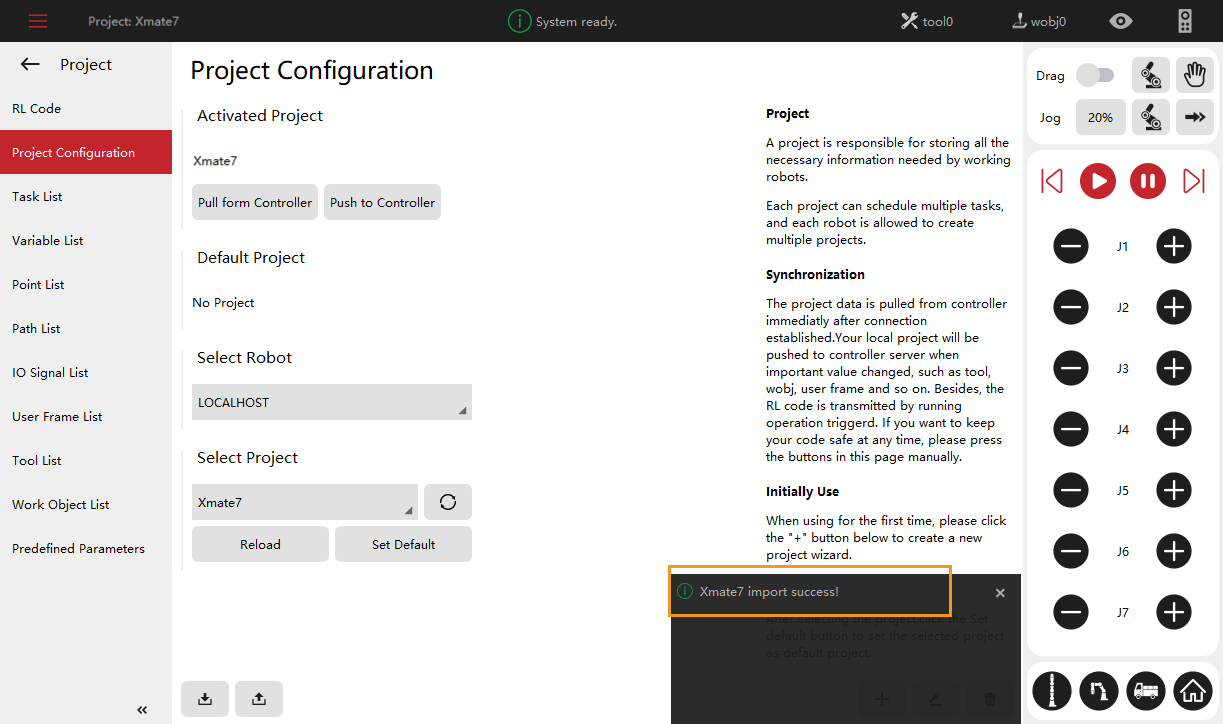
  3. An “Import Success” message will appear in the lower right corner.
    load program4
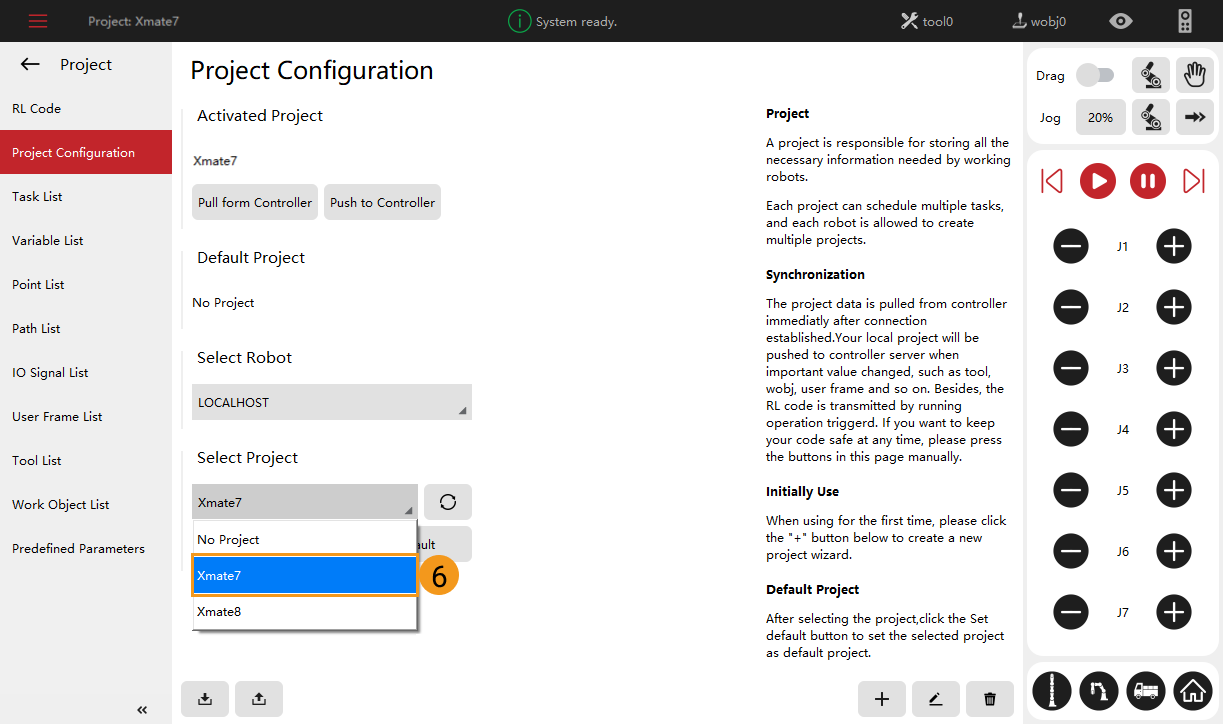
  4. Select the Xmate7 program.

    load program5
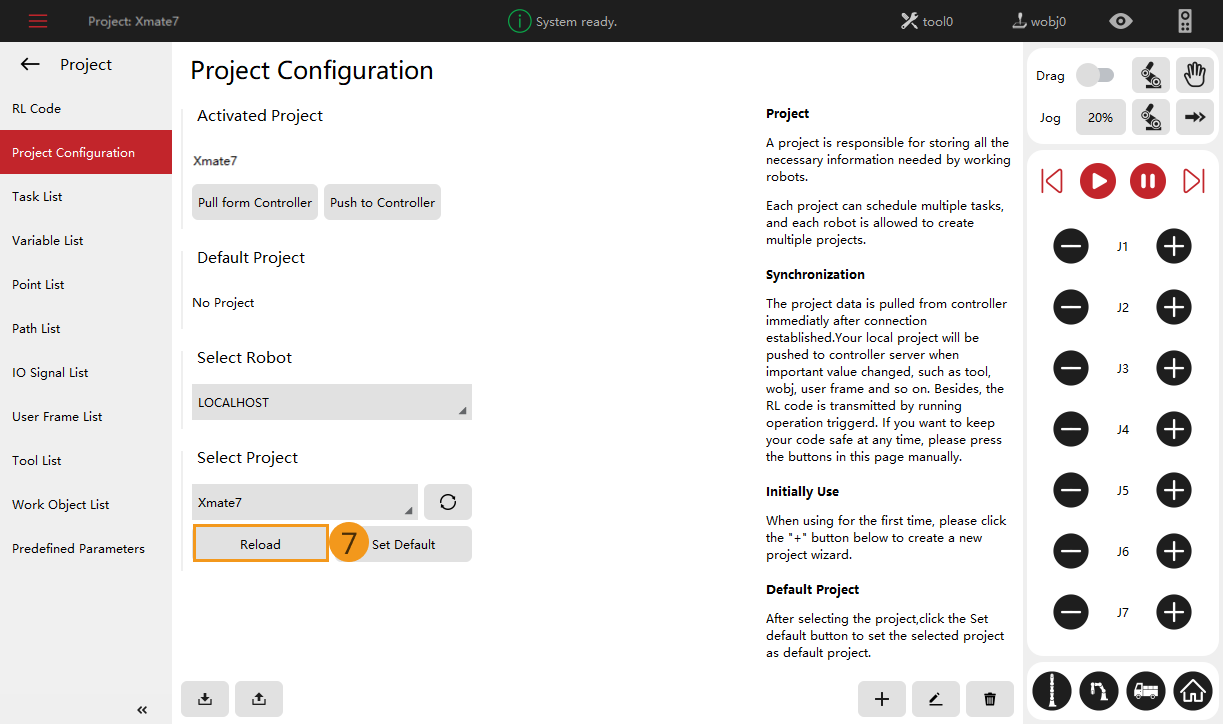
  5. Select Reload and then select Yes in the pop-up window.
    load program6

Configure External Communication

  1. Select Robot.

    configure communication1
  2. Go to Communication  Socket. Then follow the steps as shown in the figure below to open Enable and configure the socket.

    configure communication2

Test Master-Control Communication

  1. Create a Mech-Viz Project.

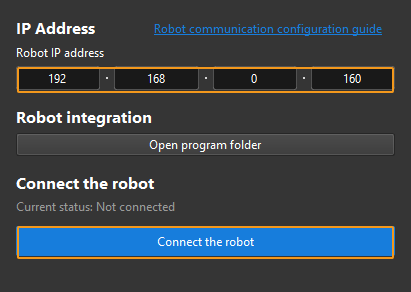
  2. Select Master-Control Robot on the toolbar of Mech-Viz.

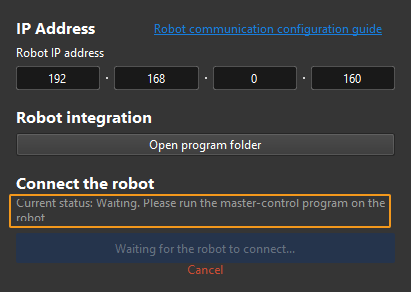
    Input 192.168.0.160 in Robot IP address and select Connect the robot.
    Unnamed image

    Mech-Viz will wait for the master-control program to run before establishing the connection. By default, the waiting time is 120s.
    Unnamed image

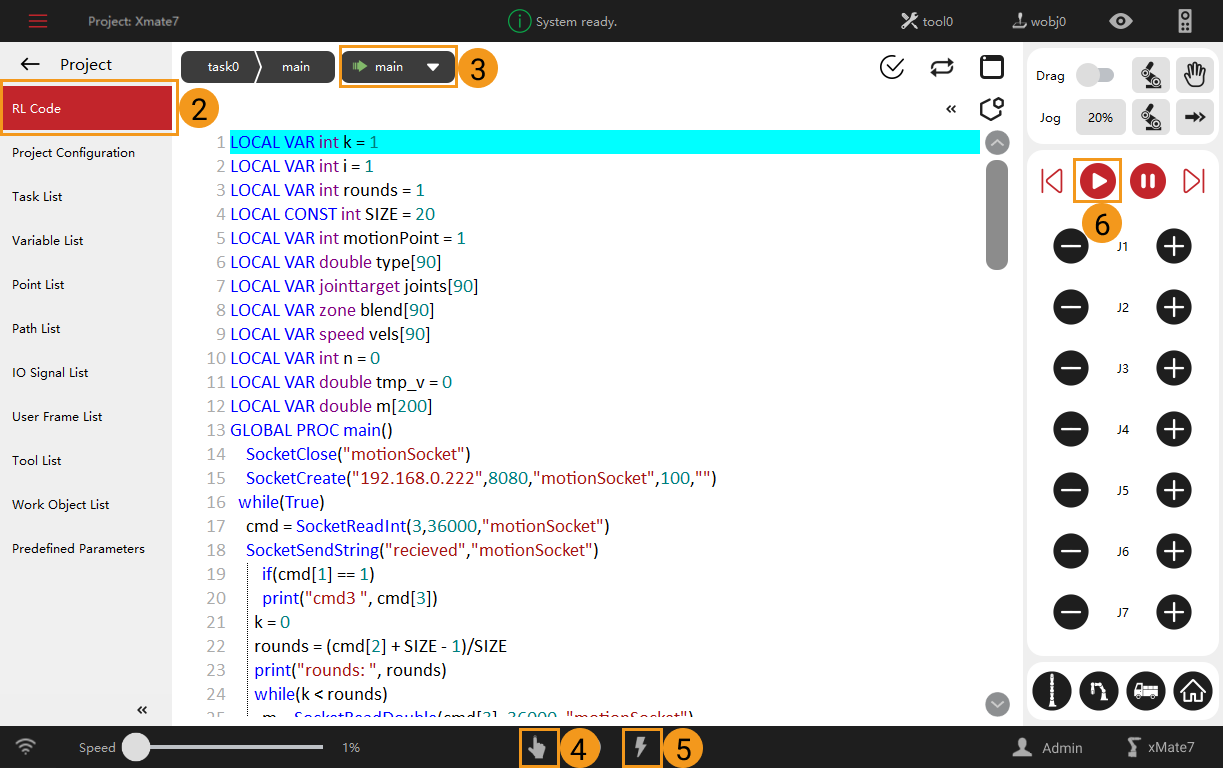
With the following steps, you can load and run the master-control program. Note that the operation should be completed in 120 seconds. Otherwise, you’ll need to select Connect the robot in Mech-Viz again.

load program1
run program

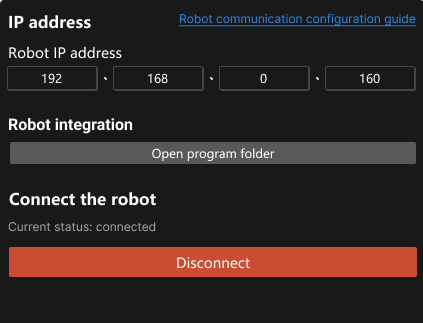
In Mech-Viz, the current status shows “connected”.
viz connect rokae3

After finishing the above operation, please move the robot.

We Value Your Privacy

We use cookies to provide you with the best possible experience on our website. By continuing to use the site, you acknowledge that you agree to the use of cookies. If you decline, a single cookie will be used to ensure you're not tracked or remembered when you visit this website.