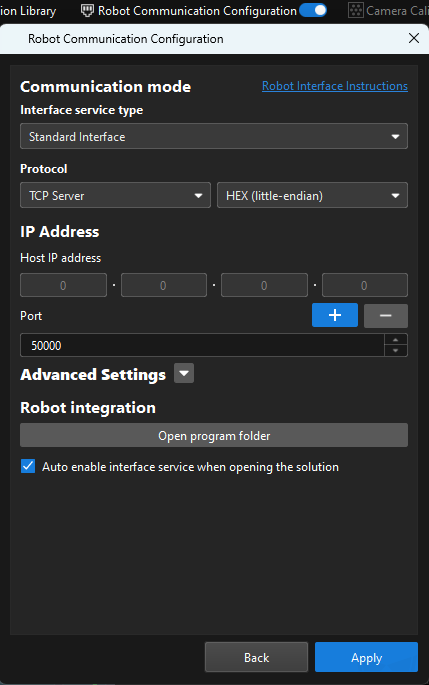
Robot Communication Configuration
In this tutorial, you will learn how to load the Standard Interface program files to the ABB robot, and set up the Standard Interface communication between the Mech-Mind Vision System and the robot.
|
Preparation before Loading
Check Controller and Software Compatibility
-
The robot is a 4-axis or 6-axis robot. This section takes ABB_IRB6700_150_3_20 as an example.
-
The robot controller is IRC4 or IRC5, and the version of RobotWare is between 6.02 to 6.15.
-
The RobotWare option 616-1 PC Interface is installed.
Click here for instructions
-
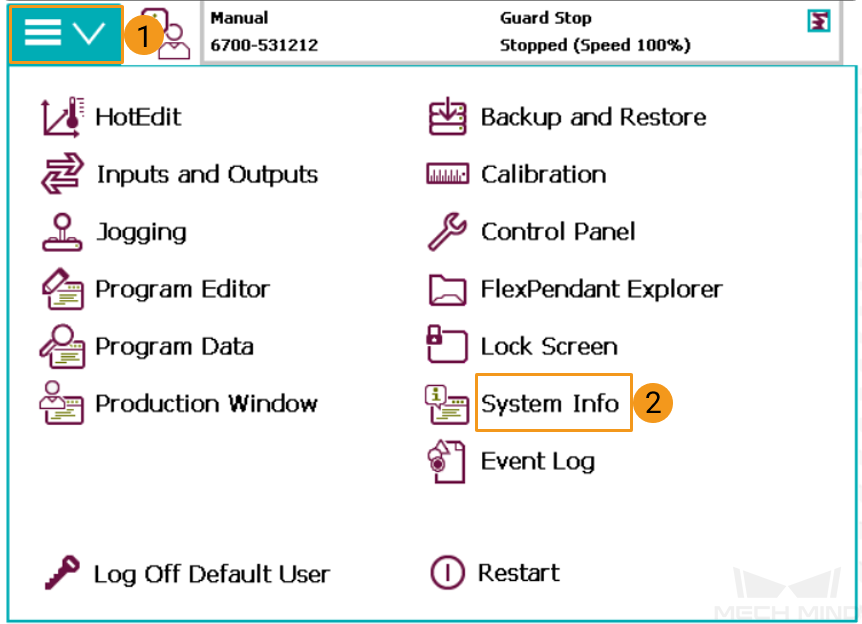
Tap the drop-down button in the upper-left menu bar of the teach pendant interface and select System Info.
-
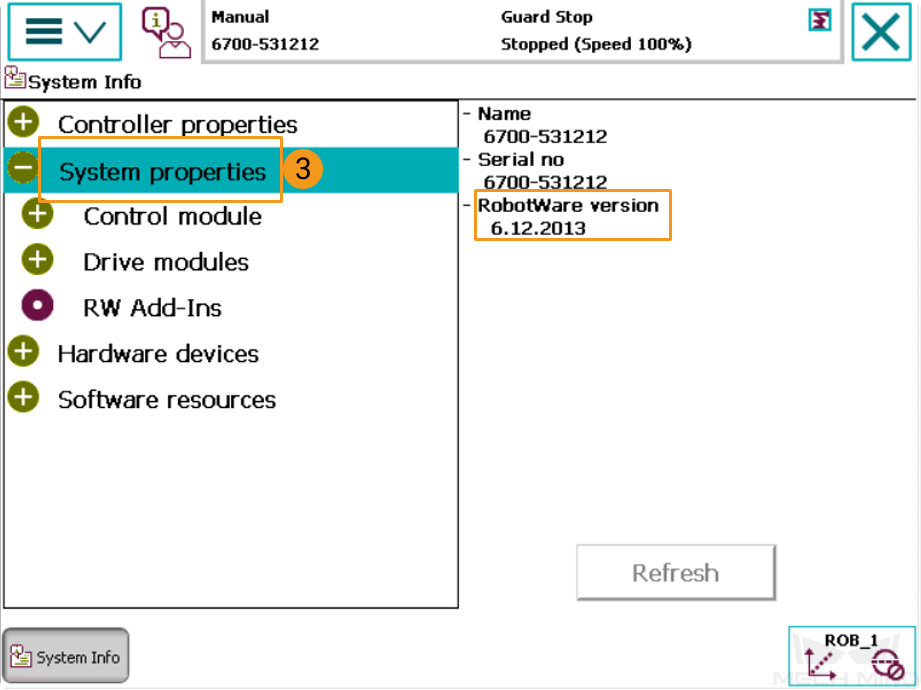
Tap System properties and check if the version of RobotWare is above 6.02.
-
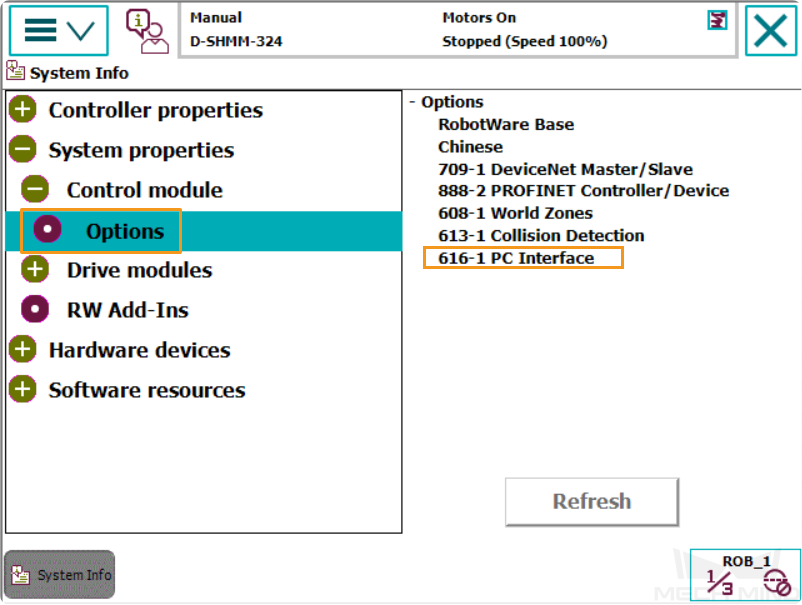
Tap Options, and check if the control module 616-1 PC Interface is installed.
-
| If the preceding conditions are not met, the vision system cannot communicate with the robot by using the Standard Interface. Contact the robot manufacturer for support. |
Set up Network Connection
Connect the Hardware
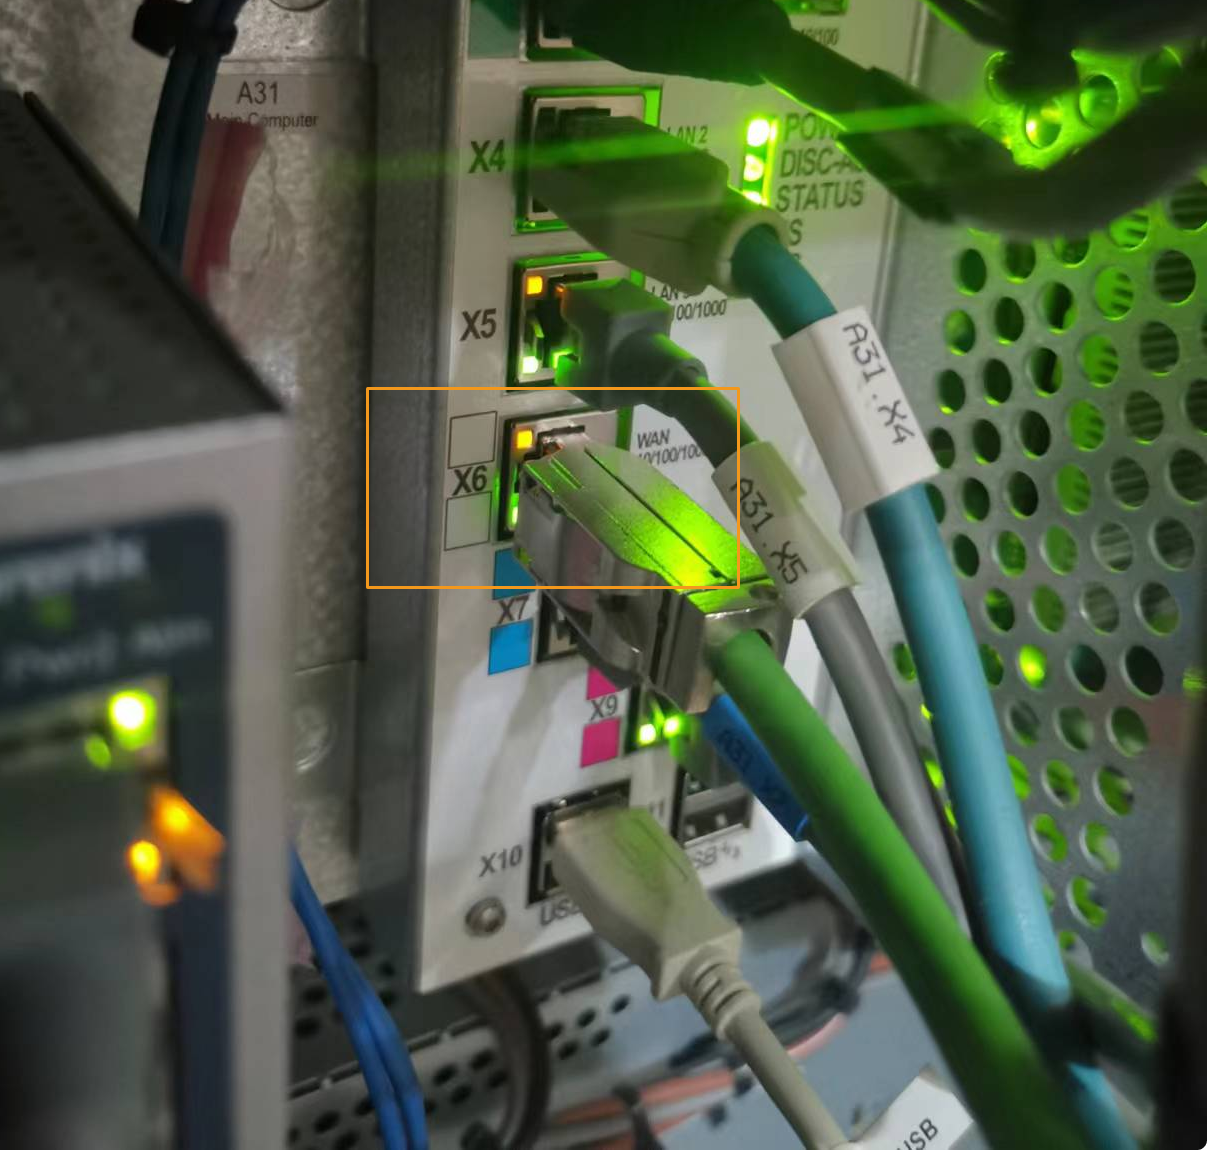
Plug the Ethernet cable of the IPC into the X6 (WAN) port of the robot controller, as shown below.
Set IP Addresses
Please set the IP address of the robot to the same subnet as that of the IPC. You can set the IP address by using the teach pendant or RobotStudio. This section introduces how to use the teach pendant to set the IP address. For more information about how to use RobotStudio to set the IP address, please refer to Set IP Address in RobotStudio.
-
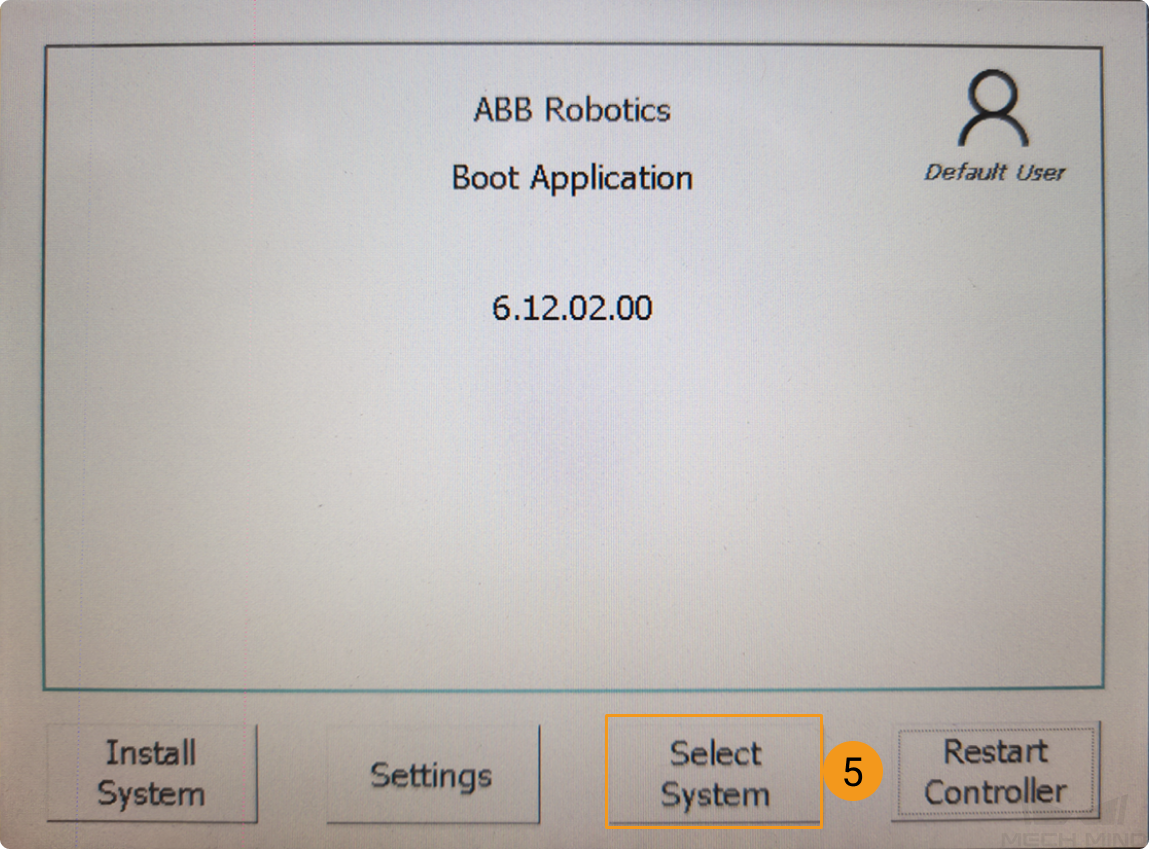
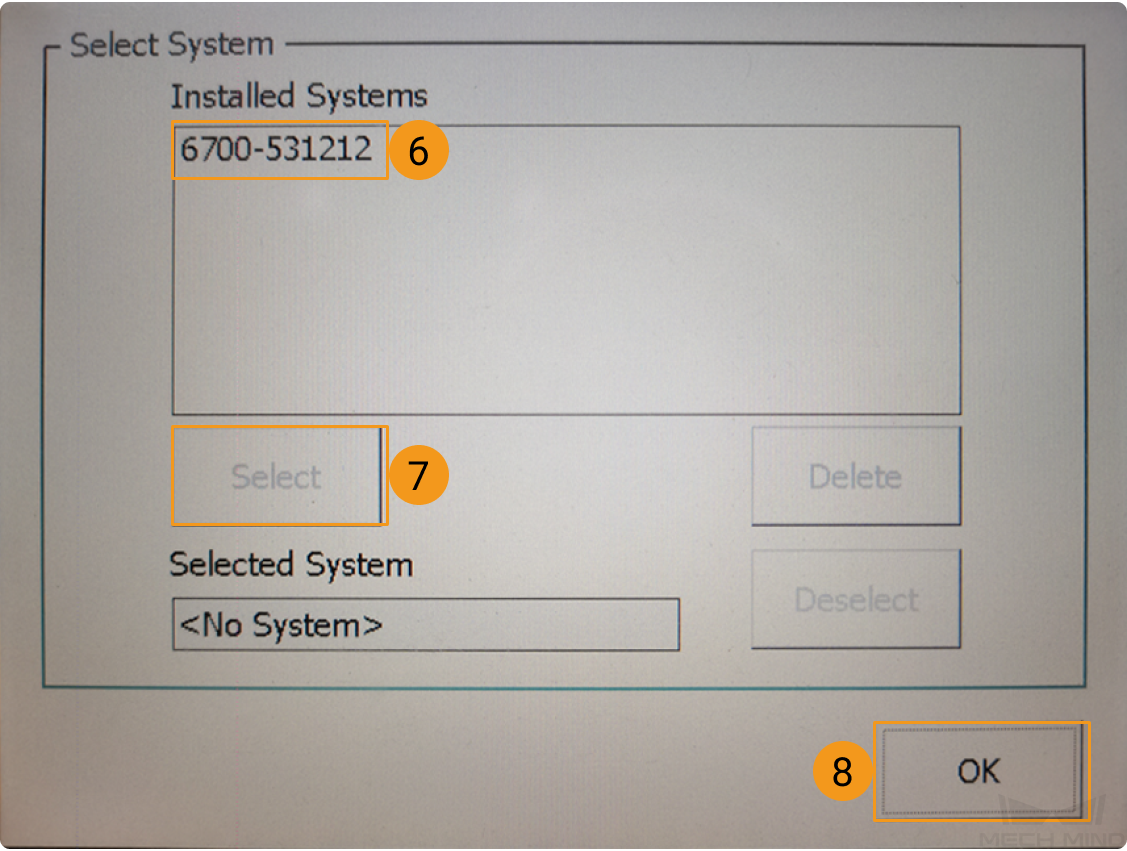
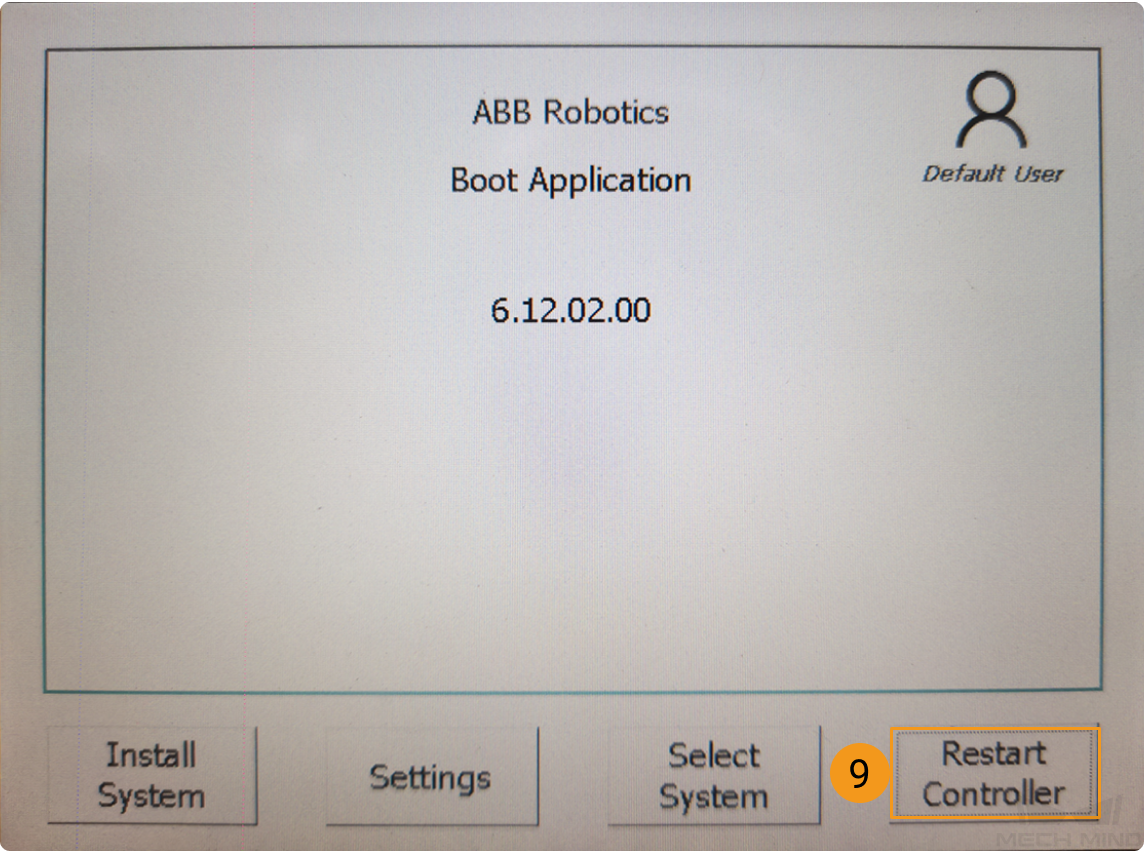
Follow the steps as shown in the figures below to start boot application.
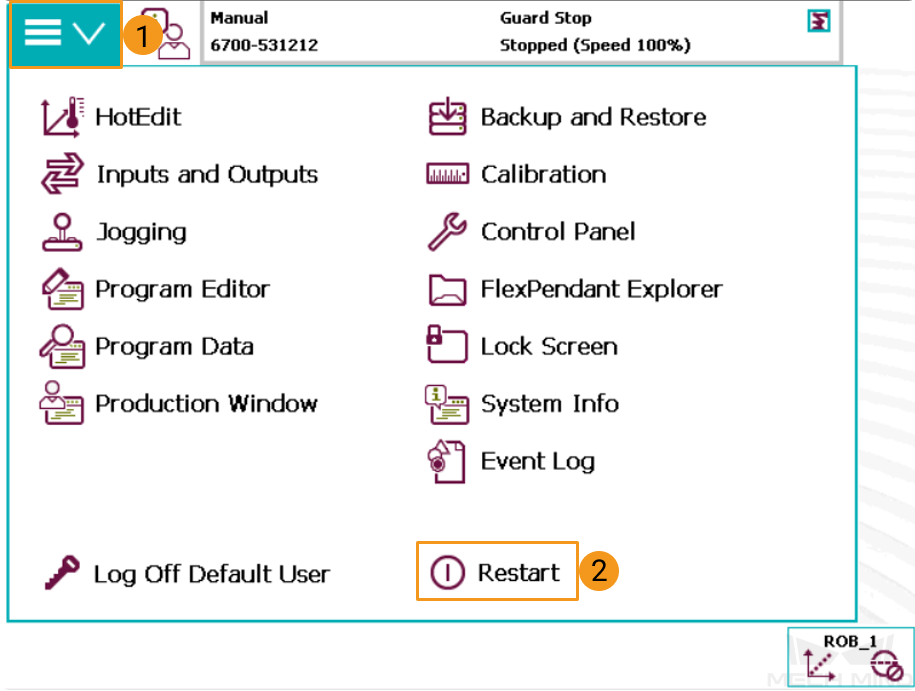
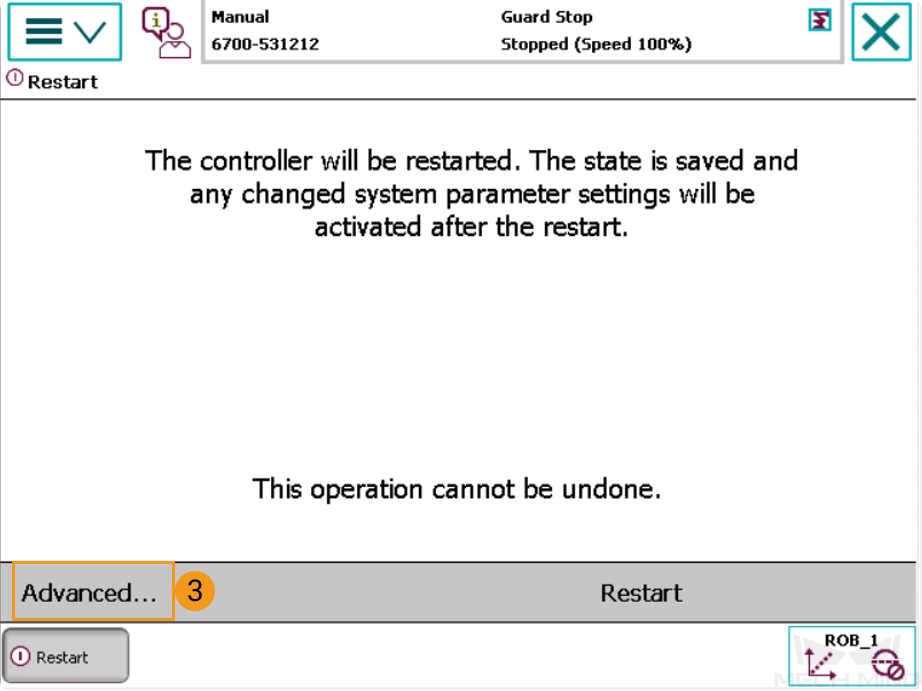


-
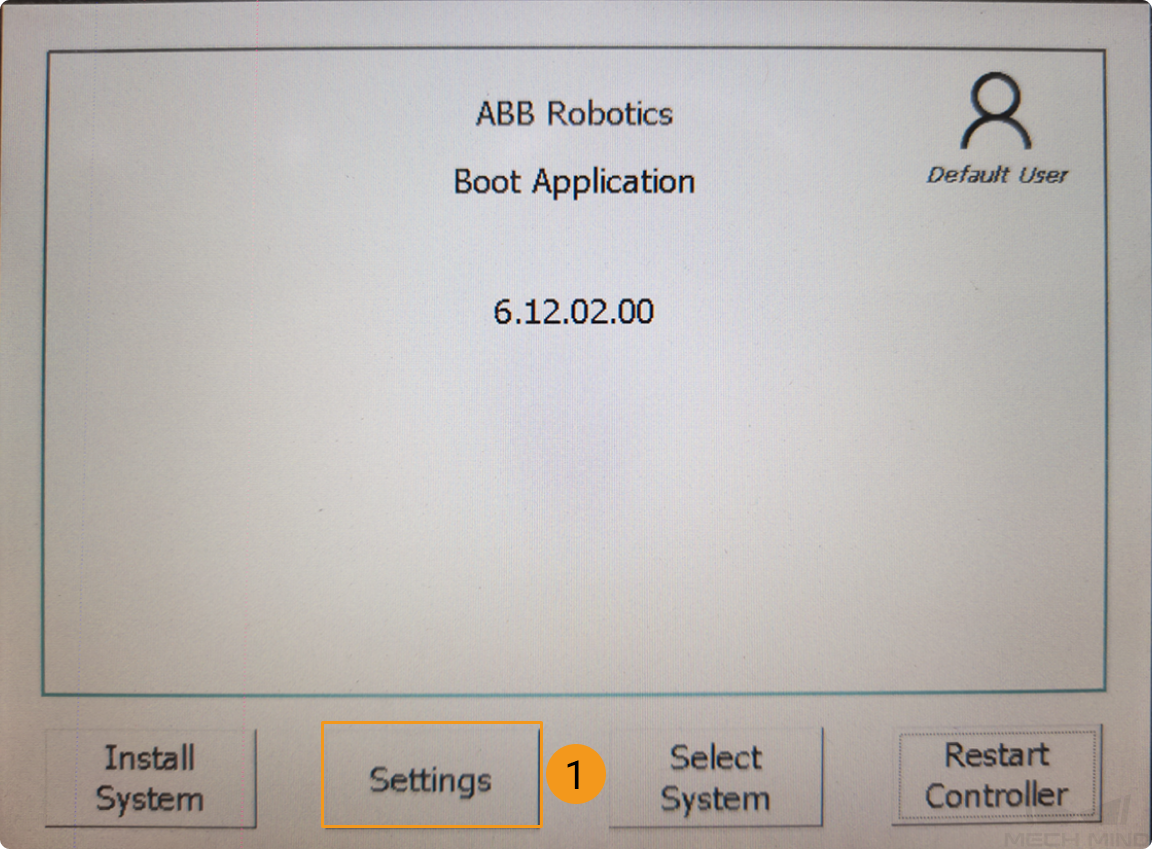
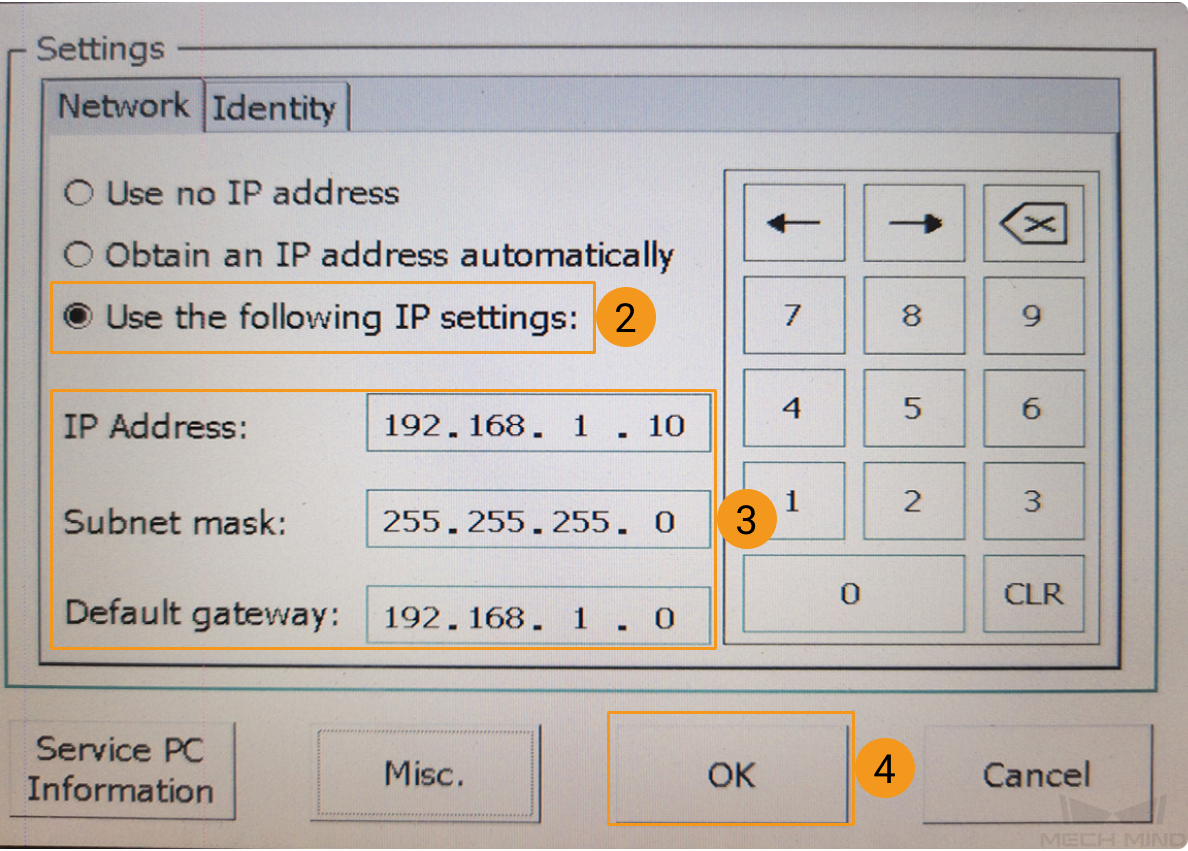
After the restart is complete, the following interface appears. Follow the steps below to configure the IP address. The IP addresses of the robot and the IPC must reside in the same subnet.
Create a Mech-Vision Project and Save It
-
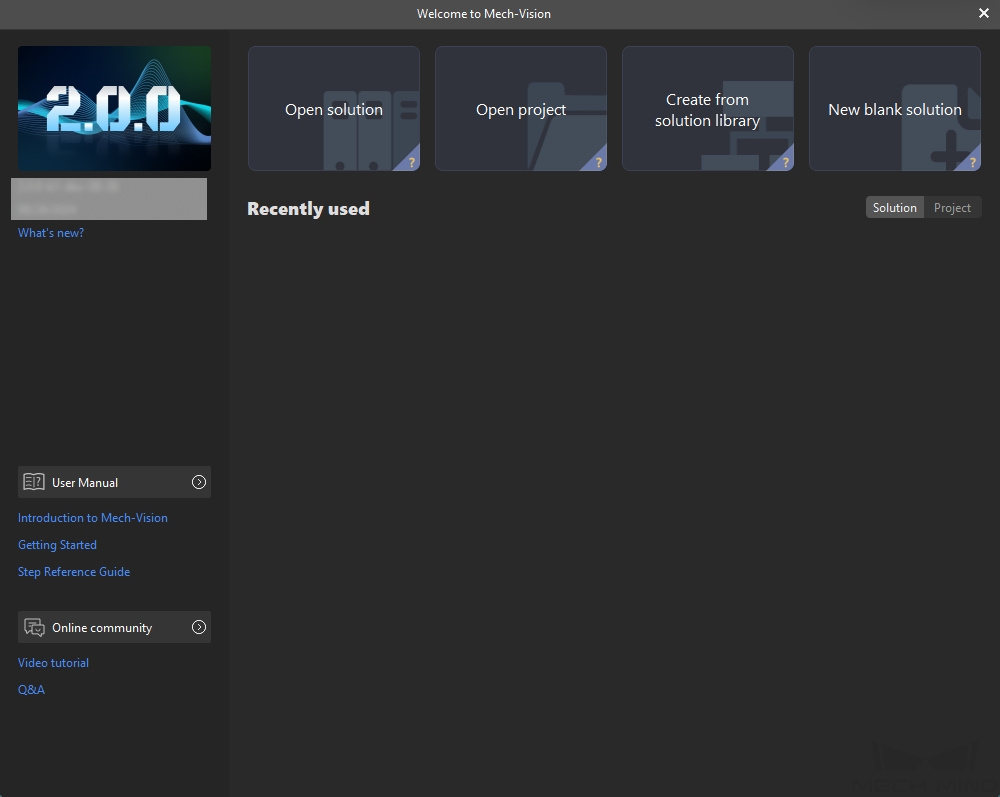
Open Mech-Vision. If the Welcome interface as shown below is displayed, it indicates that Mech-Vision is started successfully.
-
In the Welcome interface of Mech-Vision, click Create from solution library to open the Solution Library.

The Solution Library is a resource library that provides typical solutions or projects (with sample data) from various application scenarios. -
In the Application Template tab of the Solution Library, select the Single-Case Depalletizing solution, as shown below.
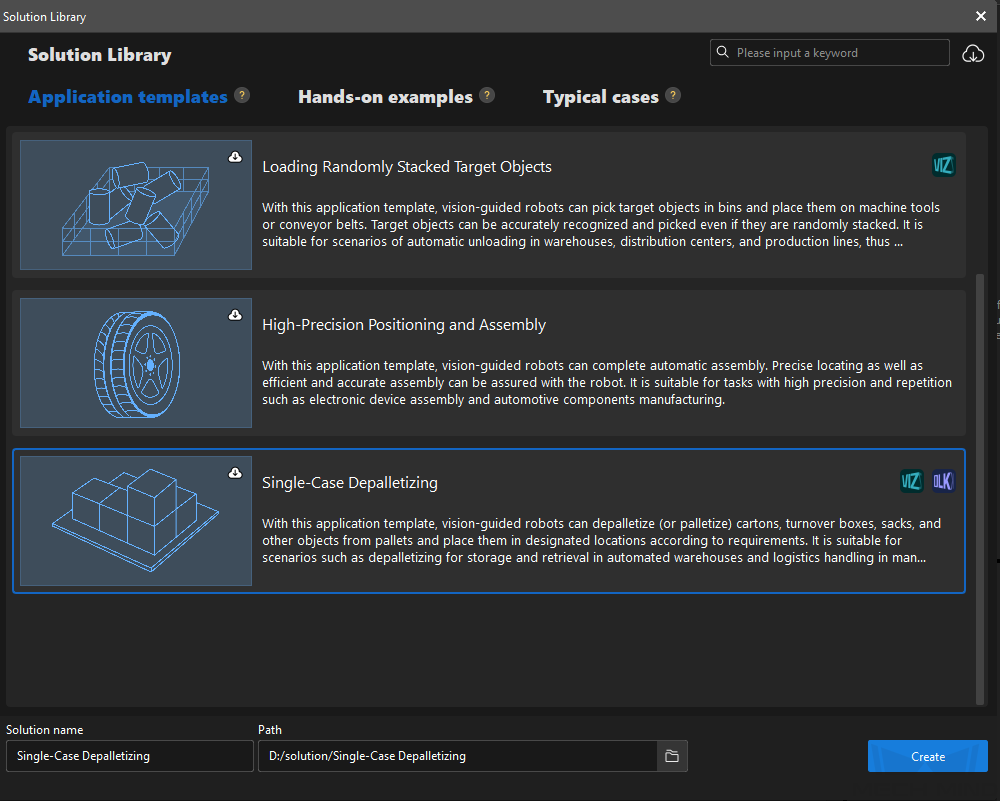
If you cannot find the Single-Case Depalletizing solution in the Solution Library, click the Download icon in the upper-right corner.
-
Set the solution name and path, and then click Create.
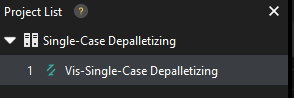
After the project is created, the created solution and project will be displayed in the project list in the upper-left corner of the Mech-Vision main interface.
-
A solution is a set of configurations and data related to robots and robot communication, vision processing, path planning, etc. that are required for the machine vision application.
-
A project is a workflow of vision processing in the solution. Normally, a solution only contains one Mech-Vision project, but it may contain more than one project in complex application scenarios.
-
The Single-Case Depalletizing solution only contains one project “Vis_Single_Case_Depalletizing”.
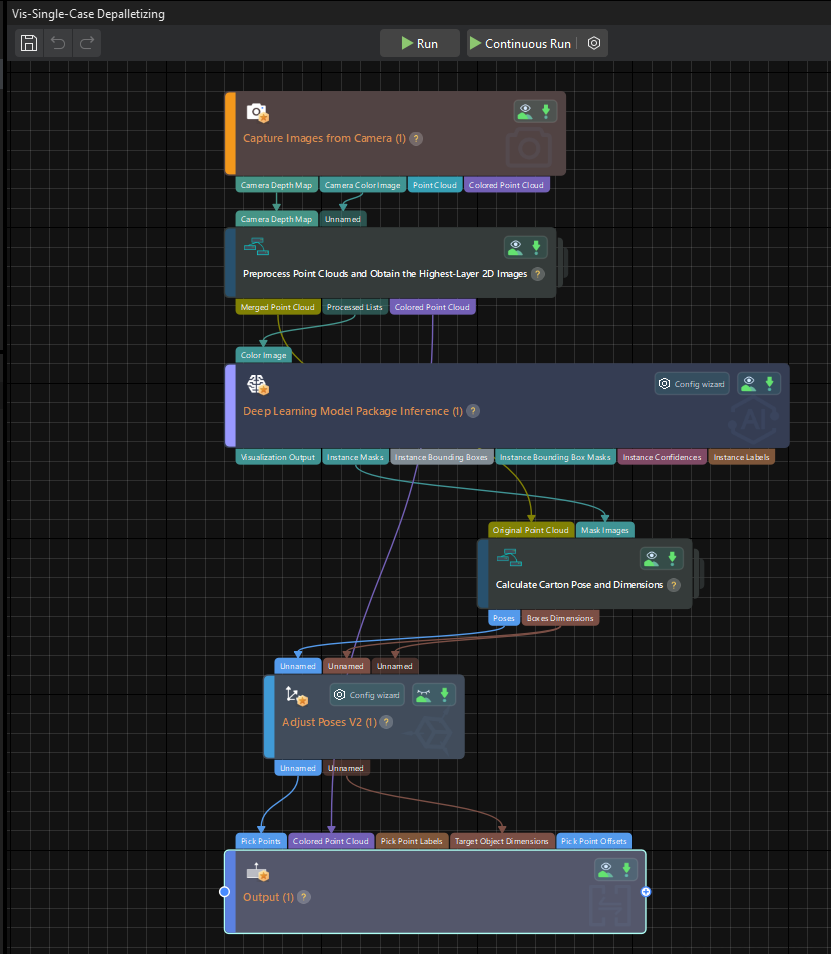
In the Graphical Programming Workspace of the main interface, the workflow of the “Vis_Single_Case_Depalletizing” project will be displayed.
-
-
In the project list, right-click the solution, and select Autoload Solution.
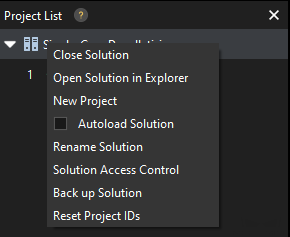
After this solution is set to autoload, the project name will be displayed in green, and the project ID will be displayed in the left of the project name.
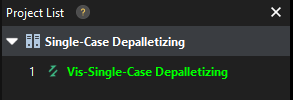
The project ID will be used by the robot pick-and-place program to trigger the Mech-Vision project to run. -
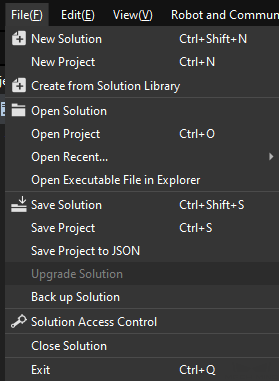
On the menu bar, select .
Load the Program Files to the Robot (Auto)
You can follow the instructions below to auto-load the Standard Interface programs or Standard Interface example programs to the robot. This section only introduces how to autoload the Standard Interface program. The autoload process of the Standard Interface example program is similar to this process.
|
-
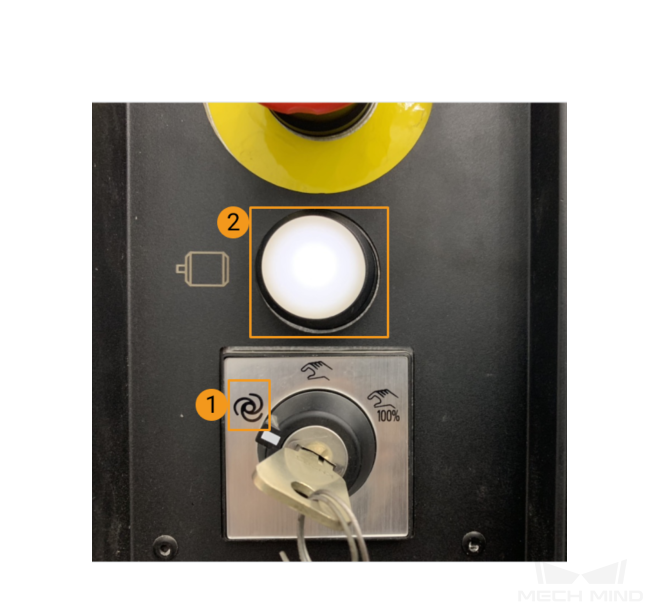
Switch the key in the controller to the automatic mode, and ensure that the motor indicator light is on.
-
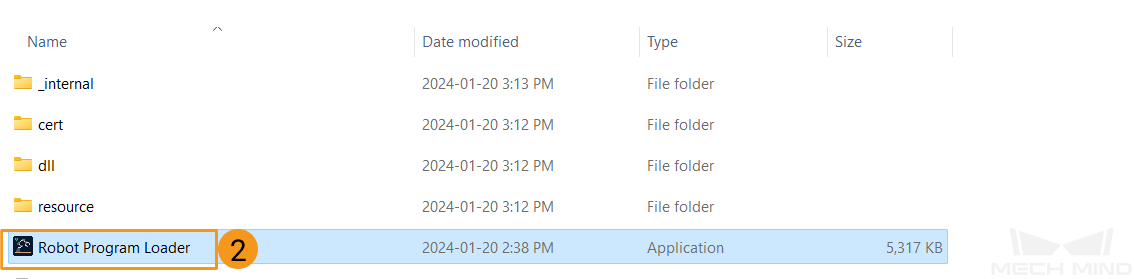
Navigate to the installation directory of Mech-Vision and Mech-Viz, go to the Robot Program Loader folder by using the
Communication Component/tool/Robot Program Loaderpath, and then double-click the Robot Program Loader program to open the loader. The main interface of the loader appears.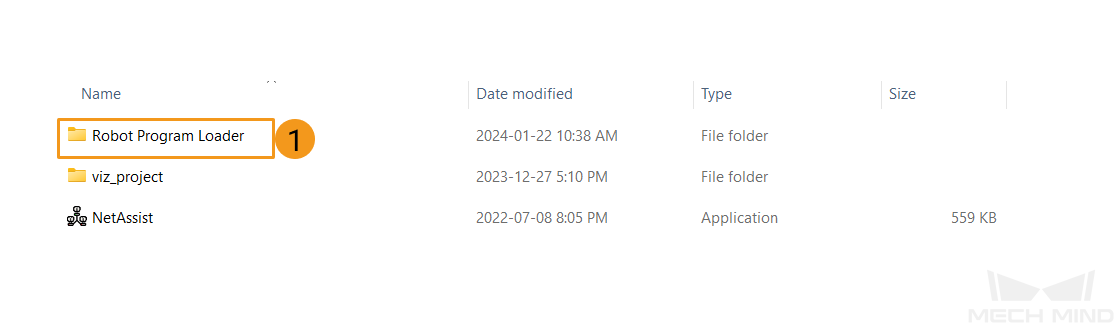
To switch languages in the loader, select a different language from the drop-down list in the upper-right corner and restart the loader for the new language to take effect. -
Select the ABB robot brand, enter the actual robot IP address, and then click Connect.

If the connection fails, click Test network connection in the lower-right corner to troubleshoot the issue. -
In the ABB Program loading interface, select a folder to store the backup files and then click Back up. If the files are backed up, a message that indicates the backup is successful is displayed in the Log section.
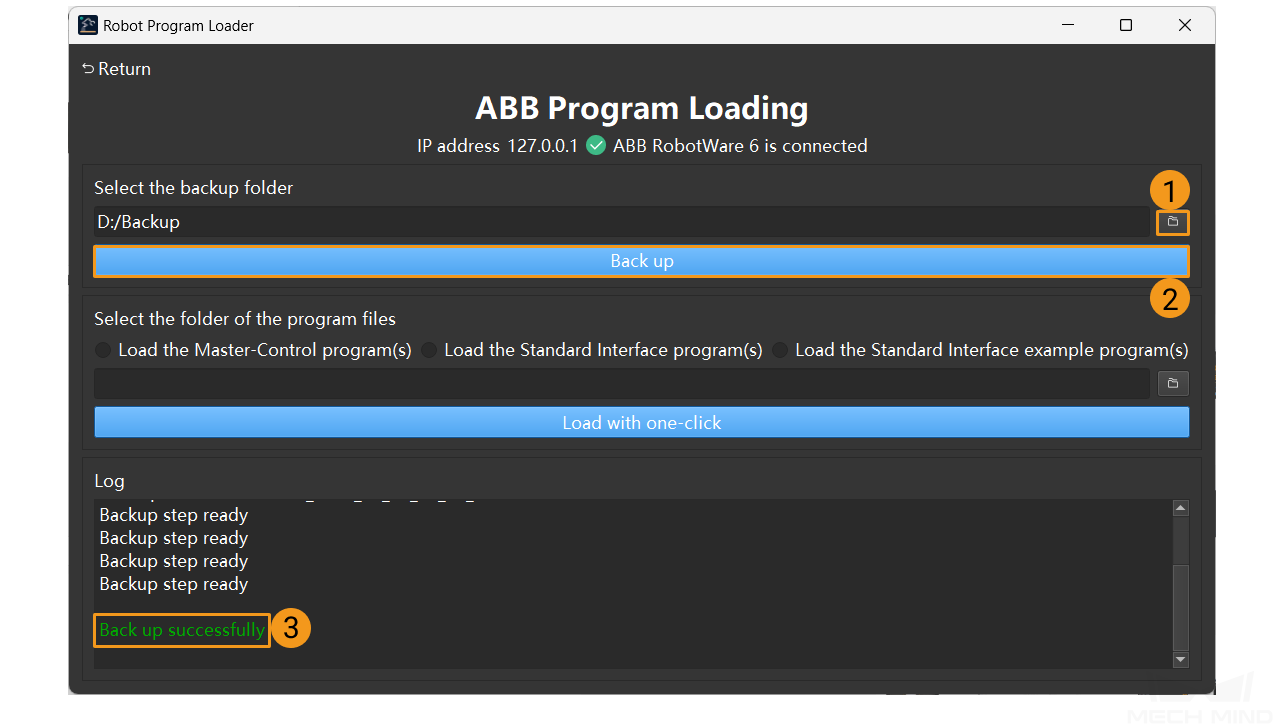
If errors occur in the subsequent loading process, the files can be used to reset the robot system. -
After the backup succeeds, select Load the Standard Interface program to confirm the folder that stores the program files and then click Load with one-click. If the files are loaded to the robot, a message that indicates the program files are successfully loaded appears in the Log section.
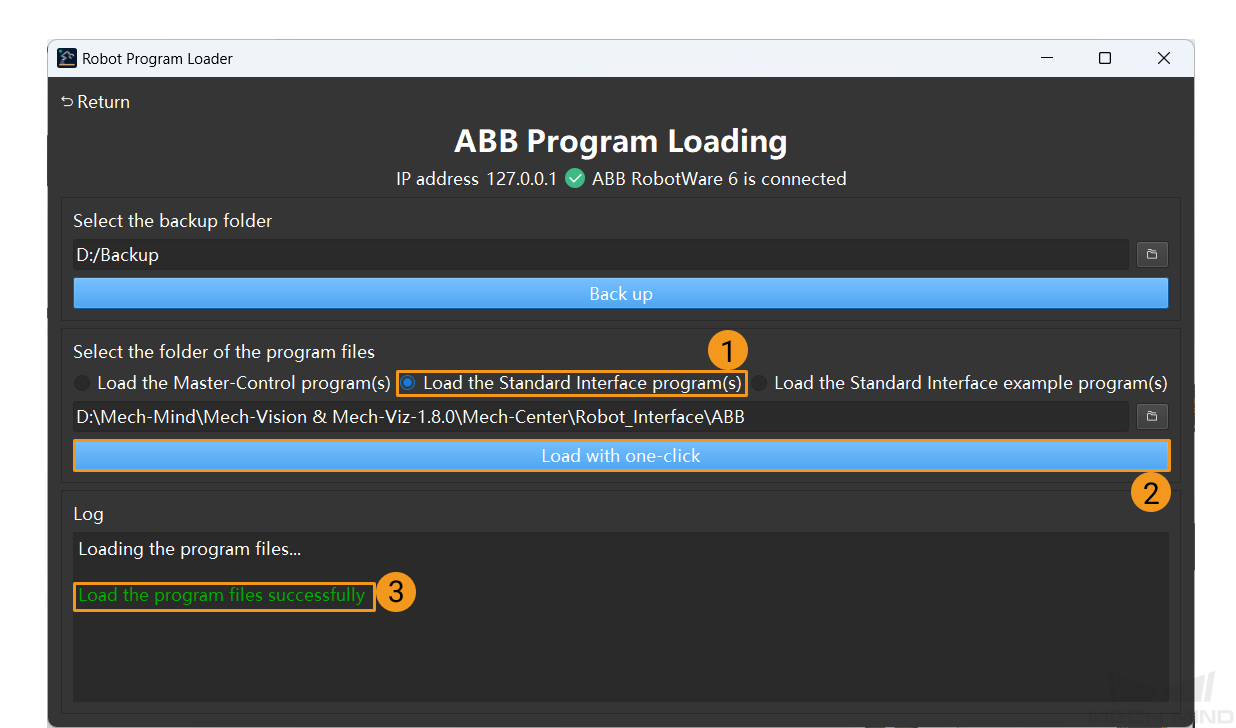
| If you want to load standard interface example programs, select Load the Standard Interface example programs and then click Load with one-click. |
Test Standard Interface Communication
Select and Modify the Program Used for the Communication Test
-
Turn the switch on the controller to the automatic mode.
-
On the teach pendant, tap the menu in the upper-left corner, select , select MM_Com_Test, and then select Show Module.
If you cannot find MM_Com_Test after you select T_ROB1 and program code is displayed, select Tasks and Programs in the upper part. In the Tasks and Programs interface, confirm that T_ROB1 is selected and then select Show Modules to make MM_Com_Test appear. 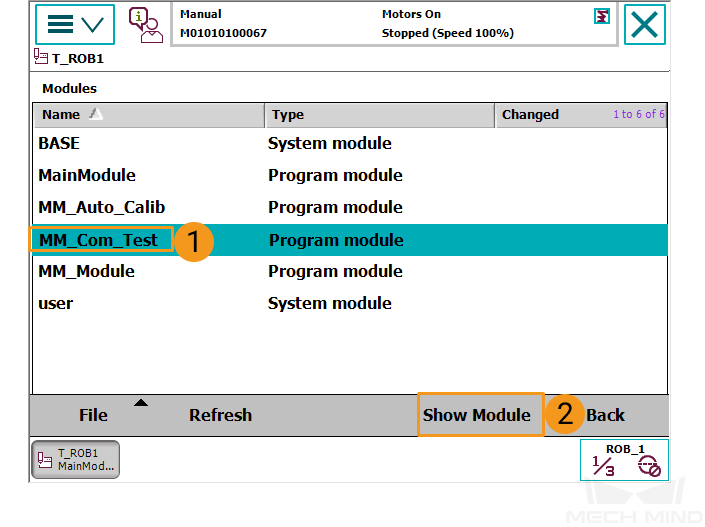
-
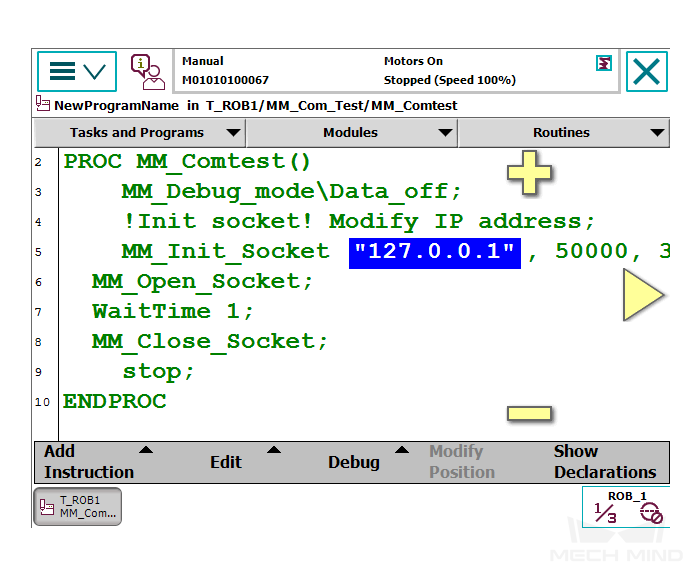
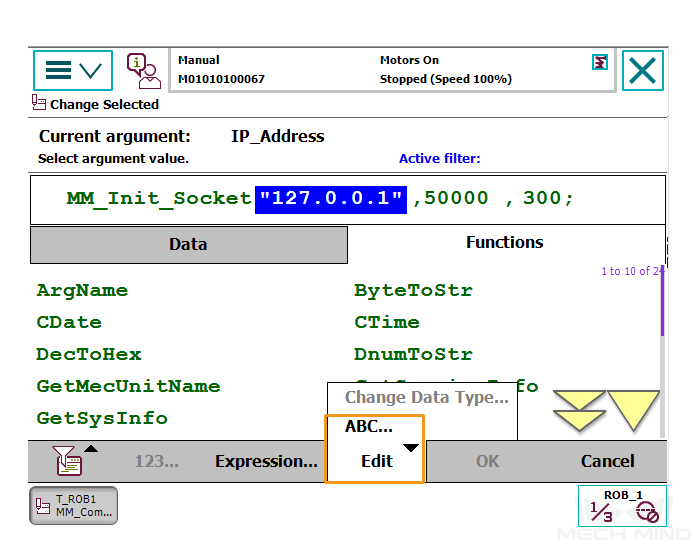
Double-tap the IP address, select , change the IP address to the IP address of the IPC, and then select OK. If the host port number set in Mech-Vision is modified, the port number 50000 here should be changed to the host port number in Mech-Vision.
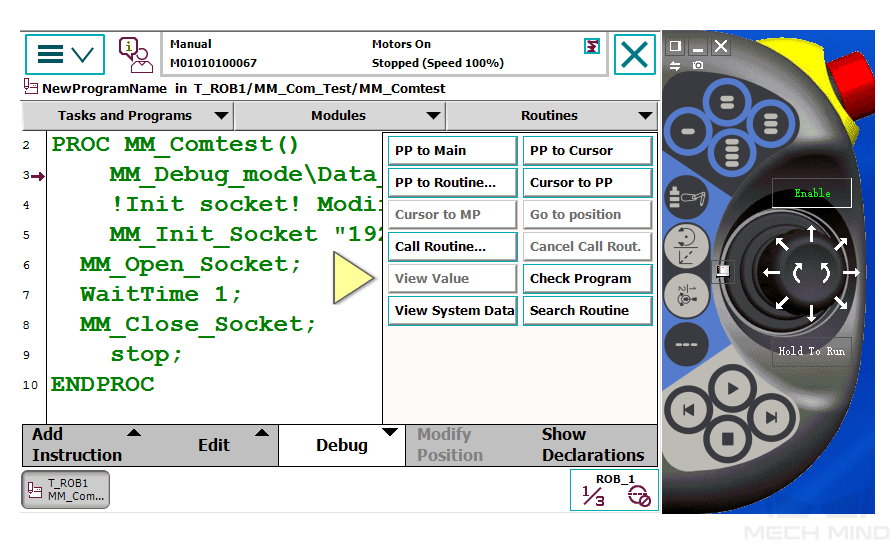
Run the Program and Test Connection
-
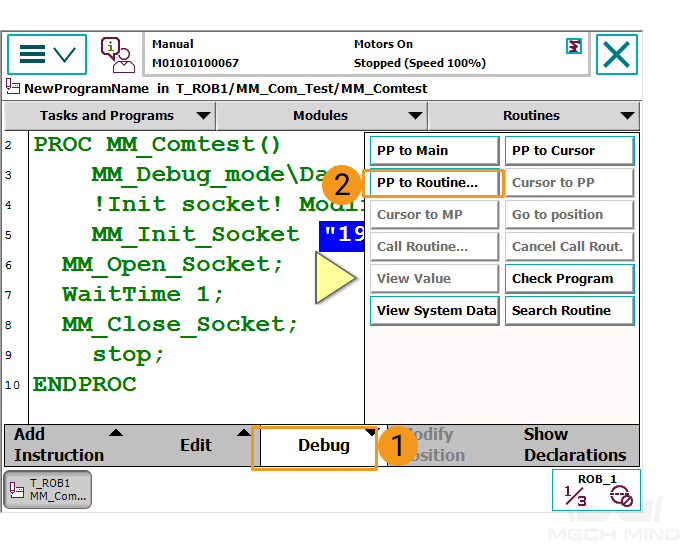
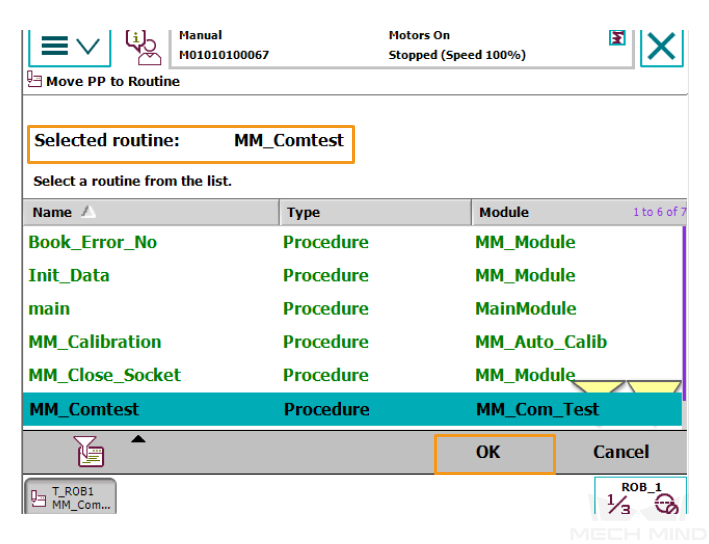
In the following interface, select .
-
Confirm that MM_Comtest is selected and click OK.
-
Keep holding down the enable button on the right side of the teach pendant (ensuring you do not release it during program execution). Then, repeatedly press the following button to manually step through the program until the program pointer reaches line 9.
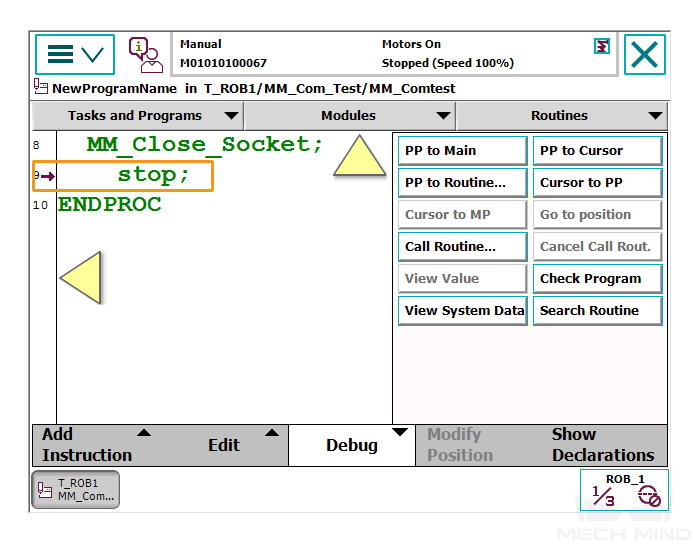
-
Tap the following button to view the following message.
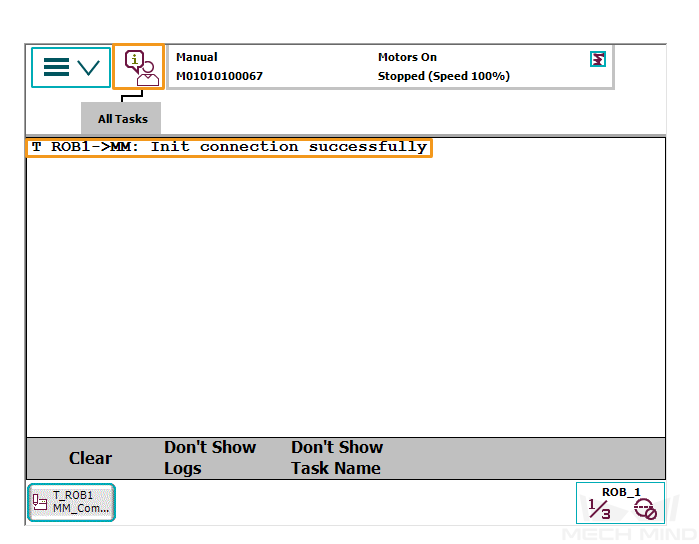
-
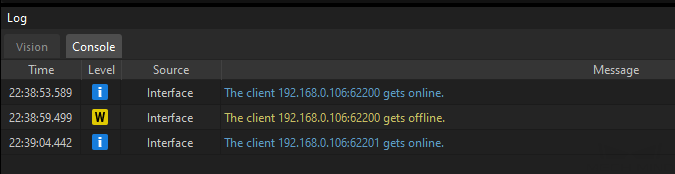
If the communication between the robot and the vision system is set up, a log will be recorded on the Console tab of the Log panel of Mech-Vision.
Now you have loaded the robot Standard Interface program and the configuration files to the robot system to establish the Standard Interface communication between the vision system and the robot.