Master-Control Communication Setup
This guide shows you how to set up Master-Control communication with a YASKAWA robot.
Check Controller and Software Compatibility
-
Confirm that the robot is a 6-axis YASKAWA robot.
-
Confirm that the robot controller model and the system version meet the requirements below.
Controller model System version DX200
DN3.16.00A-00
YRC1000
YAS2.94.00-00
YRC1000micro
YBS2.31.00-00
In this guide, the robot YRC1000 (YAS2.94.00-00) is used. -
Confirm that the Ethernet option has been enabled for the YASKAWA robot.
Click here for instructions
-
Press and hold the MAIN MENU key on the teach pendant, and power on the robot to enter the maintenance mode.
If the robot is already started, please restart the robot while pressing the MAIN MENU key on the teach pendant. 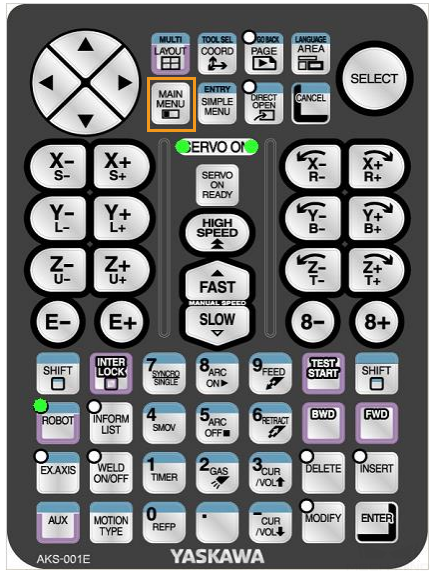
-
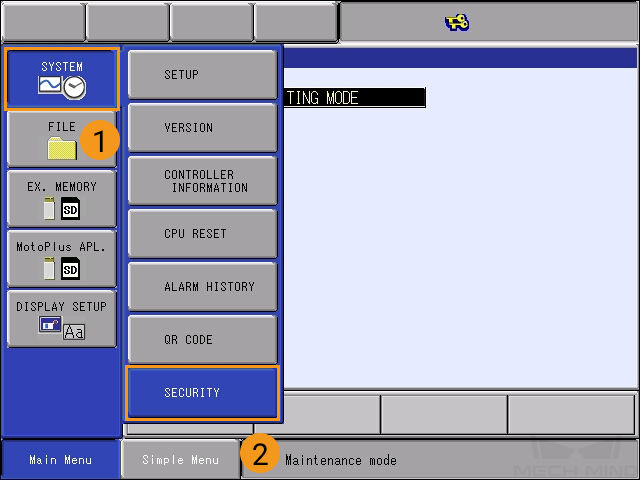
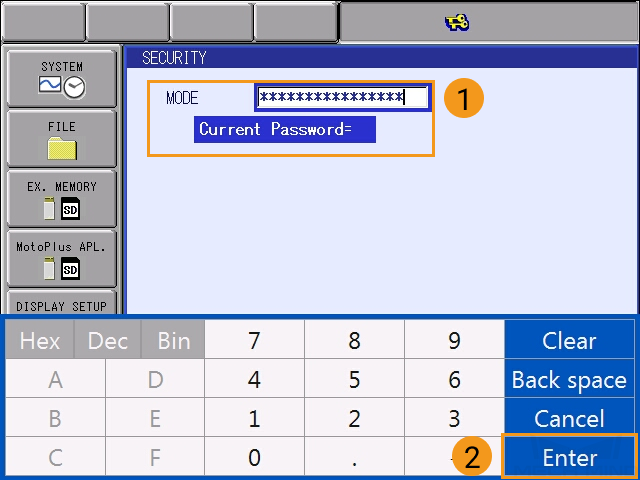
In the maintenance mode, select .
-
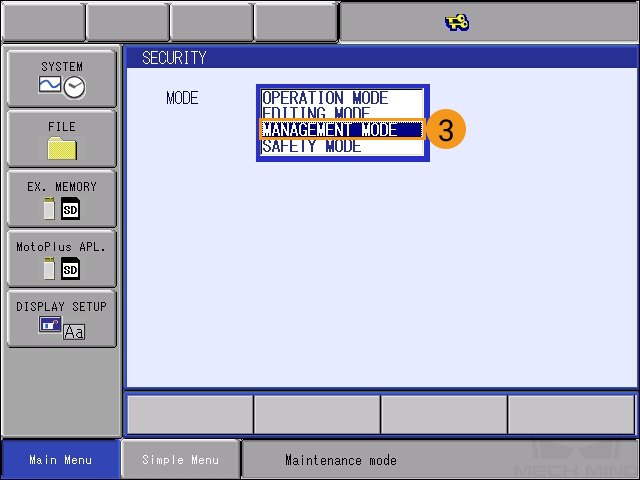
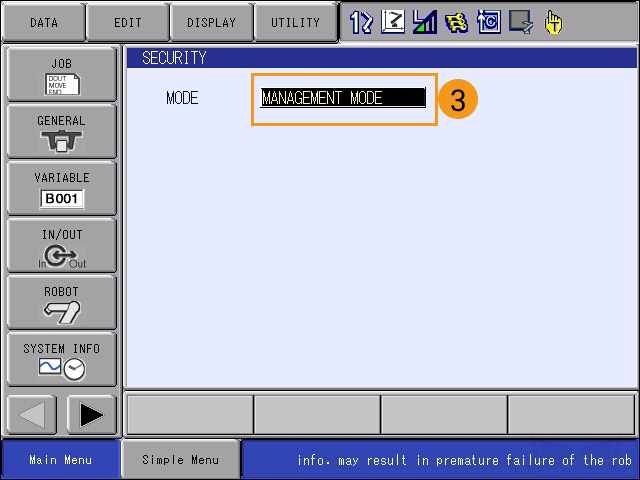
Enter the password (which is sixteen 9s by default), and then select Enter to enter the MANAGEMENT MODE.
-
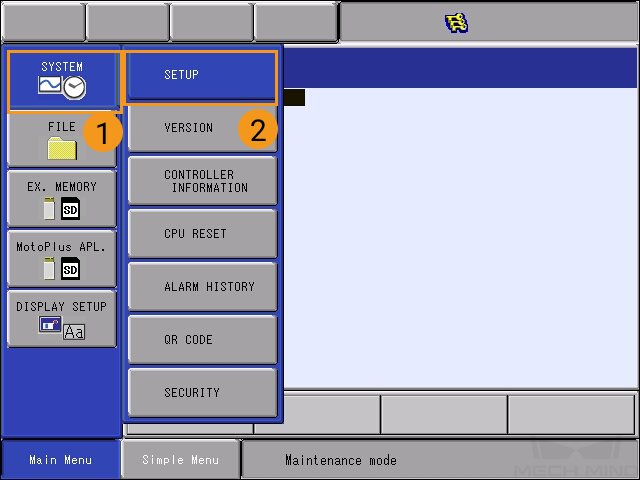
In Main Menu, select .

-
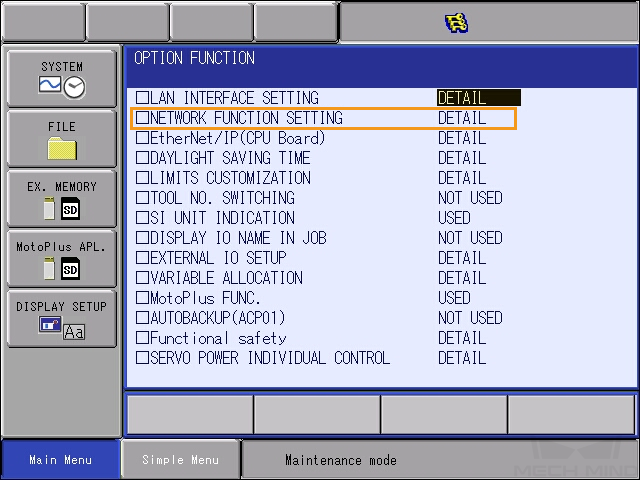
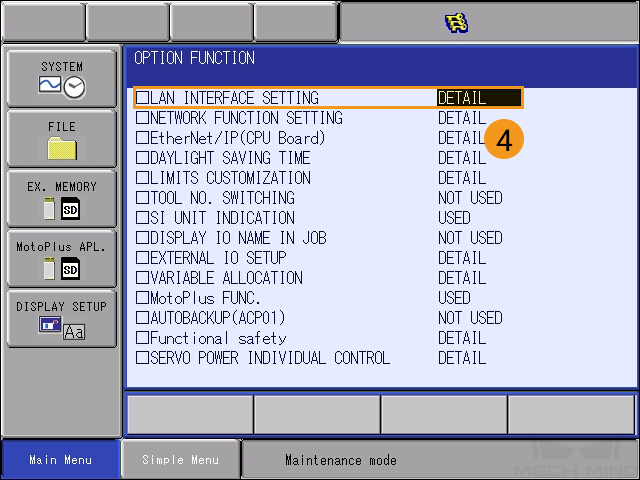
In the OPTION FUNCTION interface, select DETAIL of NETWORK FUNCTION SETTING, and then press SELECT on the teach pendant to enter the NETWORK FUNCTION SETTING interface.
-
Check whether the status of ETHERNET is displayed as USED.
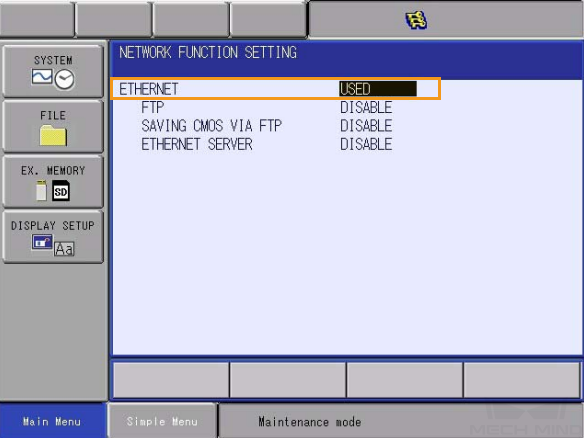
If the status is NOT USED, please contact the robot manufacturer for support.
-
-
Confirm that the MotoPlus option has been enabled for the YASKAWA robot.
Click here for instructions
-
In the MANAGEMENT MODE of the maintenance mode, select on the Main Menu.
-
On the MotoPlus FUNC. SETTING interface, check whether the status of APPLI. AUTOSTART AT POWER ON is ENABLE.
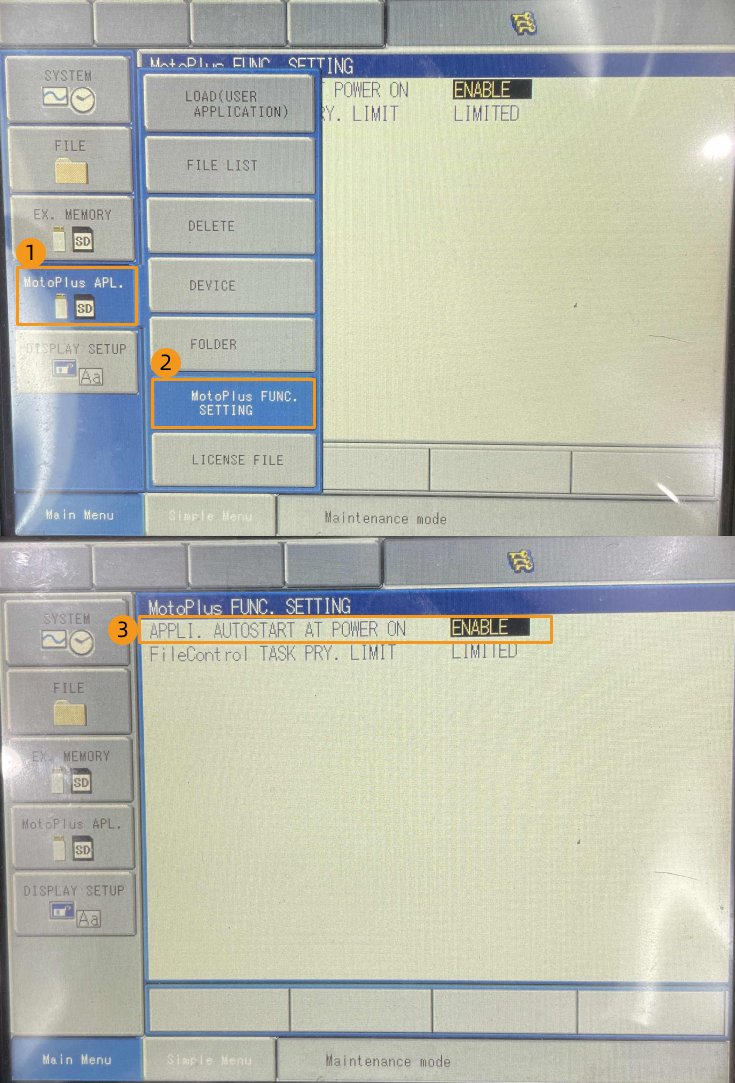
-
If the status is DISABLE, select DISABLE, and press SELECT on the teach pendant to switch the status to ENABLE.
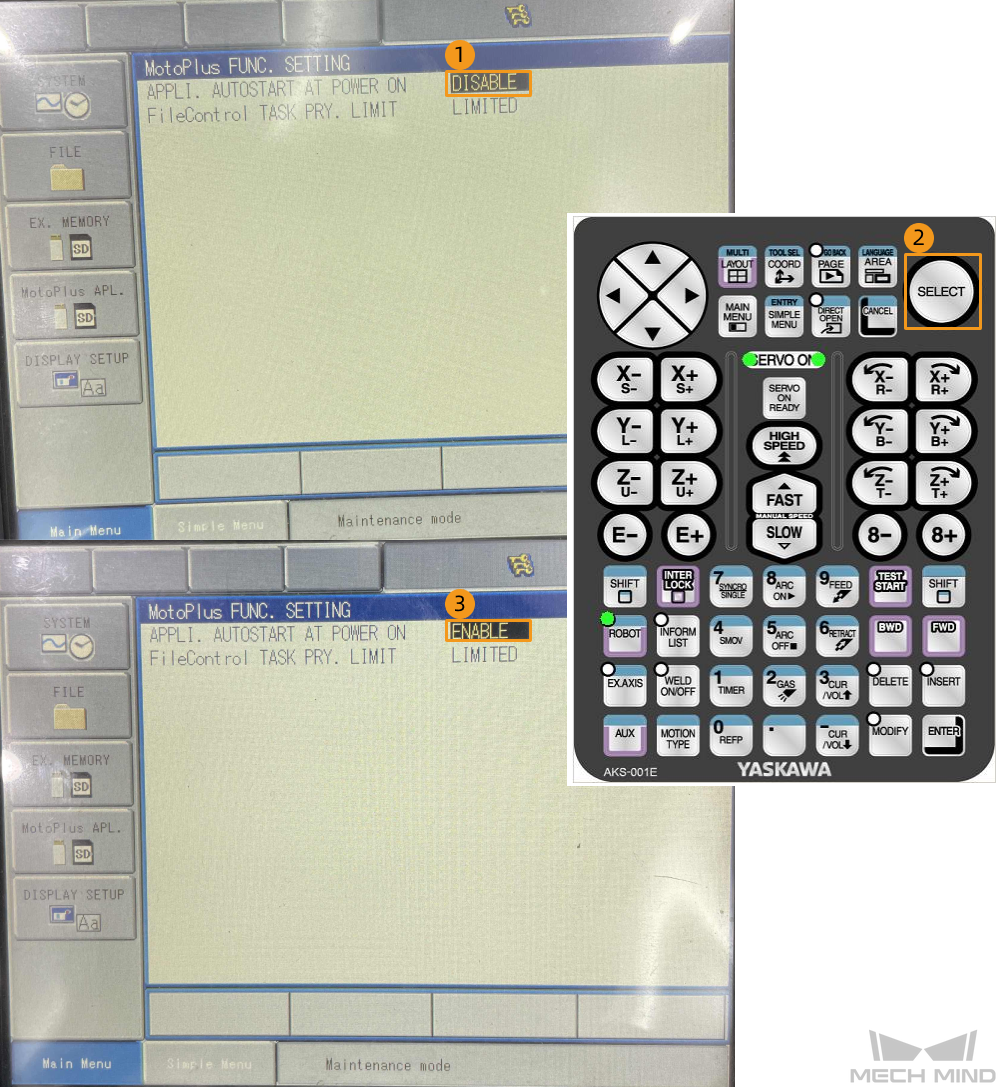
-
|
If the preceding conditions cannot be met, the vision system cannot communicate with the robot through the Standard Interface. Please contact the robot manufacturer for support. |
Set up the Network Connection
Connect the Hardware
If you are using the YRC1000 controller, plug the Ethernet cable of the IPC into the LAN2 (CN106) port on the CPU board of the robot controller. If you are using the DX200 controller, plug the Ethernet cable of the IPC into the CN104 port on the CPU board of the robot controller.
|
For the YRC1000 controller:
|
Set the IP Address
-
Press and hold the
MAIN MENUkey and power the robot to enter the maintenance mode.
The system enters the normal startup mode if you do not press the MAIN MENUkey. -
Select MANAGEMENT MODE.
-
Enter the password (the default password is sixteen 9s), and then click Enter to enter MANAGEMENT MODE.
-
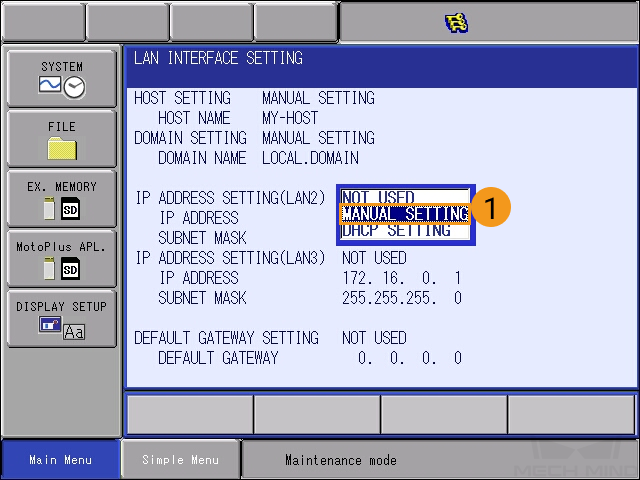
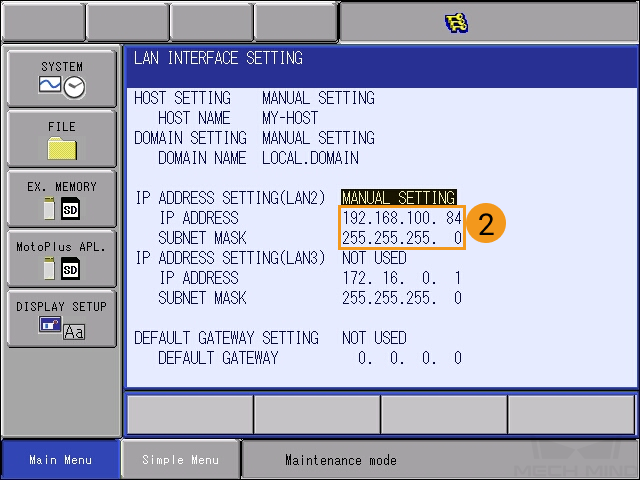
Select . At the OPTION FUNCTION interface, click LAN INTERFACE SETTING.
-
In the drop-down menu of IP ADDRESS SETTING (LAN2), select MANUAL SETTING, and set a proper IP ADDRESS and SUBNET MASK.
-
The IP address of LAN2 should belong to the same subnet as the IPC.
-
The subnet mask should be 255.255.255.0.
-
-
Press the
ENTERkey on the teach pendant, and then click YES in the pop-up message.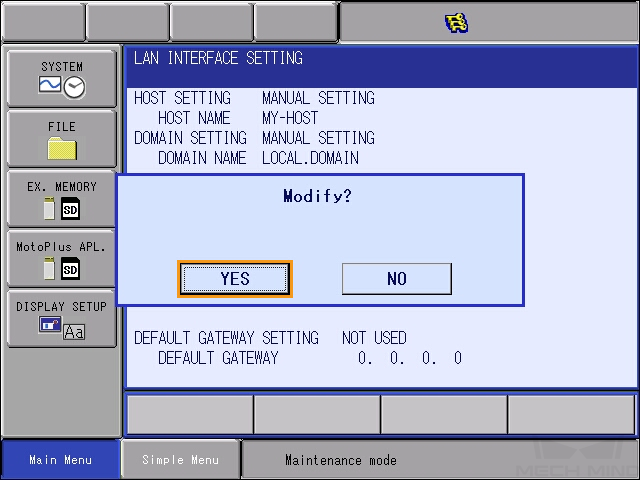
Load the Program Files to the Robot
Prepare the Files
-
Navigate to
Communication Component/Robot_Server/Robot_FullControl/yaskawafrom the installation directory where Mech-Vision and Mech-Viz are installed. Copy the program file (yrc1000.out) and paste it to the root directory of your flash drive.-
The file system of the flash drive must be FAT32.
-
If you are using a DX200 controller, copy the dx200.out file.
-
-
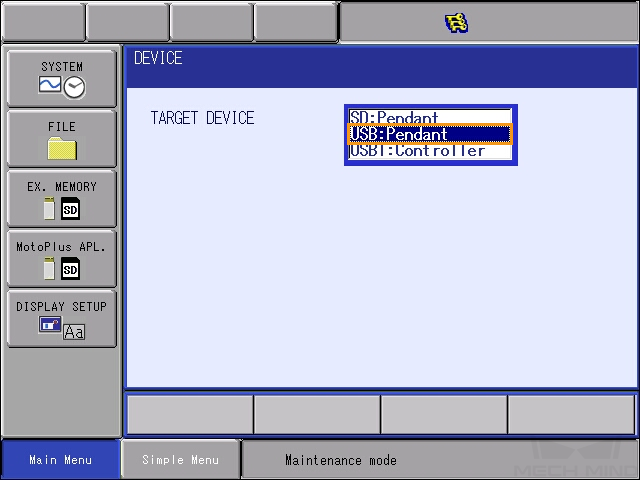
Plug the USB flash drive with the program file into the USB port on the back of the teach pendant.
Copy the program file suitable for the used controller.
Load the Files
-
Under the Maintenance mode, select .

-
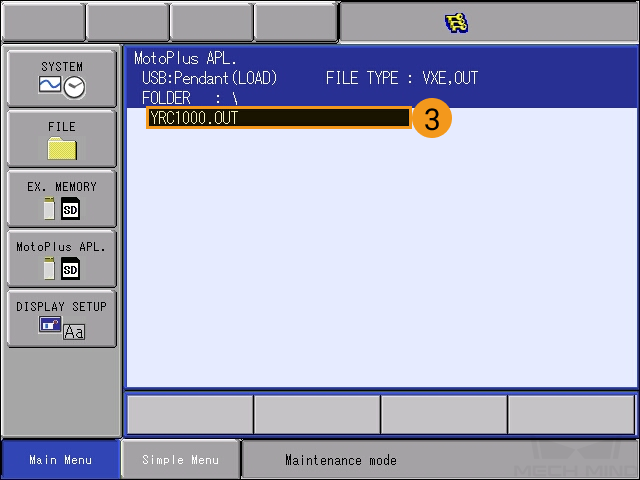
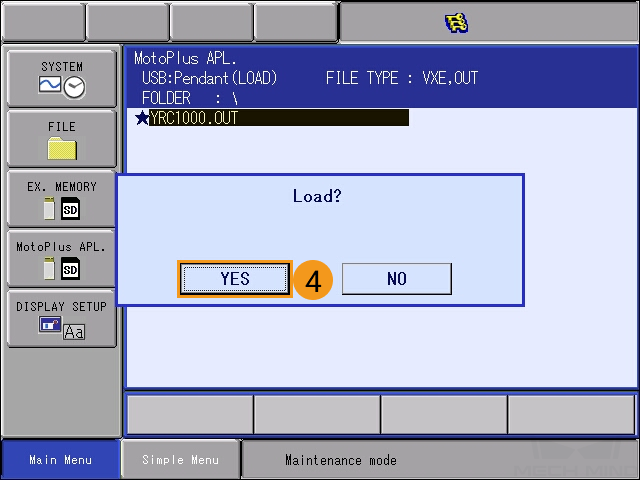
Select . Select the OUT file, press the
ENTERkey, and click YES in the pop-up window to start loading the program.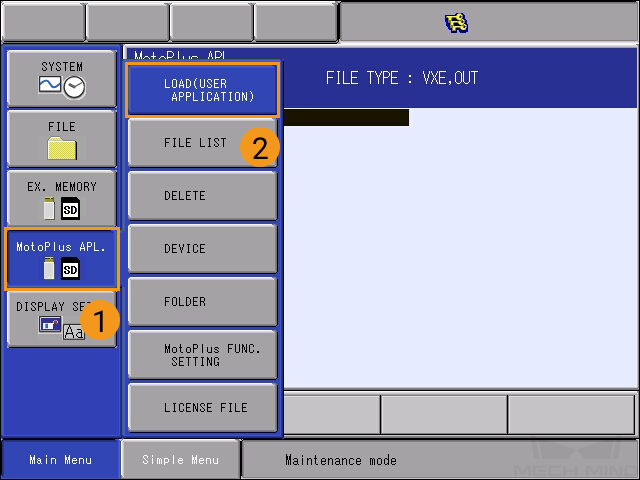
-
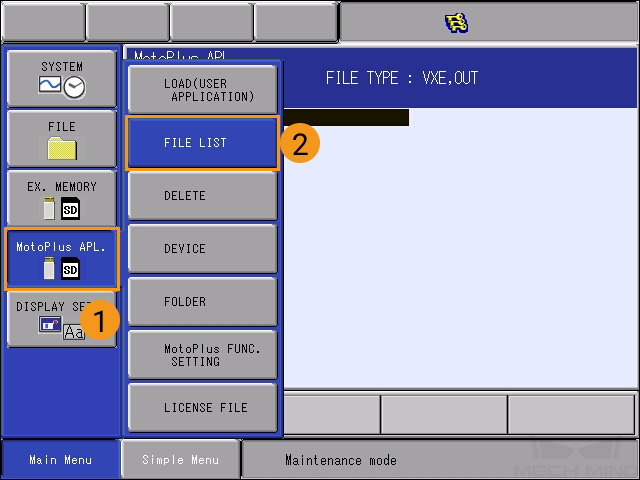
After the installation, select . You can see the installed file here.

-
Restart the controller (without pressing the MAIN MENU key) to enter the normal mode so that the YRC1000.out file can automatically run in the background. Turn the key to the far-left position, and Mech-Viz will be connected to the robot.
When started, the robot will run at the default velocity (100%), a relatively high velocity. To ensure safety, please modify the velocity before triggering the Mech-Viz project.
-
Click .
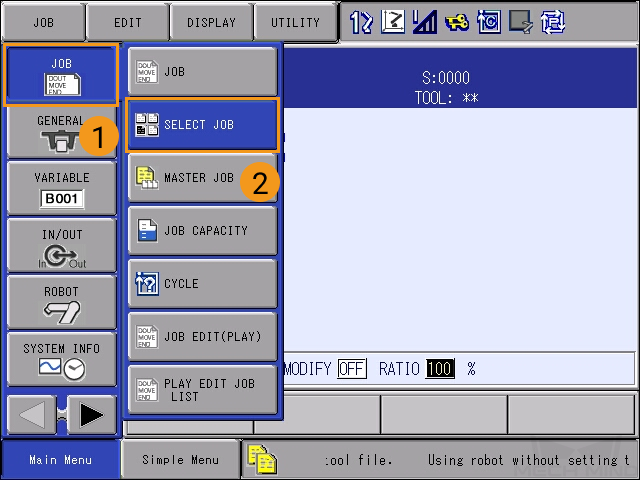
-
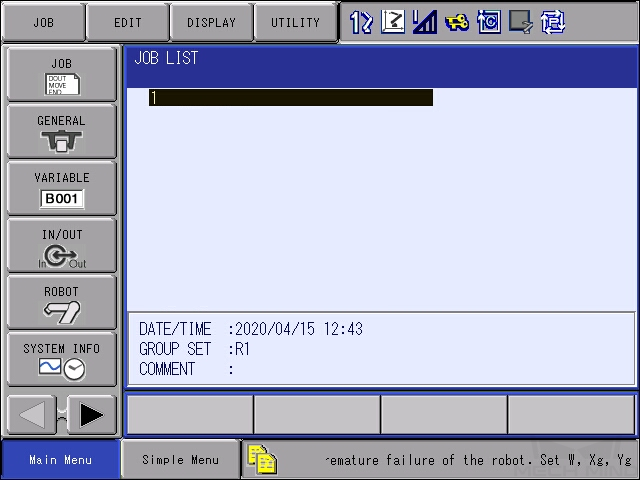
Select any blank job in the job list (or a job that contains the start point), and press the
SELECTbutton on the teach pendant. The following interface will appear.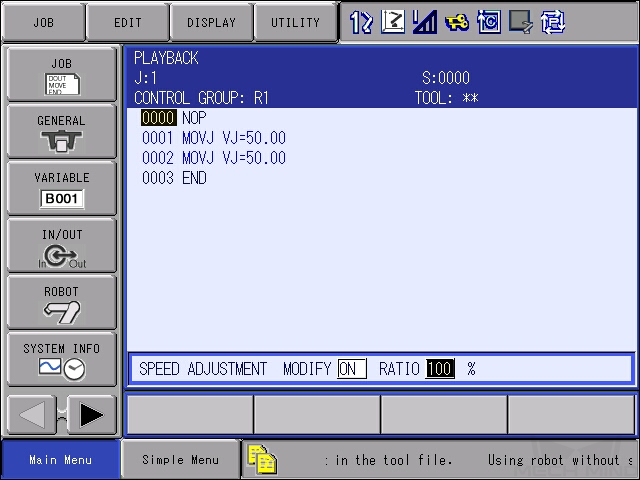
-
Select , and then select the SPEED ADJUSTMENT bar.
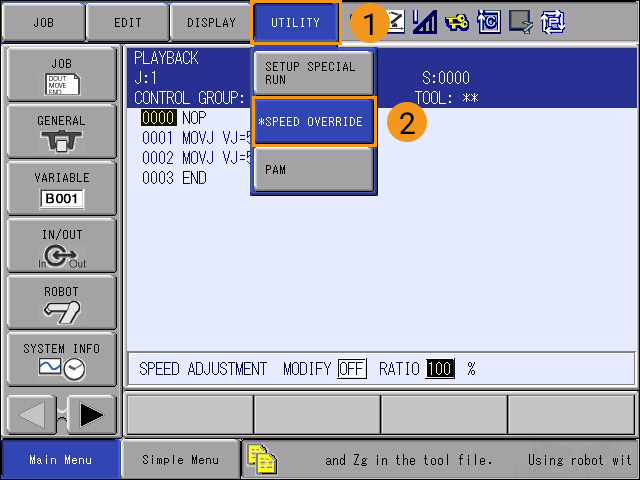
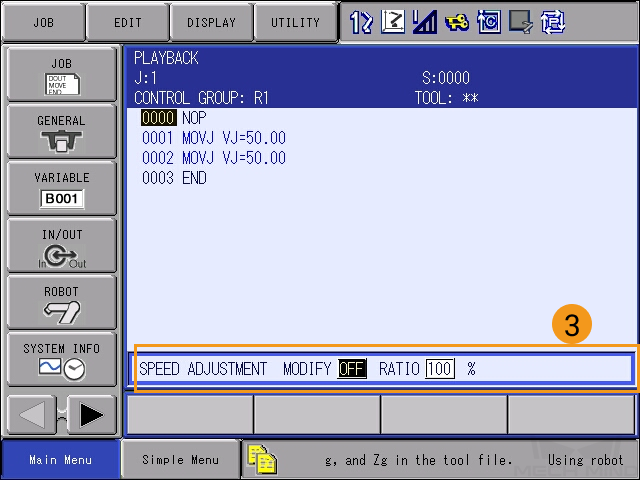
You cannot modify the parameters if the SPEED ADJUSTMENT bar is not selected. -
Press SPEED ADJUSTMENT and then OFF, press the
SELECT keyto switch MODIFY to ON.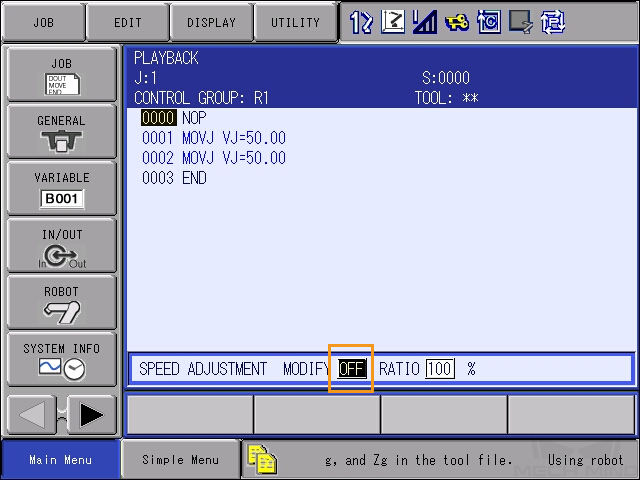
You cannot adjust the velocity if MODIFY is not switched to ON. -
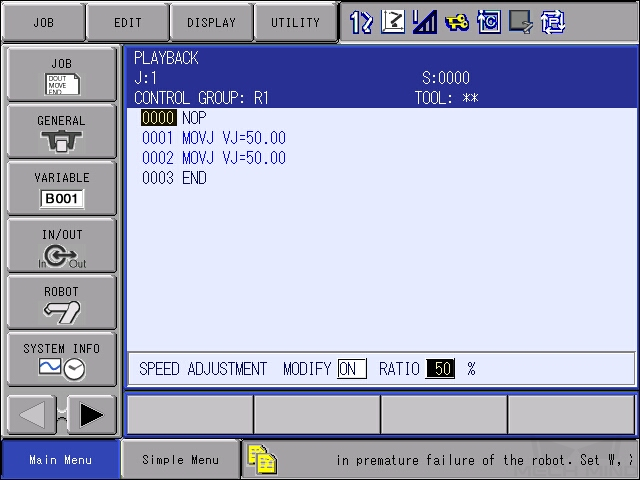
Similarly, press the number after RATIO, and press the
SELECTkey to change the velocity ratio. Press theEnterkey to save the change.
-
The interface after the velocity is adjusted is as follows.
Test Master-Control Communication
Create a Mech-Viz Project
-
Open Mech-Viz, press Ctrl+N on the keyboard to create a new project. Select the robot model corresponding to your real robot brand and model on the interface as shown below.
-
Press Ctrl+S and create or select a folder to save the project.
-
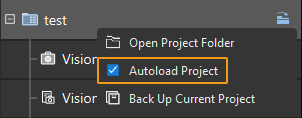
Right-click the project name in the left panel in Mech-Viz and select Autoload Project.
Connect to the Robot
-
Click Master-Control Robot on the toolbar of Mech-Viz.
-
Input the IP address of the real robot in Robot IP address (the IP address in the picture is only an example). Click Connect the robot.

If Mech-Viz successfully connects the real robot, the current status will change to Connected. Meanwhile, the icon in the toolbar will turn from blue to green.
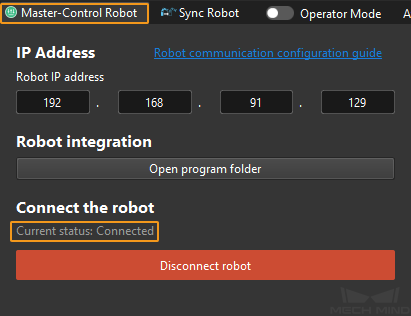
If the connection fails, please double-check the robot IP address.
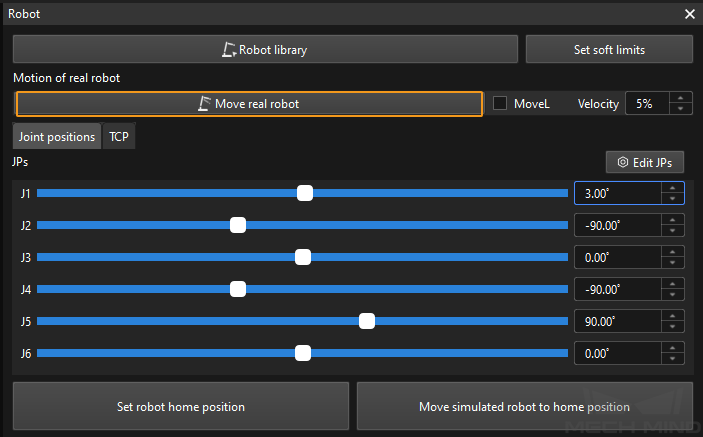
Move the Robot
-
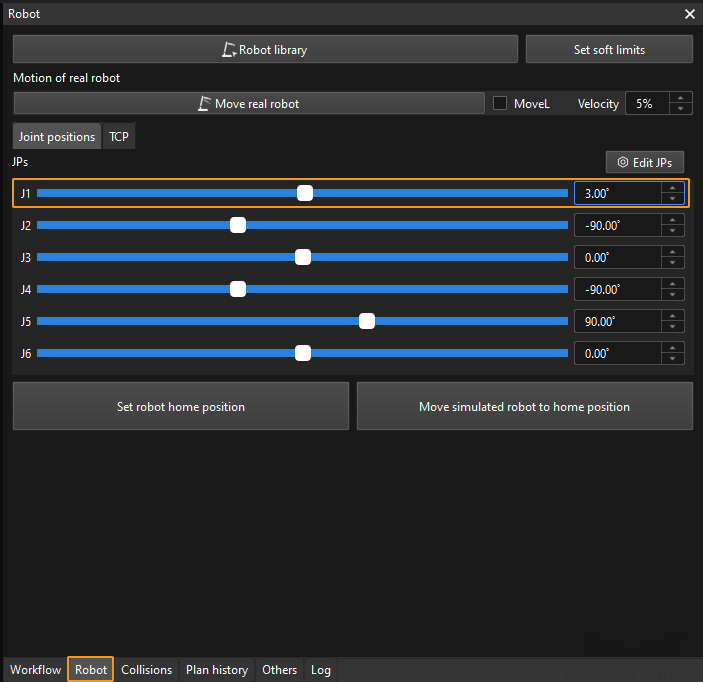
In the toolbar of Mech-Viz, change the “Vel.” (velocity) and “Acc.” (acceleration) parameters to 5%.

-
Click Sync Robot in the toolbar, and you can synchronize the poses of the simulated robot in the 3D simulation space with the poses of the real robot. Then click Sync Robot again to unselect it.

-
In the Robot tab, slightly adjust the value of “J1”, for example, from 0˚ to 3˚. This operation will move the simulated robot.
-
Click Move real robot and check if the real robot has moved. If the real robot has reached the JPs set for the simulated robot, the master-control communication is working.
When moving the robot, please ensure the safety of personnel. In the case of an emergency, press the emergency stop button on the teach pendant!