Elite Automatic Calibration
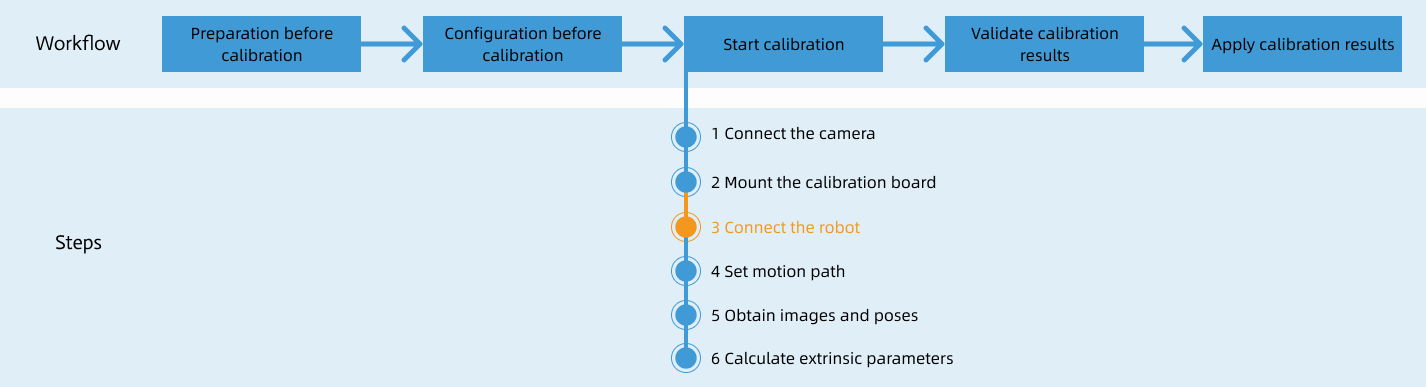
After you set up Standard Interface communication, you can connect the robot to perform automatic calibration. The overall workflow of automatic calibration is shown in the figure below.
Special note
During the calibration procedure, when you reach the Connect the robot step and the Waiting for robot to connect... button appears in Mech-Vision, perform the steps below on the robot side. After you perform the steps, proceed with the remaining steps in Mech-Vision.
|
|
Before proceeding, please make sure that:
|
1. Open Needed Variables
The tool center point (TCP) of the calibration point is stored in the variable V099, and the corresponding joint positions are stored in P099. Open variables V099 and P099 according to the steps below before calibration.
-
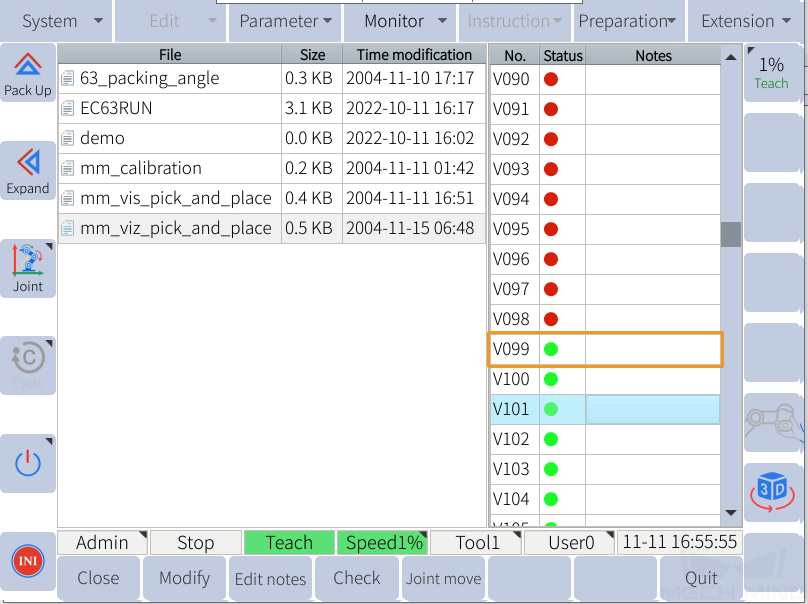
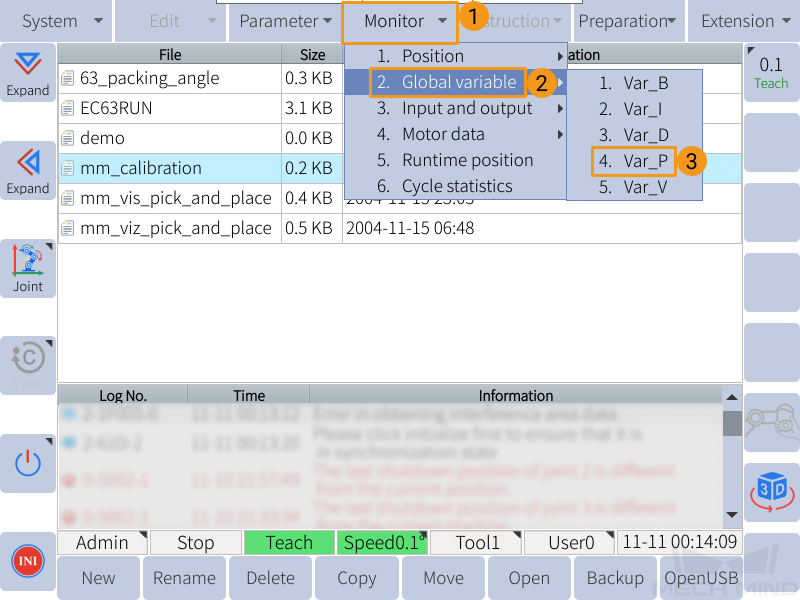
On the teach pendant, press to check if the variable V099 is open. If the dot in the Status column is red, the variable is not opened.
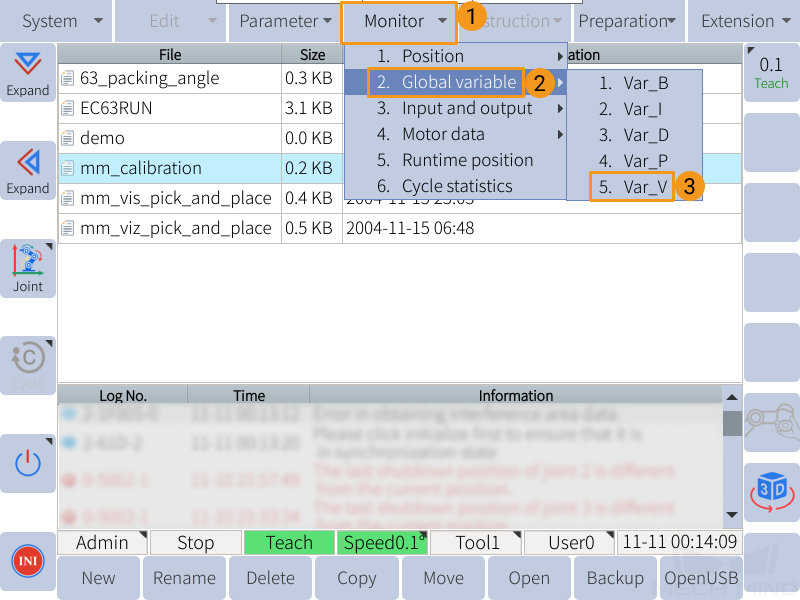
Select a closed variable, and press Open in the lower left to open it.
-
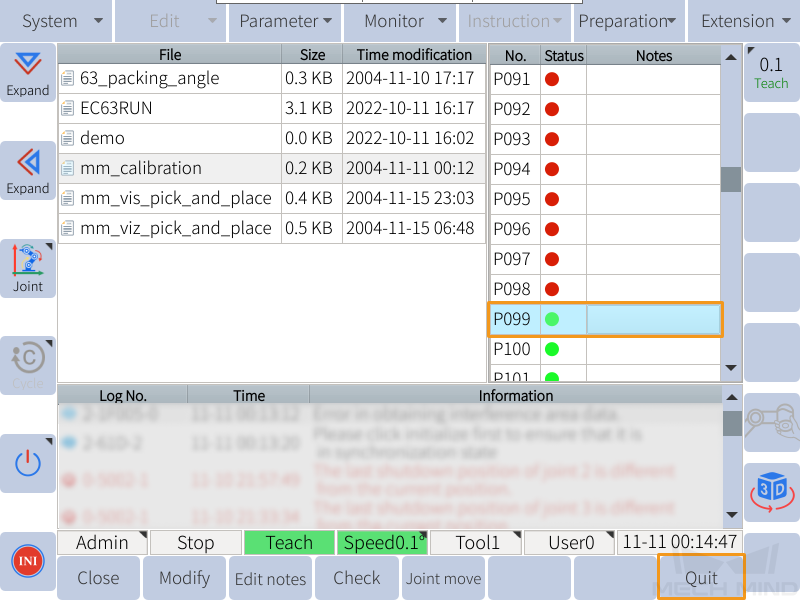
Similarly, press and open variable P099. Press Quit to return to the home page.
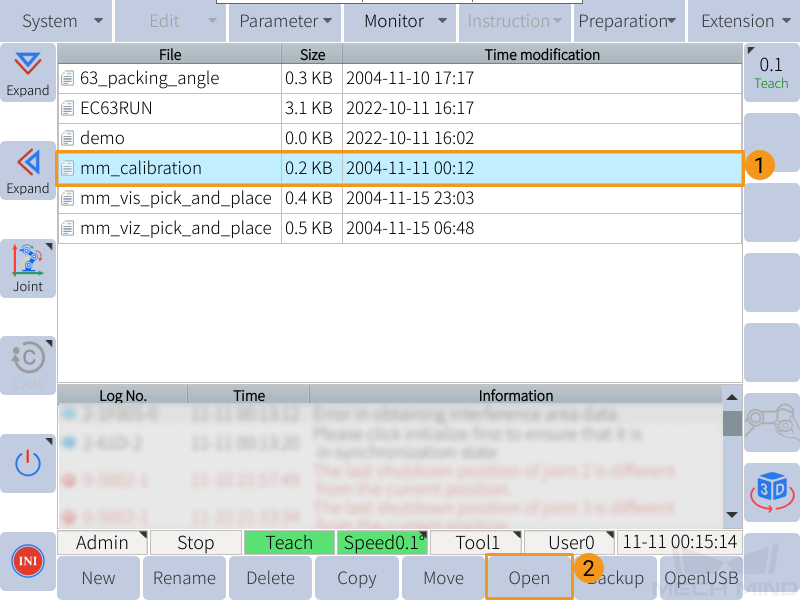
2. Teach Calibration Start Point
-
On the home page, select the mm_calibration program, and press Open.
-
Manually move the robot to the calibration start point.
You can use the position of the robot in the Check the Point Cloud Quality of the Calibration Board step as the calibration start point.
-
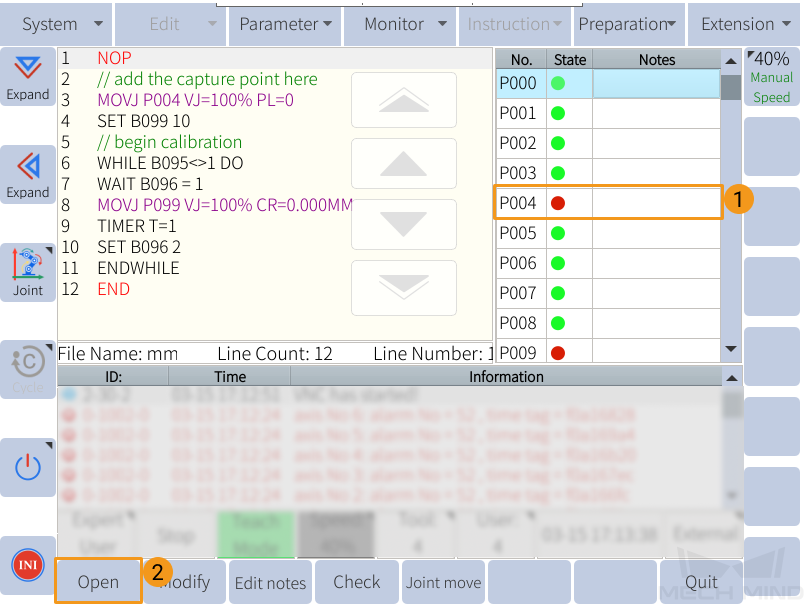
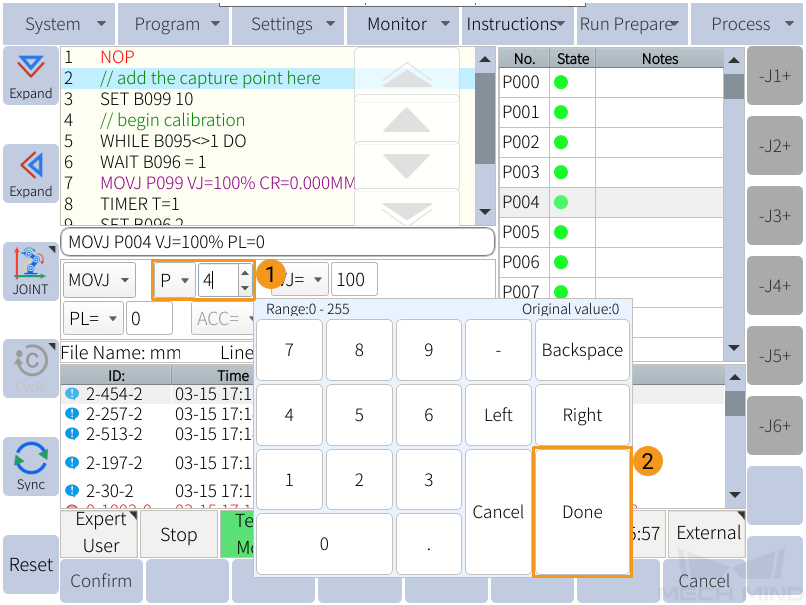
On the teach pendant, press , and select the variable to store the calibration start point (P004 is used in the following figure).
-
If the variable is closed, press Open to store the calibration start point.
-
If the variable is opened, press Close first and then Open to store the calibration start point.
-
-
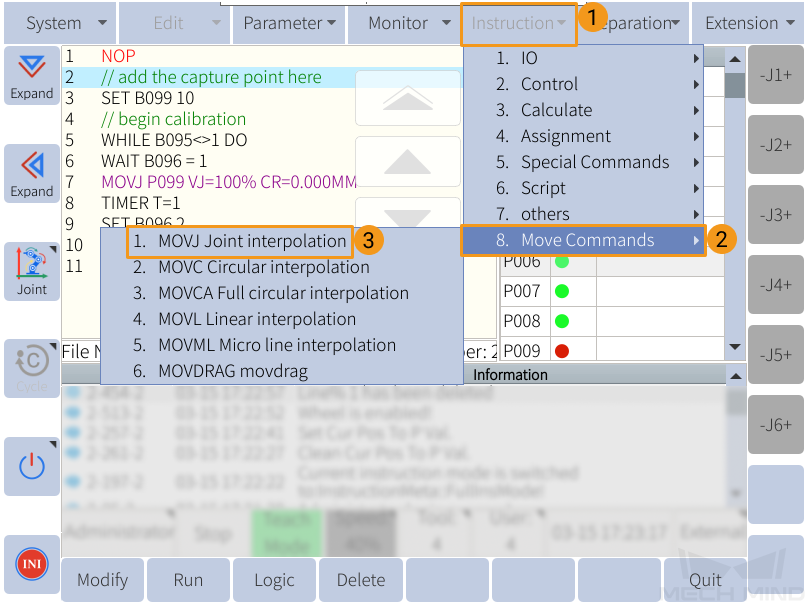
Select the second line in the mm_calibration program, and press .
-
Select the P variable that stores the calibration start point, and press Done. Press the yellow SERVO ON switch at the back of the teach pendant, and press OK in the lower left to confirm inserting the move instruction.

-
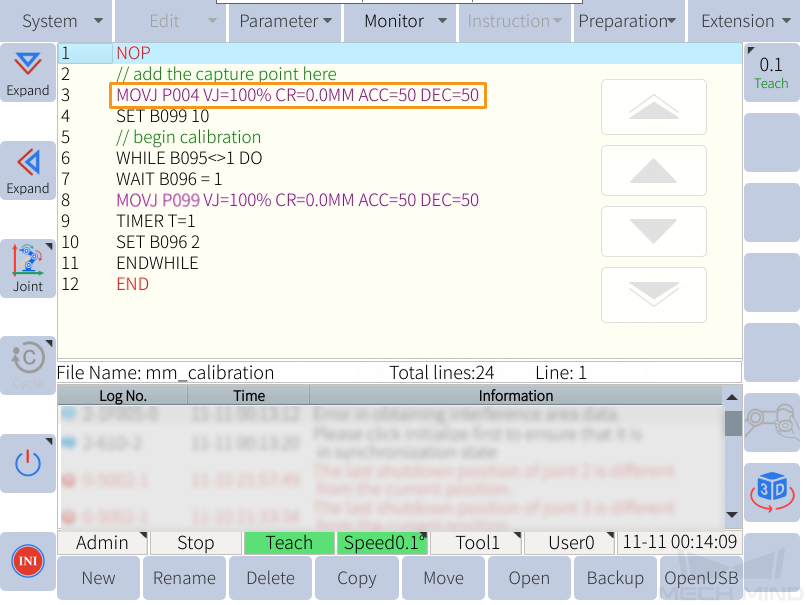
If the MOVJ instruction is successfully inserted, you can see the following command in line 3 of the program.
|
Select the type of move instructions (MOVJ or MOVL) according to the actual situation. If using MOVJ instruction, store the calibration start point in a P variable in the form of JPs; If using MOVL instruction, store the calibration start point in a* V variable* in the form of TCP. |
3. Run Calibration Program
-
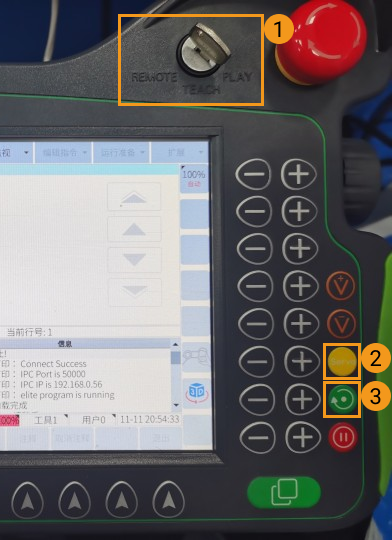
Move the cursor to the first line of the program, and turn the key to PLAY.
-
Press the yellow button in the lower right of the teach pendant to start the servo motors, and then press the green button to run the program automatically.
-
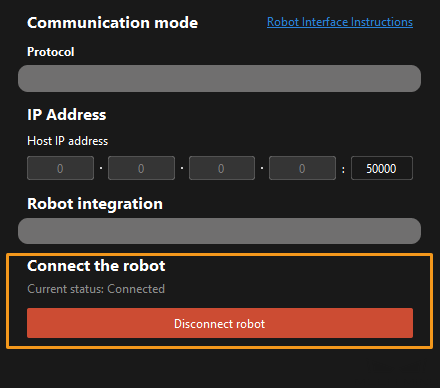
When, in the Configuration window in Mech-Vision, the current status changes to connected and the button Waiting for the robot to connect... changes to Disconnect robot, click Next at the bottom.
-
Perform Step 4 of Start calibration (which is Set motion path) and the subsequent operations based the following links.
-
If the camera mounting mode is eye to hand, see this document and proceed with the relevant operations.
-
If the camera mounting mode is eye in hand, see this document and proceed with the relevant operations.
-