YASKAWA Automatic Calibration
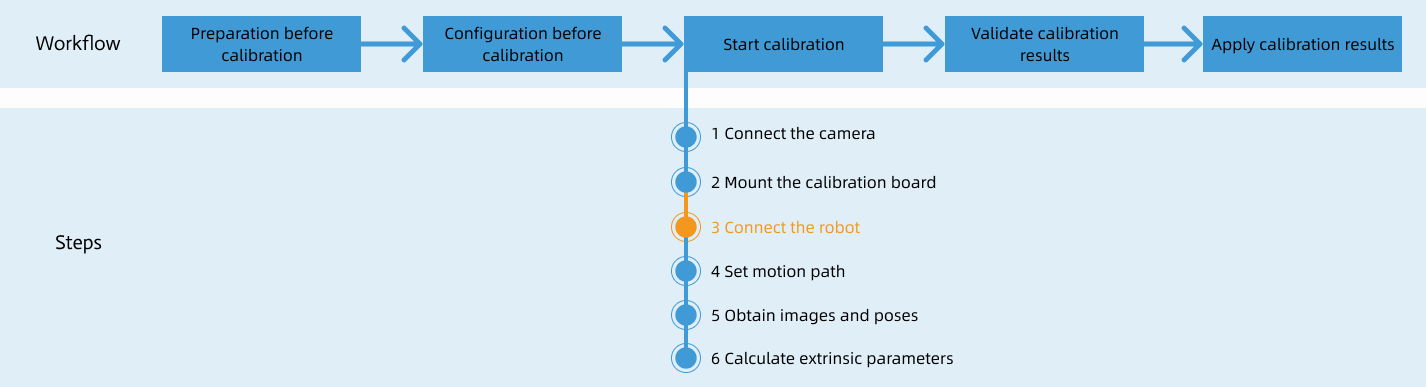
After you set up Standard Interface communication, you can connect the robot to perform automatic calibration. The overall workflow of automatic calibration is shown in the figure below.
Special note
During the calibration procedure, when you reach the Connect the robot step and the Waiting for robot to connect... button appears in Mech-Vision, perform the steps below on the robot side. After you perform the steps, proceed with the remaining steps in Mech-Vision.
|
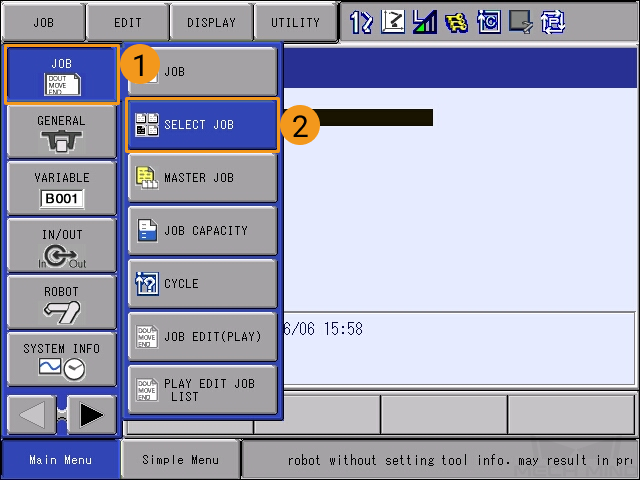
1. Select and Modify Calibration Program
-
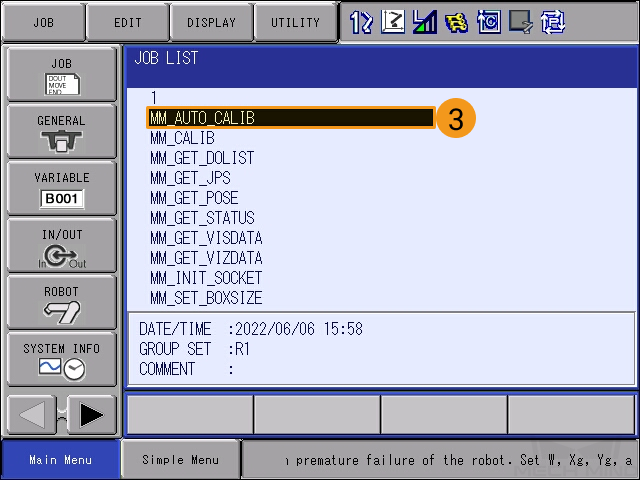
Select and move the cursor to MM_AUTO_CALIB in the JOB LIST.
-
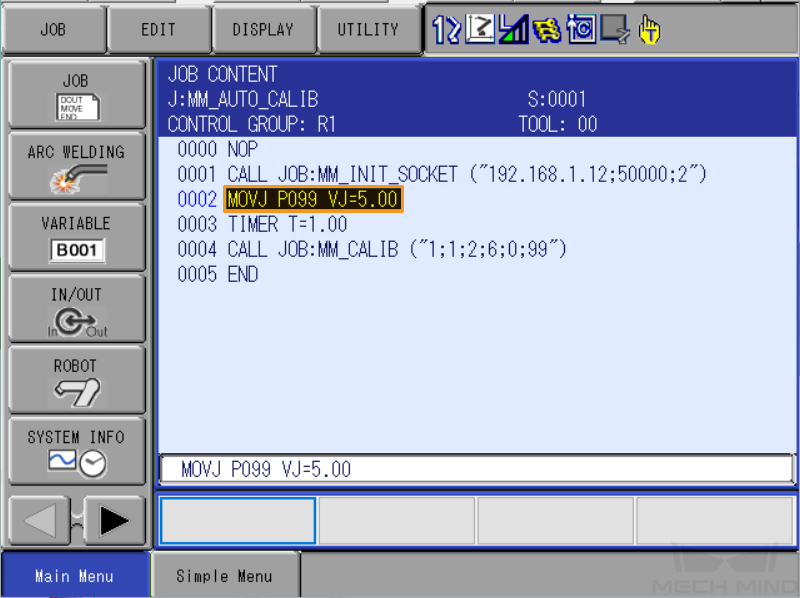
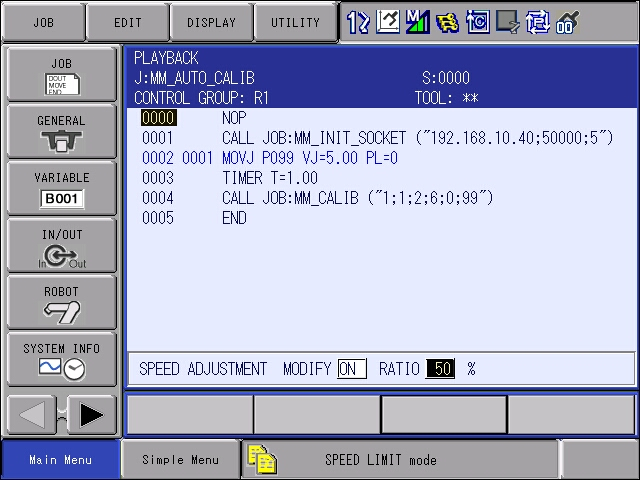
After you select this program file, press SELECT on the teach pendant to enter the following interface.
-
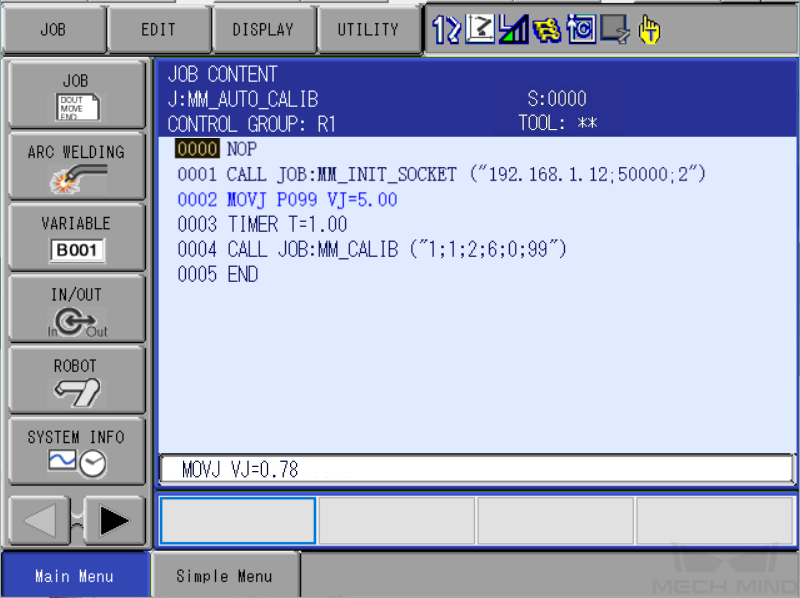
Select the content of line 0001, and then select the IP address and port number in the textbox at the bottom. Press ENTER to enter the edit interface.
-
Change the IP address to that of the IPC. If the host port number set in Mech-Vision is modified, the port number 50000 here should be modified accordingly to make it consistent with the host port number set in Mech-Vision. After the modifications are completed, press the ENTER key at the bottom right of the teach pendant twice to return to the program content interface.
2. Teach Calibration Start Point
-
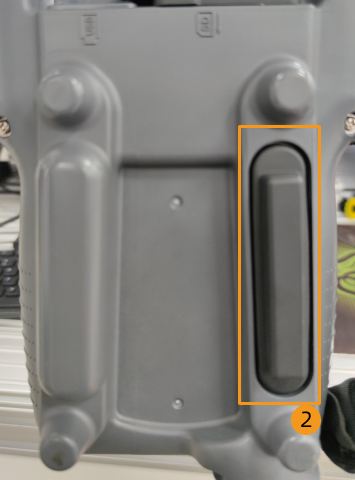
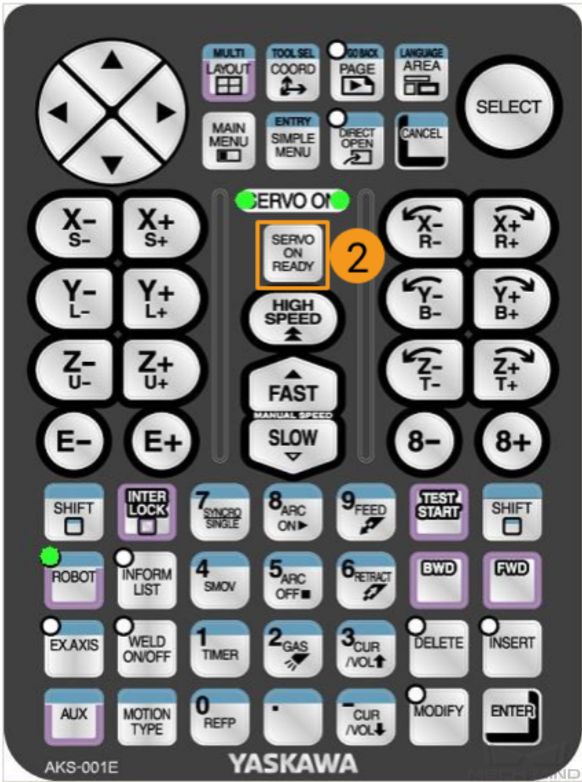
Press the SERVO ON READY key on the teach pendant, press and hold the enable switch on the back of the teach pendant, and then manually move the robot to the calibration start point.
You can use the position of the robot in the Check the Point Cloud Quality of the Calibration Board step as the calibration start point.

-
Move the cursor to the MOVJ P099 VJ=5 line and press the DIRECT OPEN key on the teach pendant.
-
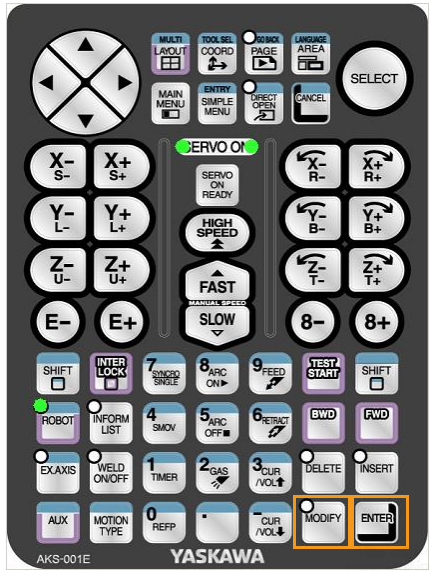
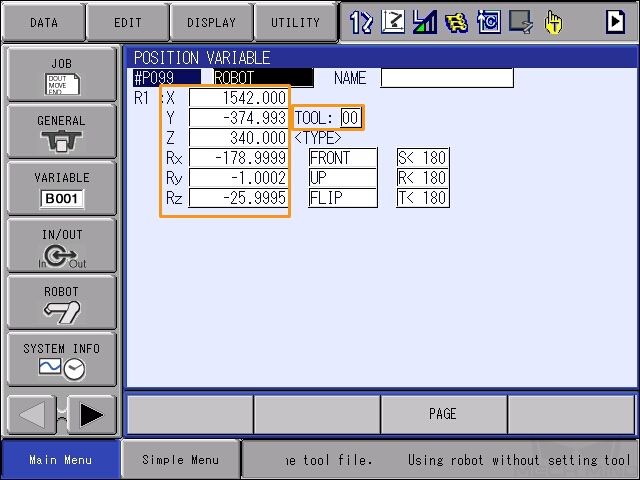
After pressing the SERVO ON READY key on the teach pendant, hold down the enable switch on the back of the pendant with one hand (wait until the other hand finishes the operation before releasing it). With the other hand, press the MODIFY key and then the ENTER key to update position variable P099 to the current position. Make sure that the data type of P099 is set to the robot type and the tool is 00.
-
If the P099 variable stores flange poses or tool poses, the data format for the P099 variable should be set to the robot type.
-
If the P099 variable stores joint positions, the data format for the P099 variable should be set to the joint or pulse type.
-
The X, Y, Z, Rx, Ry, and Rz values for TOOL 00 must be set to 0 in advance.
-
-
Press DIRECT OPEN on the teach pendant again to return to JOB CONTENT.
3. Run Calibration Program
-
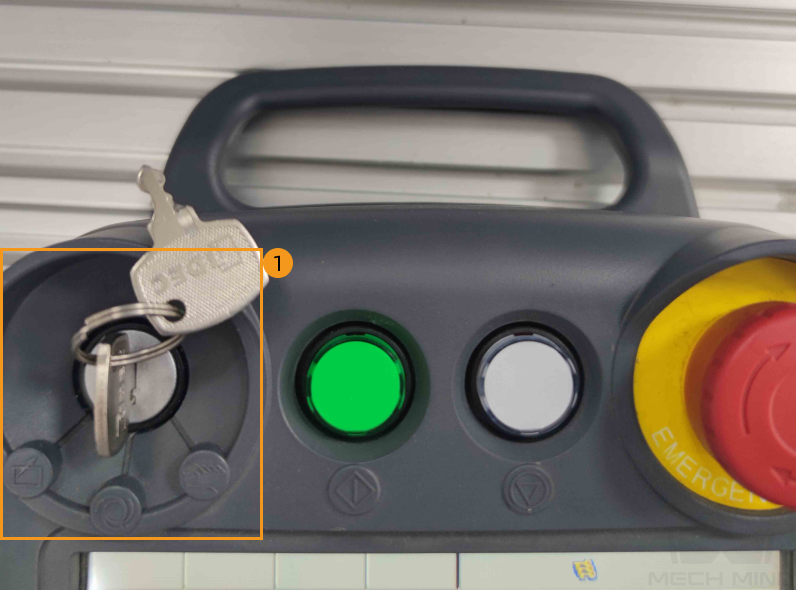
Move the cursor back to line 0000, turn the mode switch to PLAY mode, and then press SERVO ON READY on the teach pendant.
To adjust the speed for low-speed operation, follow the steps below.
-
In the teach pendant interface, select . Move the cursor to MM_AUTO_CALIB in the JOB LIST and press the SELECT key on the teach pendant.
-
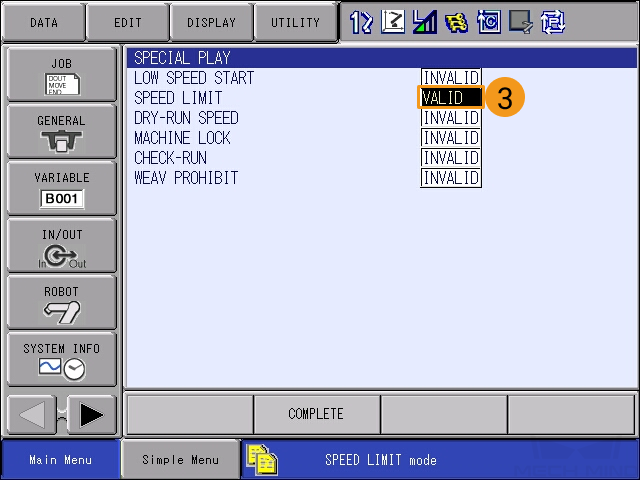
Select , and then select the SPEED ADJUSTMENT bar at the bottom.
You cannot modify the parameters if the SPEED ADJUSTMENT bar is not selected. 
-
In the SPEED ADJUSTMENT bar, select OFF and then press the SELECT key to change OFF to ON.
-
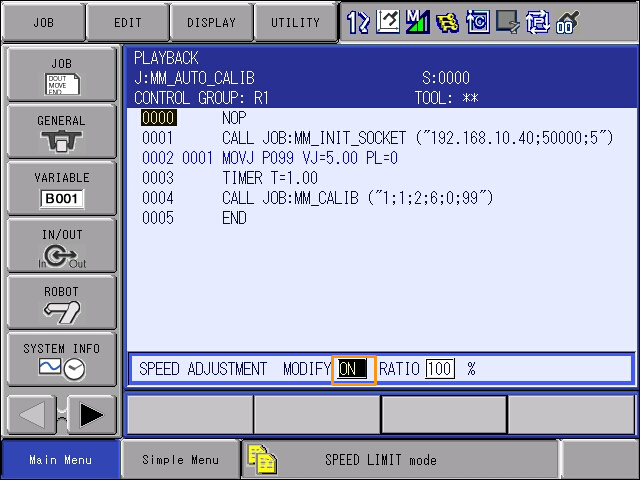
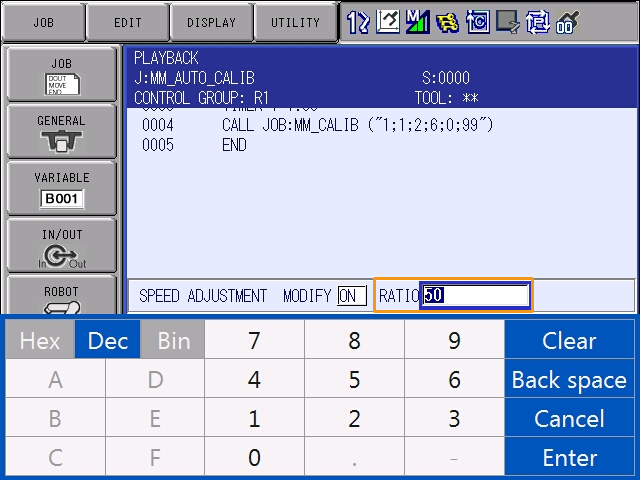
Then, adjust the ratio. Similarly, press the number after RATIO and then press the SELECT key to change the velocity ratio. After a new ratio is specified, press the ENTER key on the teach pendant to save the change.
-
The interface after the velocity is adjusted is as follows.
-
-
Press the green START button on the teach pendant. The program starts to run when the button lights up.
In case of emergency, press PAUSE or STOP. 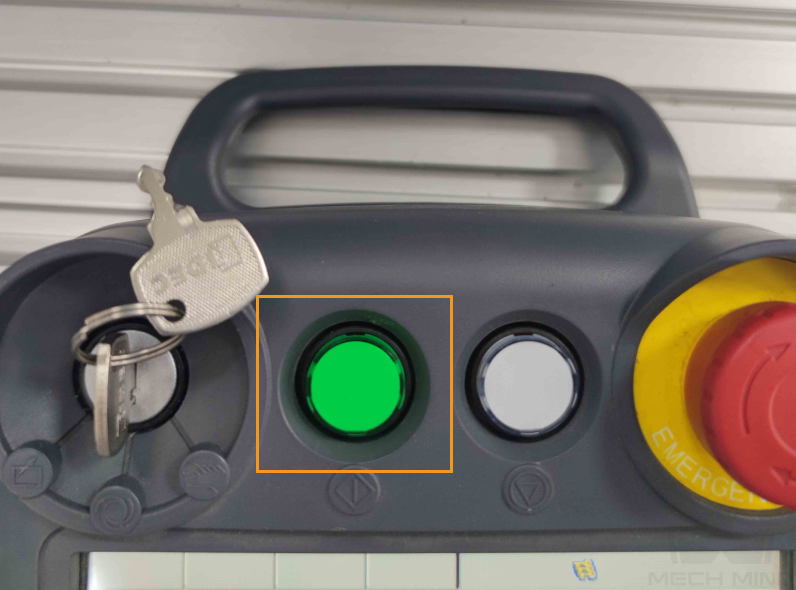
-
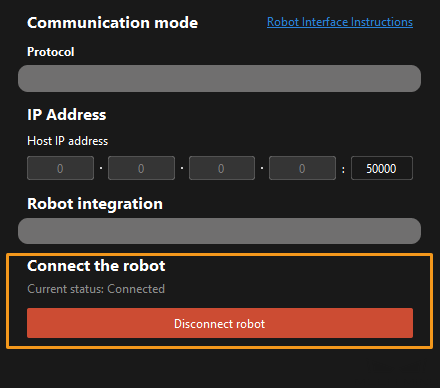
When, in the Configuration window in Mech-Vision, the current status changes to connected and the button Waiting for the robot to connect... changes to Disconnect robot, click Next at the bottom.
-
Perform Step 4 of Start calibration (which is Set motion path) and the subsequent operations based the following links.
-
If the camera mounting mode is eye to hand, see this document and proceed with the relevant operations.
-
If the camera mounting mode is eye in hand, see this document and proceed with the relevant operations.
-