KUKA Automatic Calibration
This topic introduces the process of automatic calibration via Standard Interface communication between the KUKA robot and Mech-Mind Vision System.
Preparation before Calibration
Make preparation before calibration according to the camera mounting method. You may refer to the links below.
-
If the camera is mounted in the Eye to Hand method, refer to Preparation before Calibration in Automatic Calibration in the Eye-to-Hand Setup.
-
If the camera is mounted in the Eye in Hand method, refer to Preparation before Calibration in Automatic Calibration in the Eye-in-Hand Setup.
Pre-calibration Configuration
-
Open Mech-Vision, and click the Camera Calibration (Standard) button in the toolbar. The Configuration before Calibration window will be prompted.
-
In the Select how to calibrate window, select the New calibration radio button, and then click the Next button.
-
In the Select calibration task window, select Hand-eye calibration for listed robot from the drop-down list box, click the Select robot model button to select the robot model used by the project, and then click the Next button.
-
In the Select camera setup window, select the camera mounting method in this project, and then click the Next button.
-
In the Calibration method and robot control window, select Automatic and Standard Interface, and then click the Next button.
-
In the Communication mode window, keep the default value of Protocol. Click the Start interface service button in the Connect the robot area, and the message on this button will change to Waiting for the robot to connect....
-
The port number for the Host IP address parameter is 50000 by default. If the port number determined in the communication solution is not 50000, please change it as required.
-
After finishing the previous steps, do not close the Configuration before Calibration window.
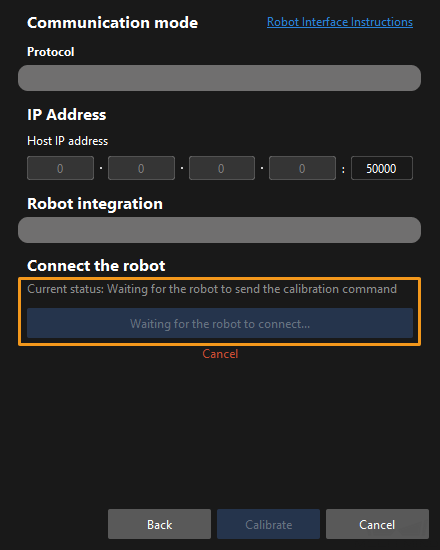
-
Select the Calibration Program
| Before starting, ensure that you have set up Standard Interface communication. |
-
Switch to the Administrator mode following the instruction on switching to the Expert mode.
-
On the teach pendant, open the
KRC:\R1\mmfolder, select mm_module.src, and press Select.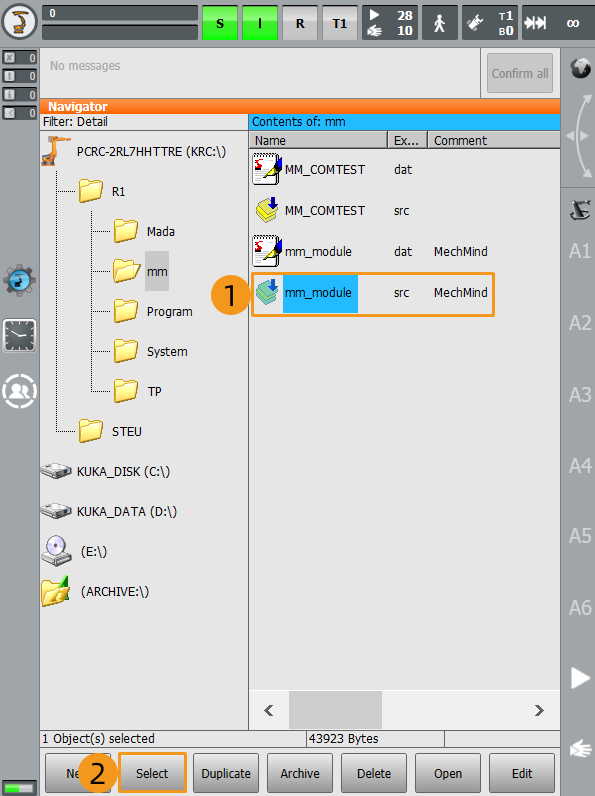
Teach the Calibration Start Point
-
Move the robot to the start point for calibration.
-
Click the line containing “PTP P0 Vel=100 % PDAT0 Tool[1]:Tool1 Base[0]” and move the cursor to this line. Click Block selection. When the cursor appears in the front of the line, click Touch-Up.
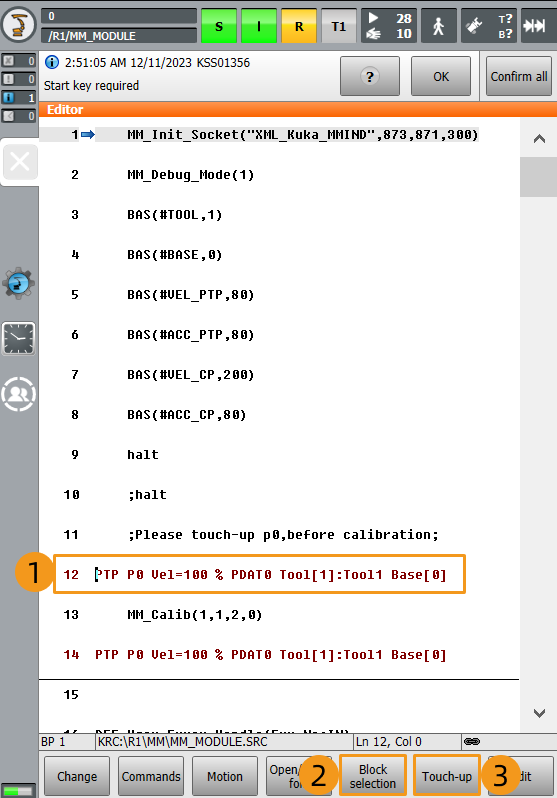
-
Press Yes in the pop-up window to finish teaching the start point for calibration.
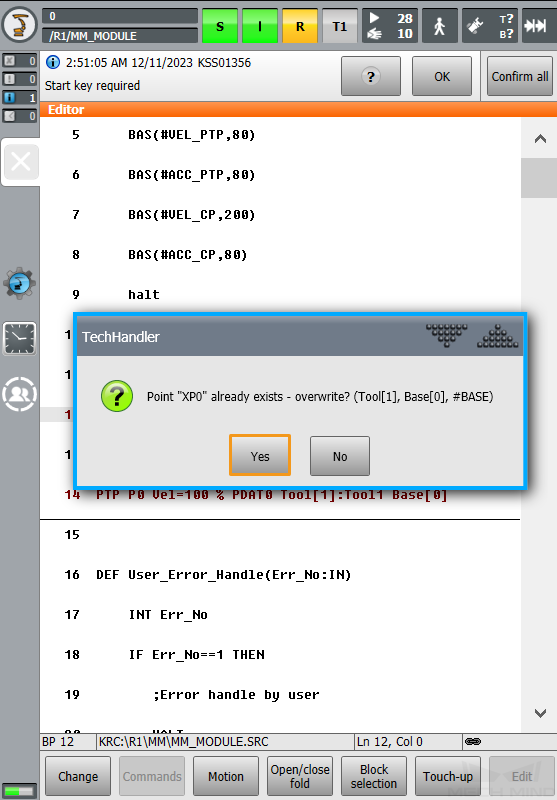
Run the Calibration Program
Before starting, learn how to switch the running mode following the instruction below:
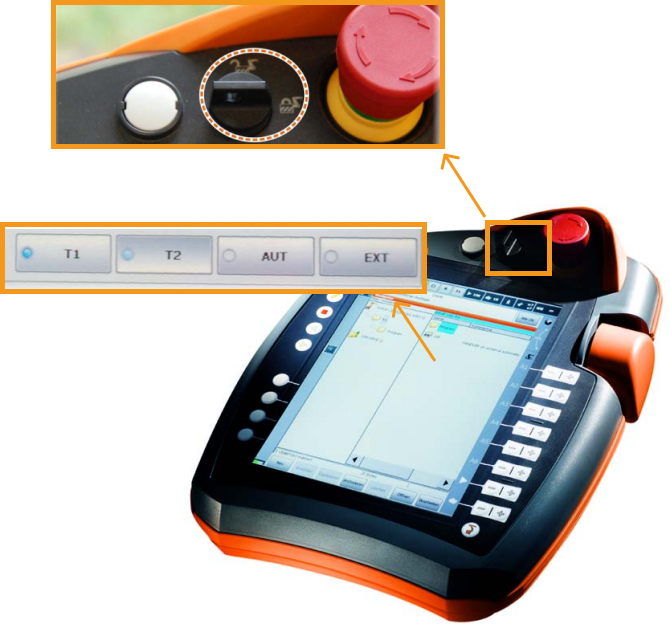
Turn the key switch to horizontal, select the running mode, for example, T1 or AUT, in the pop-up dialog box on the screen. Then, turn the switch back to vertical.
| T1 stands for the Manual Reduced Velocity mode, and AUT stands for the Automatic mode. |
-
Switch to the T1 mode following the instruction above.
-
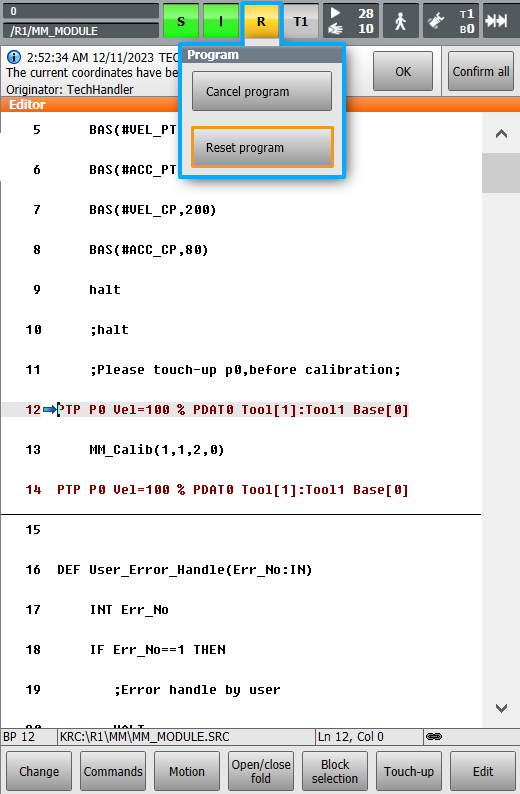
Click R on the teach pendant. Click Reset program in the pop-up menu.
-
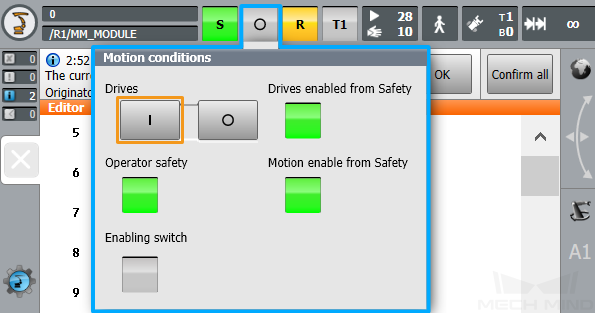
Click O. Then, click I in the pop-up window to switch the status of Drives to I. Skip this step if the status of Drives is I in the first place.
-
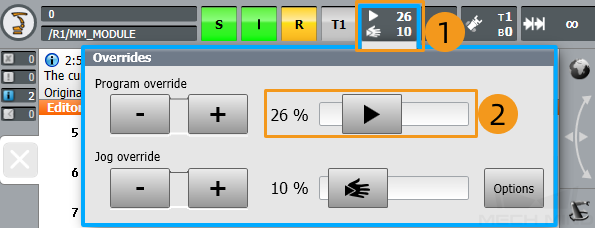
Adjust the value of Program override to a proper speed. Watch the robot’s motion when the program is running.
-
Switch to the AUT mode following the instruction above.
-
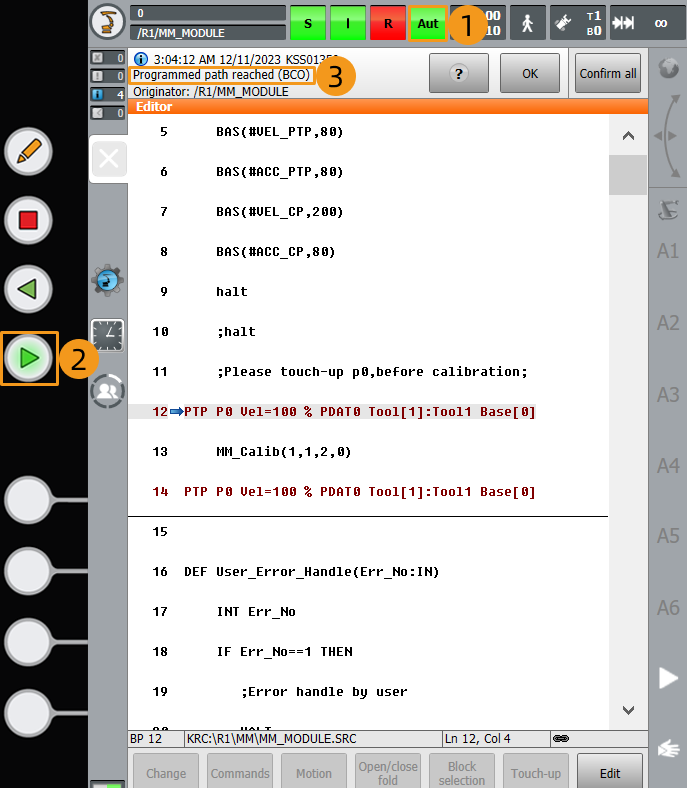
Press and hold the green run button on the front of the teach pendant until the arrow moves to the line “PTP P0 Vel=100 % PDAT0 Tool[1]:Tool1 Base[0]”, which stands for the calibration start point. The message “Programmed path reached (BCO)” will prompt on the top of the screen.
-
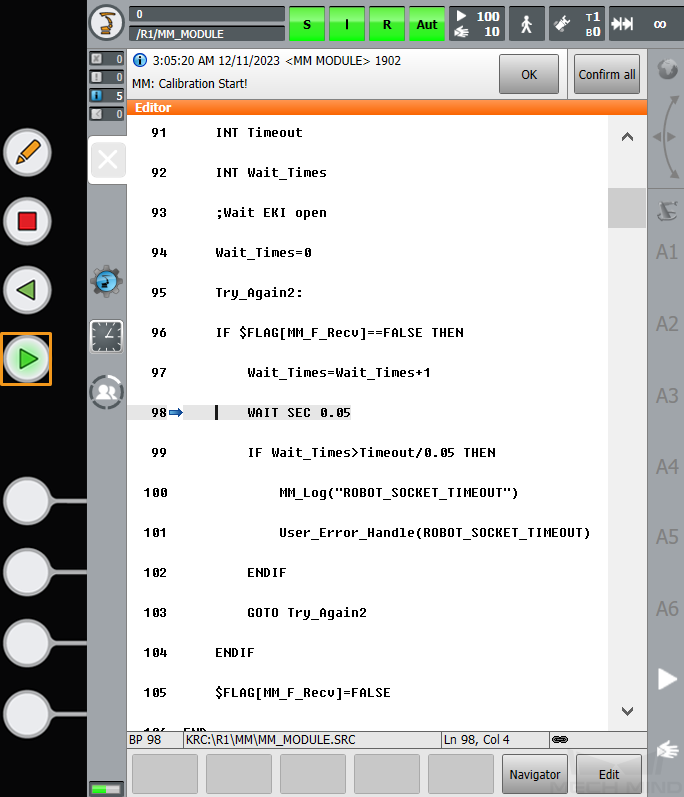
Then, press the run button to continue to execute the program. (The R button turns green when the program is running.)
-
When, in the Configuration before Calibration window in Mech-Vision, the current status changes to connected and the button “Waiting for the robot to connect” changes to “Disconnect”, click Calibrate. The Calibration (Eye to hand) window will be prompted.
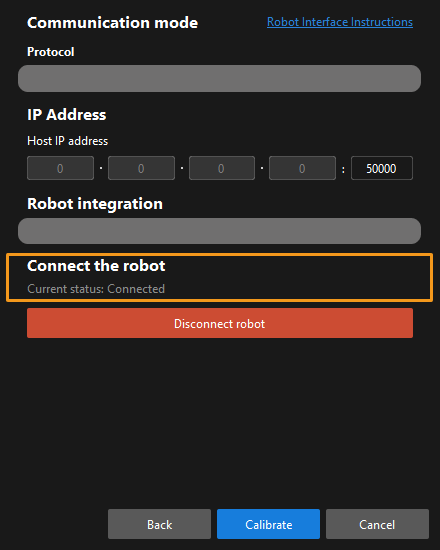
If the robot is connected successfully, the Console tab of Mech-Vision Log panel will display a log.

Calibration Procedure
Conduct calibration according to the camera mounting method. You may refer to the links below.
-
If the camera is mounted in the Eye to Hand method, refer to Calibration Procedure in Automatic Calibration in the Eye-to-Hand Setup.
-
If the camera is mounted in the Eye in Hand method, refer to Calibration Procedure in Automatic Calibration in the Eye-in-Hand Setup.
Change the Extrinsic Parameter File
If the camera’s extrinsic parameter file has been used by a Mech-Vision project, you need to change the extrinsic parameter file used by the Mech-Vision project to a new one after you finish the hand-eye calibration.
-
Select the Capture Images from Camera Step.

-
In the Step Parameters panel, click
 of the Camera Calibration Parameters parameter, and select the newly calibrated extrinsic parameter file.
Calibration-Related Status Codes
During automatic calibration via Standard Interface communication, the vision system returns data together with the status code to the robot. Status codes, which are categorized into error codes and normal status codes, indicate the command execution status. Calibration related status codes are listed in the tables below.