Set up Standard Interface Communication with ROKAE
This topic introduces the process of setting up the Standard Interface communication with a ROKAE robot.
Check Hardware and Software Versions
-
The robot in use is a ROKAE industrial robot.
-
The series of the controller is XBC3, and the version is 3.6.
-
The versions of Mech-Vision and Mech-Viz are 1.7.2 or above.
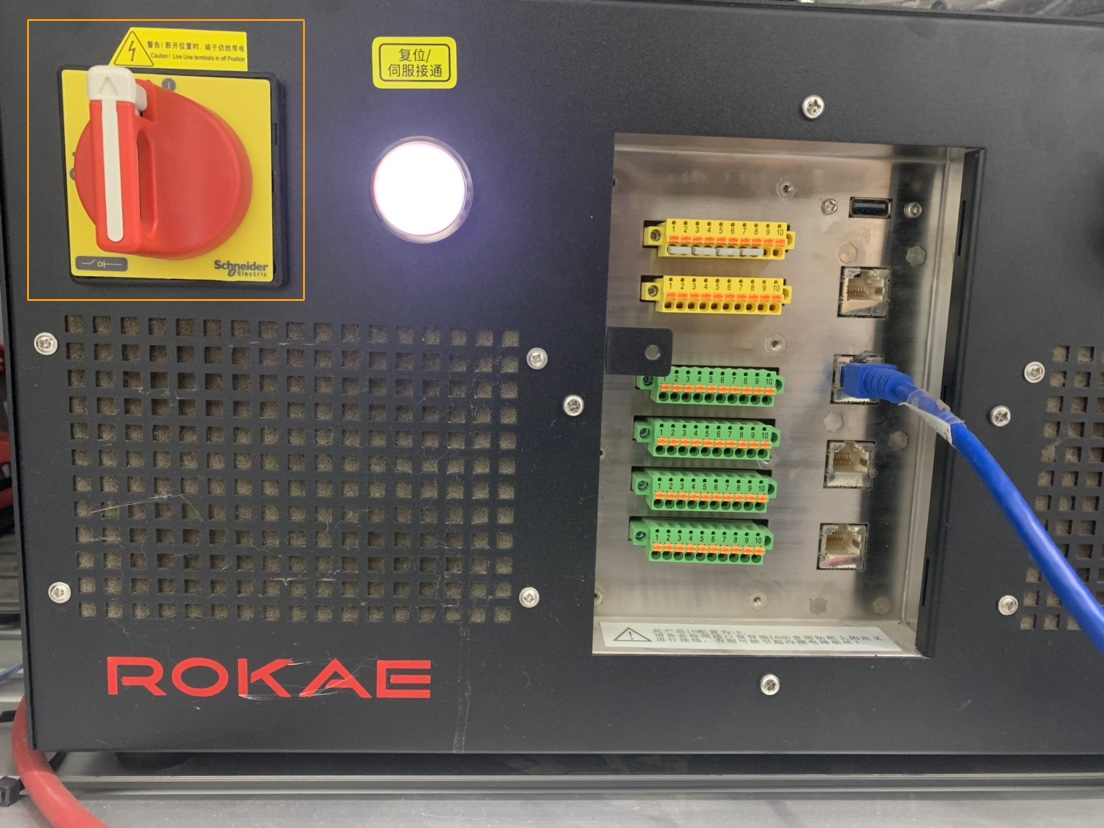
Start the Robot and Teach Pendant
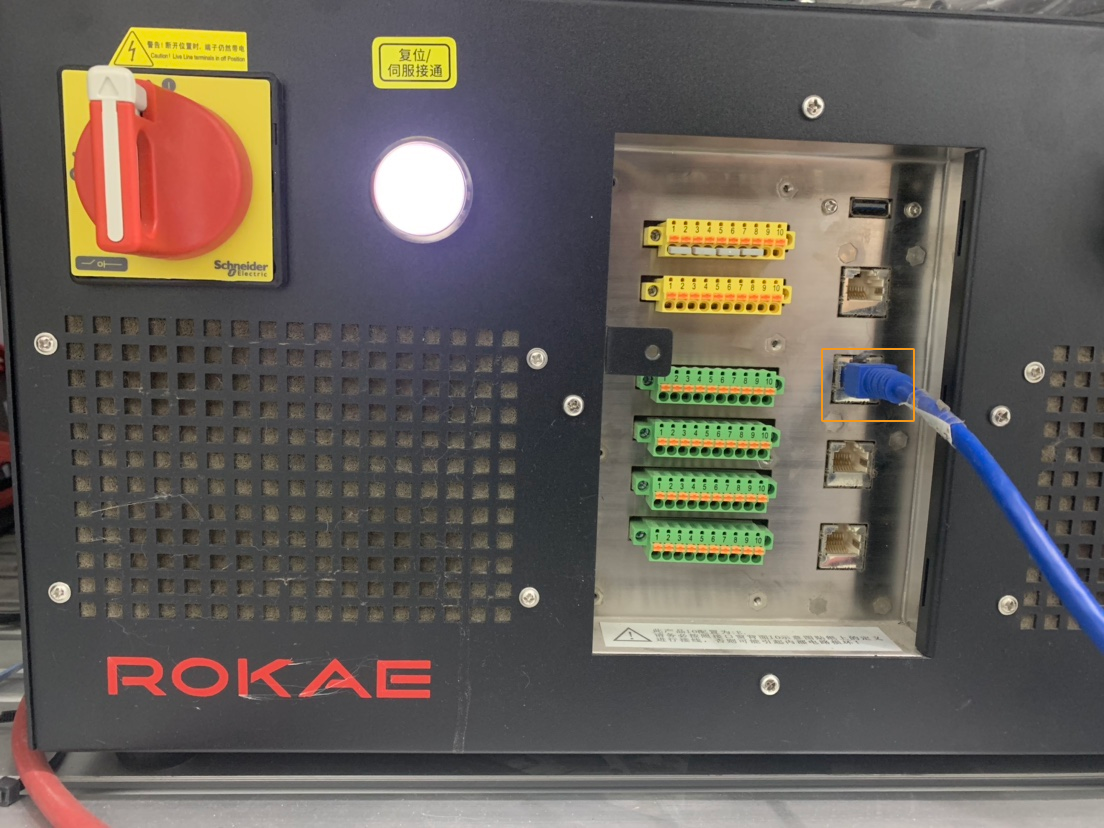
Turn the controller’s power switch on, as shown below. If the controller is started successfully, a welcome interface will appear on the teach pendant.
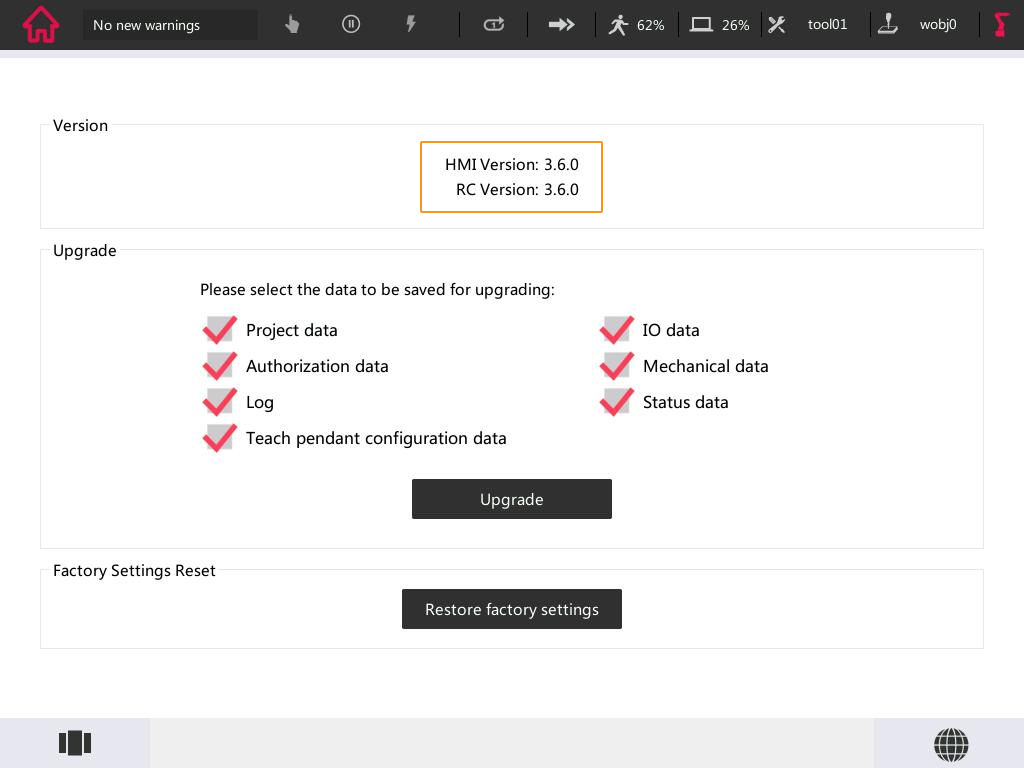
Check the Controller Version
On the teach pendant, press the icon in the upper left corner, and then press Help to check the version.

Switch the User Type to Admin
An operator user does not have the right to manage files or operate. Therefore, please switch to the admin user.
-
On the teach pendant, press the icon in the upper left corner, and then press Settings.
-
Press , and select admin.
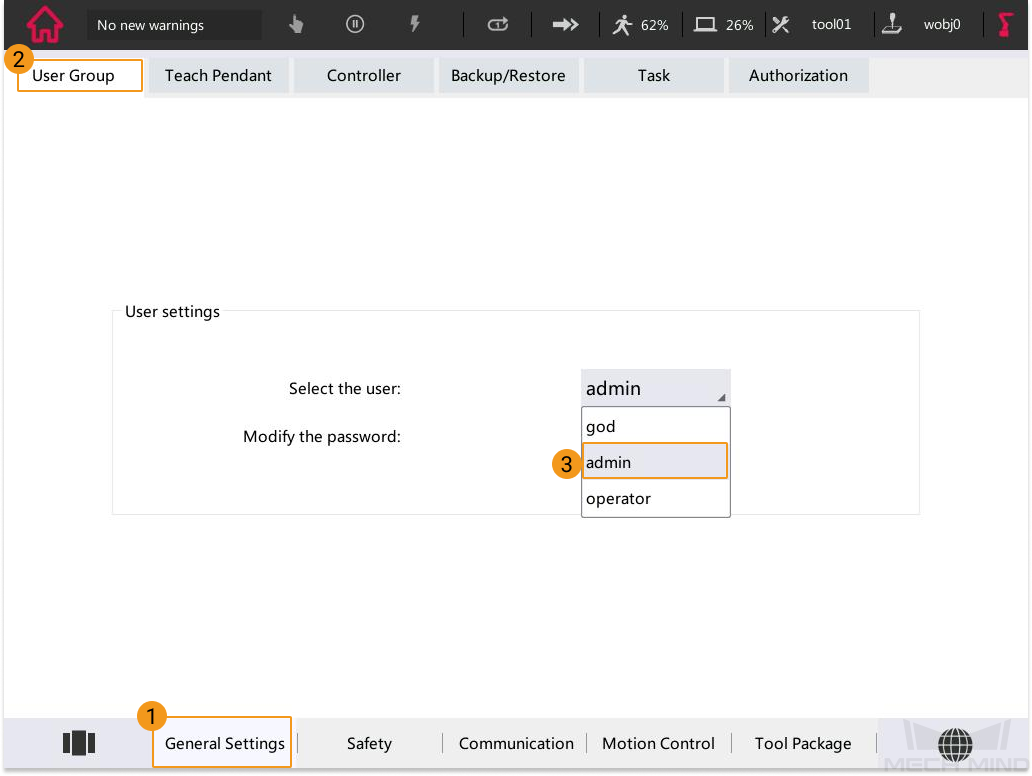
-
Enter the password 123456 in the pop-up window.
Set up the Network Connection
Connect the Hardware
Use the Ethernet cable to connect the network ports of the IPC and the robot controller.
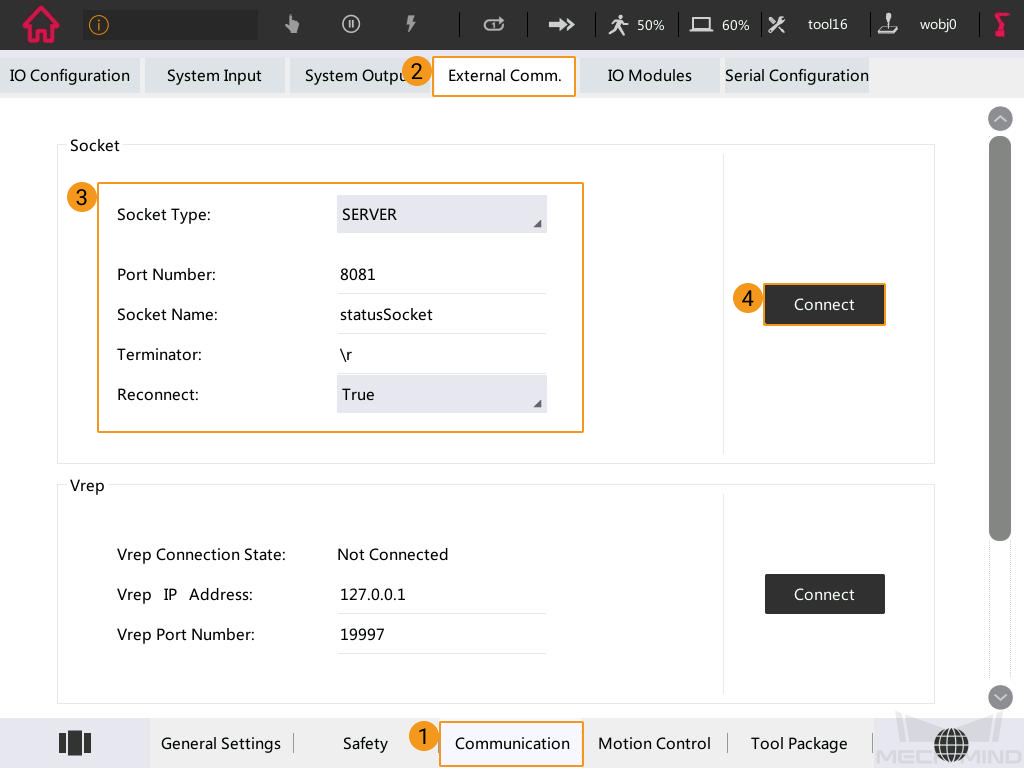
Configure External Communication
-
On the teach pendant, press the icon in the upper left corner, and then press Settings.
-
Press , configure Socket communication as shown in the figure below, and then click Connect.
-
Restart the controller.
Set the IP Address of the IPC
The default IP address of the ROKAE robot to communicate with the vision system is 192.168.2.160, which cannot be modified currently. However, you can modify the IP address of the IPC (192.168.2.222 is used in this example) to ensure that their IP addresses are in the same subnet. Please refer to Set IP Address of the IPC for detailed instructions.
After modifying the IP address on the IPC, open the Command Prompt window of the IPC, enter “ping 192.168.2.160”, and test whether the connection between the IPC and the robot is successful.
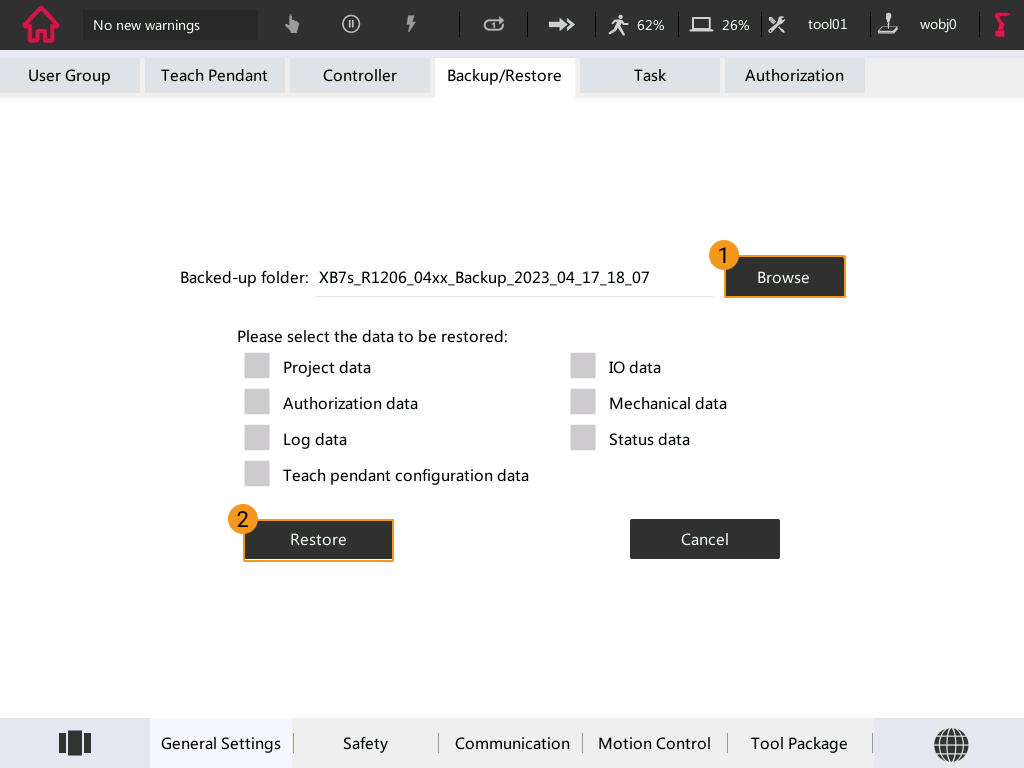
Load the Program Files to the Robot
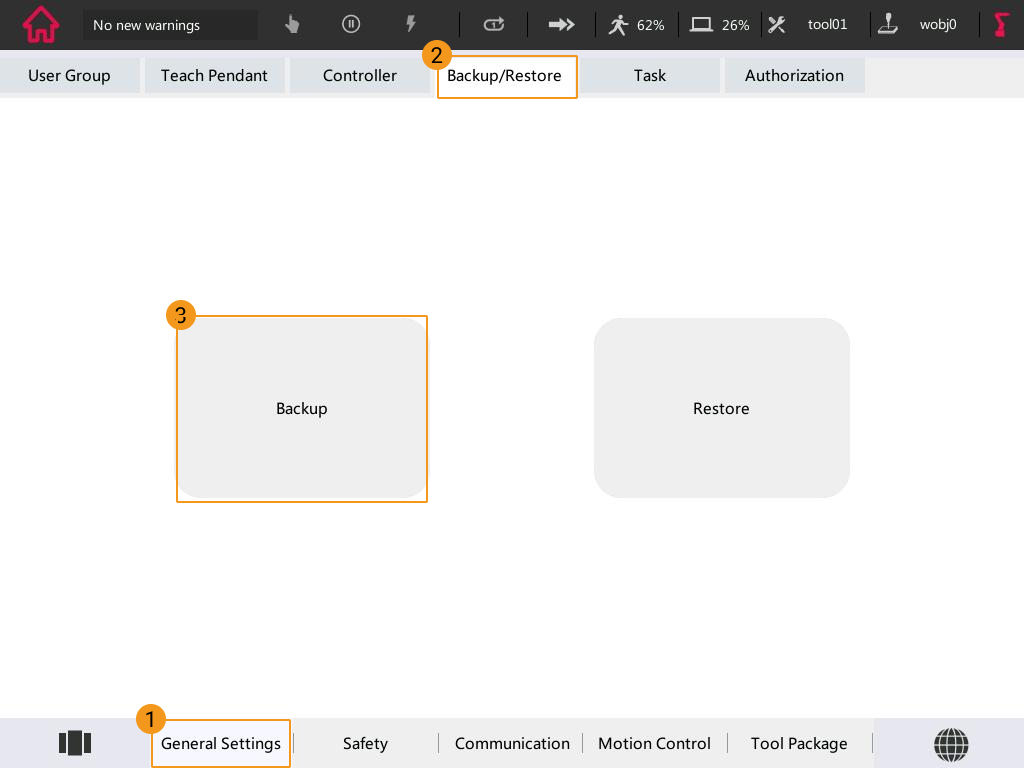
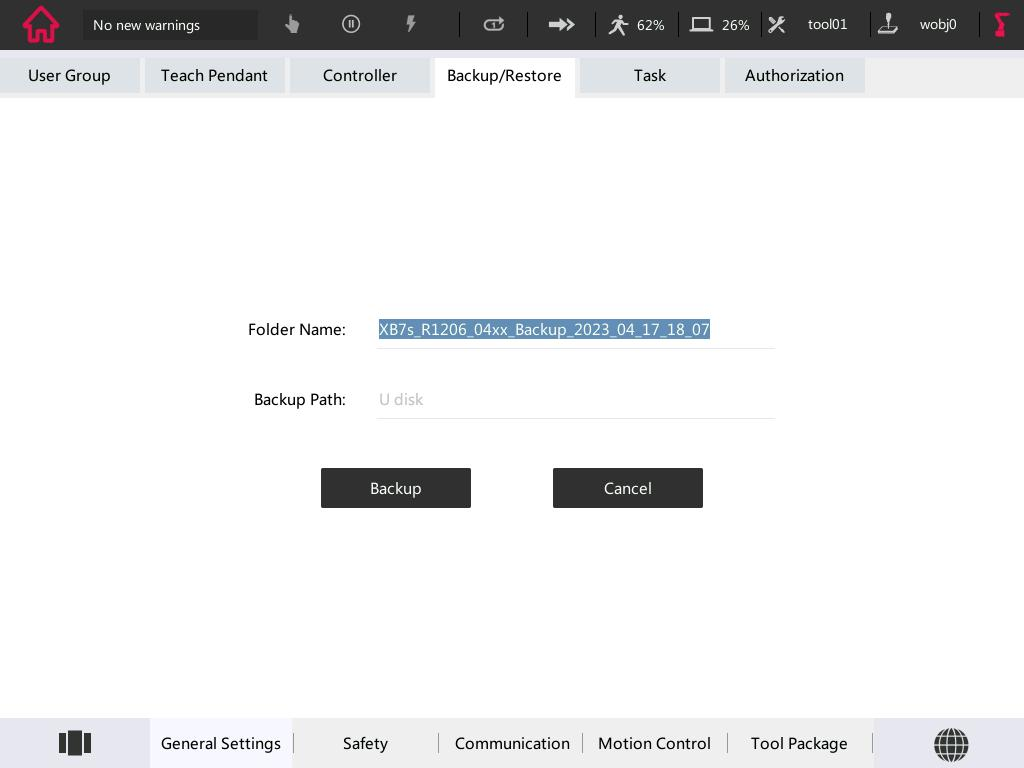
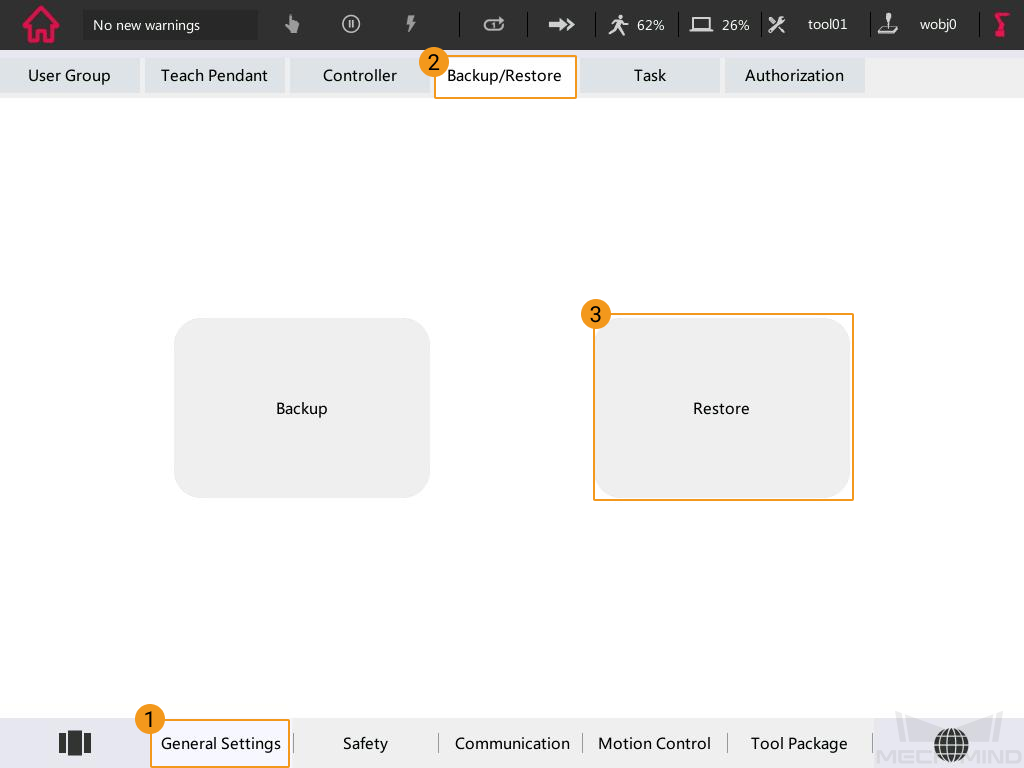
| It is recommended to back up robot system files before loading Master-Control program files to avoid system corruption that may be caused by the loading operation. In case any issue occurs, you can use the backup file to restore the robot system. Please refer to Backup and Restore Robot Files for detailed instructions. |
-
Plug the USB flash drive into the USB port of the IPC. Navigate to
Mech-Center/Robot_Interface/ROKAEfrom the installation directory of Mech-Vision & Mech-Viz. Copy the MM_Project folder to the flash drive and then remove the USB flash drive safely. -
Plug the USB flash drive with the program files into the USB port on the teach pendant.
-
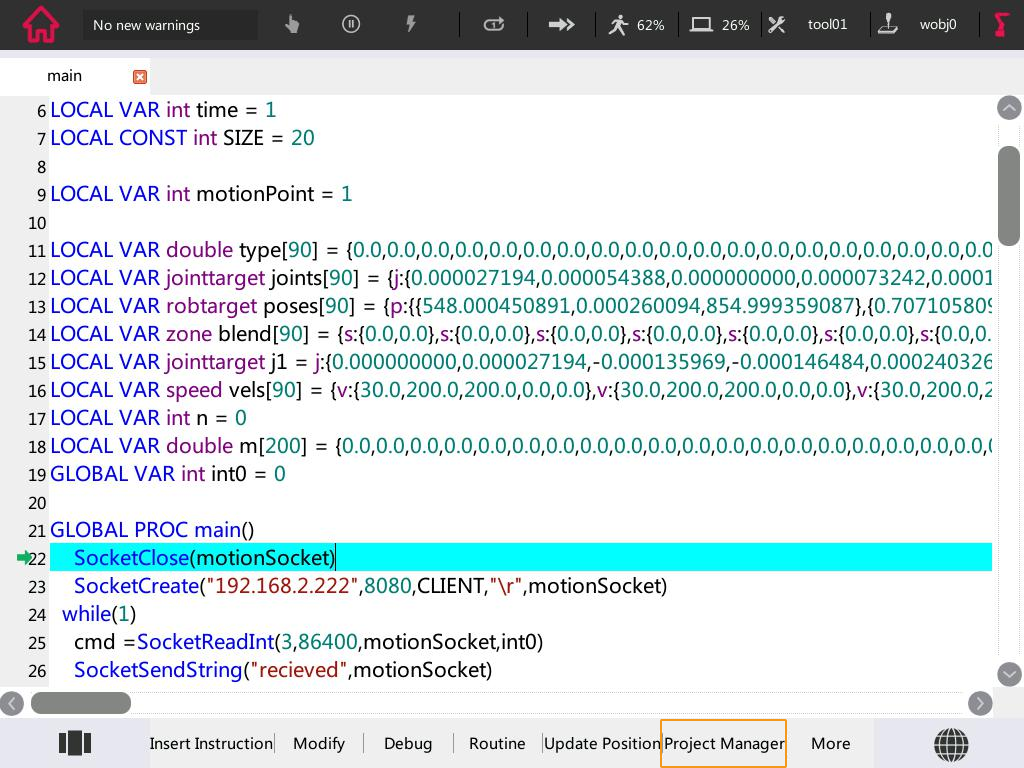
On the teach pendant, press the icon in the upper left corner, and then press Project.
-
Press Project Manager.
-
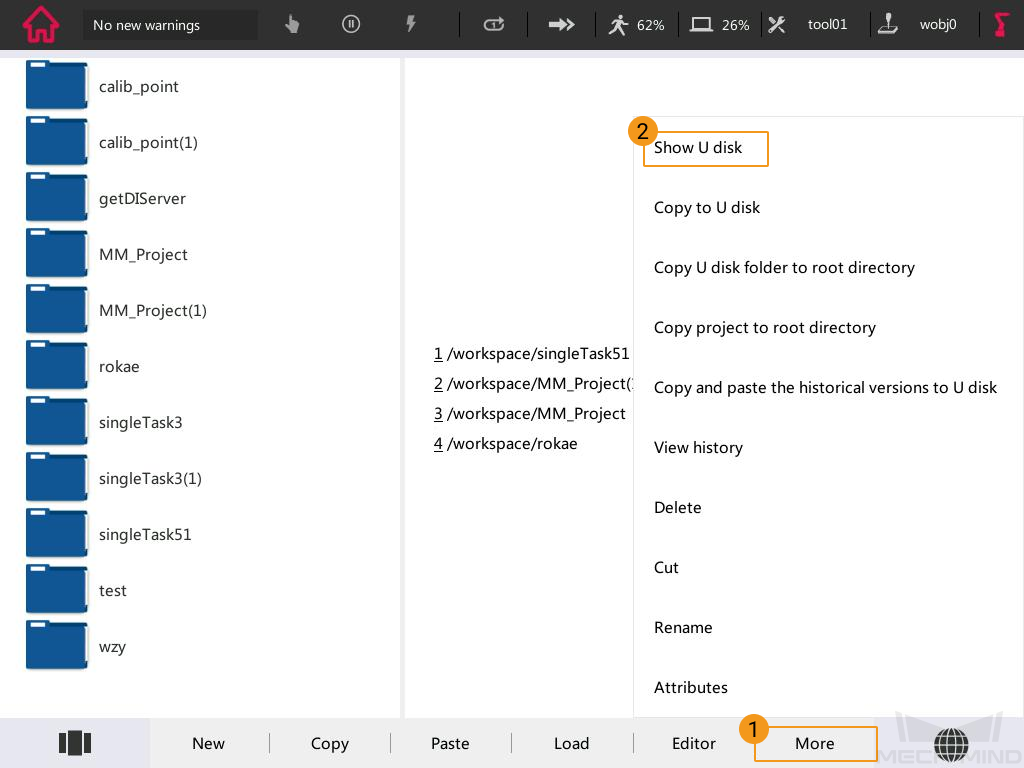
Press More and select Show U disk.
-
Select the MM_Project folder in the flash drive, press More, and select Copy U disk folder to root directory.

Once pasted successfully, the MM_Project folder can be found in the file browser at the bottom left.
Configure Robot I/O
-
On the teach pendant, press the icon in the upper left corner, and then press Settings.
-
Press in turn.
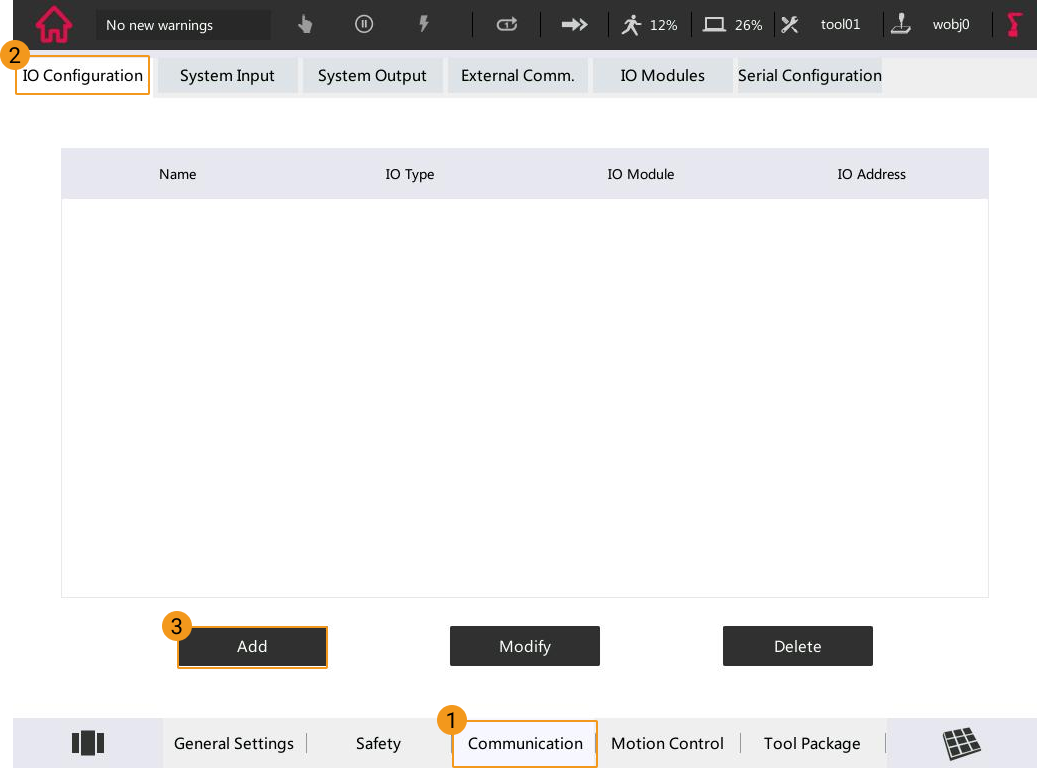
-
Configure the options as shown in the figure below, and press OK.

Set up “Robot Communication Configuration”
-
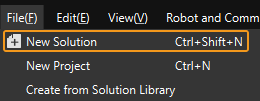
Run Mech-Vision, and you may enter different interfaces. Create a new solution according to the instructions below.
-
If you have entered the Welcome interface, click New blank solution.

-
If you have entered the main interface, click on the menu bar.
-
-
Click Robot Communication Configuration on the toolbar of Mech-Vision.
-
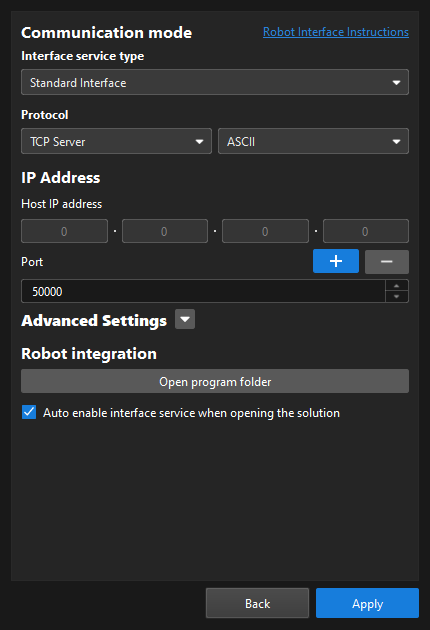
In the Robot Communication Configuration window, complete the following configurations.
-
Click the Select robot drop-down menu, and select Listed robot. Click Select robot model, and select the robot model that you use. Then, click Next.
-
In the Communication mode area, select Standard Interface for Interface service type, TCP Server for Protocol, and ASCII for the protocol format.
-
It is recommended to set the port number to 50000 or above. Ensure that the port number is not occupied by another program.
-
(Optional) Select Auto enable interface service when opening the solution.
-
Click Apply.
-
-
On the main interface of Mech-Vision, make sure that the Robot Communication Configuration switch on the toolbar is flipped and has turned blue.

Test Standard Interface Communication
-
In the Project Manager window on the teach pendant, select the MM_Project folder and press Load.
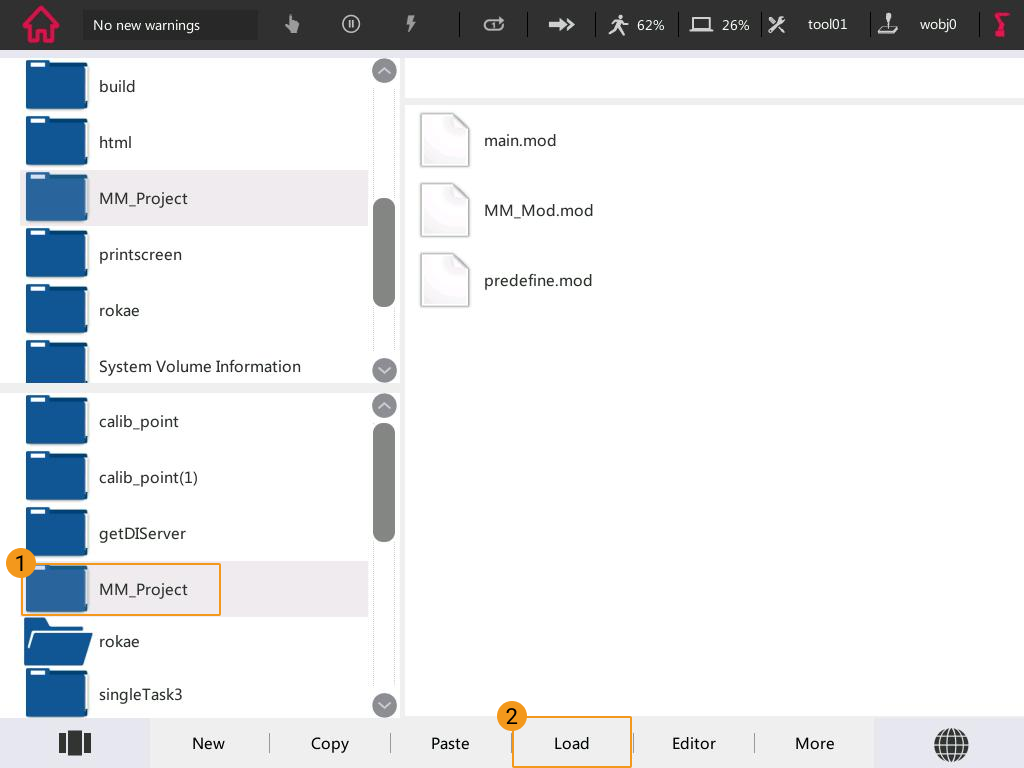
-
Select the “// MM_Calibration()” line, and press .

-
Then press .
-
Switch the manual mode to automatic mode. The figure below shows the teach pendant in the automatic mode.
Select Ok in the pop-up window as shown below.
-
Press the button on the controller as shown in the figure below. If the once-flashing indicator light turns to be always on, the servo is successfully turned on in the automatic mode.

-
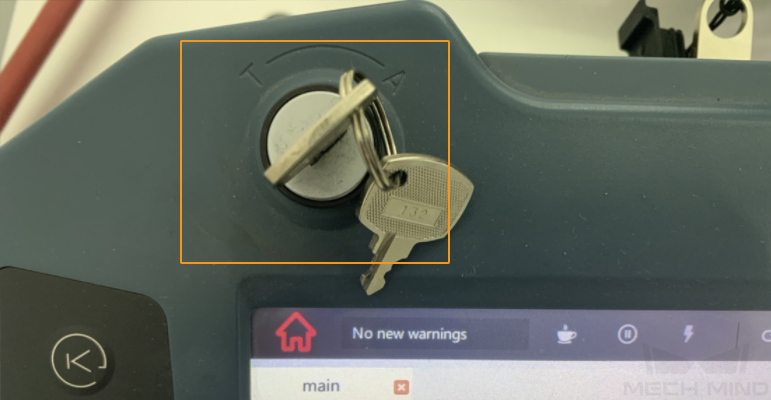
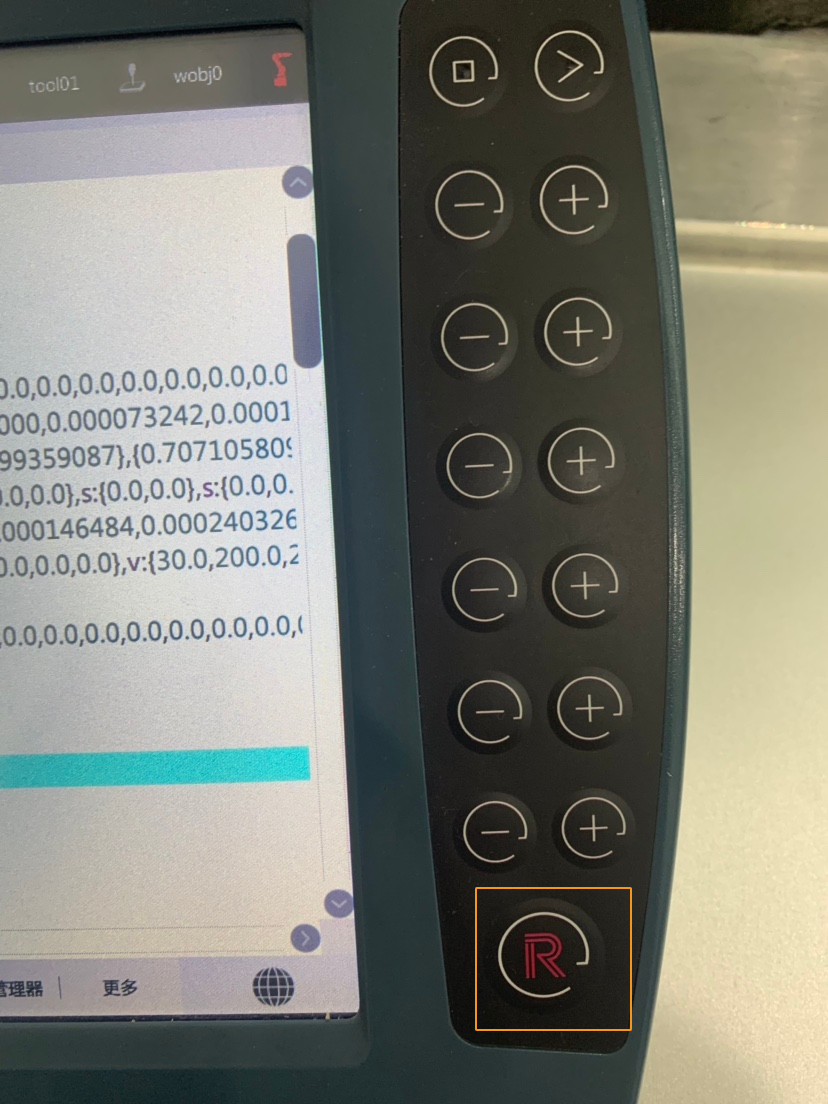
Press the R button in the lower right corner to power on the robot.
-
Press Debug and select PP to Main.

-
Click the icon as shown below to adjust the program’s running speed.

-
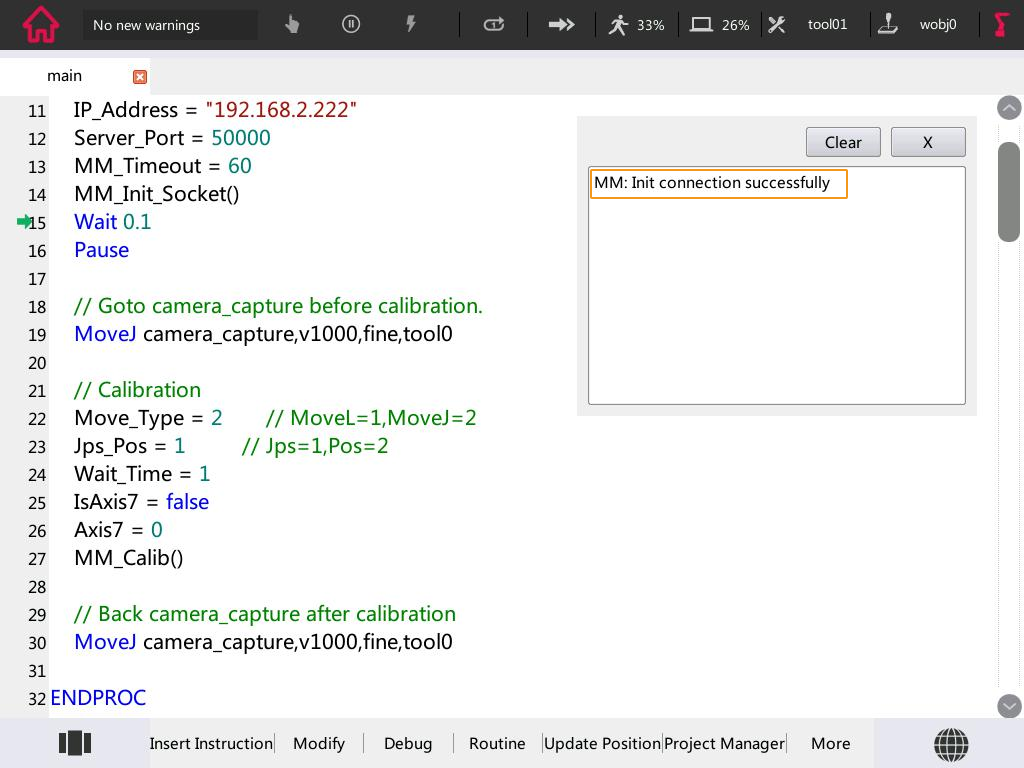
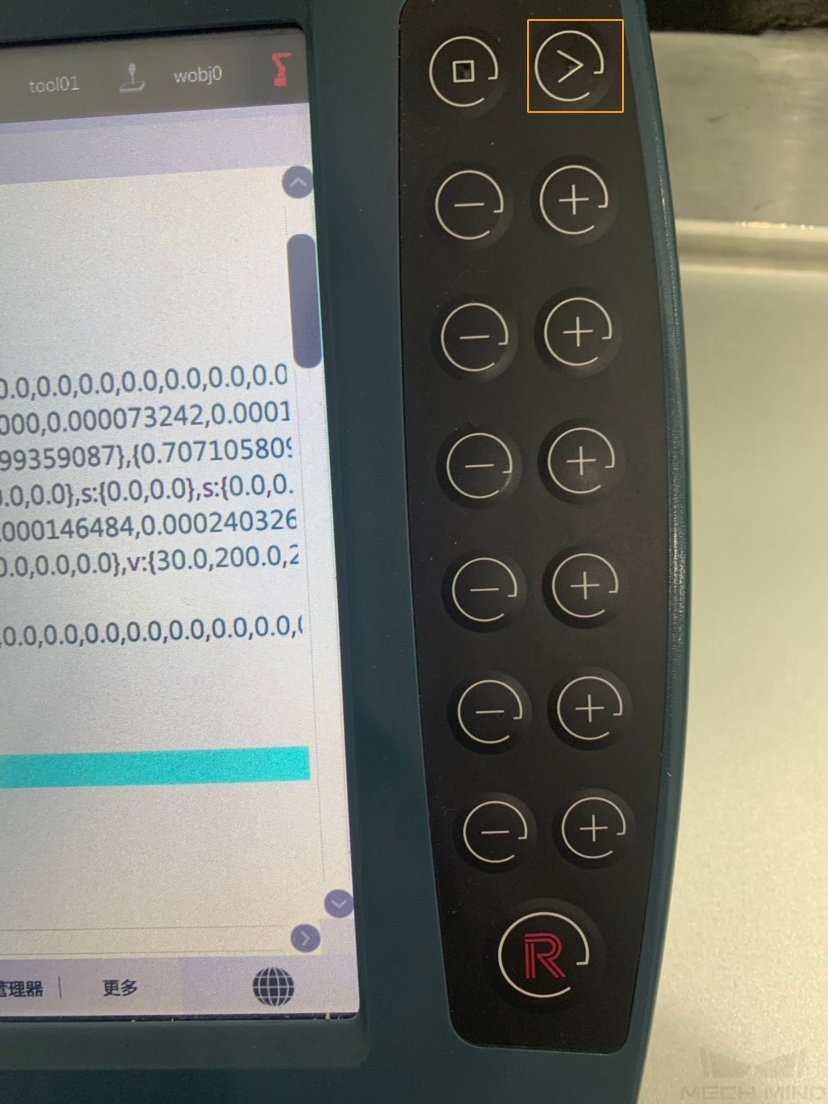
Press the button as shown below to run the program.
-
Double-check if the connection has established. When the following message appears on the teach pendant, the robot has been successfully connected to the vision system.