Master-Control Communication Setup
This guide shows you how to set up Master-Control communication with a YASKAWA robot.
Preparation
Set up the Network Connection
Connect the Hardware
Use an Ethernet cable (prepared by yourself) to connect the Ethernet ports on the IPC and that inside the accessory panel on the front of the controller.
There are two Ethernet ports provided by the CPU board of the robot controller. The IP addresses of the two ports should be on different subnets.
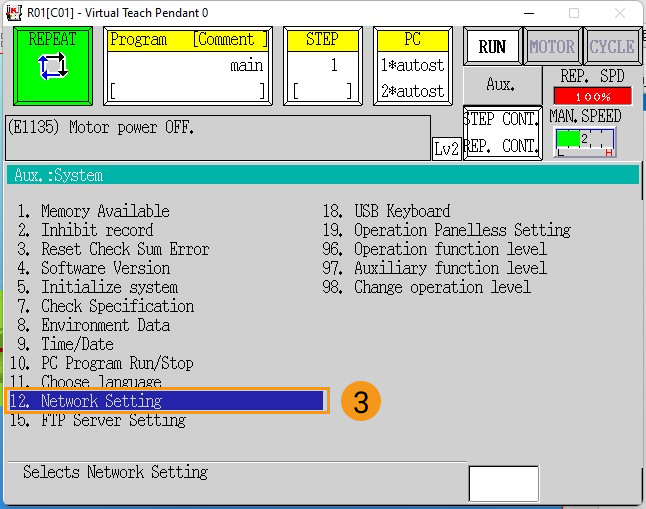
Set the IP Address
-
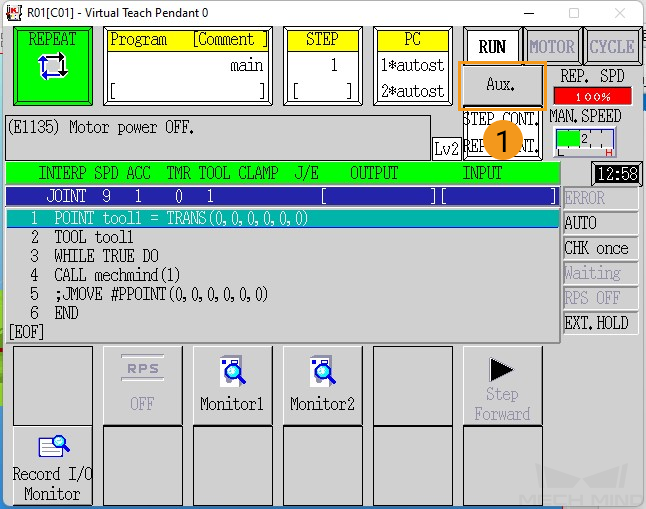
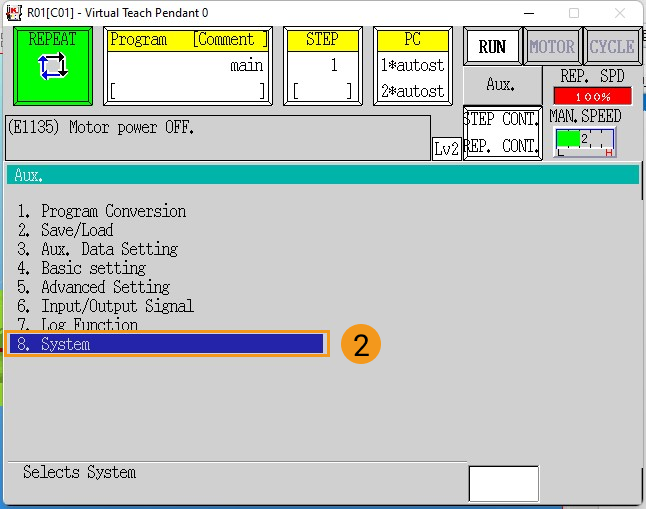
To set the IP address of the robot Ethernet port, press the Aux. button on the teach pendant, and then select .
-
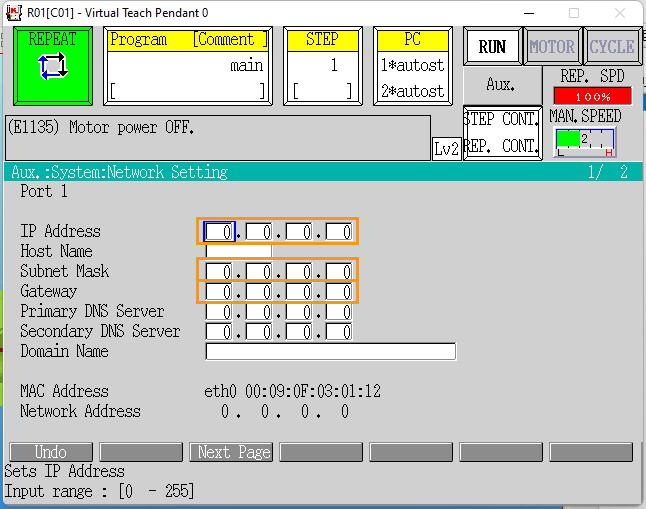
Set the IP address and subnet mask of port 1 on the Port 1 network setting page. The IP address of the robot must be on the same subnet as that of the IPC’s Ethernet port. If a network gateway is used, set the Gateway parameter.
-
After the IP address is set, press the
ENTERbutton on the teach pendant, and then restart the controller.
Load the Program Files to the Robot
Prepare the Files
The program files are stored in Mech-Center/Robot_Server/Robot_FullControl/kawasaki in the installation directory where Mech-Vision and Mech-Viz are installed.
Copy the mm_control.as file to the USB flash drive.
Precautions for Loading Files
-
Save user programs.
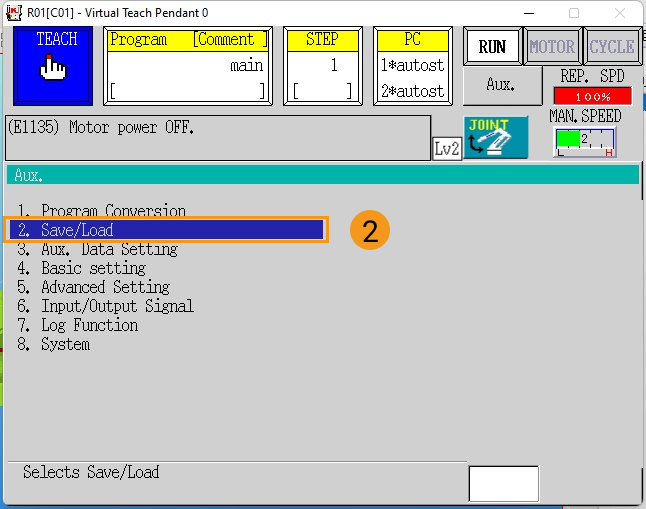
If there are user programs in the program list on the teach pendant, save them before loading program files. If there are no user programs on the teach pendant, skip this step. Press the Aux. button, and then select .
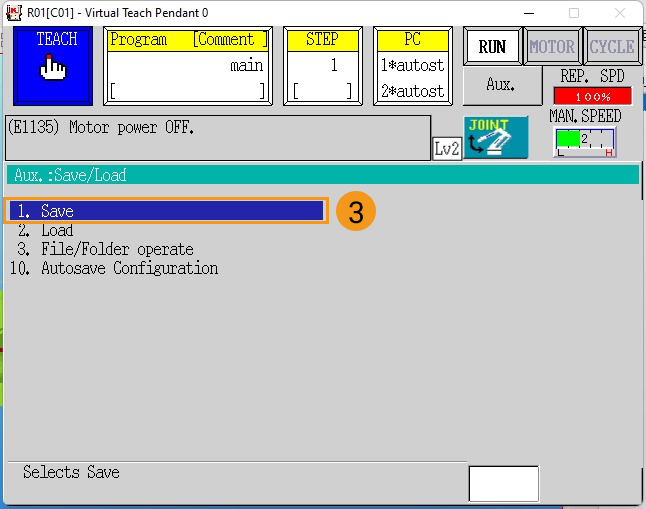
On the Save page, press Input File name to enter the file name, and then press the Save button. After the file is saved, press the
Rkey on the teach pendant to return to the main page.
-
Exit the frontend and PC programs of the robot.
Before loading program files to the robot, make sure that all the frontend and PC programs of the robot have exited. Check the Program and PC areas on the teach pendant to make sure that no programs are listed. If there is any program, please kill it.
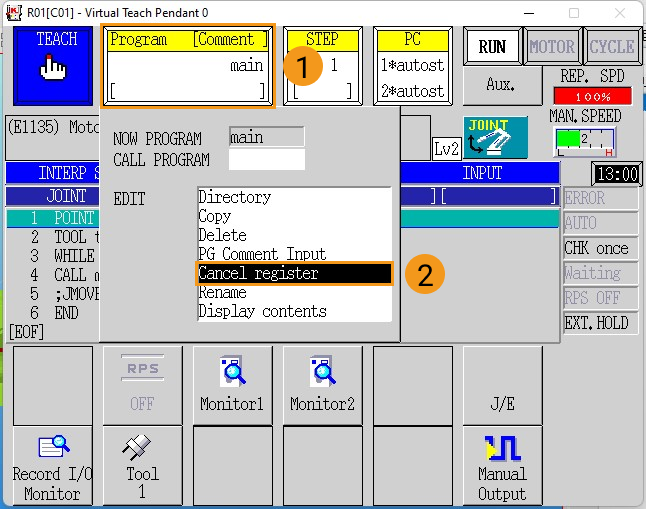
To kill a frontend program, press the Program area, and then press Cancel register** in the drop-down menu.
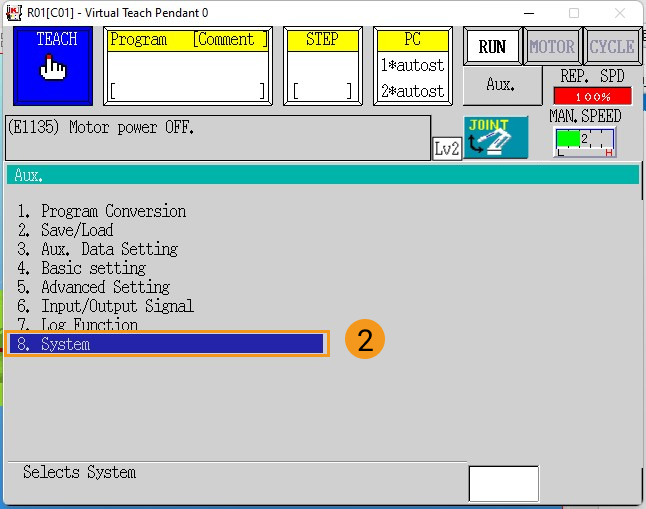
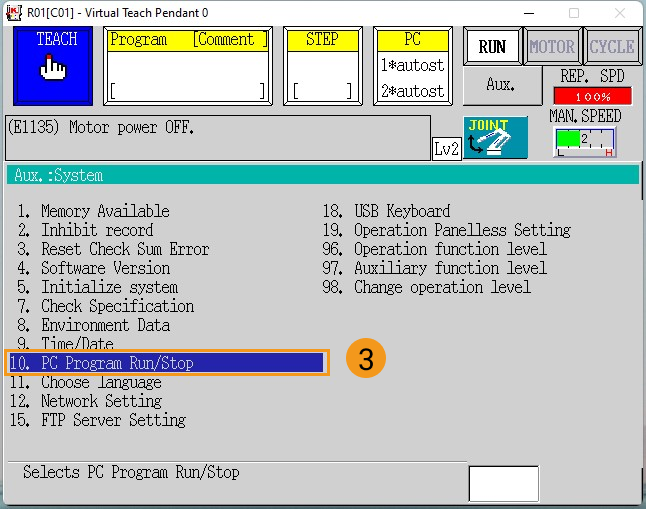
To kill a PC program, on the teach pendant, press the Aux. button, and then select .
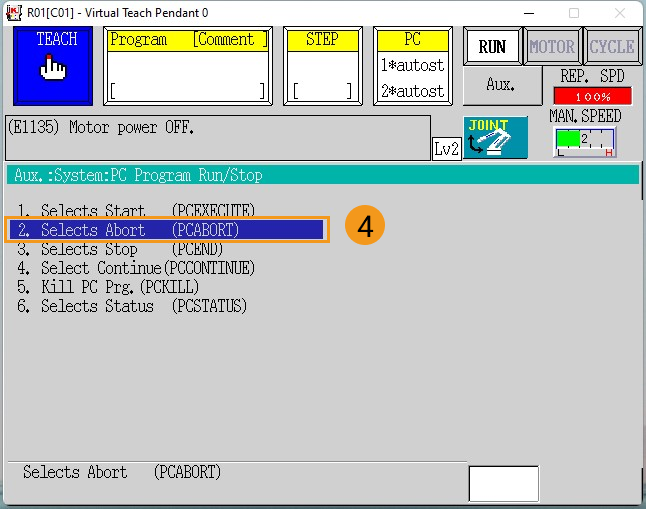
Press the
ENTERkey to abort PC program 1. Then, press 2 to change the program No. to 2, and press theEnterkey to abort PC program 2. At last, press theRto return to the previous page.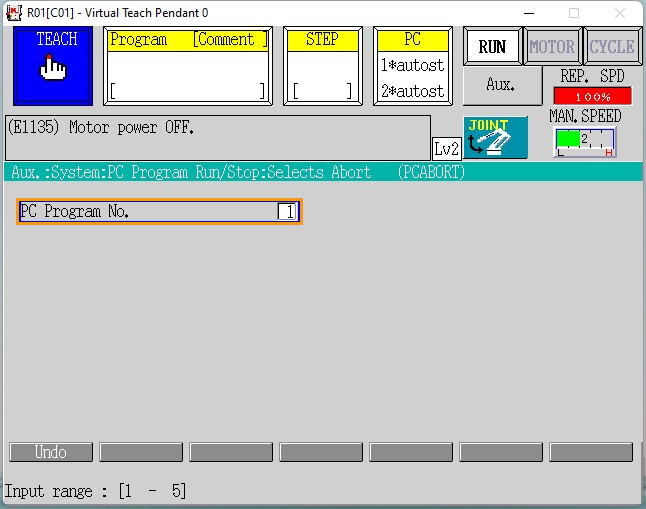
Select 5. Kill PC Prog., and then press the
ENTERkey to kill PC program 1. Then press 2 to change the PC program No. to 2, and press theENTERkey to kill PC program 2. At last, press theRto return to the previous page.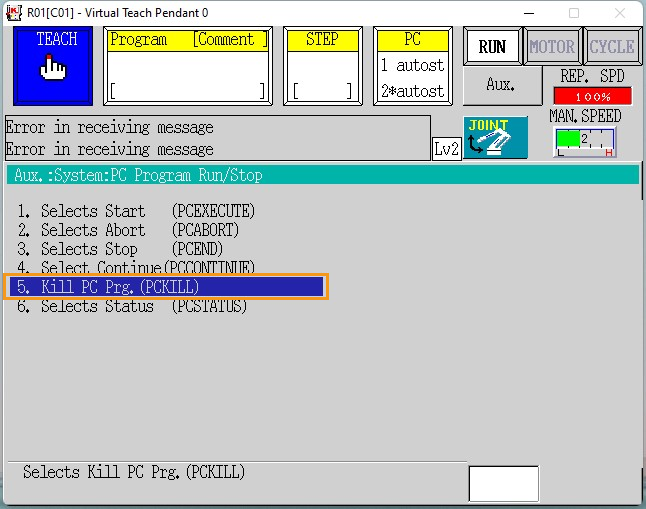

-
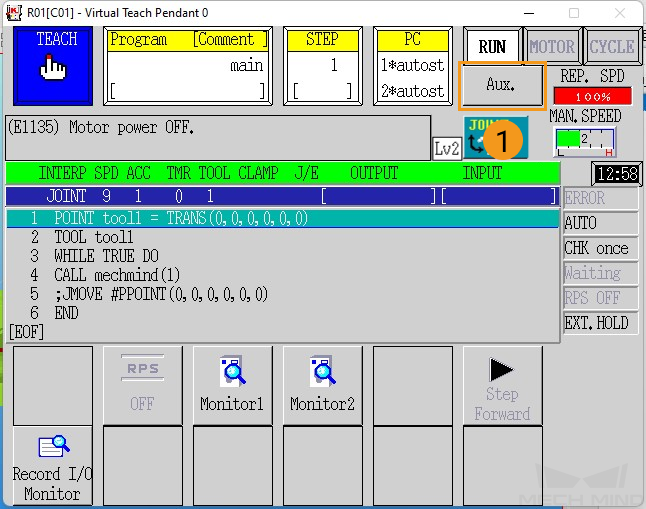
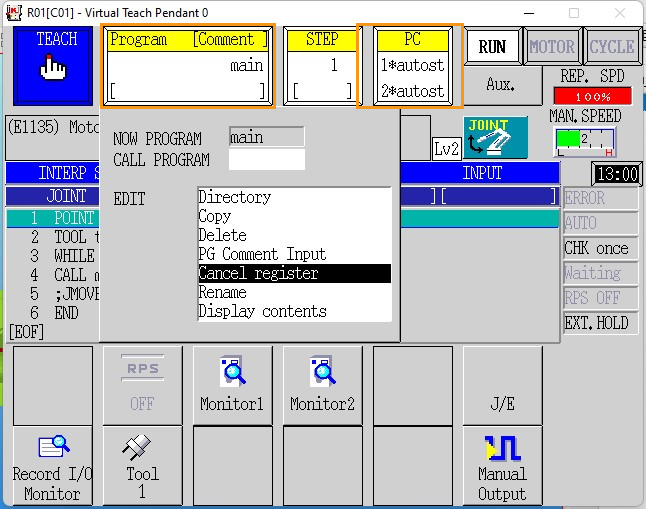
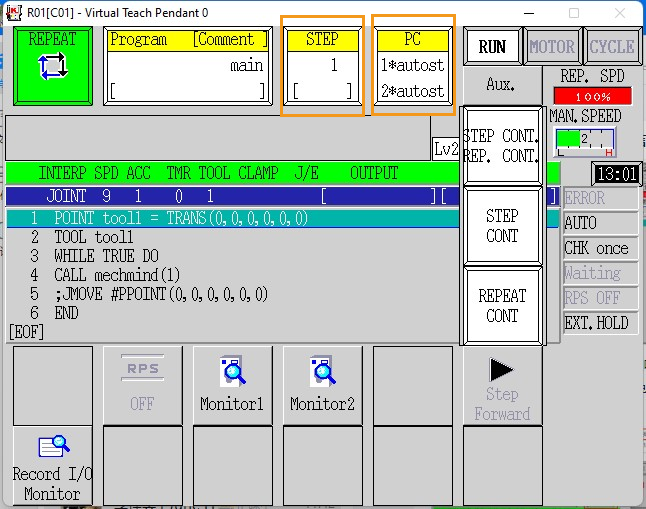
Make sure that the robot is in teach mode, and that the Program and PC areas have nothing listed, as shown below.
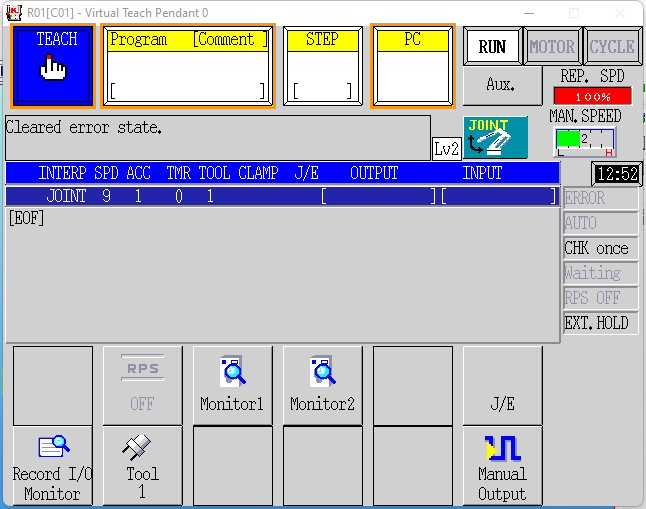
If there are still programs in the PC area, repeat the preceding steps to kill them until there are no programs in the PC area.
Load the Program Files to the Robot
-
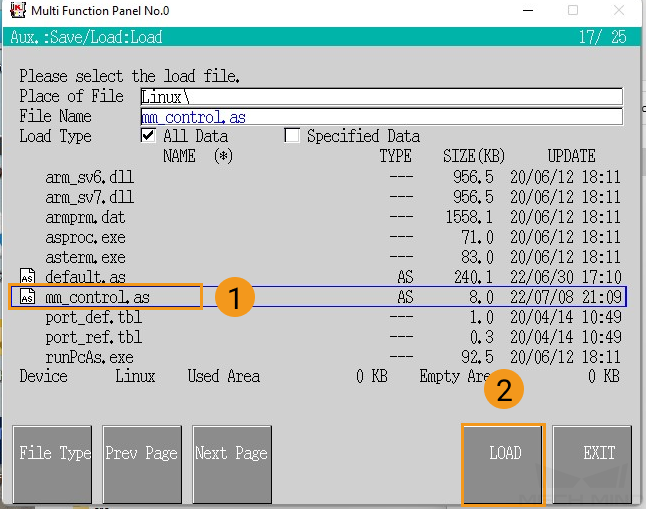
Insert the USB flash drive storing the program files to the USB port inside the accessory panel on the controller. Then on the teach pendant press Aux., and select .


-
Press mm_control.as in the file list twice to select it (mm_control.as displayed as the file name), and then press the LOAD button.
-
After the file is loaded, make sure no errors occurred during loading, and press the
Rkey on the teach pendant to exit.
Further Configurations
-
Set the PC program to automatically start up.
Set the PC program to automatically start up after the robot program files have been loaded. Follow these steps:
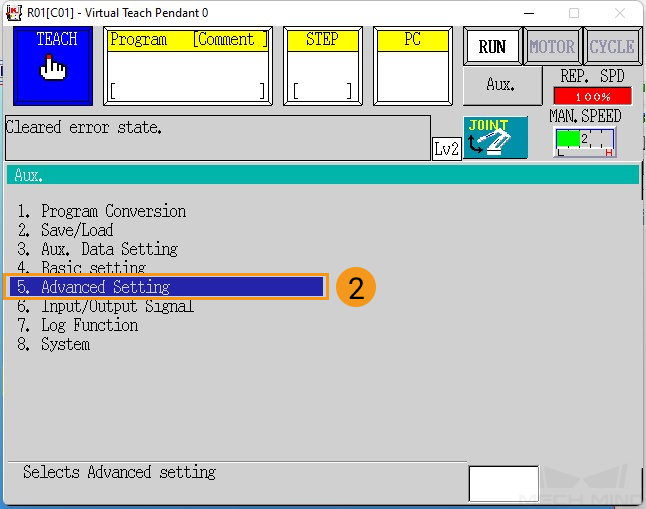
On the teach pendant, press the Aux. button, and select .


Press Next Page, find AUTOSTART.PC and AUTOSTART2.PC, select the On checkboxes of these two programs, and press the
ENTERkey on the teach pendant to save the changes.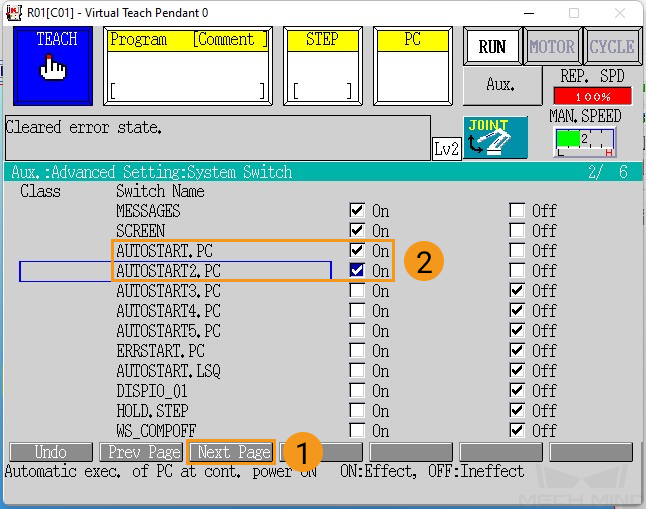
-
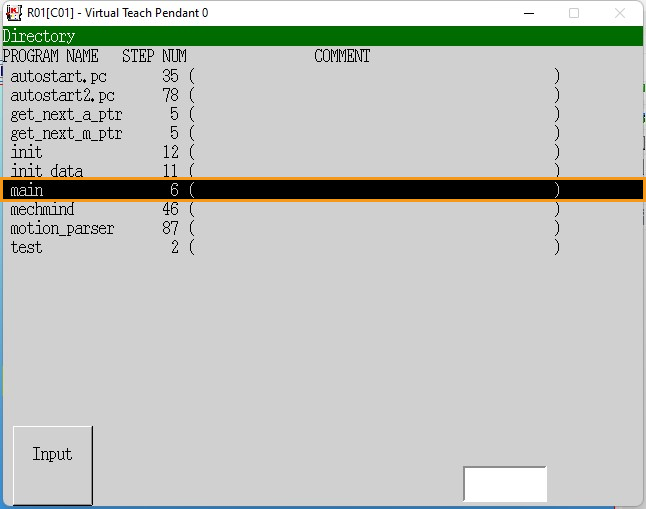
Select the frontend main program.
Press the Program area, and select Directory. Then select main and press the
ENTERkey on the teach pendant to save the changes. Make sure no other programs are listed in the PC area.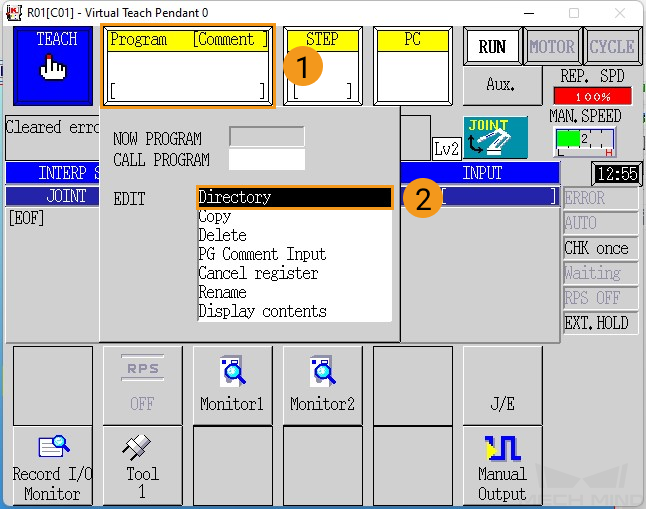
-
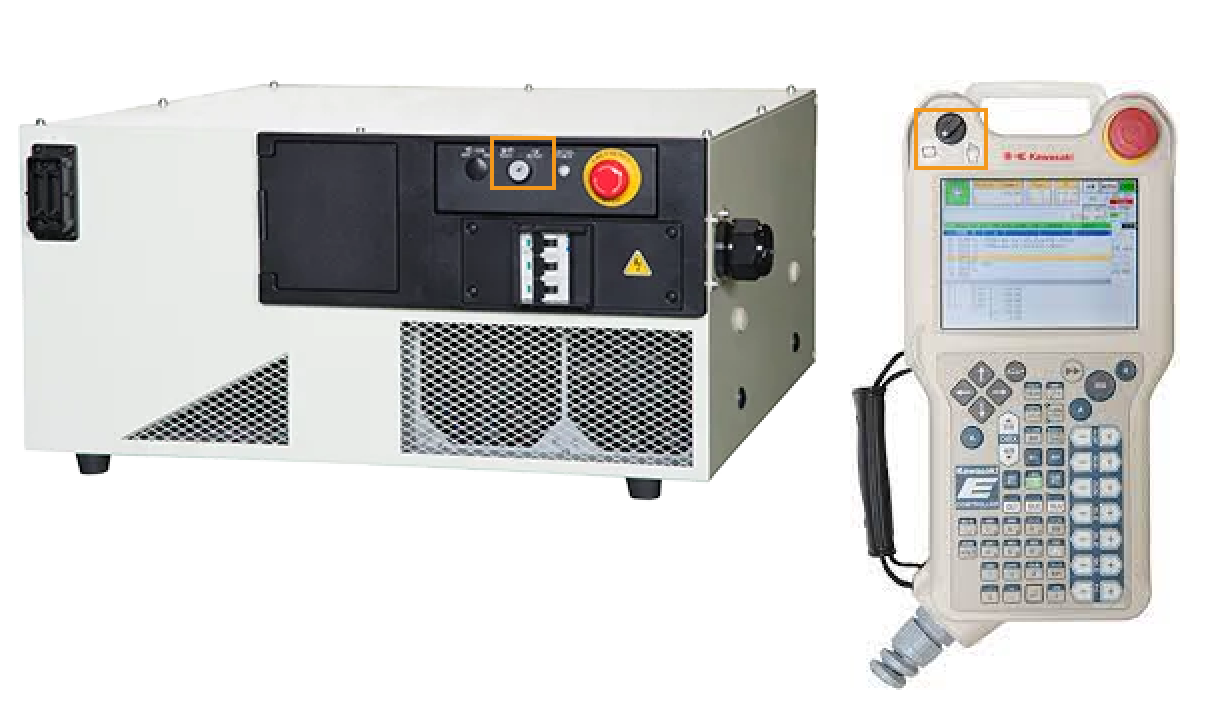
Switch the robot to repeat mode.
Switch Teach/Repeat on the controller to REPEAT, and switch the teach lock on the teach pendant to OFF. After these operations, the robot should be in the REPEAT mode.
Then switch the program running mode to STEP CONT and REPEAT CONT.
-
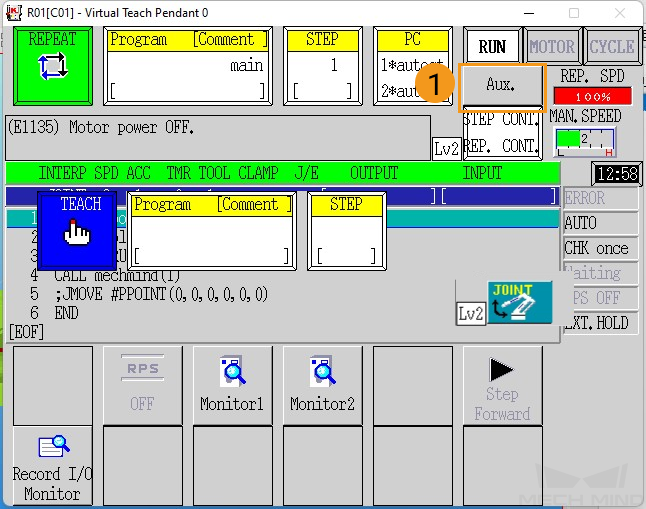
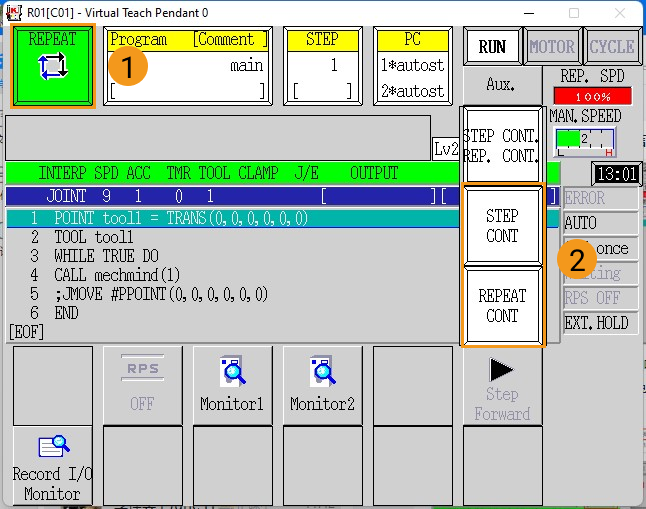
Restart the robot controller.
After the robot controller is restarted, the teach pendant should show the following interface. PC programs with asterisks (*) in front indicate the programs are running. If the running step is not 1 in the STEP area, modify it manually by pressing the STEP area and entering 1.
Test Master-Control Communication
Run the Program
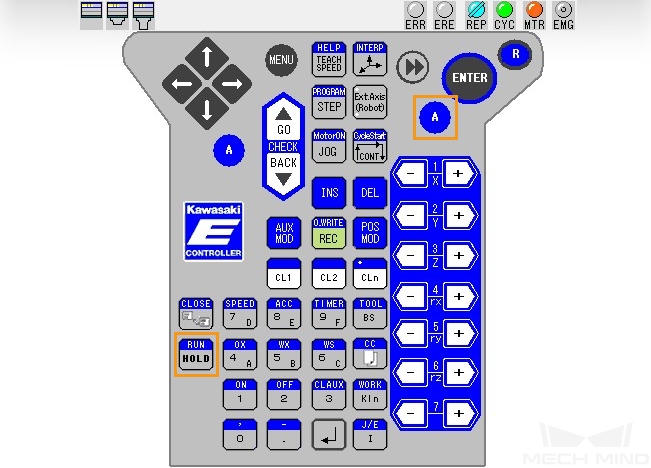
Hold the A key and press MOTOR to power on the motor.
Hold the A key and press CYCLE to start the robot.
If RUN does not turn green, hold the A key and press the RUN/HOLD key on the teach pendant.
|
Create a Mech-Viz Project
-
Open Mech-Viz, press Ctrl+N on the keyboard to create a new project. Select the robot model corresponding to your real robot brand and model on the interface as shown below.
-
Press Ctrl+S and create or select a folder to save the project.
-
Right-click the project name in the left panel in Mech-Viz and select Autoload Project.

Connect to the Robot
-
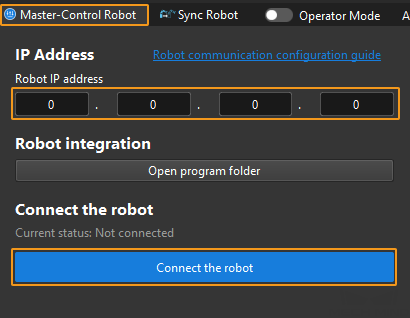
Click Master-Control Robot on the toolbar of Mech-Viz.
-
Input the IP address of the real robot in Robot IP address (the IP address in the picture is only an example). Click Connect the robot.
If Mech-Viz successfully connects the real robot, the current status will change to Connected. Meanwhile, the icon in the toolbar will turn from blue to green.
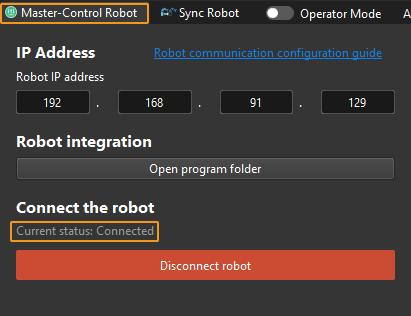
If the connection fails, please double-check the robot IP address.
Move the Robot
-
In the toolbar of Mech-Viz, change the “Vel.” (velocity) and “Acc.” (acceleration) parameters to 5%.

-
Click Sync Robot in the toolbar, and you can synchronize the poses of the simulated robot in the 3D simulation space with the poses of the real robot. Then click Sync Robot again to unselect it.

-
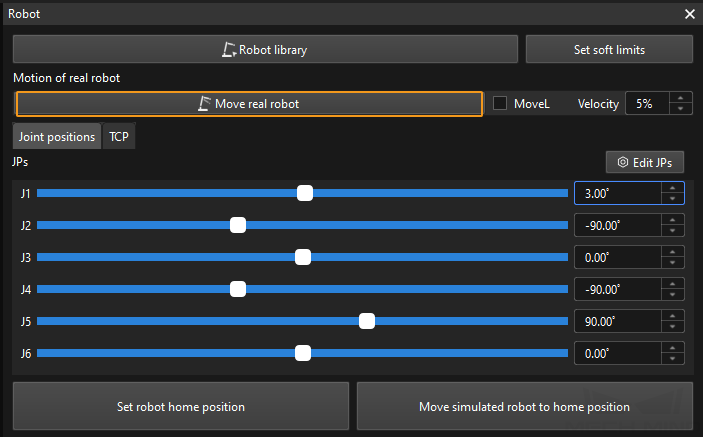
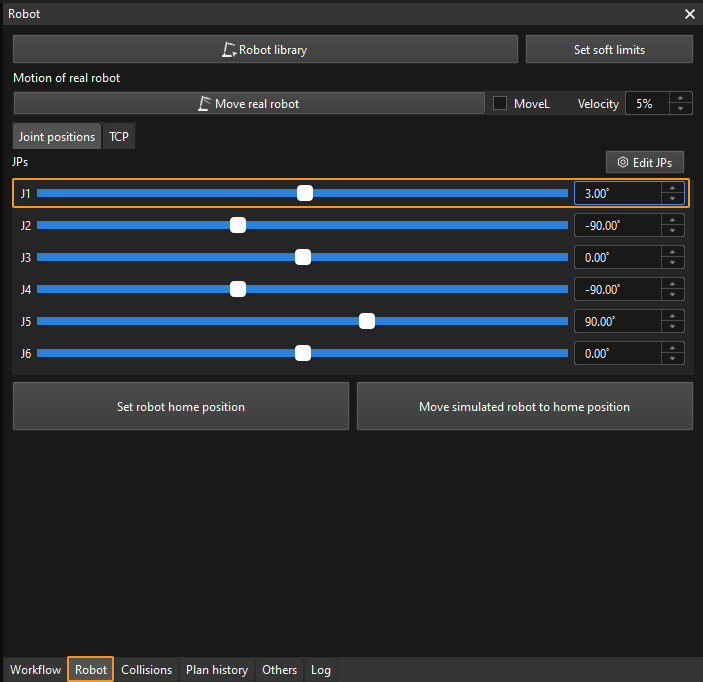
In the Robot tab, slightly adjust the value of “J1”, for example, from 0˚ to 3˚. This operation will move the simulated robot.
-
Click Move real robot and check if the real robot has moved. If the real robot has reached the JPs set for the simulated robot, the master-control communication is working.
When moving the robot, please ensure the safety of personnel. In the case of an emergency, press the emergency stop button on the teach pendant!