Master-Control Communication Setup
This guide shows you how to set up Master-Control communication with a Hyundai robot.
Preparation
Check Controller and Software Version
-
Robot controller version: Hi5a-S (Hi5a-T10 is not supported).
-
Mech-Vision & Mech-Viz versions: 1.6.0 or above
Set up the Network Connection
Connect the Hardware
Plug the Ethernet cable of the IPC into the CNETN3 port inside the controller or the Ethernet port on the outside, as shown below.
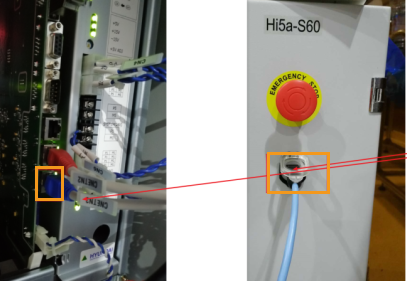
| There are three ports inside the controller, namely CNETN1, CNETN2, and CNETN3, which correspond to the EN0 address, TP address and EN2 User Ethernet address on the teach pendant respectively. Therefore, the Ethernet cable should be connected to the CNETN3 port. |
Set the IP Address
-
On the teach pendant, go to .
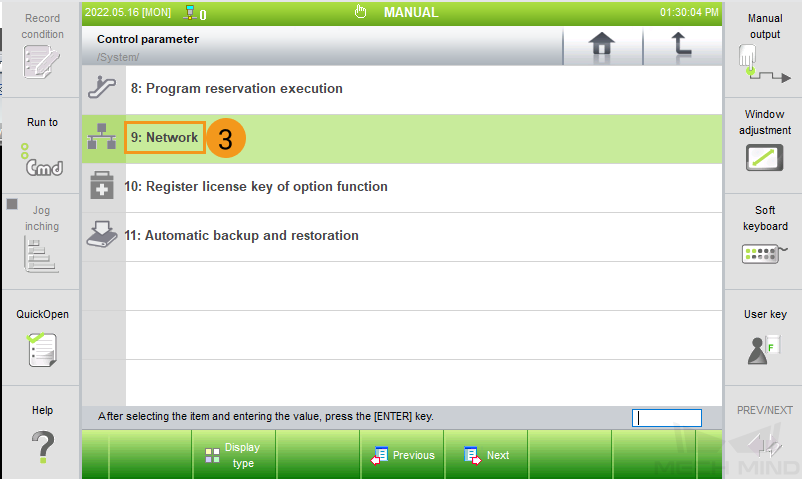
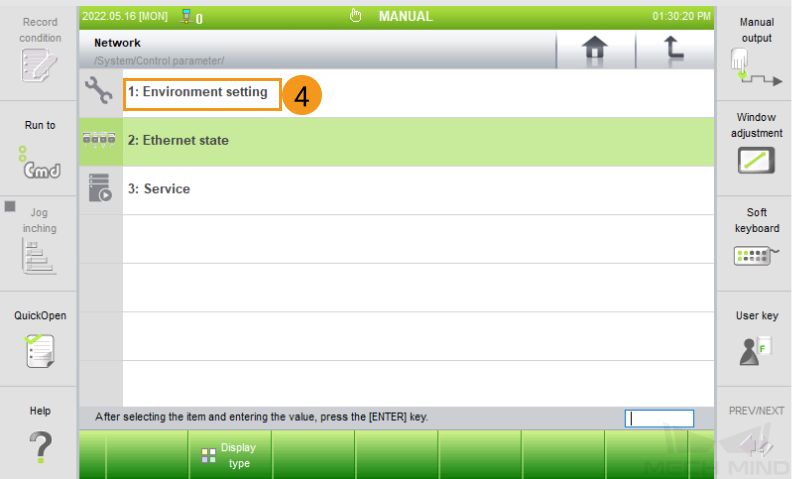
-
Select EN2(Public), and set the right IP Address. Please also make sure that the Subnet Mask is set to 255.255.255.0.
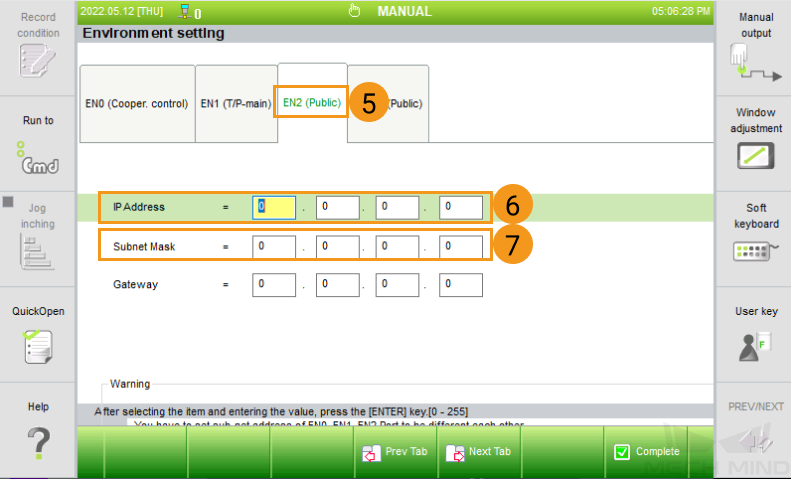
-
The robot IP should be in the same subnet as the IPC.
-
The subnet mask of the IPC is the same as that of the robot, which is 255.255.255.0.
-
Restart the robot after modifying the IP address.
-
Load the Program Files to the Robot
-
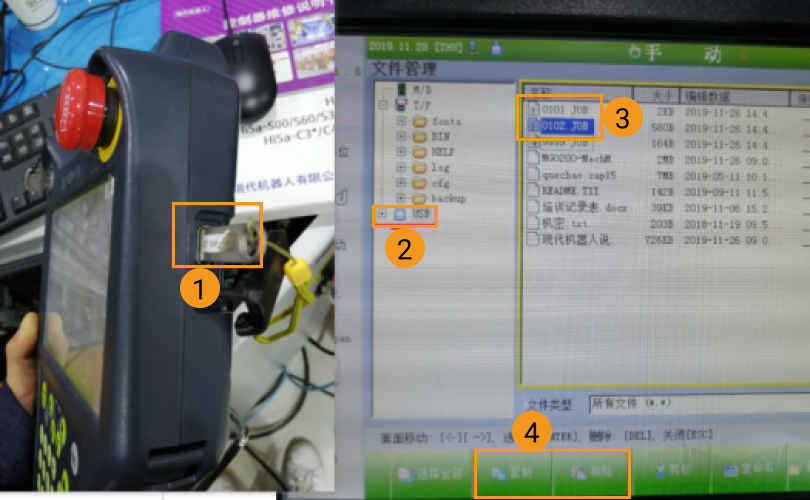
Connect the USB flash drive to the teach pendant.
To control a HYUNDAI robot, you need to modify the Program File Format Version information in the first lines of the master-control programs 0101.JOB and* 0102.JOB*.
If you already have another available program on the robot, please directly copy and paste the program into the flash drive and skip to step 5. -
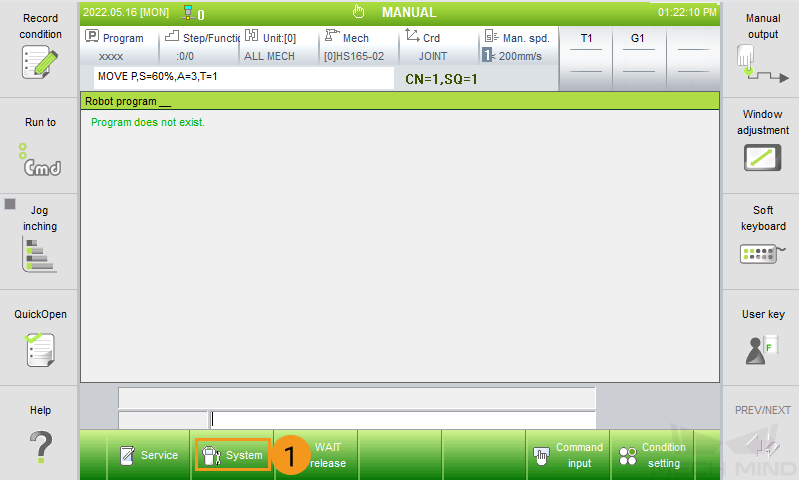
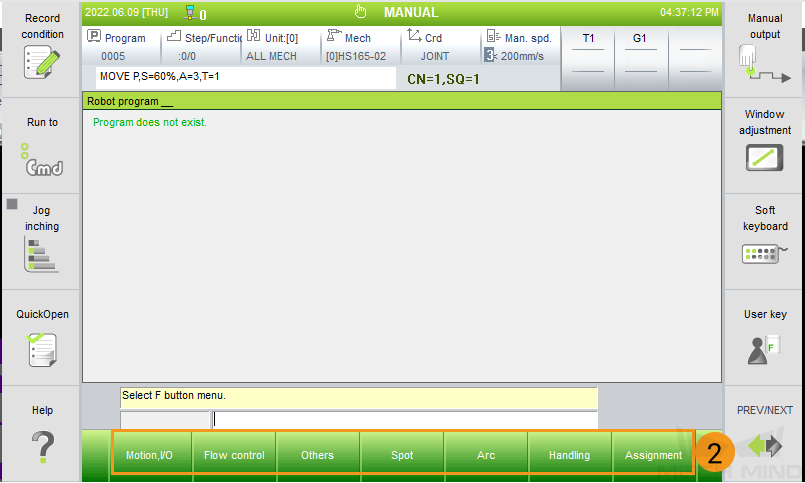
Select Command input.
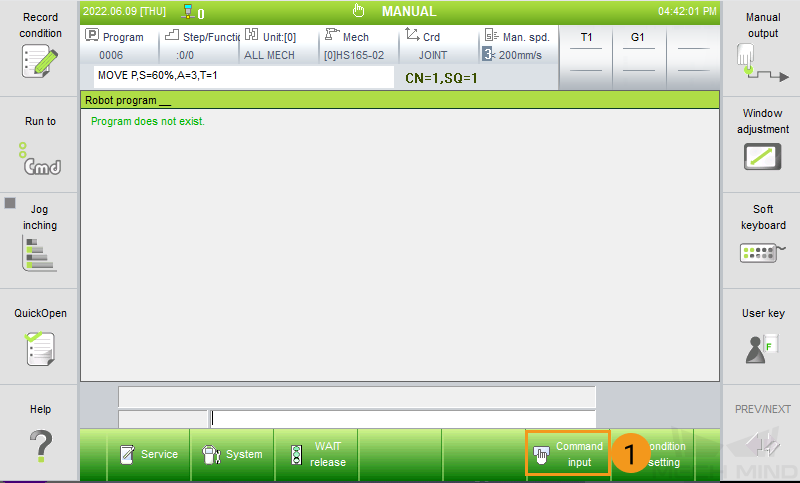
-
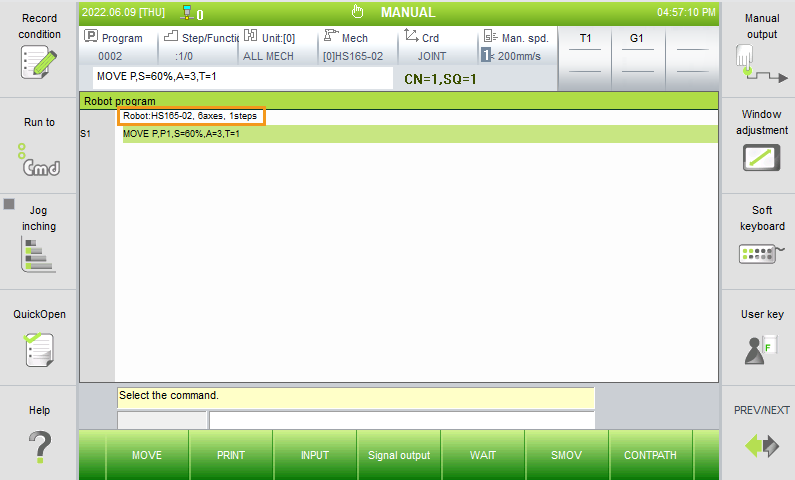
Choose either of the command to input, as shown below.
-
Now you can see the robot version information on the top. Then save the program.
-
Select the newly created program file (or a previous program file), and select Copy. Then switch to the USB folder and select Paste.
-
Connect the flash drive to the IPC. Open the program, and then copy the first line.
-
Go to
Mech-Center/Robot_Server/Robot_FullControl/hyundai/Hi5a-Sfrom the installation directory where Mech-Vision and Mech-Viz are installed. Open the two Master-Control program files 0101.JOB and 0102.JOB. Replace the first line of the two files with the copied code, and then save the changes.
-
Copy and paste the master-control program files 0101.JOB and 0102.JOB into the flash drive. Connect the flash drive to the teach pendant. Go to , and select 0101.JOB and 0102.JOB, and then select Copy. Then switch to T/P, select Paste to load the files to the robot.
Further Configuration
-
Change the IP address of the IPC to 192.168.0.150.
-
This IP address is a default one which is specified in 0101.JOB and 0102.JOB. If you need to change the IP address, please modify the IP address in the programs accordingly.
-
The new IP address should be in the same subnet as that of the robot controller.
-
-
Set the management IP address of the router to 192.168.0.1.
-
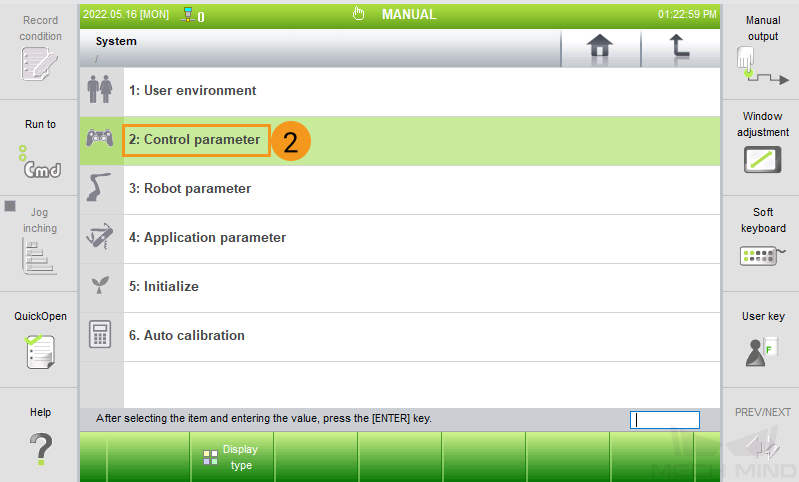
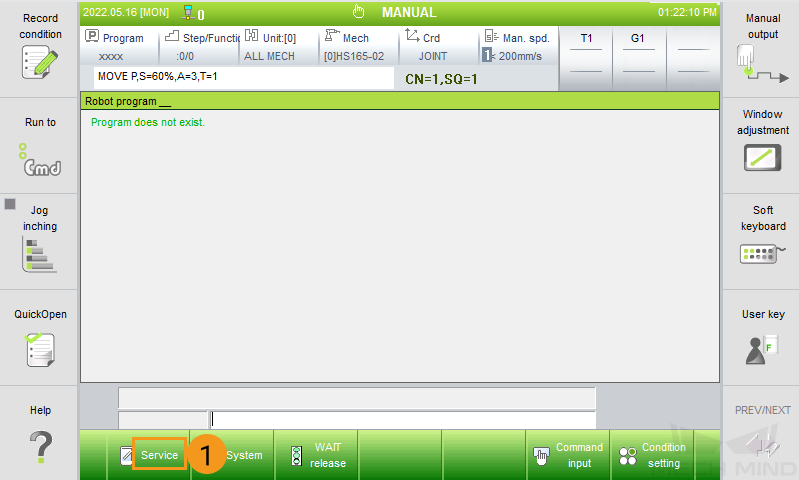
Go to .
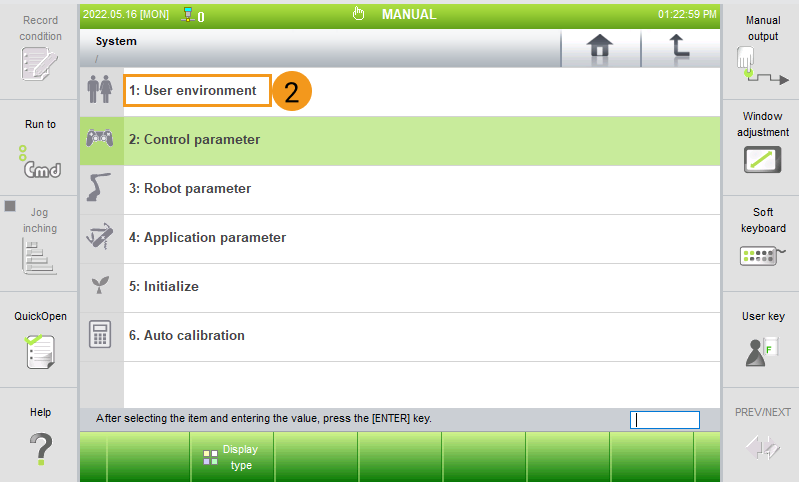
-
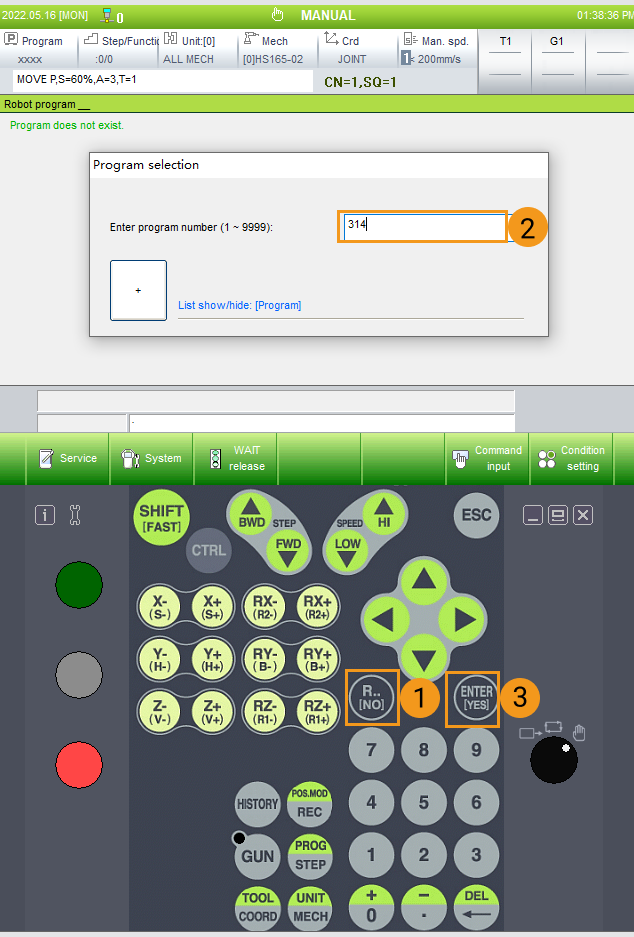
Select User key, and enter 314 to request permission.

-
Change the P Coordinate* to Axis.
-
Select Axis on the screen directly.
-
Press
SHIFTon the teach pendant and simultaneously press the left or right arrow keys to move left or right.
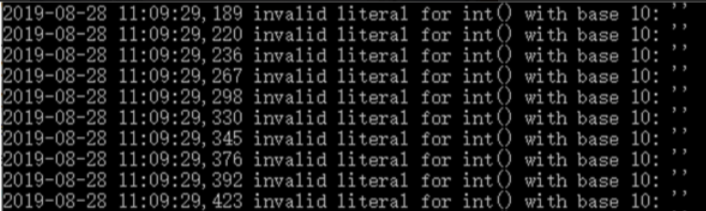
If the joint information has not been modified, the following error message will appear in the background.
-
Test Master-Control Communication
-
Switch the robot into AUTO mode.
-
Reset the program steps of the robot to 0 for both program 101 and program 102. Select , and enter 0 in the pop-up Step selection window.
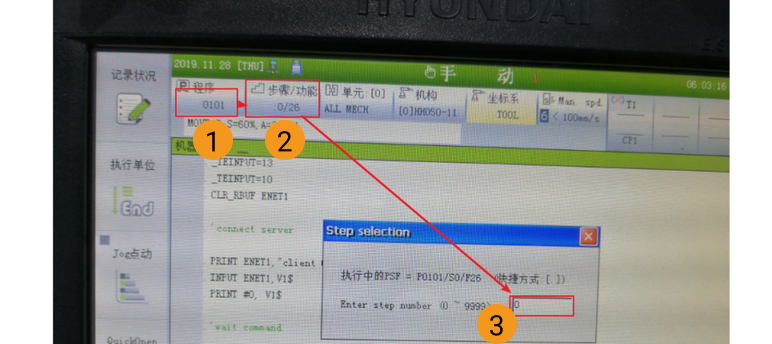
Execute the program 101.JOB. -
Connect the robot. Specifically, the robot IP address should be set to the IP address of the IPC.
Reconnect the Robot
-
Under the teach mode, press R.. [NO], enter 314 and then press ENTER [YES] to request permission.
-
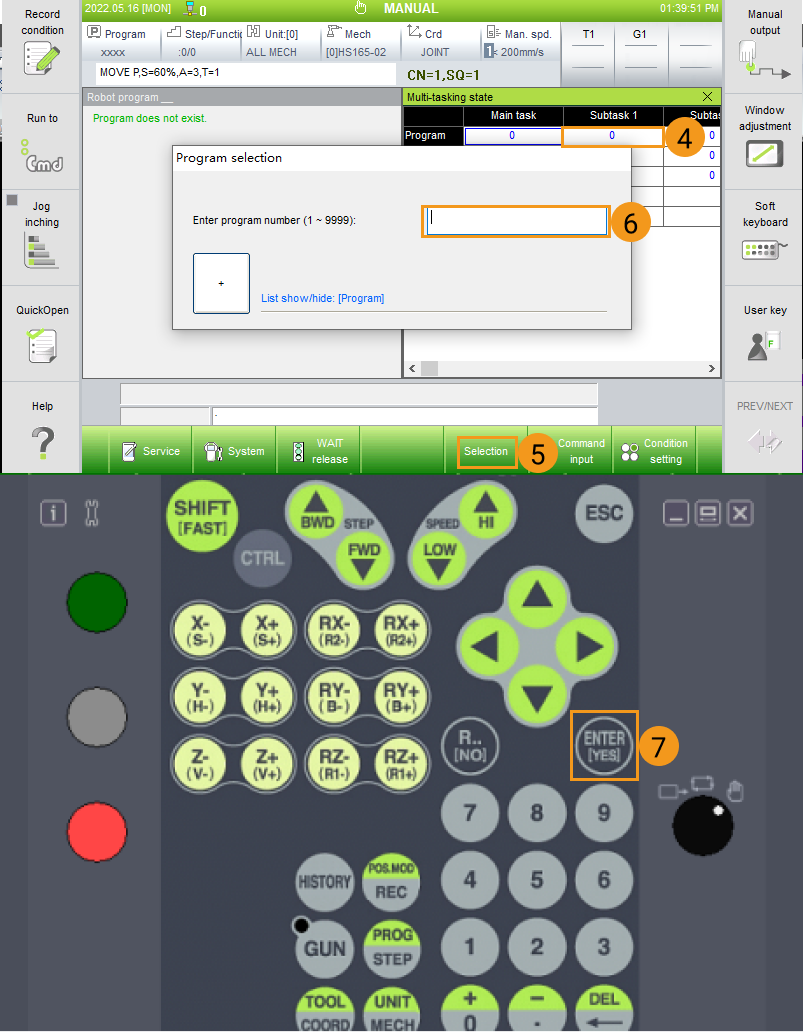
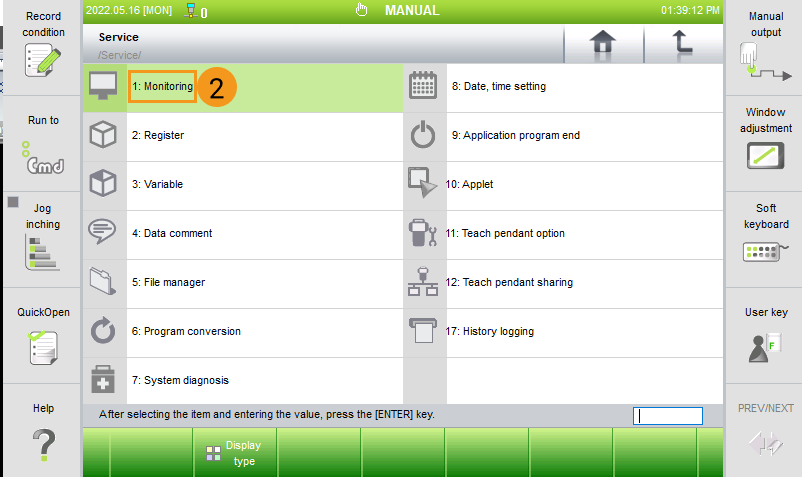
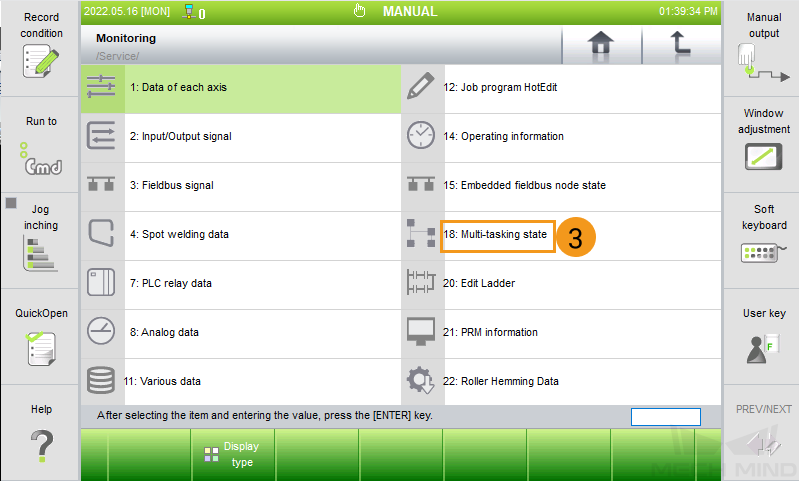
Each time when reconnect the robot, the background tasks should be stopped and the step in the foreground program should be reset to 0. Select Service‣ Monitoring ‣ Multi-tasking_state ‣ ENTER [YES] to enter the multi-tasking interface.
-
Select Program (Subtask) and then select Selection. Enter 3 in the Program selection window and then press
ENTER [YES]to complete configuration.