Example Program 3: MMS3VisPath
Program Introduction
Description |
The robot triggers the Mech-Vision project to run, and then obtains the planned path for picking and placing. |
||
File Name |
You can navigate to the installation directory of Mech-Vision and Mech-Viz and find the file by using the |
||
Project |
Mech-Vision project
|
||
Prerequisites |
|
| This example program is provided for reference only. Before using the program, please modify the program according to the actual scenario. |
Program Description
This part describes the MMS3VisPath example program.
#Include "MMMODULE"
MM_DROP_COM()
Mcomnum = 7
MM_INT_COM(Mcomnum)
Tool P_NTool
PMTool=(+0.00,+0.00,+0.00,+0.00,+0.00,+0.00)
Tool PMTool
MM_SET_MOD(1,1,MM_Status)
If MM_Status <> 1107 Then
Hlt
EndIf
MM_START_VIS(1,5,1,JntSend,MM_Status)
If MM_Status <> 1102 Then
Hlt
EndIf
Dim MM_Result(20,8)
MM_GET_VISP(1,2,5,MM_Status,MM_WayPt_Num,MM_VPos_Num,MM_Result)
If MM_Status <> 1103 Then
Hlt
EndIf
MM_GET_POS(MM_Result,1,PPick_pre,MM_Label,MM_ToolID)
MM_GET_POS(MM_Result,2,PPick,MM_Label2,MM_ToolID2)
MM_GET_POS(MM_Result,3,PPick_after,MM_Label3,MM_ToolID3)
MM_DROP_COM()
Mov PPick_pre
Mvs PPick
Fine 0,P
Mvs PPick
Hlt
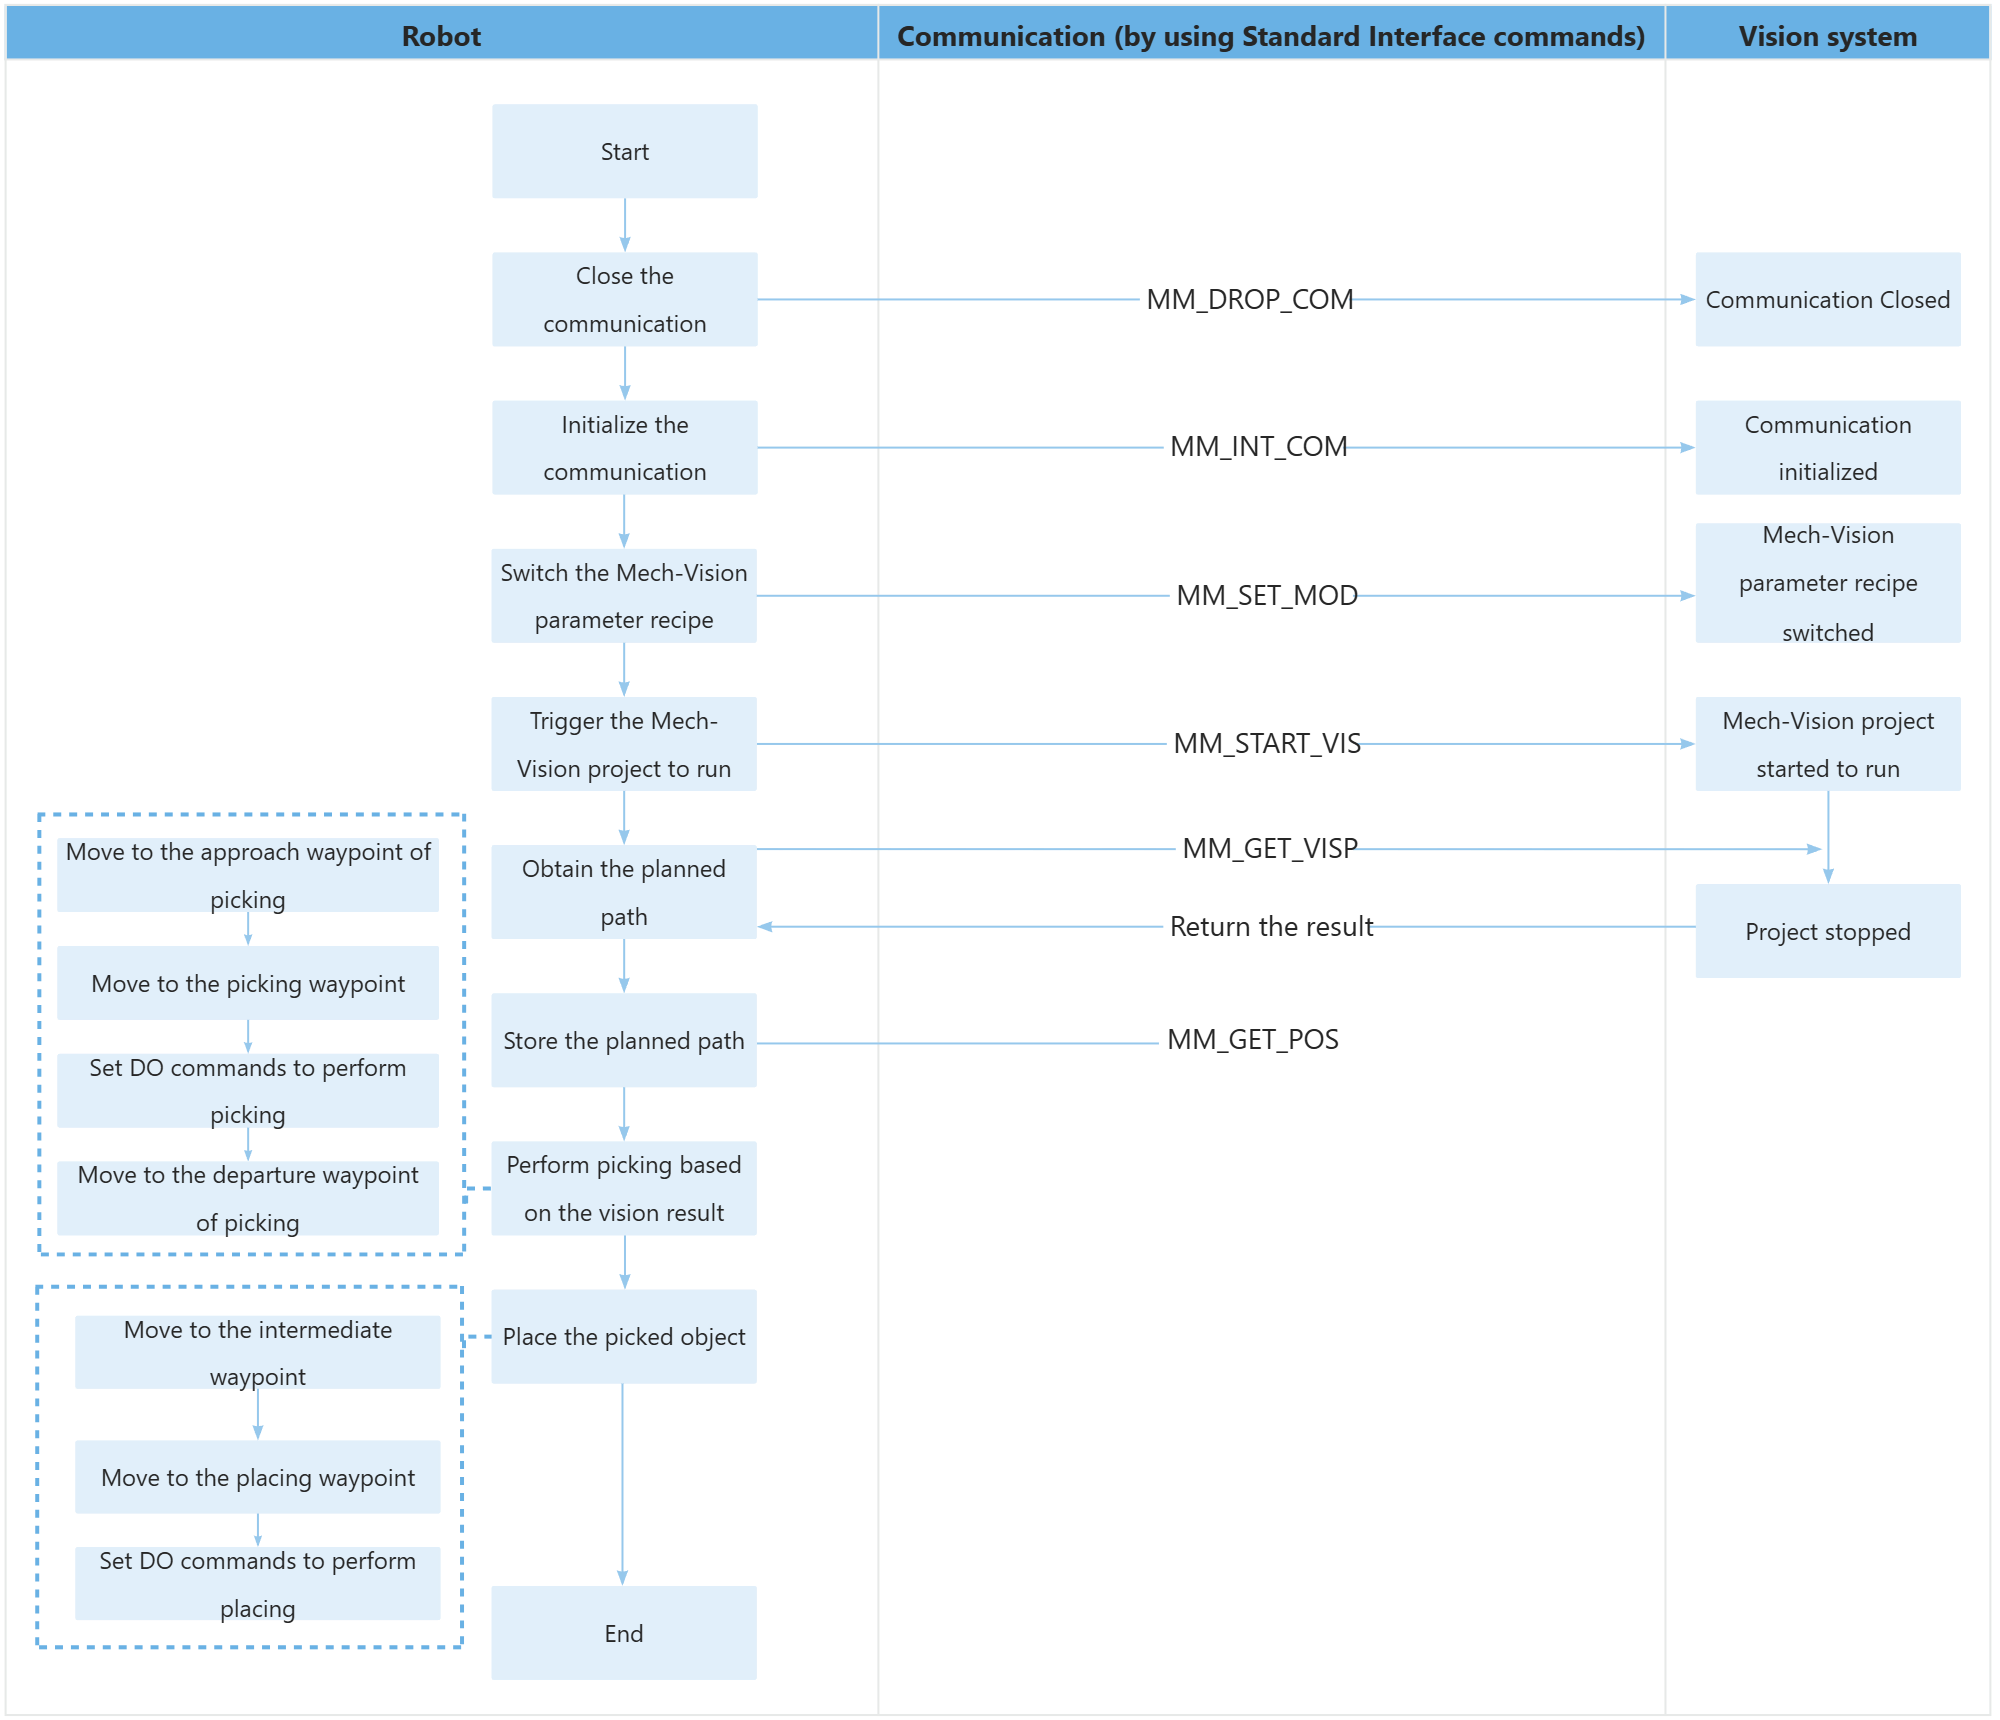
Mvs PPick_afterThe workflow corresponding to the above example program code is shown in the figure below.
The table below explains the above program. You can click the hyperlink to the command name to view its detailed description.
| Feature | Code and description | ||
|---|---|---|---|
Include the MM_Module header file |
|
||
Initialize communication parameters |
Close the communication first, then reconnect to ensure no project is currently connected. |
||
Reset the control points to their initial values and declare the tool variables |
|
||
Switch the Mech-Vision system’s parameter recipe and verify the status code. |
|
||
Trigger the Mech-Vision project to run and verify the status code. |
The entire statement indicates that the robot triggers the vision system to run the Mech-Vision project with an ID of 1 and expects the Mech-Vision project to return all vision points.
|
||
Obtain the planned path from Mech-Vision |
The entire statement indicates that the robot obtains the planned path from the Mech-Vision project that has an ID of 1.
|
||
Store the planned path |
The entire statement stores the TCP, label, and tool ID of the first vision point in the specified variables. |
||
Disconnect the communication. |
|
||
Move to the approach waypoint of picking |
Move to the grasp approach point and set absolute positioning for arrival. |
||
Move to the picking waypoint |
The robot moves from the approach waypoint of picking to the picking waypoint linearly.
|
||
Move to the departure waypoint of picking |
The robot moves to position above the picking waypoint and reaches the departure waypoint of picking.
|