AUBO (ARCS) Automatic Calibration
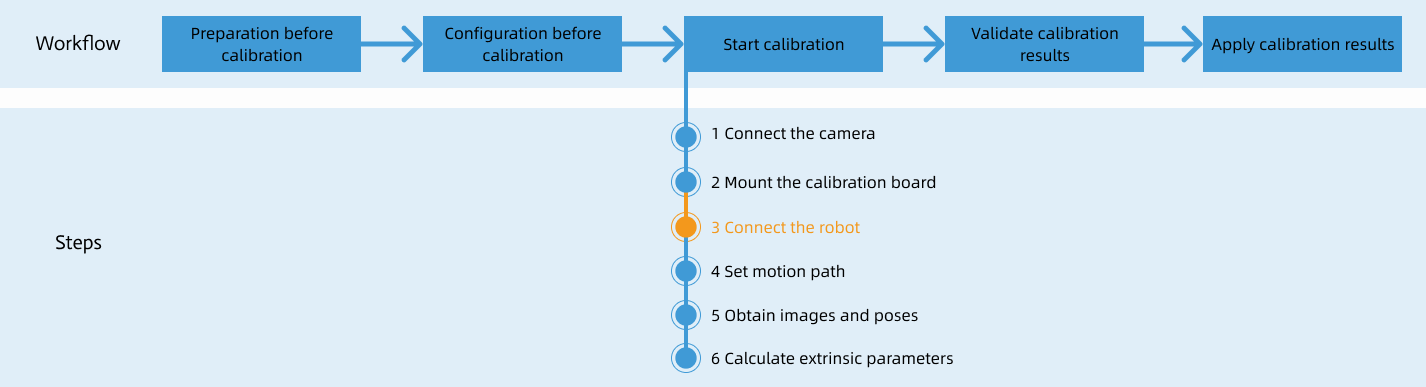
After you set up Standard Interface communication, you can connect the robot to perform automatic calibration. The overall workflow of automatic calibration is shown in the figure below.
Special note
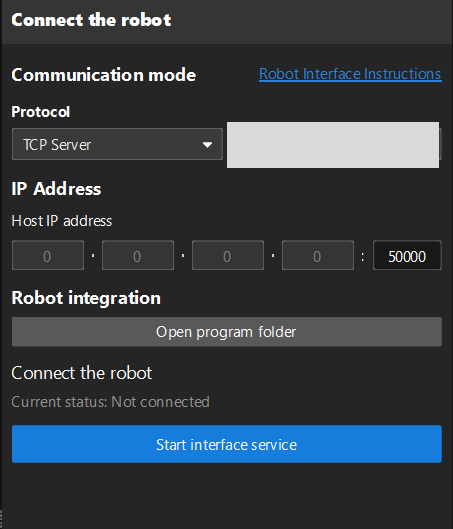
During the calibration procedure, when you reach the Connect the robot step and the Waiting for robot to connect... button appears in Mech-Vision, perform the steps below on the robot side. After you perform the steps, proceed with the remaining steps in Mech-Vision.
|
1. Create a Calibration Program
-
If the robot is powered off, on the teach pendant Home screen tap Power On; after confirming the payload, tap . If the robot is already powered on, skip this step and proceed to the next step.
-
On the teach pendant screen, tap Programming, check Add Before Start, and uncheck Program loops. A Before Start section will appear in the right-side program pane.
-
Click Plugins, select Empty under the Before Start section, click initSocket, and add mm_init_socket to the program. Under the Command tab, enter the IPC IP Address and the host-side Port in the Mech-Vision.
-
Under Robot Programming, click autoCalib to add mm_auto_calib to the program. Fill in Move Type and Wait Time according to the actual application; for detailed parameter descriptions, refer to the autoCalib instruction.
2. Teach Calibration Start Point
-
In the Programming interface, click .
-
On the screen shown, move the robot to the calibration start point, then click OK to return to the Programming interface. At this point, Waypoint_0 is the calibration start point.
You can use the position of the robot in the Check the Point Cloud Quality of the Calibration Board step as the calibration start point.
-
Click Save to save the above program.
3. Run Calibration Program
-
Click the Speed button in the lower-left corner to bring up the speed adjustment slider. Adjust the speed appropriately to prevent the robot from moving too fast.
-
Click the Run button in the lower-left corner and select Run from Start Point.
-
When, in the Calibration window in Mech-Vision, the current status changes to connected and the button Waiting for the robot to connect... changes to Disconnect robot, click Next at the bottom.
-
Perform Step 4 of Start calibration (which is Set motion path) and the subsequent operations based the following links.
-
If the camera mounting mode is eye to hand, see this document and proceed with the relevant operations.
-
If the camera mounting mode is eye in hand, see this document and proceed with the relevant operations.
-