Import and Export Image Data
This topic describes how to import and export image data in an algorithm module.
Import Image Data
Before importing images, you should follow the data acquisition standard to acquire the required images for the business. In Mech-DLK, there is no need to configure a camera. You only need to import images to train the model.
You can use the following method to import images:
Method 1
Drag and drop images or files into the image list area to import them. Importing datasets by dragging is not supported.
Method 2
-
In the Modules section at the top right corner of the interface, select the module that you need to import images.
-
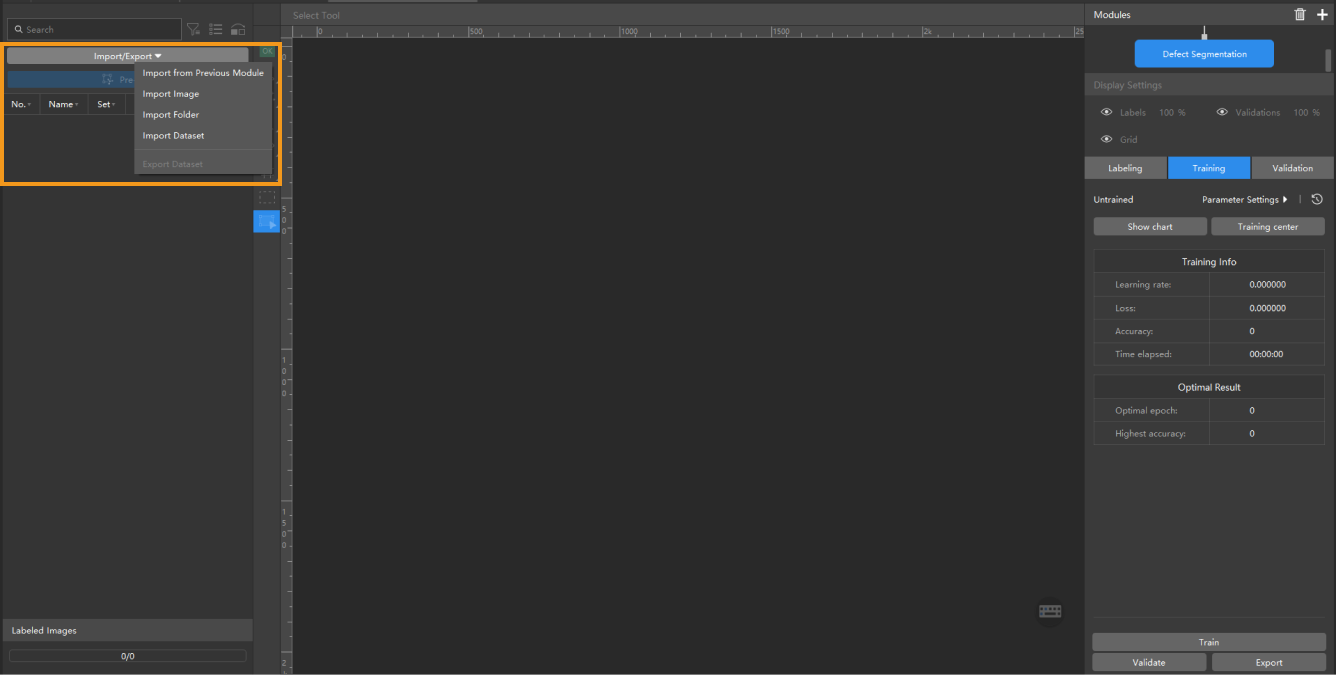
On the top of the image list, click Import/Export.
-
Select the import method based on the data type:
-
Import from Previous Module: Import images from the previous module.
-
Import Image: Import one or more images.
-
Import Folder: Import all images in the folder (images in the subfolders are not included).
-
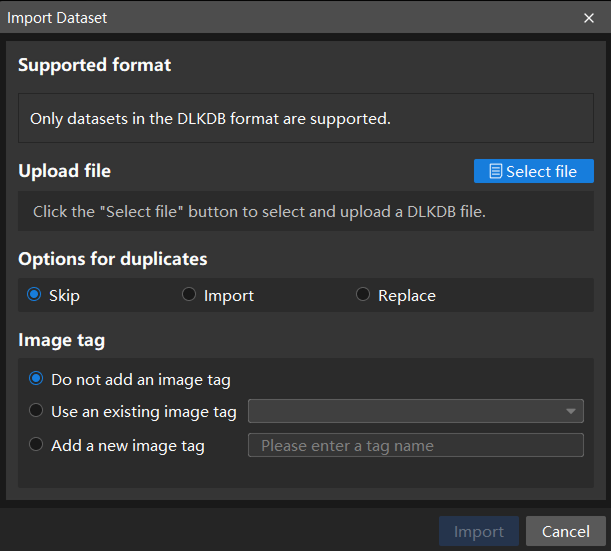
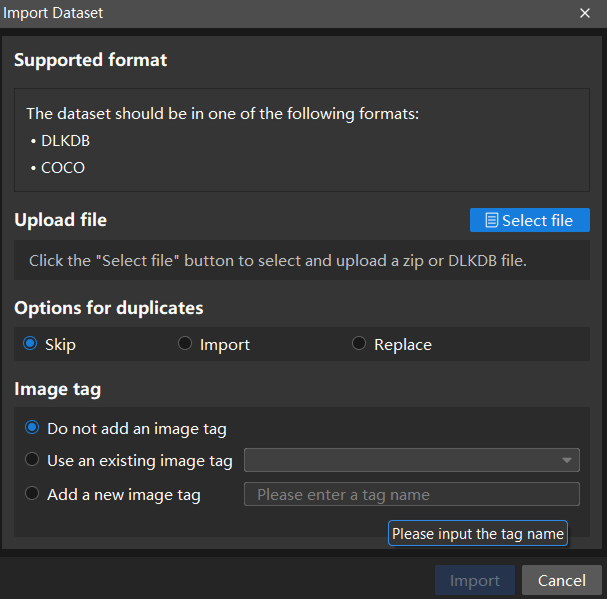
Import Dataset: Import datasets in DLKDB format (.dlkdb) or COCO format (for Instance Segmentation and Object Detection) into Mech-DLK.
-
-
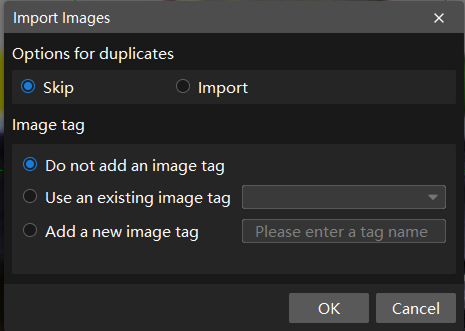
If the dataset contains duplicate images, you can choose to skip or import them in the Import Images dialog. You can also choose to apply new tags or keep the existing ones for the imported images.
-
Dialog box for the Import Images or Import Folder option:
-
Dialog box for the Import Dataset option:
-
|
Import from Previous Module
Import from Previous Module is supported only when the previous module (parent module) of the module has been validated. Otherwise, this button is unavailable. The Input module does not support the Import from Previous Module function.
|
Definitions of parent module and submodule:
As shown below, Fast Positioning is a submodule of the Input module and a parent module of Object Detection. 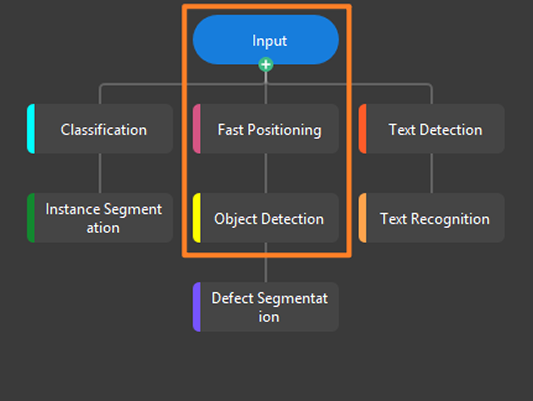
|
Procedure:
-
At the top of the image list, choose to open the Import from Previous Module window.
-
In the Import from Previous Module window, complete the Process images and Select images steps, and then click Import.
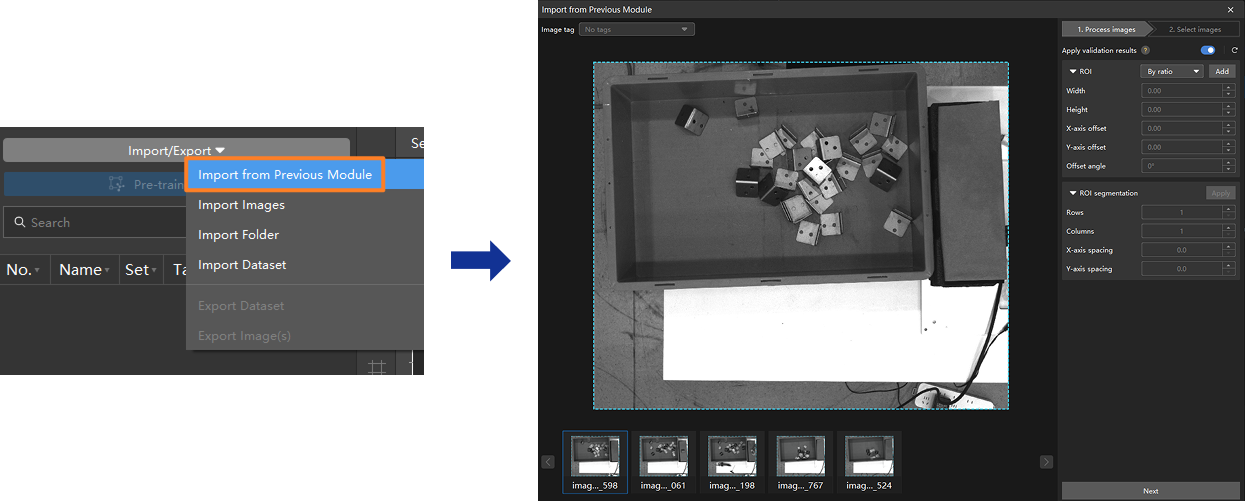
Parameter description:
| Step | Parameter | Description | |
|---|---|---|---|
Process images |
Mask settings |
Set a mask for images. Three mask modes are supported: No Mask, Auto Mask, and Inverse Mask.
|
|
Apply validation results |
Whether to apply the validation result area of the previous module.
Enable this function if the current module needs to use the previous module’s validation result area as the initial ROI for image processing. This function is enabled by default. If disabled, the original images that have not been processed by the previous module will be imported. ROI:
In the visualization area, you can drag an ROI with the mouse to adjust it, or adjust it by setting Width, Height, X-axis offset, Y-axis offset, and Offset angle. ROI segmentation: Divide the selected ROI area into specified rows and columns, with X-axis spacing and Y-axis spacing. When there are many detection targets arranged in a regular pattern, you can use ROI segmentation to batch-generate multiple ROI areas.
|
||
Select images |
Options for duplicates |
If there are duplicate images, you can Import or Skip them. |
|
Image tag |
Supports Do not add an image tag, Use an existing image tag, or Add a new image tag. |

|
Export Image Data
You can use the following method to export image data:
Method 1: Export all data
-
In the Modules section at the top right corner of the interface, select the module that you need to export image data.
-
On the top of the image list, click Import/Export.
-
Select Export Dataset.
-
In the pop-up Export as DLKDB window, enter a file name and specify a directory to save the file.
Method 2: Export part of the data
-
In the image list, select the images that you need to export.
-
Right click the images, and then click Export dataset.
-
In the pop-up Export as DLKDB window, enter a file name and specify a directory to save the file.
|
The datasets can be exported in the Current Version Format or the Old Version Format (2.6.2).
|
Method 3: Export all images
-
In the Modules section at the top right corner of the interface, select the module that you need to export images.
-
On the top of the image list, click Import/Export.
-
Select Export Image(s).
-
In the pop-up Select Folder window, select the folder where the data is stored.
Method 4: Export some images
-
In the image list, select the images that you need to export.
-
Right-click and select Export Image(s).
-
In the pop-up Select Folder window, select the folder where the data is stored.
|
Only Import Images, Import Folder, and Export Image(s) are supported in the Input module. |