(Optional) Use Operation Mode
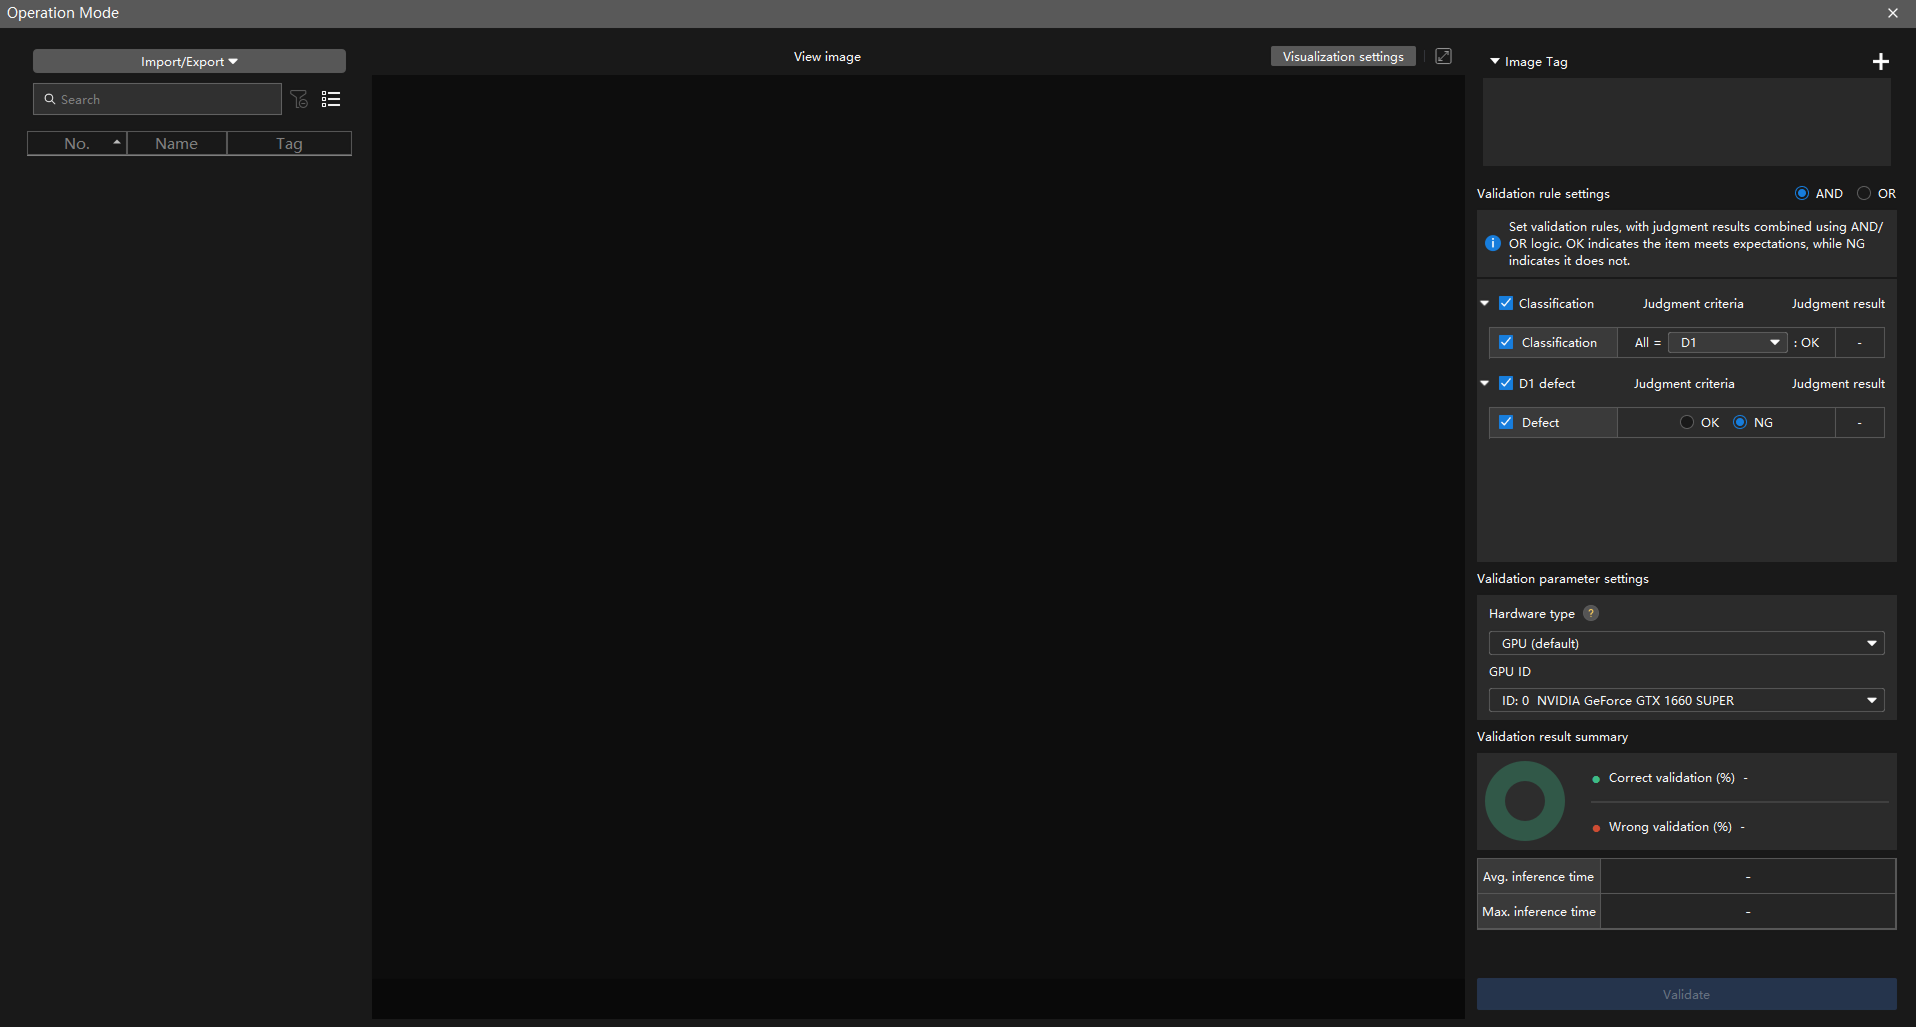
In Operation Mode, end-to-end inference can be performed on imported real-world image data based on configured validation rules, and the results are output to quickly evaluate the model’s overall performance in real-world scenarios. Images with unsatisfactory detection results can be added directly to the corresponding module for further training, continuously improving model detection capability and deployment efficiency. Compared with single-module validation, Operation Mode can comprehensively check the rationality of the overall workflow.
The workflow for using Operation Mode is as follows:
-
After model training is completed and validation is passed, choose in the menu bar to open Operation Mode.
-
In the Operation Mode window, complete the following steps as needed: import images, configure validation rules, configure validation parameters, configure visualization settings, perform validation, view validation results, and export images.
Import Images
On the top of the image list, click the Import/Export button.
The following two import types are supported:
-
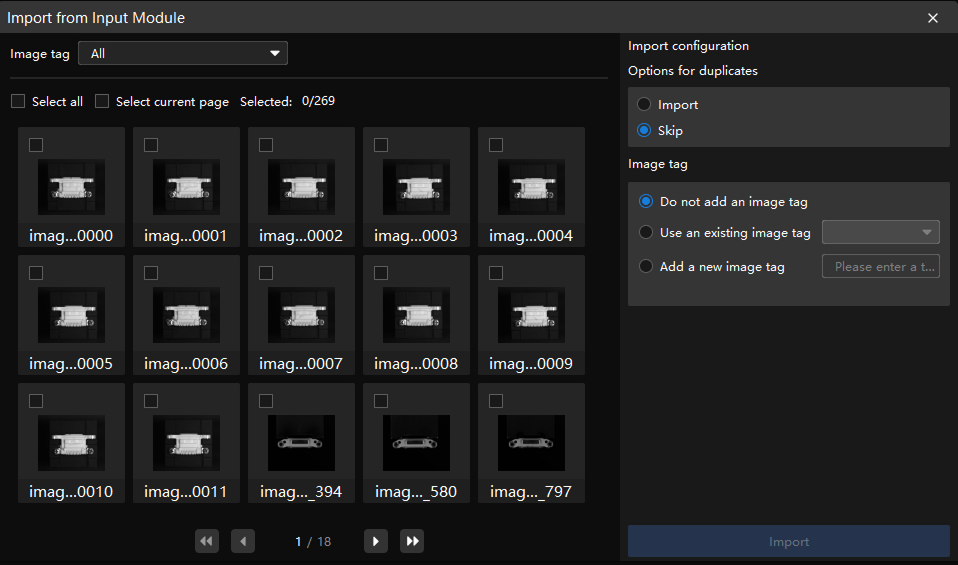
Import from Input Module: In the pop-up window, select the images to import, complete import settings, and click Import.
-
Import from External: Select the images to import, complete image import settings, and click OK.
Configure Validation Rules
Validation Rule Description
In the Validation rule settings area, set the validation rules. The judgment results can be combined using AND/OR logic. OK indicates that the item meets expectations, and NG indicates that it does not.
Judgment criterion: Defines whether a situation meets expectations or not when it occurs.
Judgment result: Displays actual results based on the set judgment criteria.
Validation process: The system first independently evaluates each selected validation rule to obtain the corresponding judgment result. Then, based on the configured logic (AND/OR), the results of each rule are combined to output the final judgment result for the current image.
Example Description
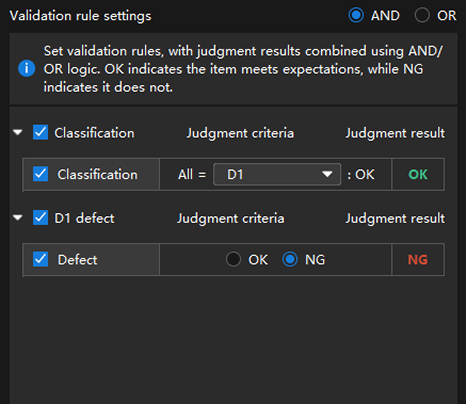
As shown in the figure, there are two validation rules involving two module types: Classification and Defect Segmentation (D1 defect). The rules are combined using AND logic.
In this example, D1 refers to the connector housing, and a D1 defect refers to scratches on the connector housing.
-
Classification
-
Judgment criteria configuration: If all results in the current image are D1, the image meets expectations (OK); otherwise, it does not meet expectations (NG).
-
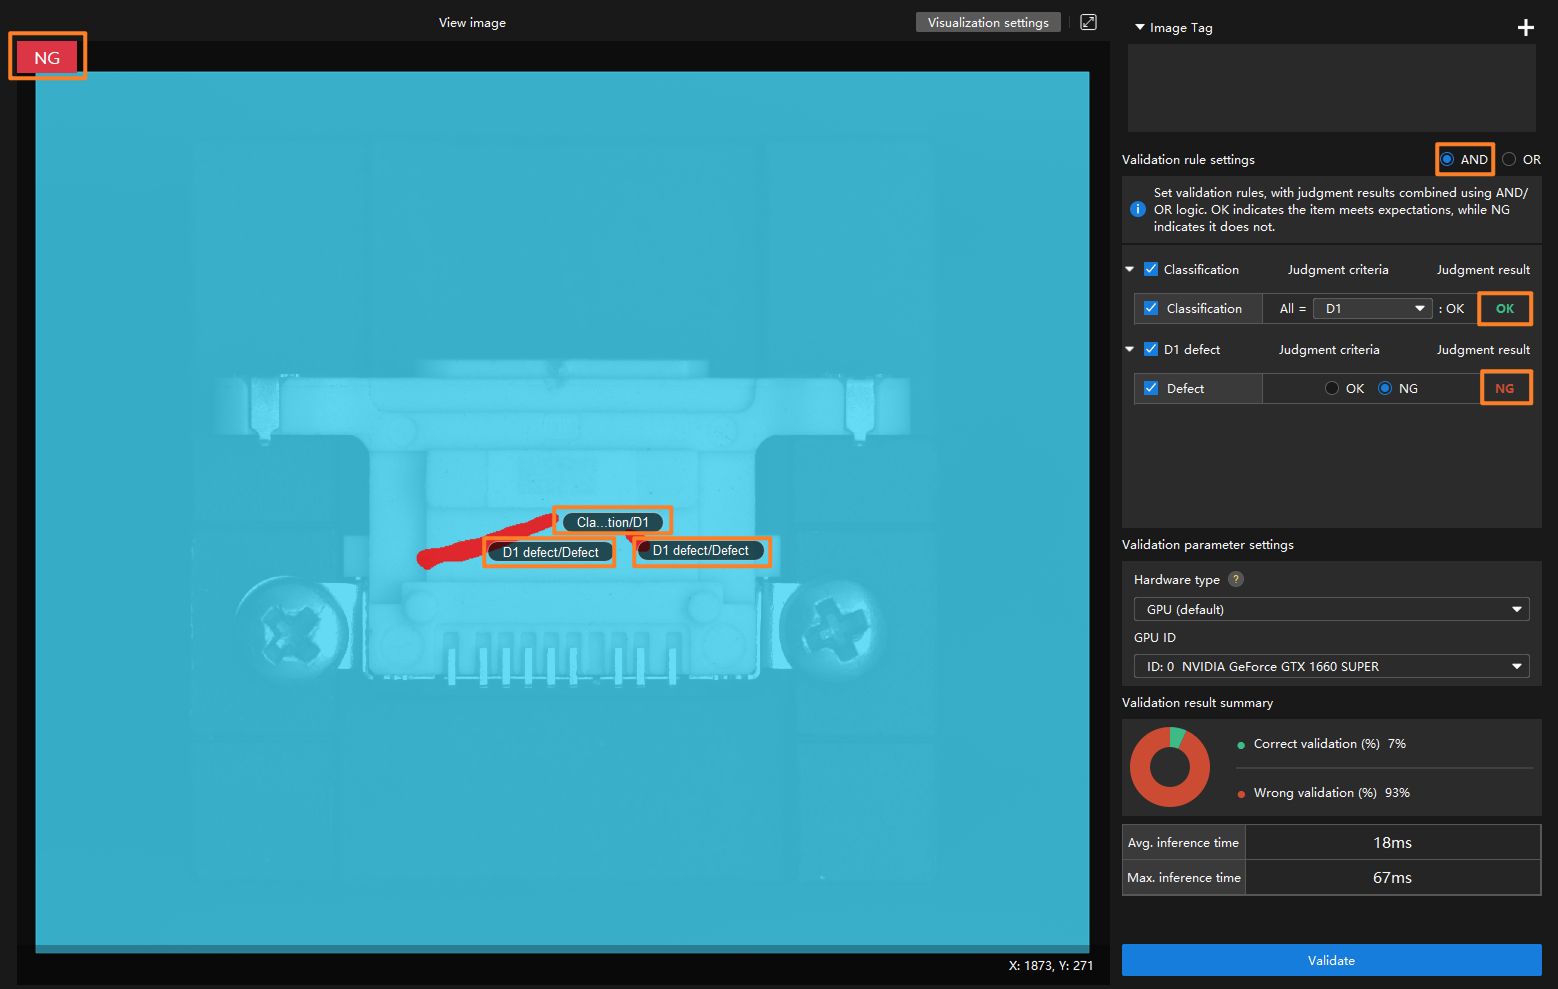
Judgment result description: All results in the current image are detected as D1, so the image is determined to meet expectations (OK).
-
-
Defect Segmentation (D1 defect)
-
Judgment criteria configuration: If this type of defect exists in the current image, it does not meet expectations (NG); otherwise, it meets expectations (OK).
-
Judgment result description: This type of defect is detected in the current image, so the image is determined not to meet expectations (NG).
-
-
Image judgment result
The results for the two rules are OK and NG, respectively. Based on the AND logic, the current image is determined as NG, and this result is displayed in the upper-left corner of the image.
|
Defect Segmentation modules: By default, the judgment criteria is set to "does not meet expectations" when related defects exist. Unsupervised Segmentation modules: By default, the judgment criteria is set to “meets expectations” when the OK class exists. When NG or Unknown classes exist, it is considered as “does not meet expectations”. Instance Segmentation, Object Detection, Text Detection, and Text Recognition modules: By default, the judgment criteria is set to “meets expectations” when the relevant classes exist. Classification module: By default, the judgment criteria is set to “meets expectations” when all results belong to the selected class. Fast Positioning module: It always meets expectations and cannot be modified. Pick Anything V2 and Object-Bin Segmentation modules: Operation Mode is not supported. |
Configure Validation Parameters
In the Validation parameter settings section, configure the following parameters.
| Parameter | Description |
|---|---|
Hardware type |
CPU: Use CPU for deep learning model inference, which will increase inference time and reduce recognition accuracy compared with GPU. GPU (default): Do model inference without optimization based on the hardware, and the model inference will not be accelerated. GPU (FP16 optimization): Do model inference with FP16 precision optimization based on the hardware, requiring only one optimization (about 5–15 minutes). It is suitable for scenarios with high requirements for model inference speed. GPU (FP32 optimization): Do model inference with FP32 precision optimization based on the hardware, requiring only one optimization (about 5–15 minutes). It is suitable for scenarios with high requirements for model recognition accuracy. |
GPU ID |
The graphics card information of the device deployed by the user. If multiple GPUs are available on the model deployment device, the model can be deployed on a specified GPU. |
Configure Visualization Settings
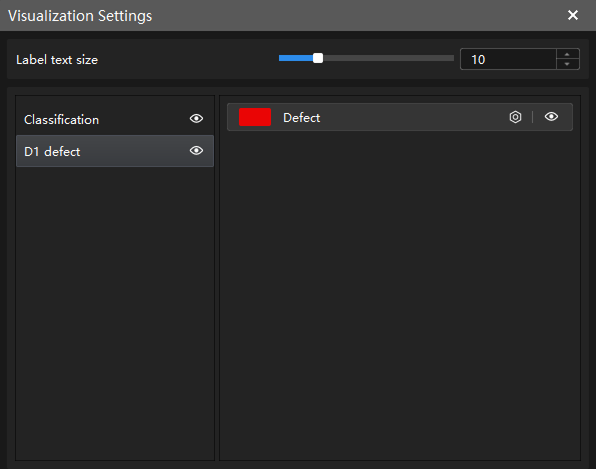
In the upper-right corner of the View image area, click Visualization settings to adjust label colors and text size. You can use the eye icon next to a module or label to flexibly hide or show a single label or all labels under an entire module. After hiding, the corresponding labels are no longer displayed in the image area, which helps reduce visual clutter.
View Validation Results
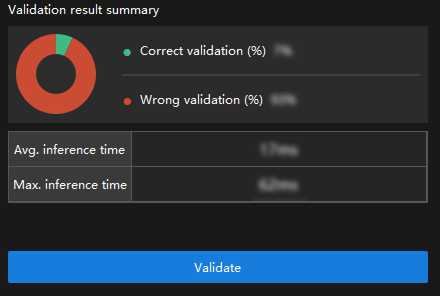
After validation is complete, in the Validation result summary section, you can view validation results and inference time.
-
Correct validation (%) refers to the proportion of images displayed as OK in the upper-left corner (that is, images determined as OK) among all images.
-
Wrong validation (%) refers to the proportion of images displayed as NG in the upper-left corner (that is, images determined as NG) among all images.
Export Images
You can access the export function in either of the following ways:
-
On the top of the image list, click the Import/Export button.
-
In the image list area, select the images to export and export them via the right-click menu.
Either method above supports the following two export types:
-
Export to Module: In the pop-up window, select the target module and click OK. Exporting to Input module or non-Input module is supported.
-
If image performance is unsatisfactory in all modules, export the image to the Input module for retraining.
-
If image performance is unsatisfactory only in a specific module, export the image to the corresponding module for targeted training.
-
-
Export to External: In the pop-up window, select the image save path.